In the previous chapter, we created our first table for storing business data. In a business application like Oinone, one of the first considerations is who (1) can access this data. Oinone provides a security mechanism to allow specific user groups to access data.
The topic of security is covered in more detail in "Restrict Access to Data". This chapter aims to cover the most basic security knowledge required for our new module.
I. Menu Entry
Objectives: By the end of this section, the basic functions of creating, deleting, modifying, and querying project information will have corresponding menu entries.
To facilitate the introduction of resource permissions and data permissions in security control, first release the management entry for project information through menu configuration.
package pro.shushi.oinone.trutorials.expenses.core.init;

import pro.shushi.oinone.trutorials.expenses.api.model.ProjectInfo;
import pro.shushi.pamirs.boot.base.constants.ViewActionConstants;
import pro.shushi.pamirs.boot.base.ux.annotation.action.UxRoute;
import pro.shushi.pamirs.boot.base.ux.annotation.navigator.UxMenu;
import pro.shushi.pamirs.boot.base.ux.annotation.navigator.UxMenus;

@UxMenus public class ExpensesMenus implements ViewActionConstants {
    @UxMenu("Basic Data")
    class ExpensesBaseMenu {
        @UxMenu("Test Menu") @UxRoute(TestModel.MODEL_MODEL) class TestModelMenu { }
    }
}This definition is sufficient for Oinone to generate a menu entry named "Test Menu". As a convention, use @UxMenus to declare ExpensesMenus as the menu initialization entry. The initialization class ExpensesMenus is located in the module's configuration package scan path, such as pro.shushi.oinone.trutorials.expenses.core.init. Then, menus initialized through ExpensesMenus are attached to the expenses module.
Tip: Menu Initialization
- Use @UxMenu to declare the menu, with the value being the menu name. Menus can be nested, such as "Test Menu" as a submenu under "Basic Data".
- Use @UxRoute with the value as the model's code to indicate which model's view page the menu will navigate to. A ViewAction record will be automatically generated as a bridge between the menu and the view.
- If no specific view is specified, it will navigate to the model's table view. For the same view type, selection is based on priority (lower values have higher priority). The system-generated views all have a priority of 88.
- Configuring a menu entry for a model, or any other entry that can navigate to the model, will generate default views for the model in the Oinone system.
Exercise
Initialize the menu for the ProjectInfo model: Create a menu "Project Management" for the
ProjectInfomodel under "Basic Data" as a submenu, following the TestModel example.
II. Users and Roles
Roles can be managed and maintained in [Management Center - Roles and Permissions - Role Management]. Add a new "test" role for testing.

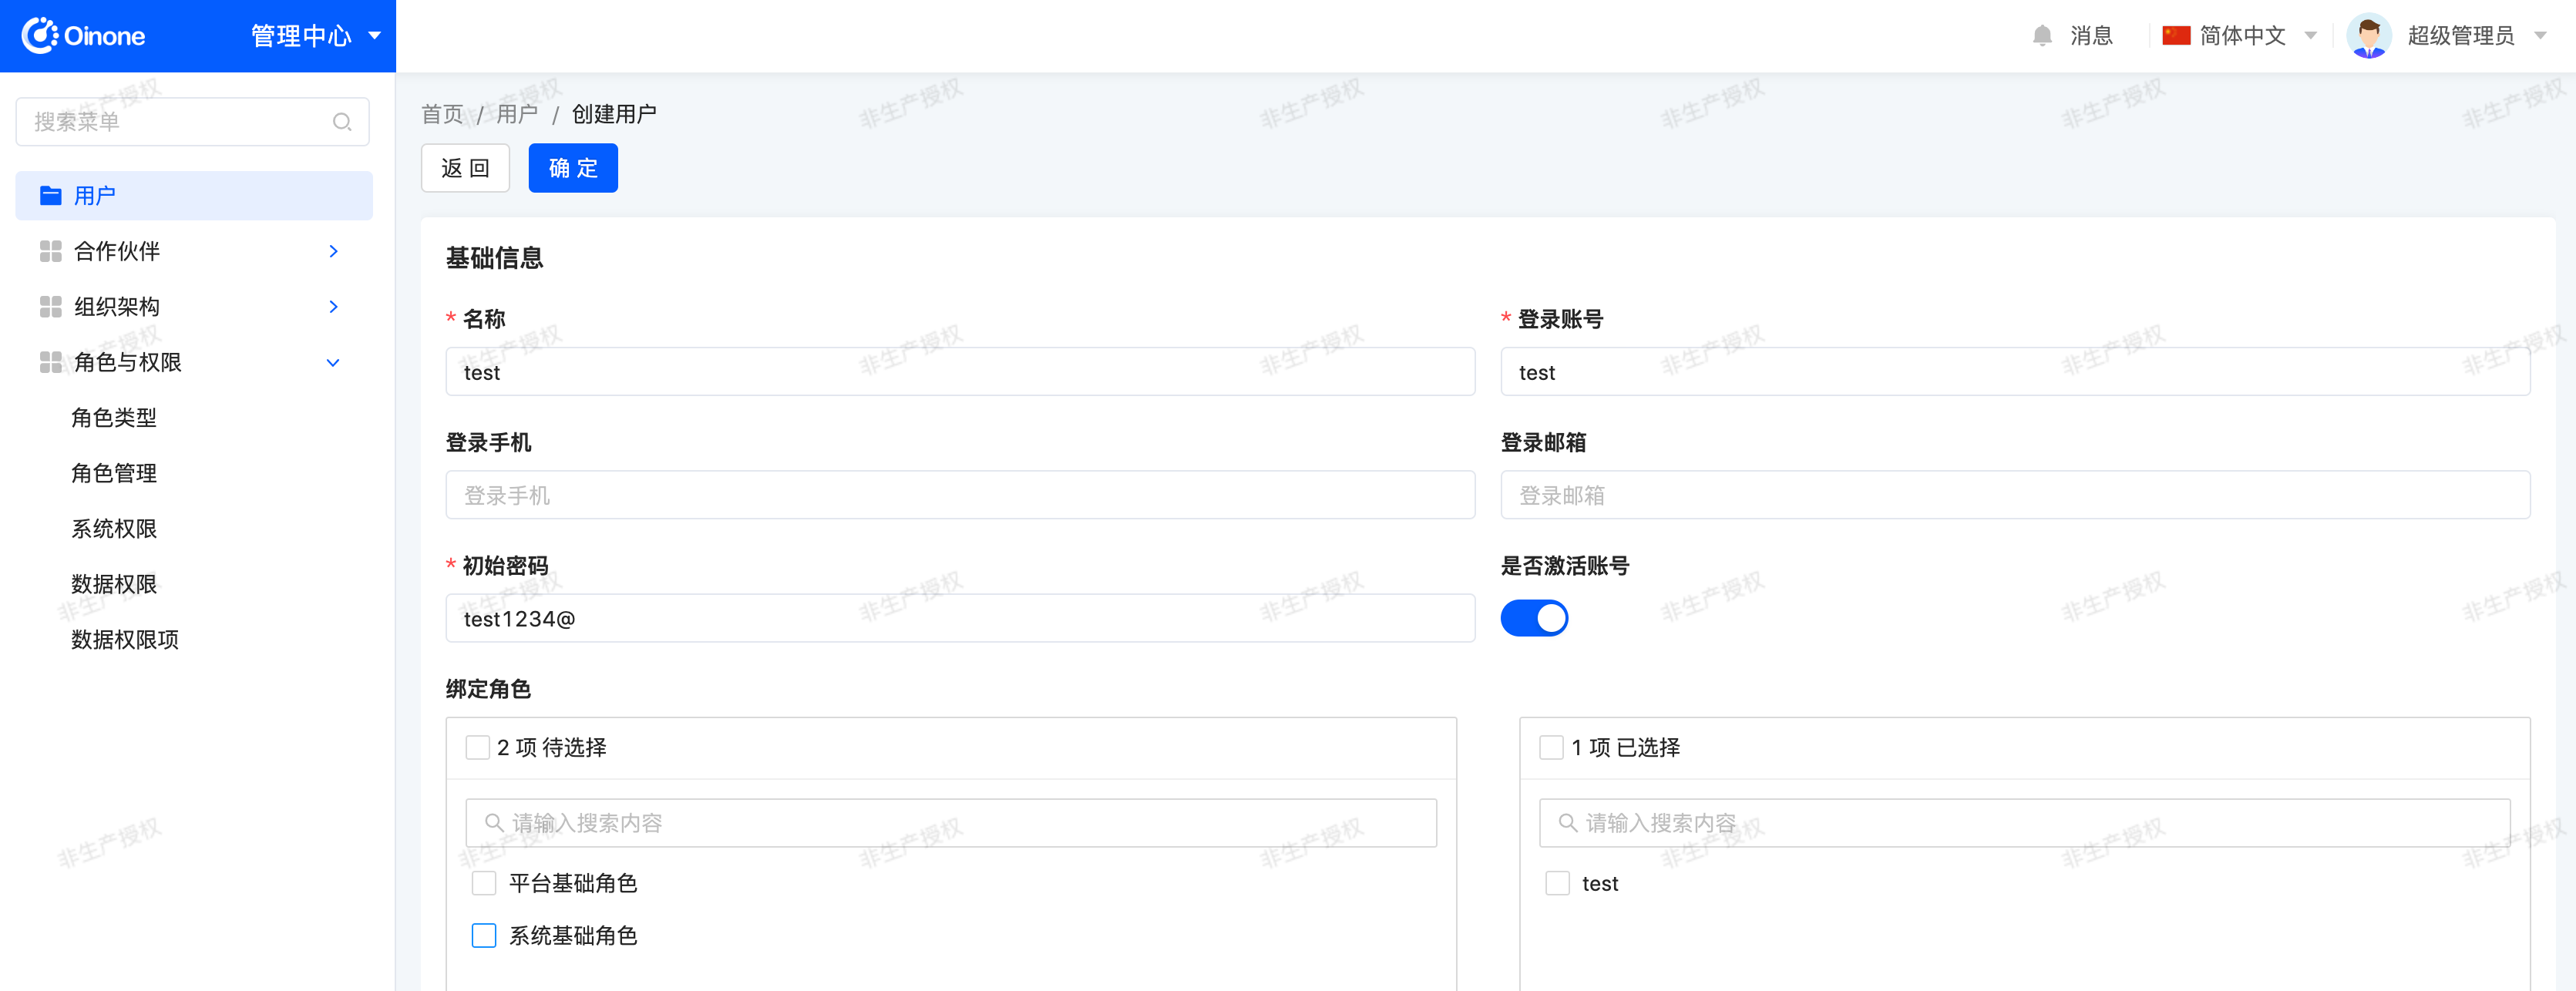
Users can be managed and maintained in [Management Center - Users]. Add a new user "test" and bind the "test" role for testing.
III. Access Permission Configuration
Objectives: By the end of this section, the test user can log in and access [Expense Management - Basic Data - Project Management], and perform create, delete, modify, and query operations on the data.
We can set permission groups for [Expense Management - Basic Data - Project Management] and bind roles. This is managed and maintained in [Management Center - Roles and Permissions - System Permissions].
(I) Resource Permissions
Resource permissions include application permissions, menu permissions, operation permissions, etc., which need to be set one by one.
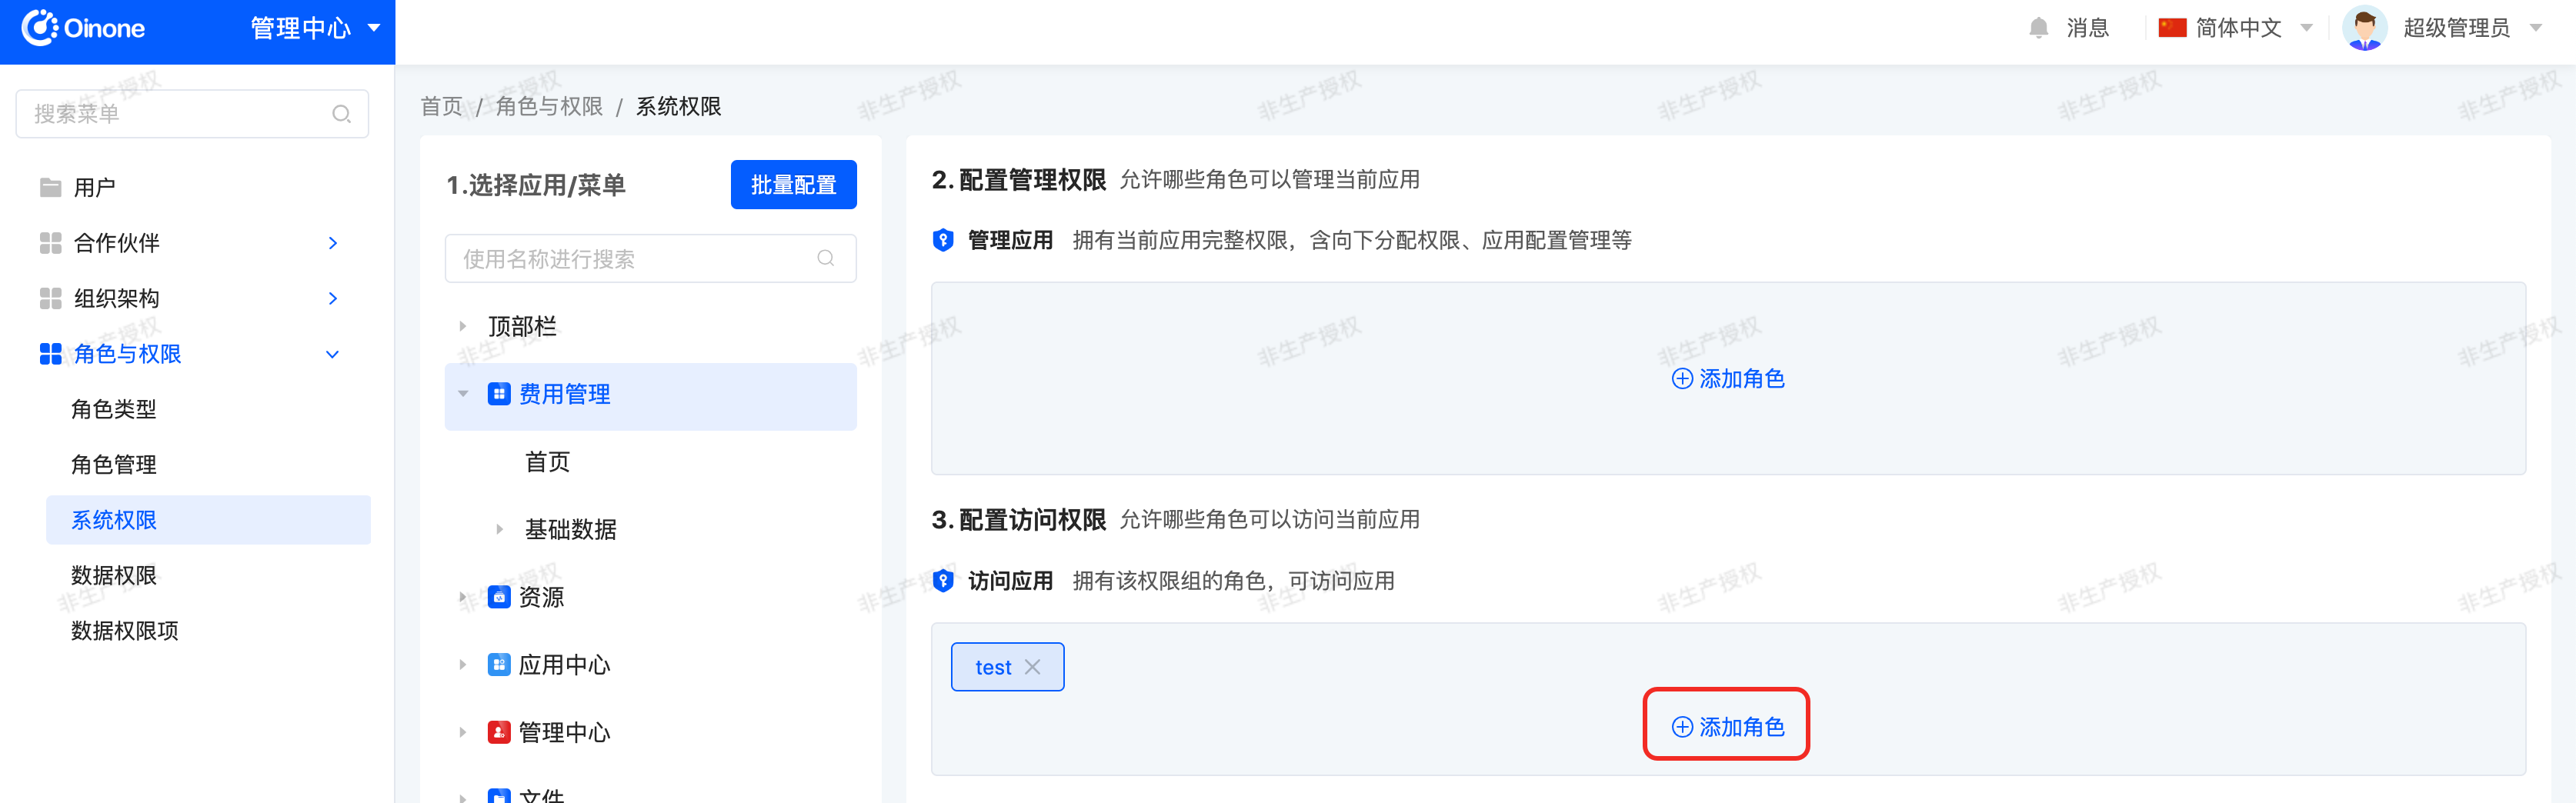
Example: Granting the "test" role access to the "Expense Management" application:
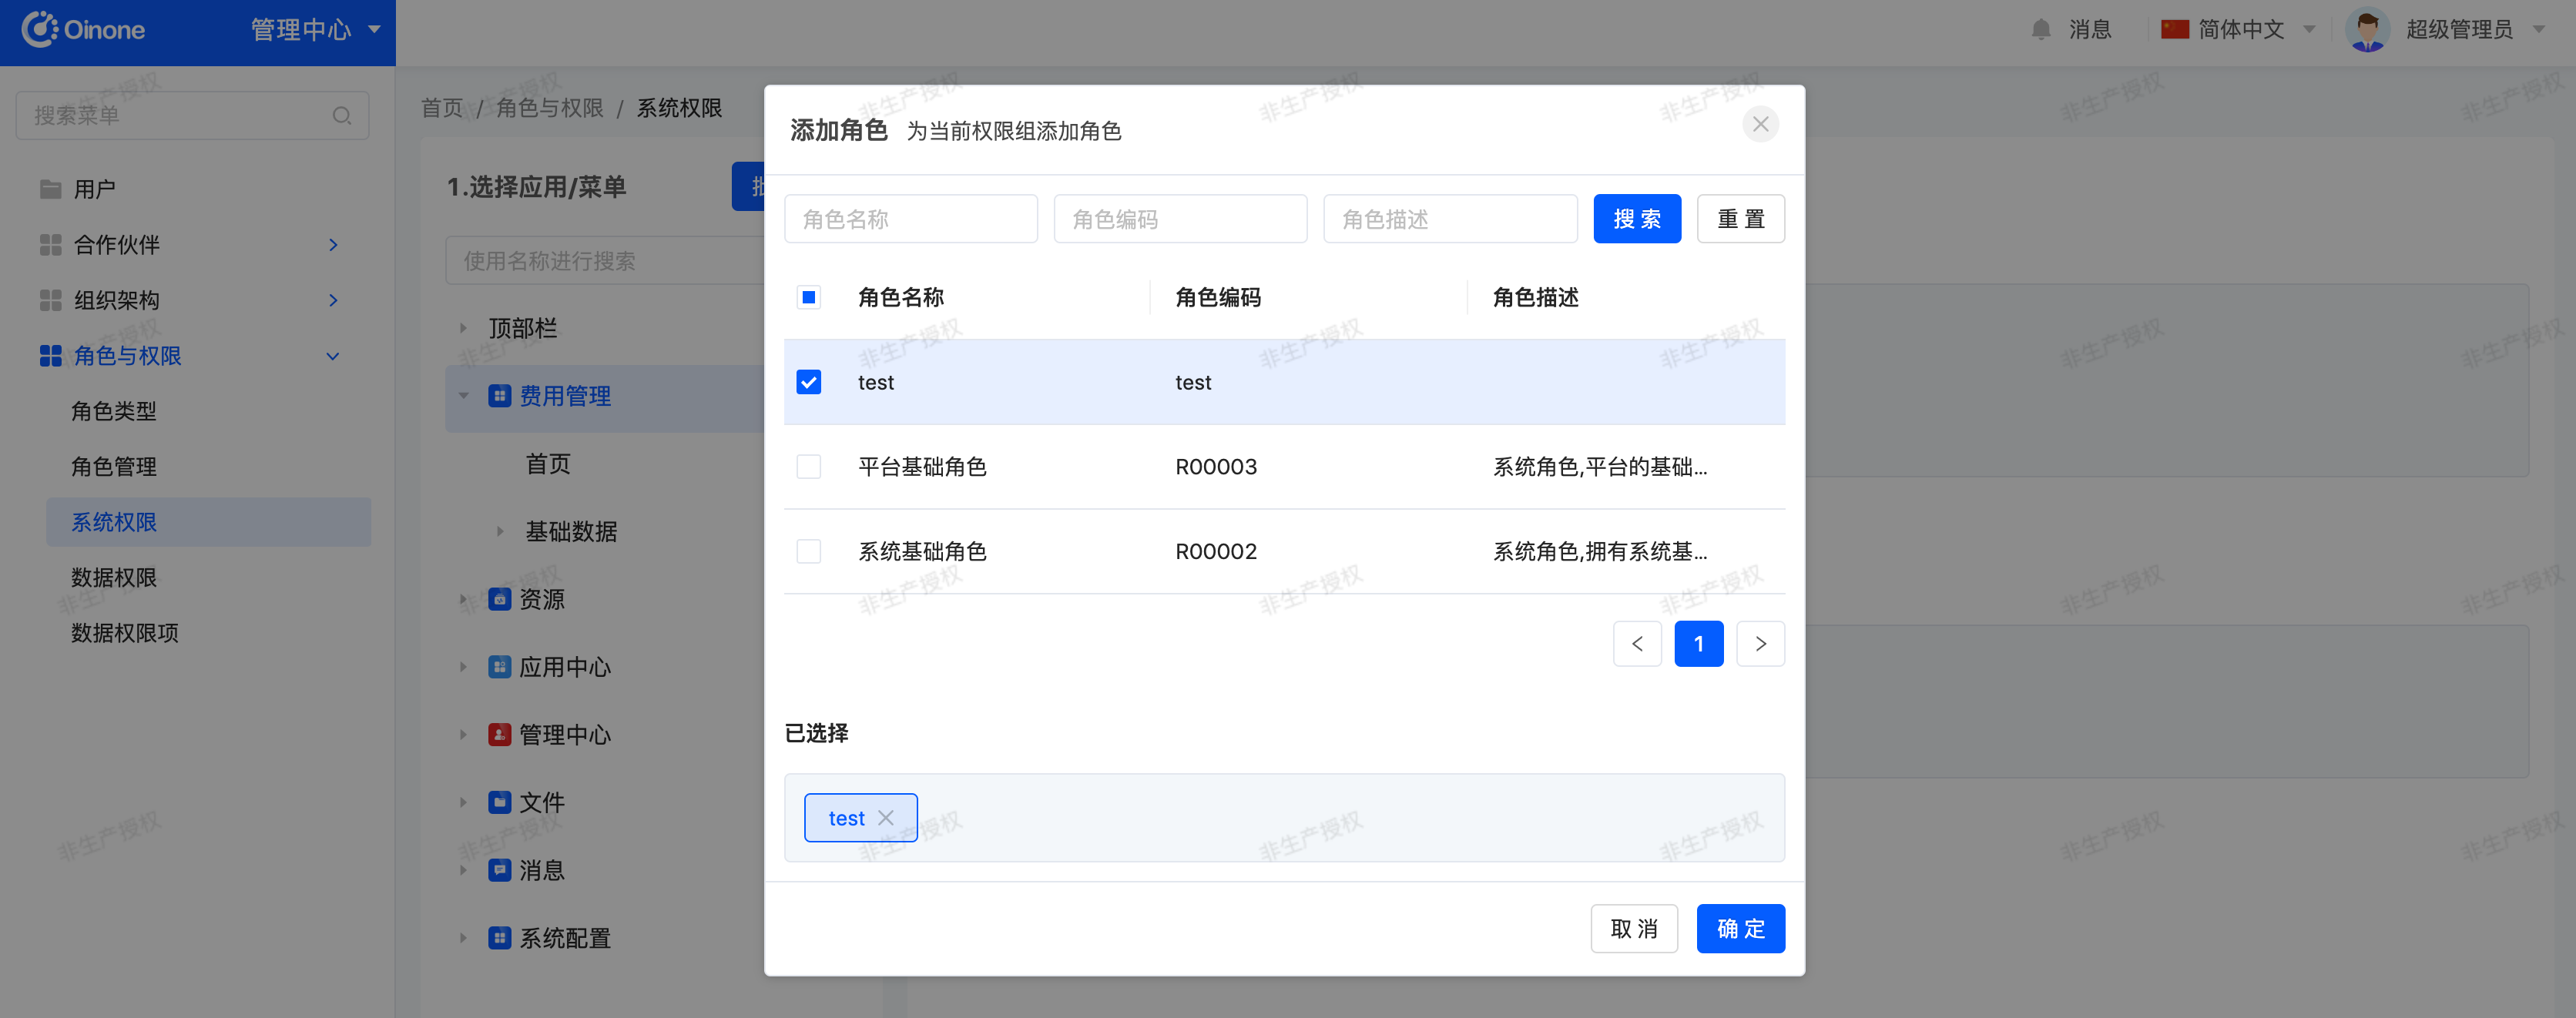
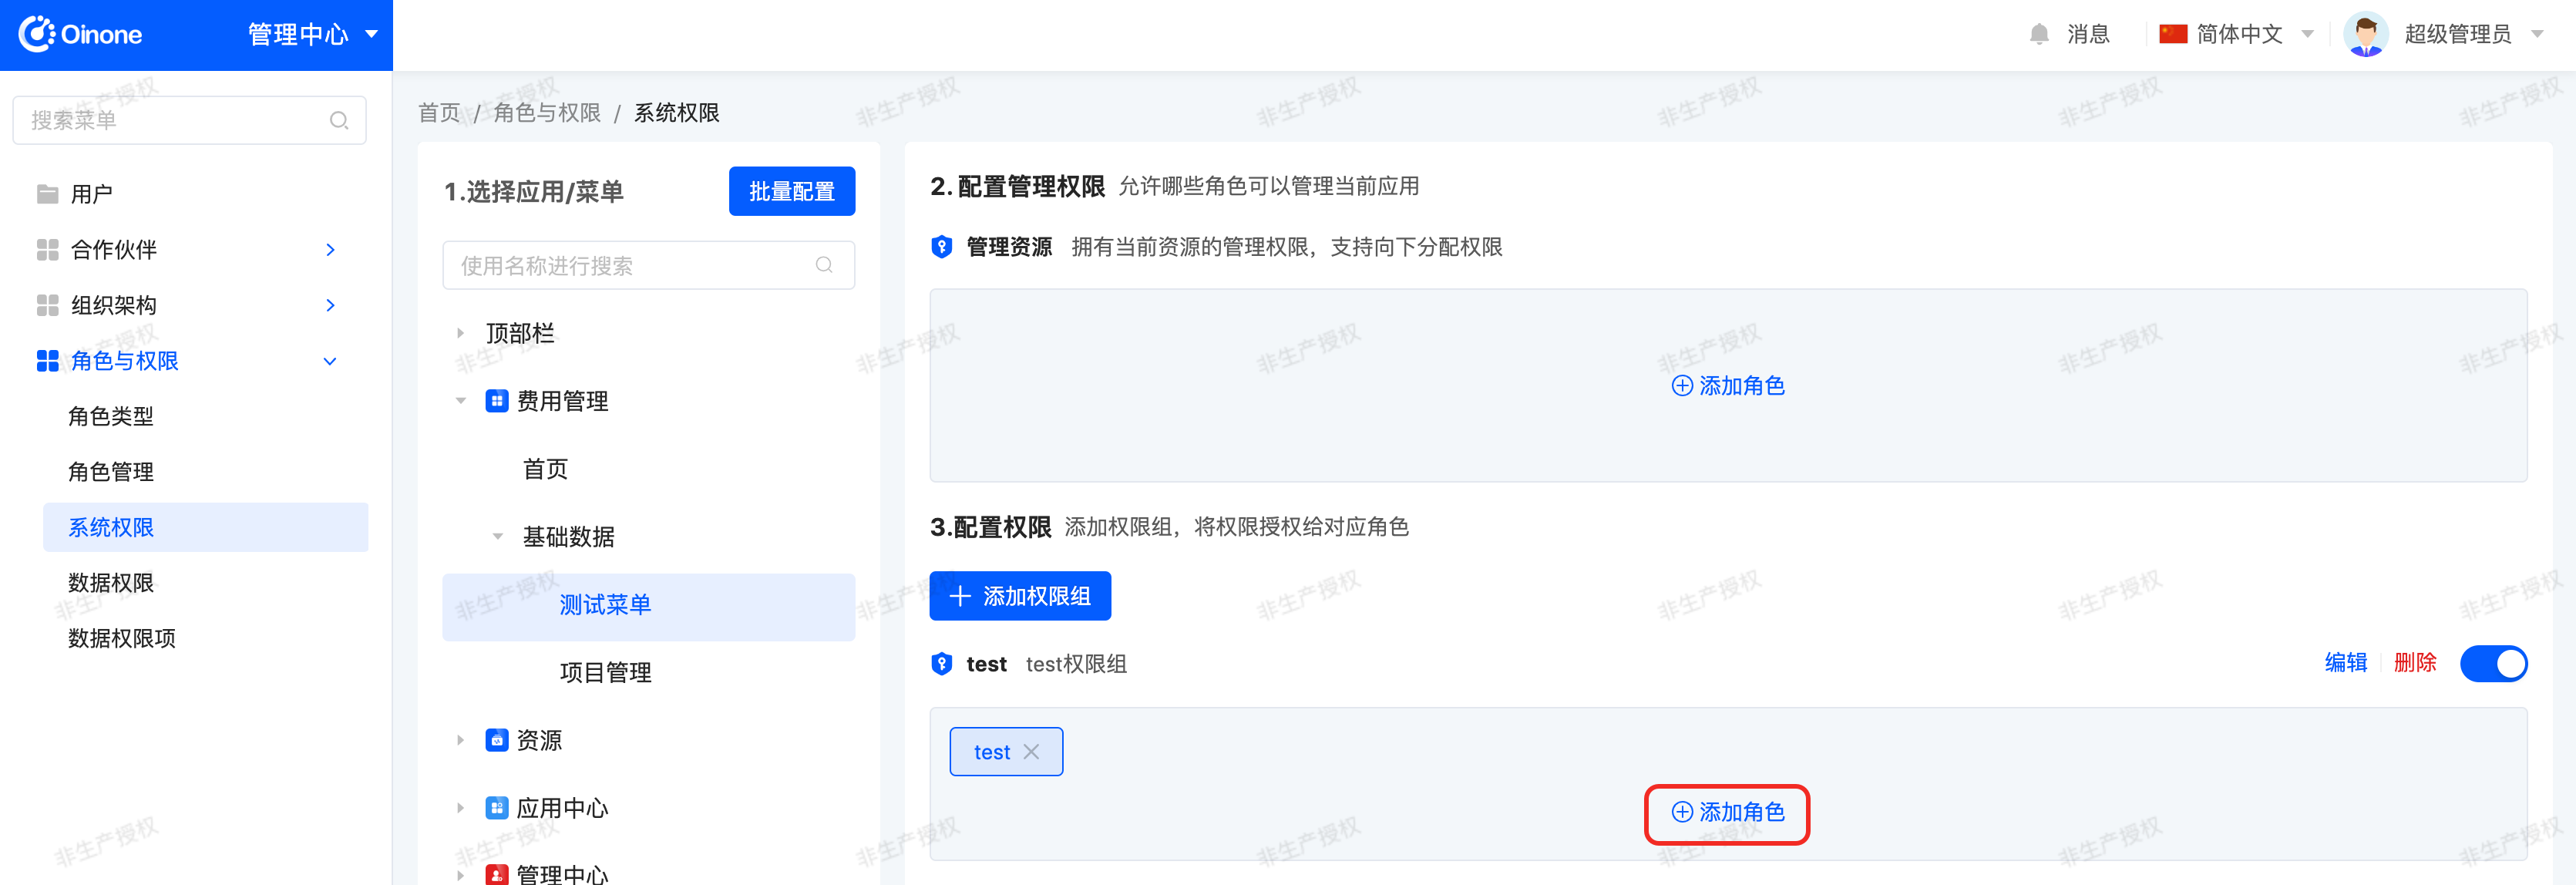
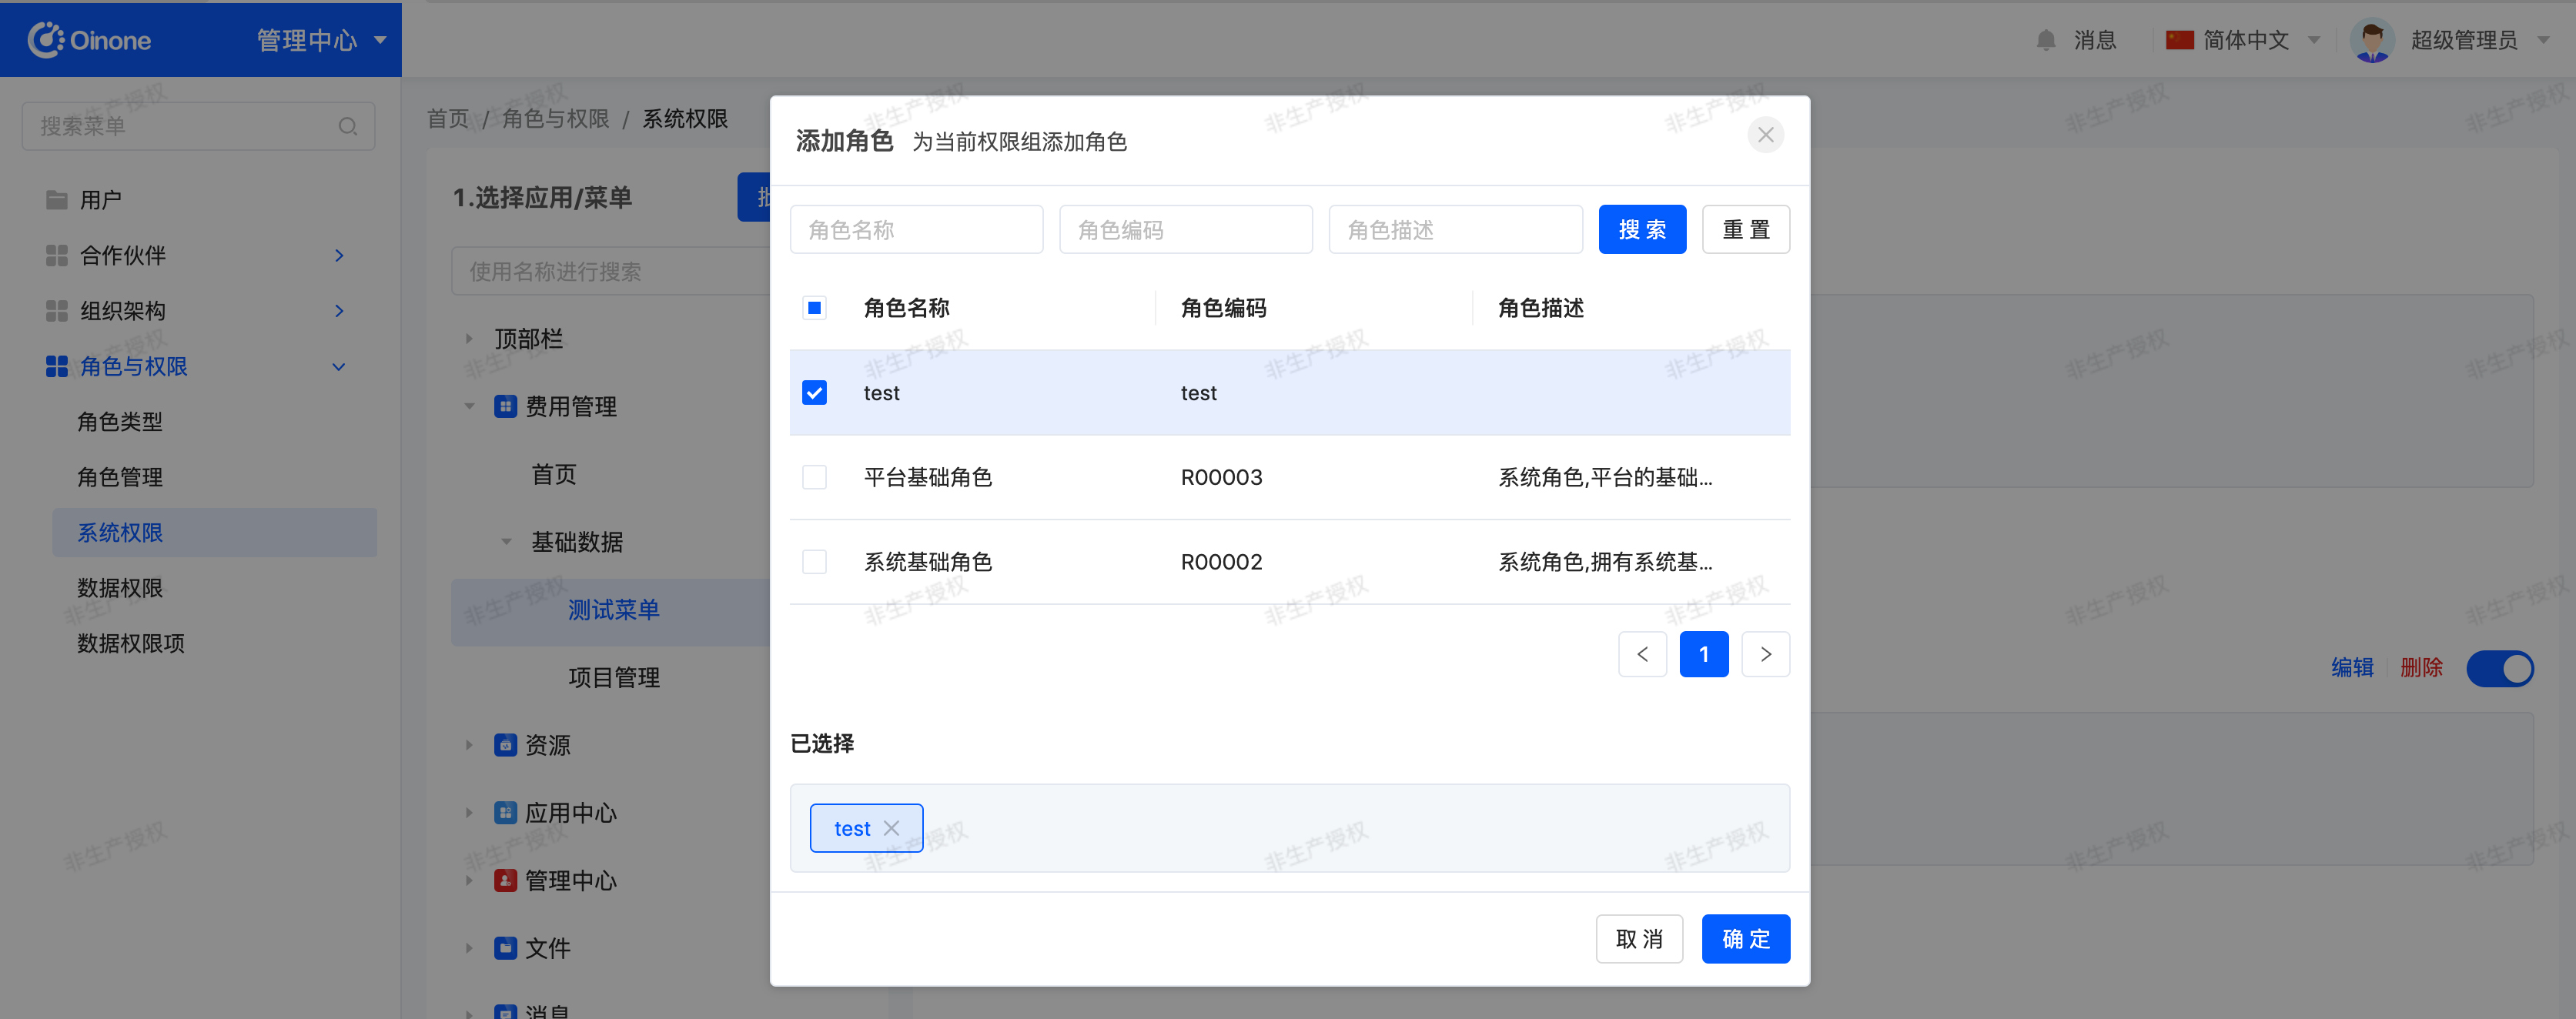
In the system permissions page, select Expense Management, click the "Add Role" button, select the "test" role in the pop-up, and confirm to save.
Example: Granting the "test" role access to the "Test Menu" under the Expense Management application:
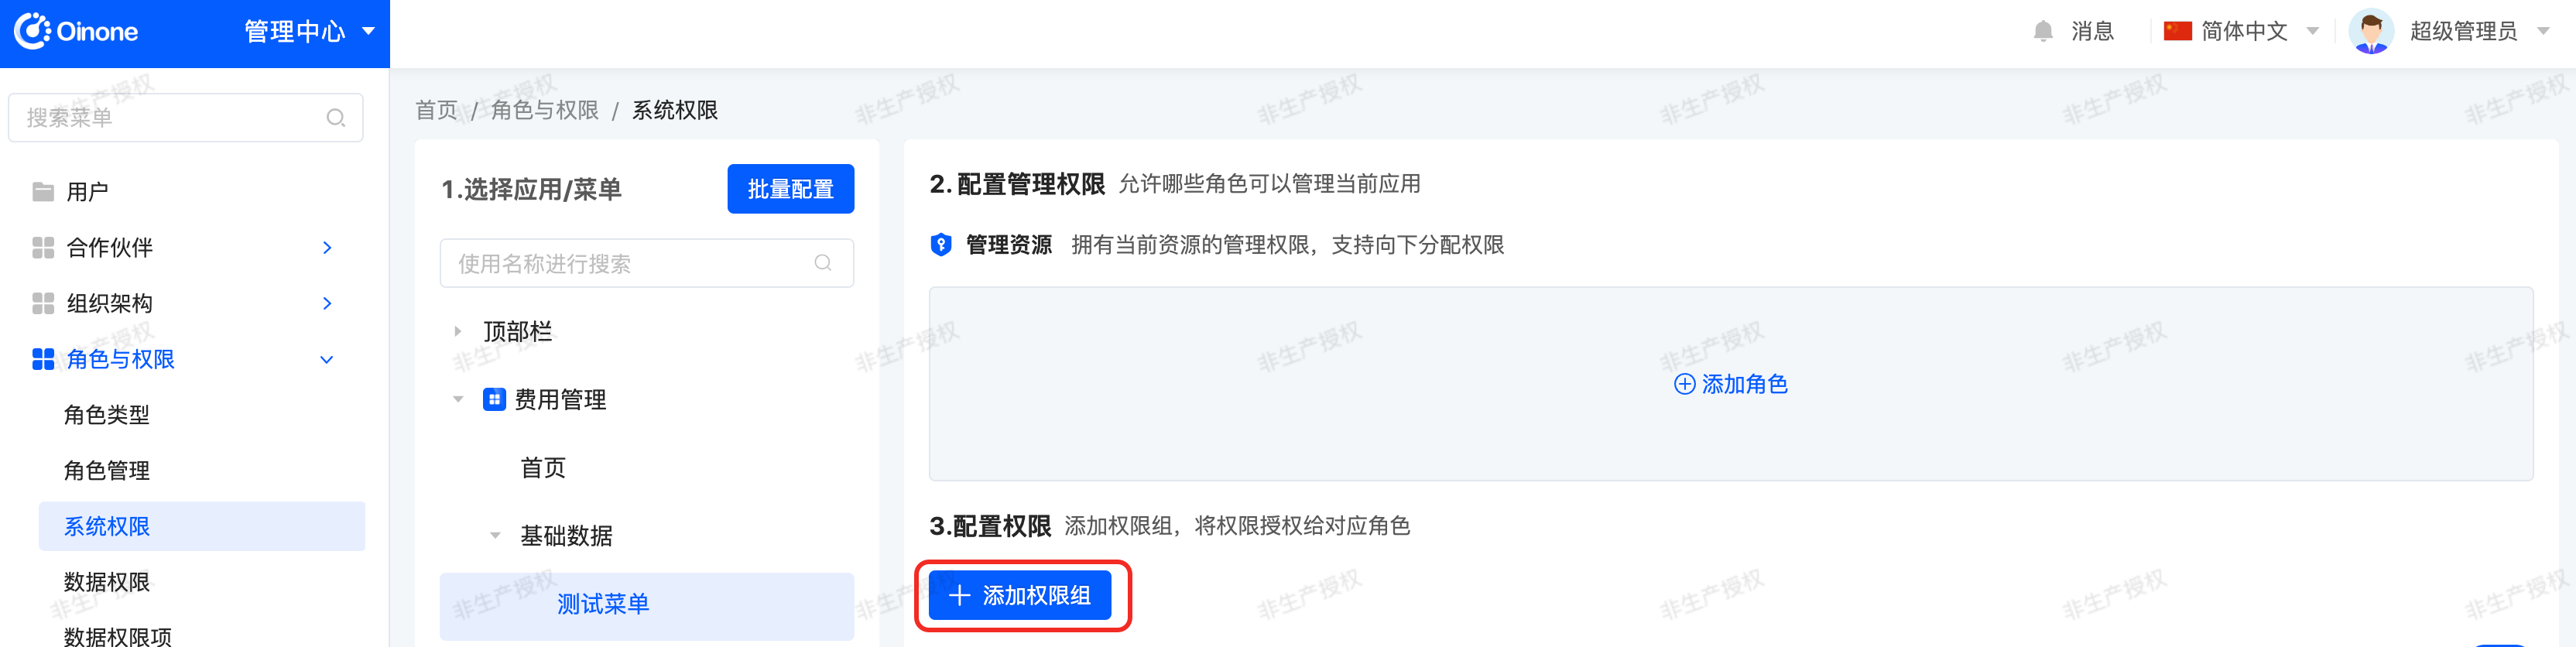
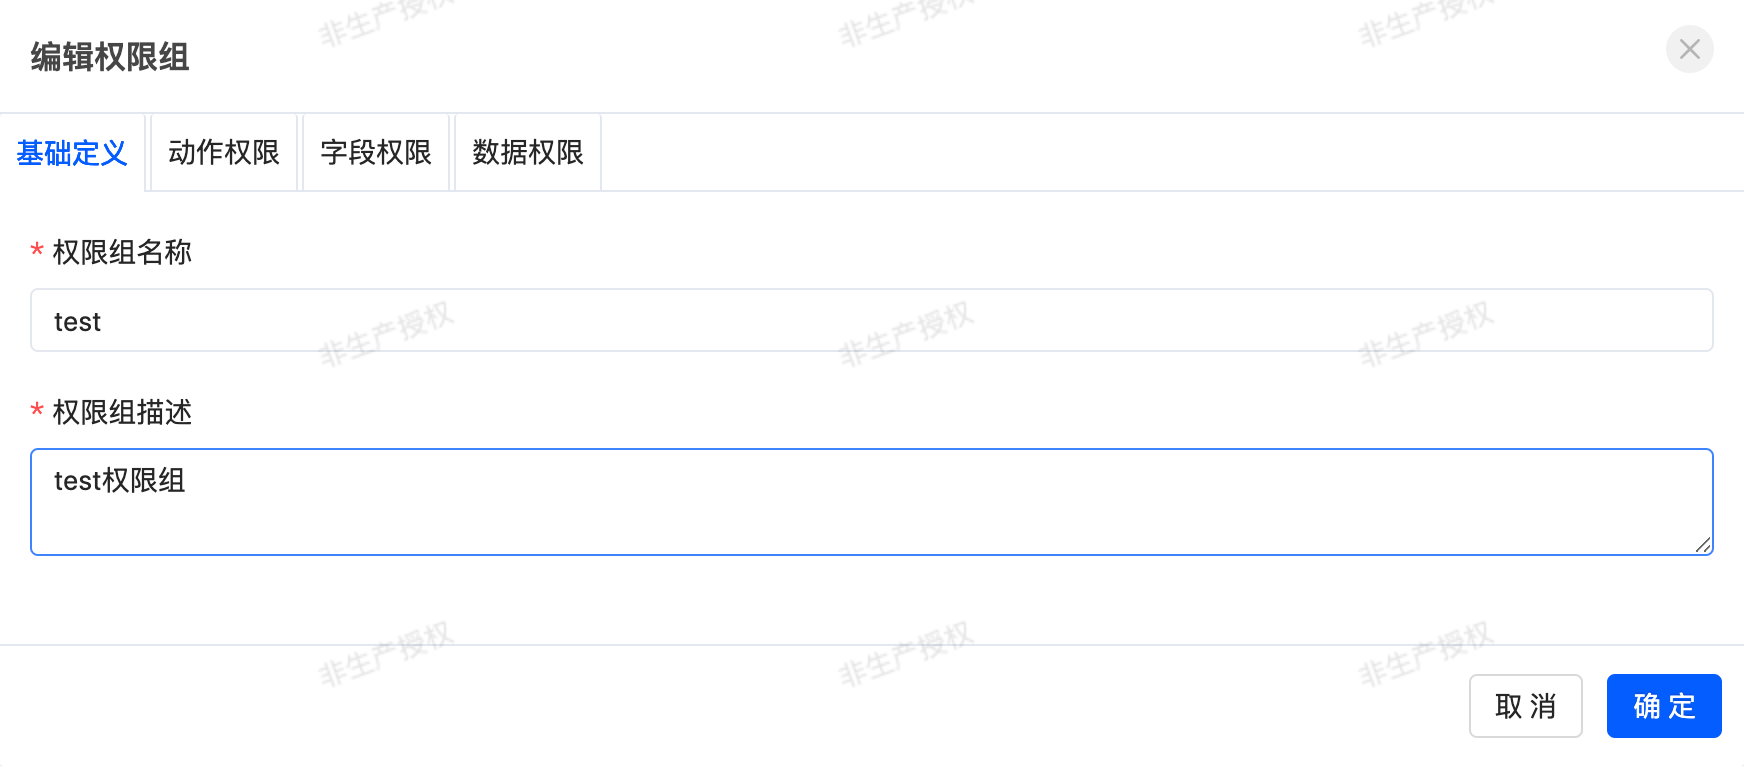
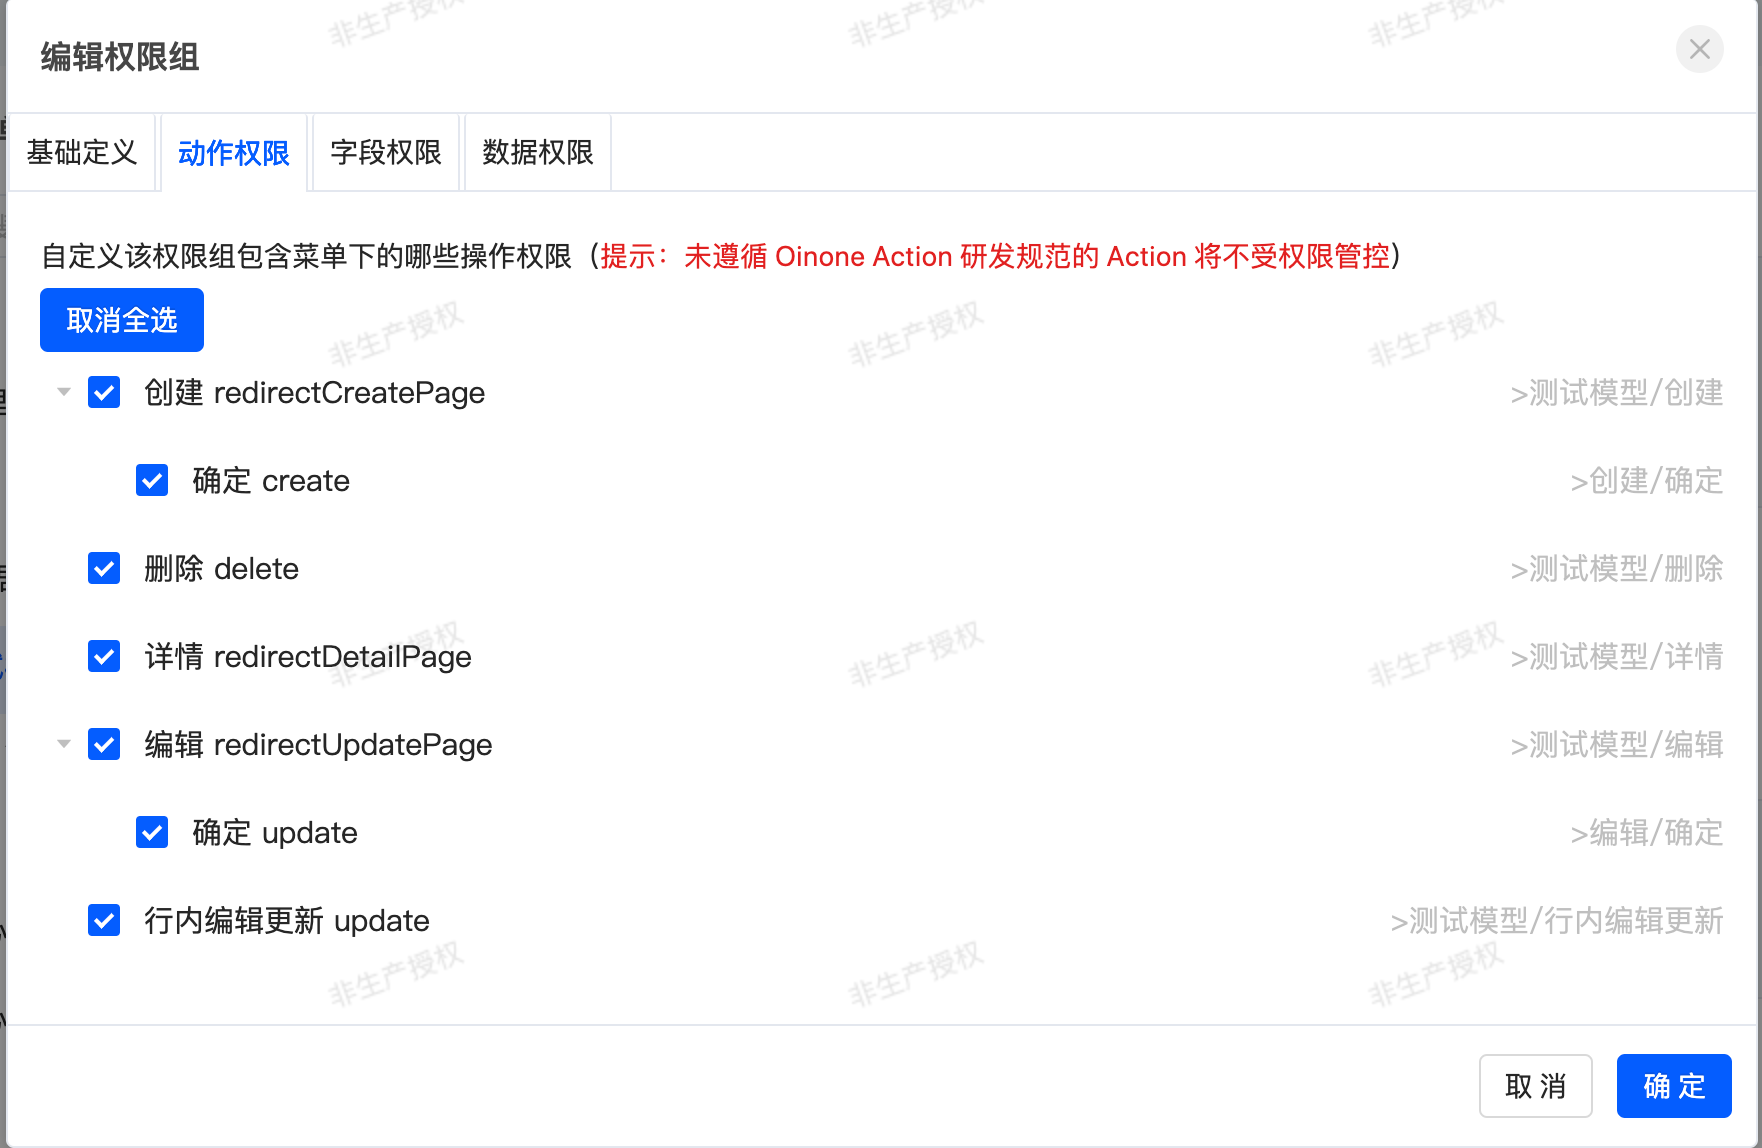
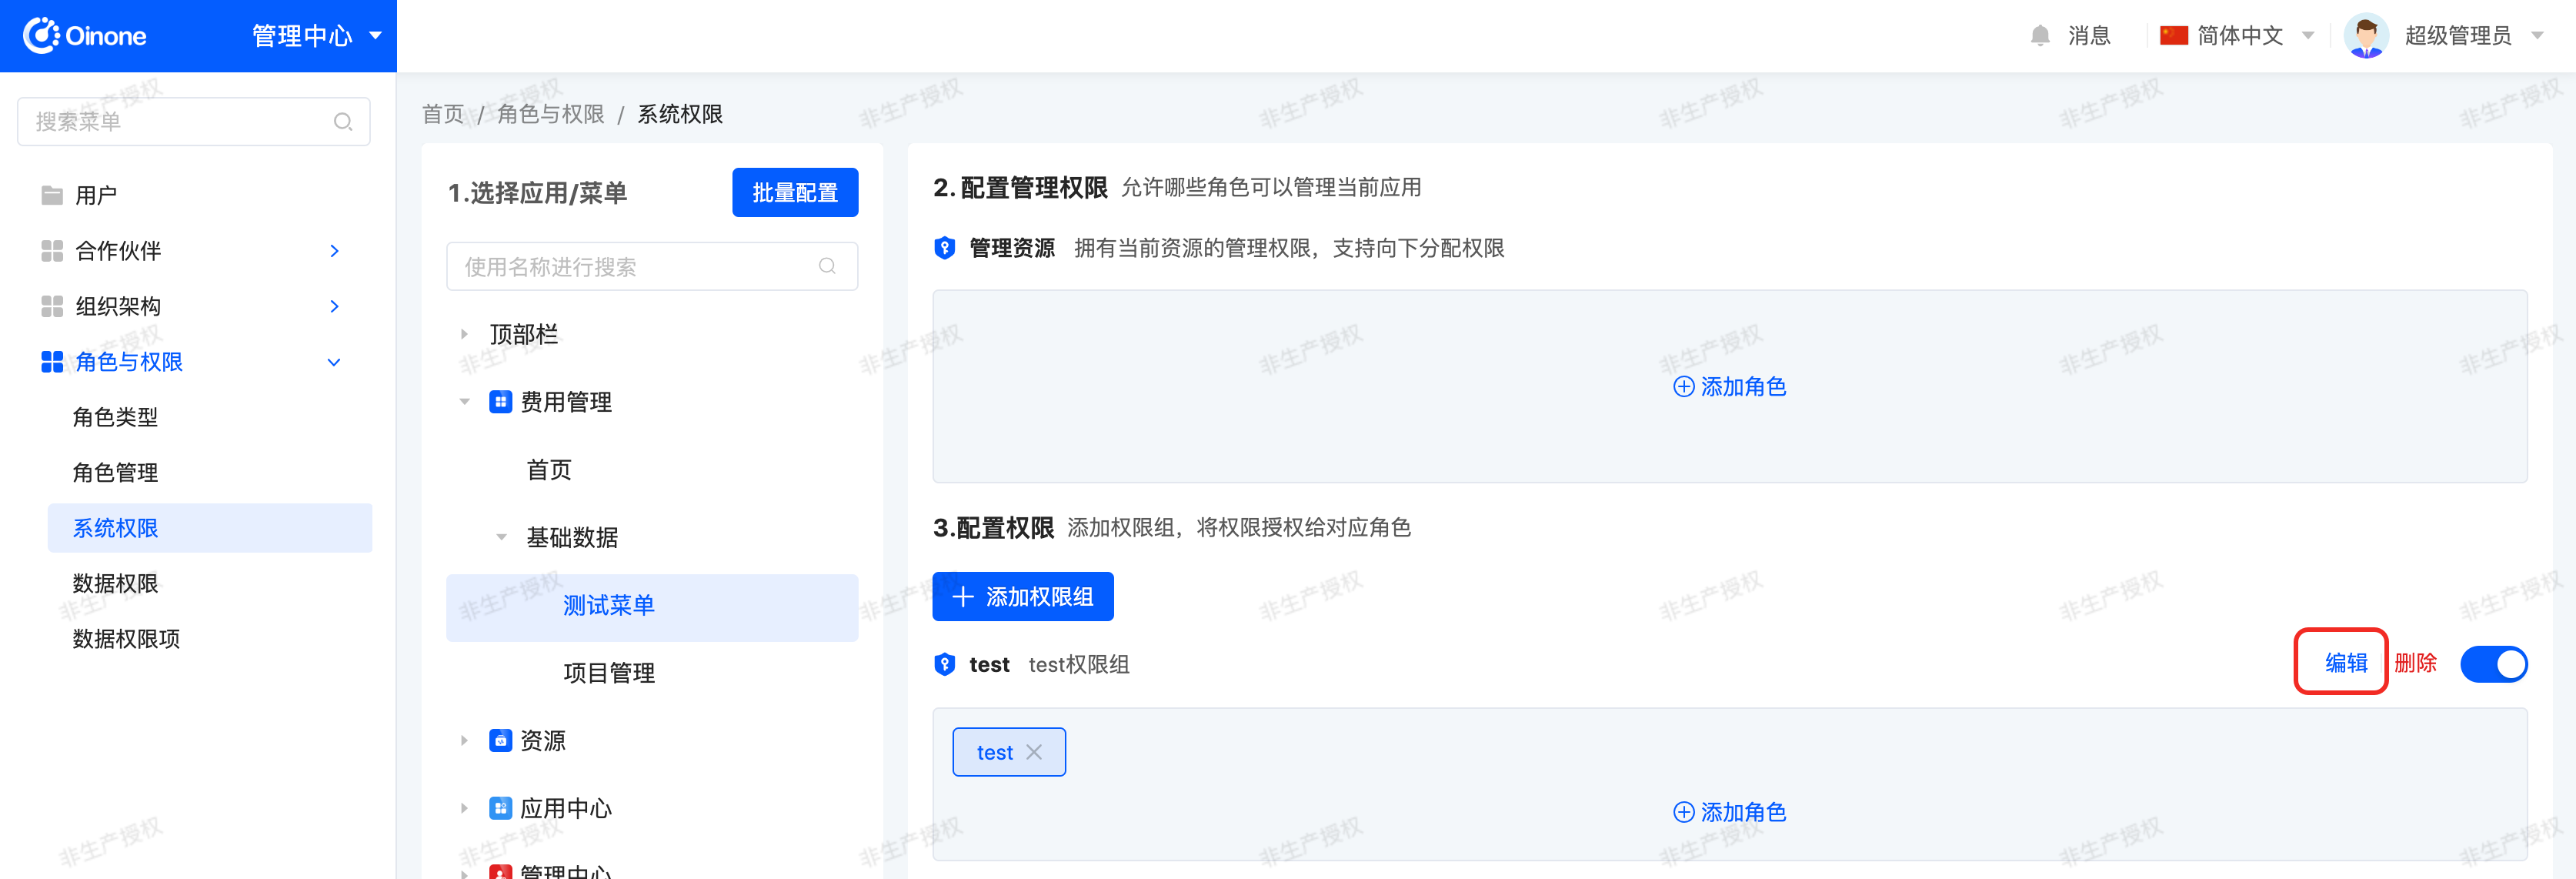
- In the system permissions page, select [Expense Management - Basic Data - Test Menu], click the "Add Permission Group" button, configure the permission group permissions in the pop-up, and confirm to save.
- Bind the test permission group to the "test" role.
- When the test user logs in, they can only access "Expense Management" and its "Test Menu".

Tips
- Log in with the admin account when configuring permissions.
- The password for test login is the initial password filled in the form when creating the user, which is "test1234@" in the example.
Exercise
Resource permission settings for the Project Management menu: Grant the "test" role the corresponding access and operation permissions for the [Expense Management - Basic Data - Project Management] menu, following the "Test Menu" example.
(II) Data Permissions
Oinone's data access permission control can be set separately for: row-level and column-level.
Objectives: By the end of this section, the test user can log in and access [Expense Management - Basic Data - Project Management], but can only access data whose name contains the character "test".
Example: Granting the "test" role data permissions for the "Test Menu" under the Expense Management application:
- In the system permissions page, select [Expense Management - Basic Data - Test Menu], click the "Edit" button corresponding to the "test permission group", configure the field permissions and data permissions in the pop-up, and confirm to save.
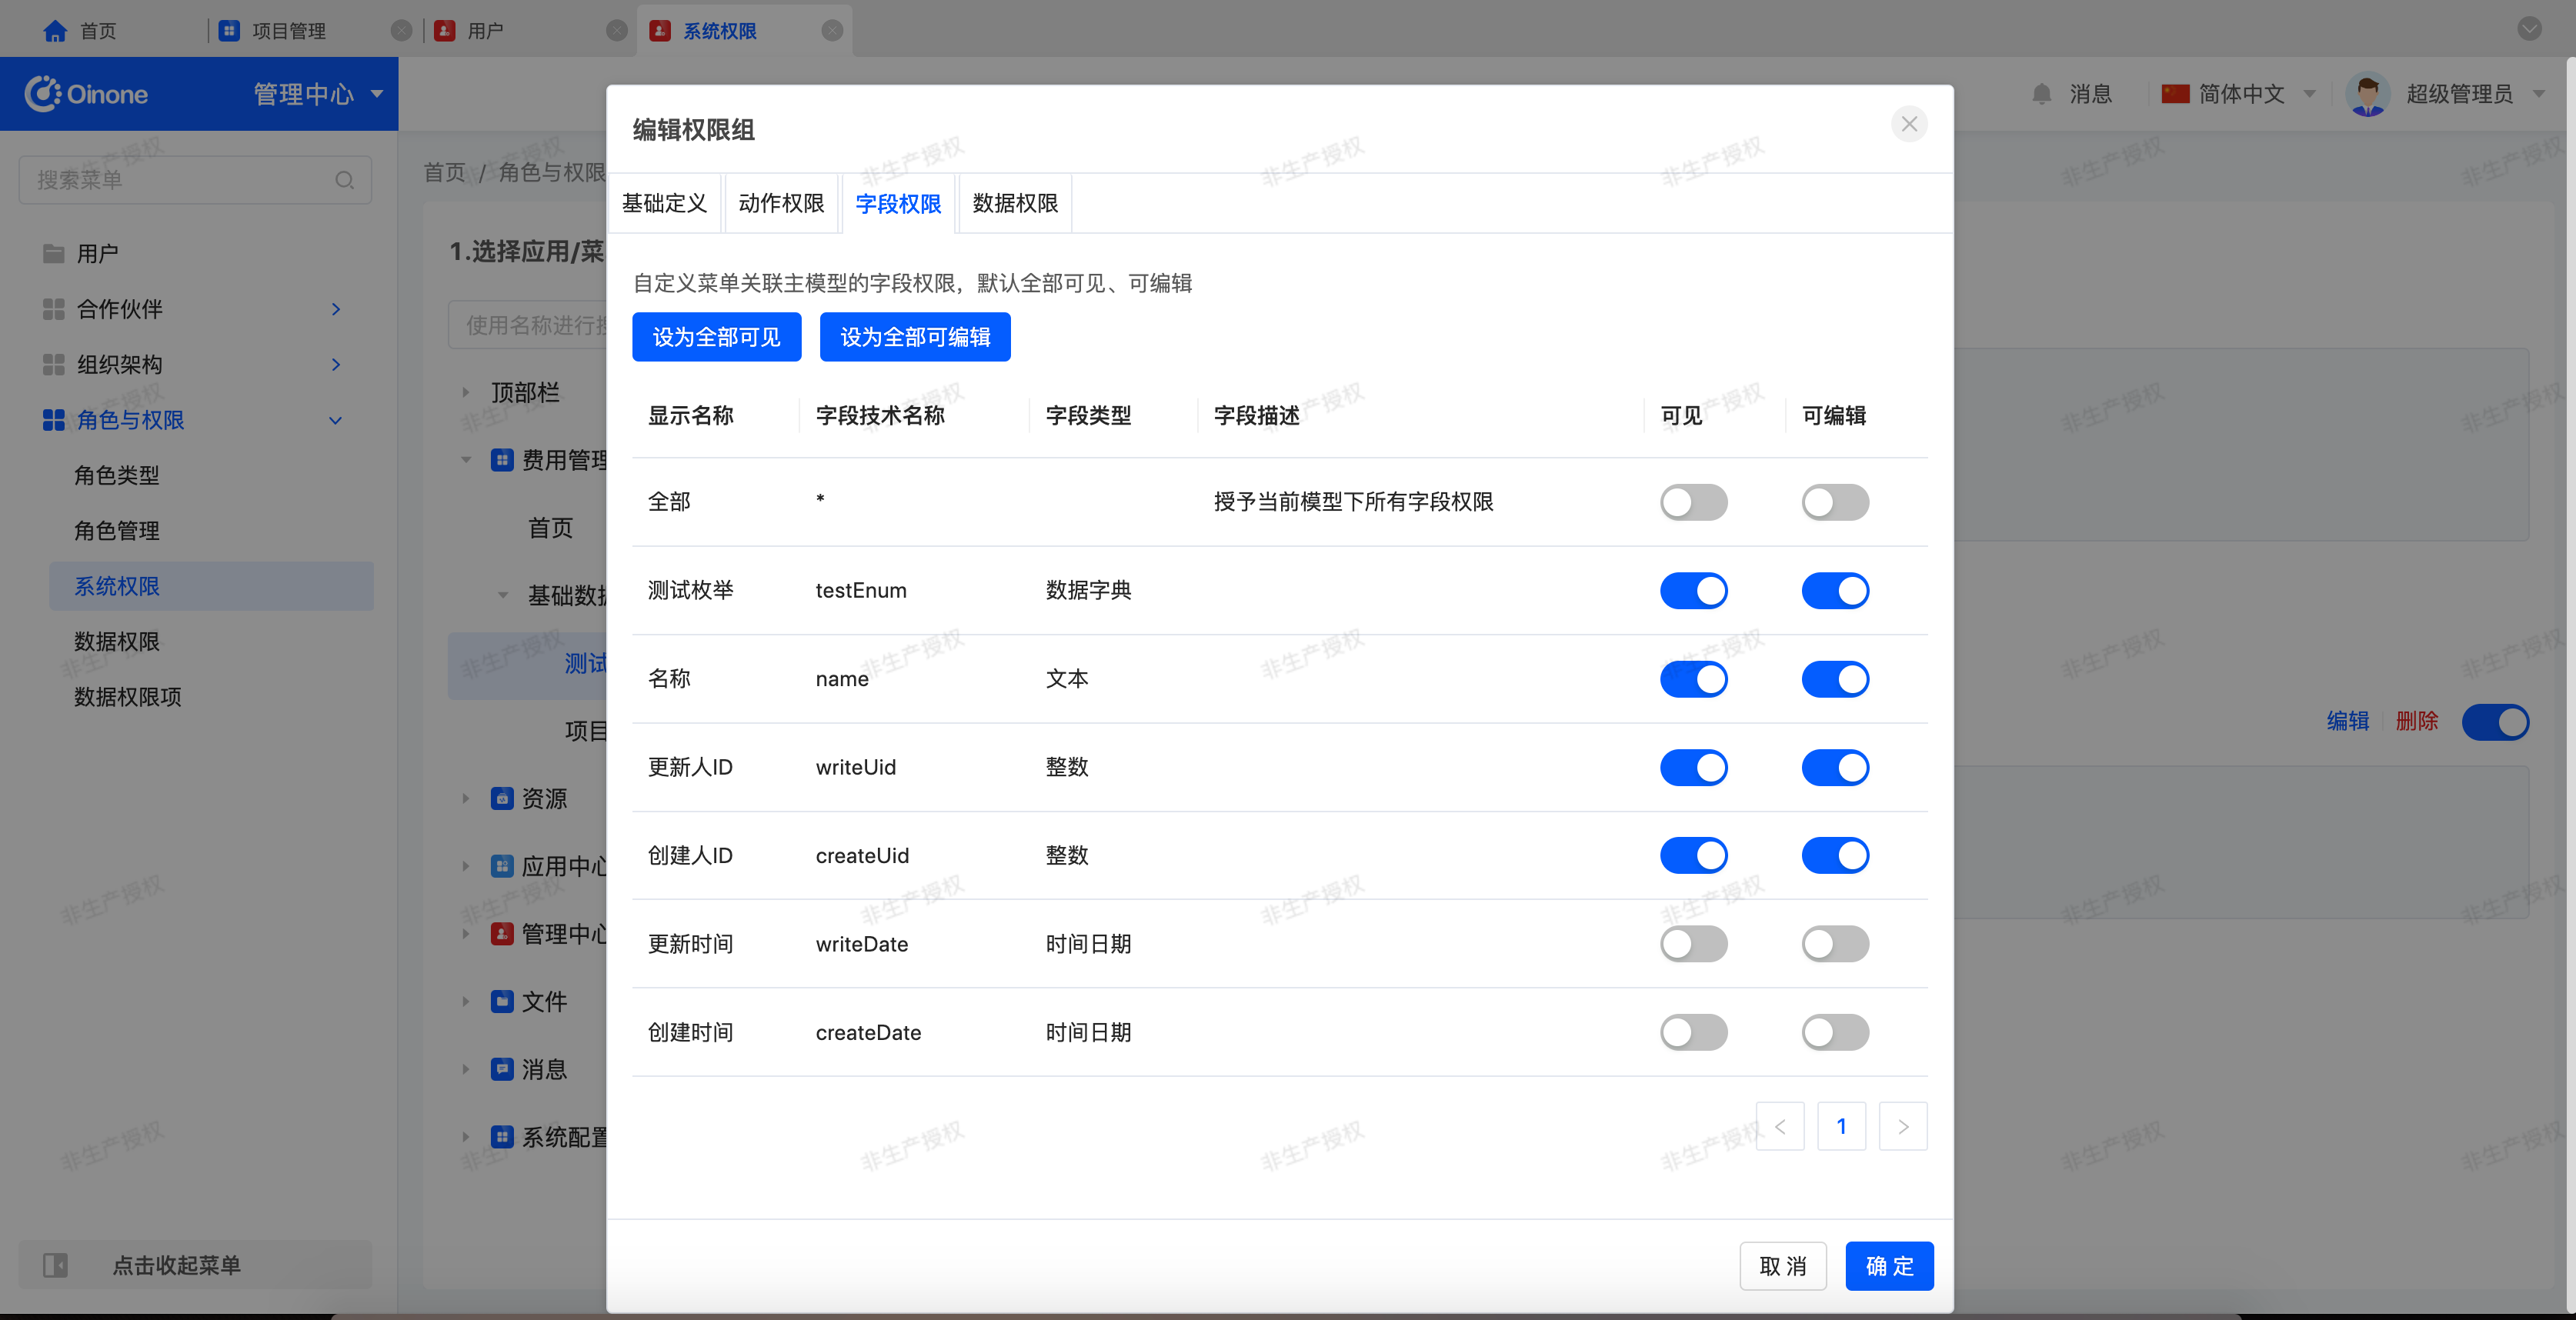
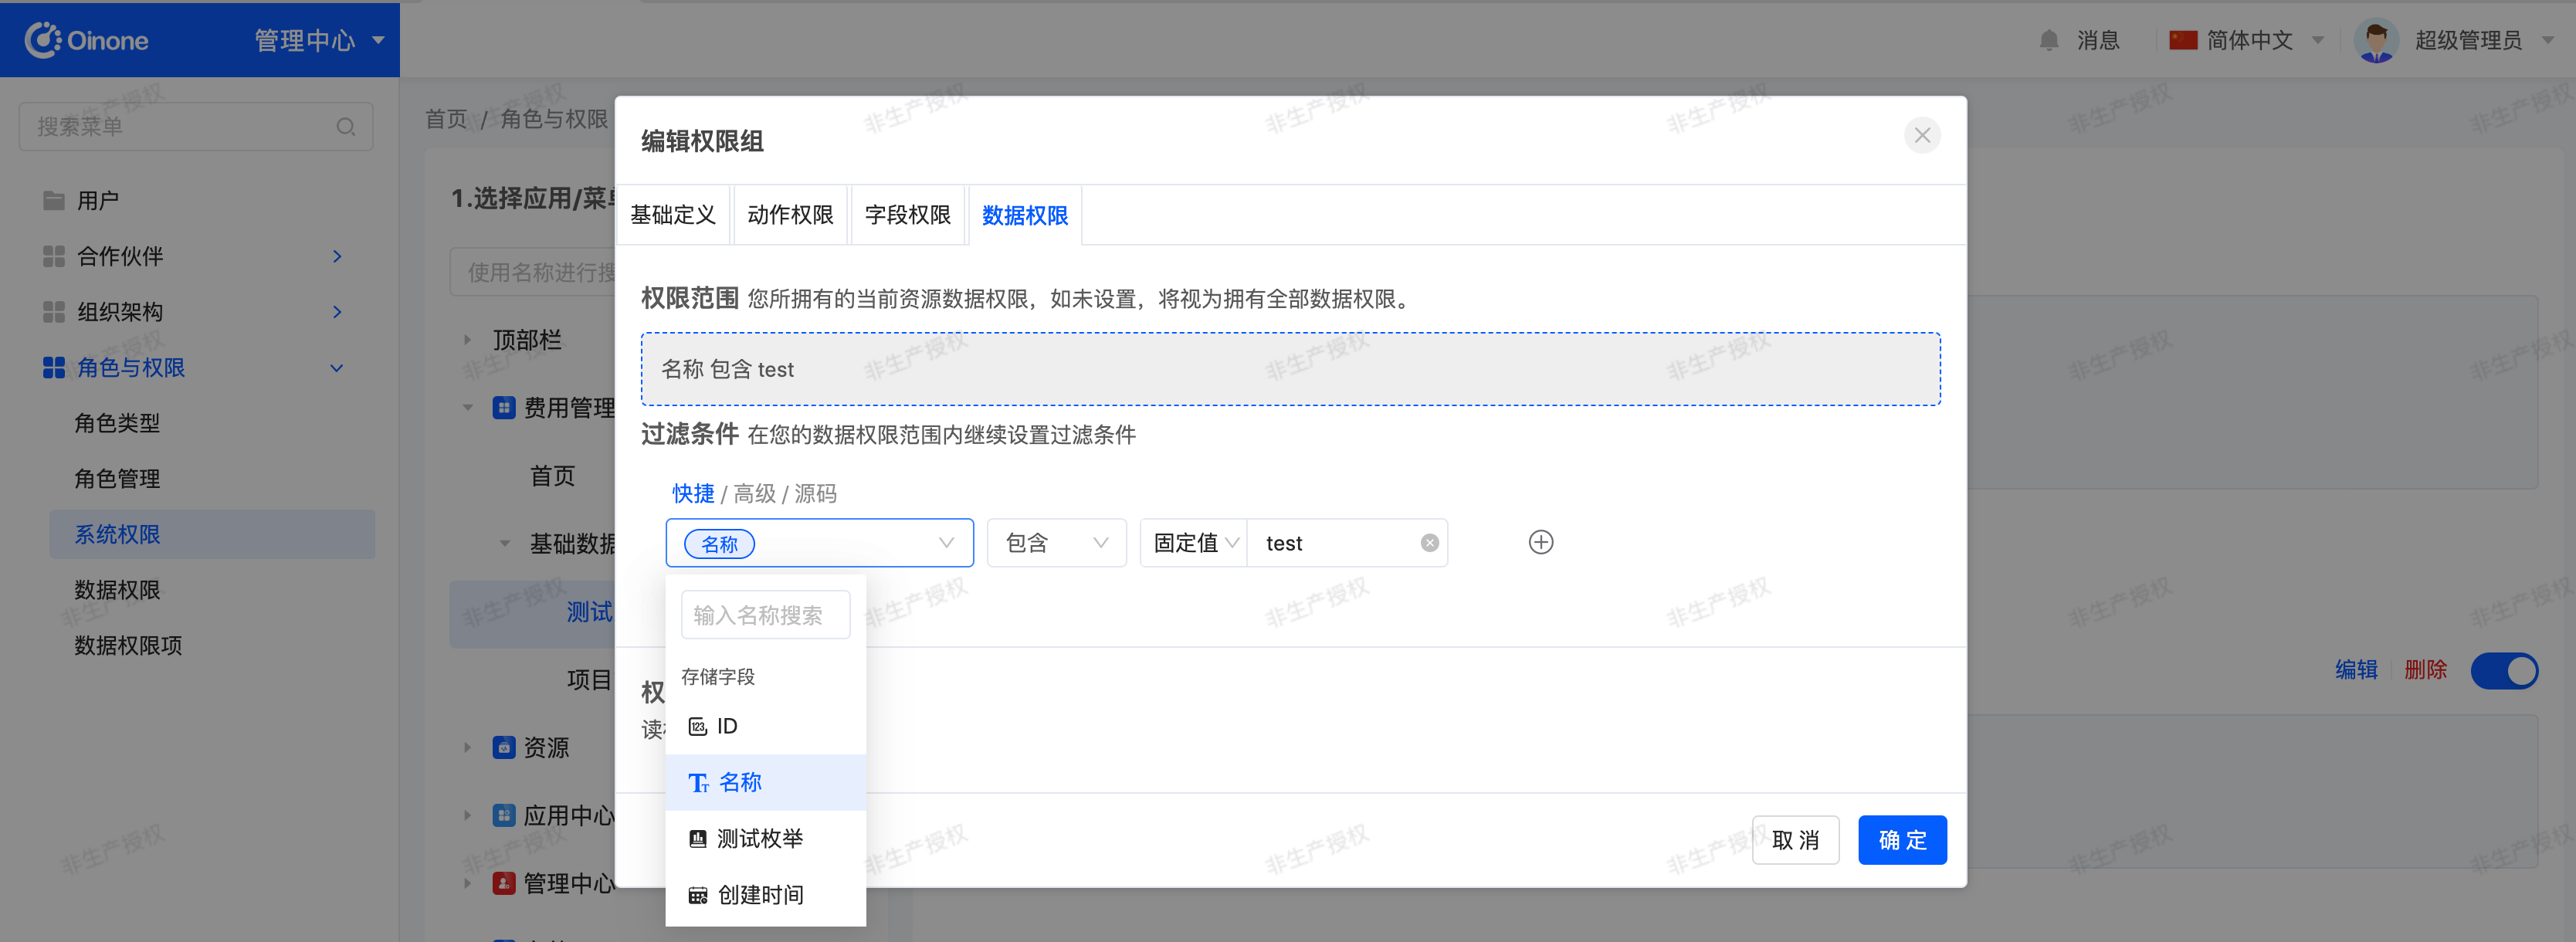
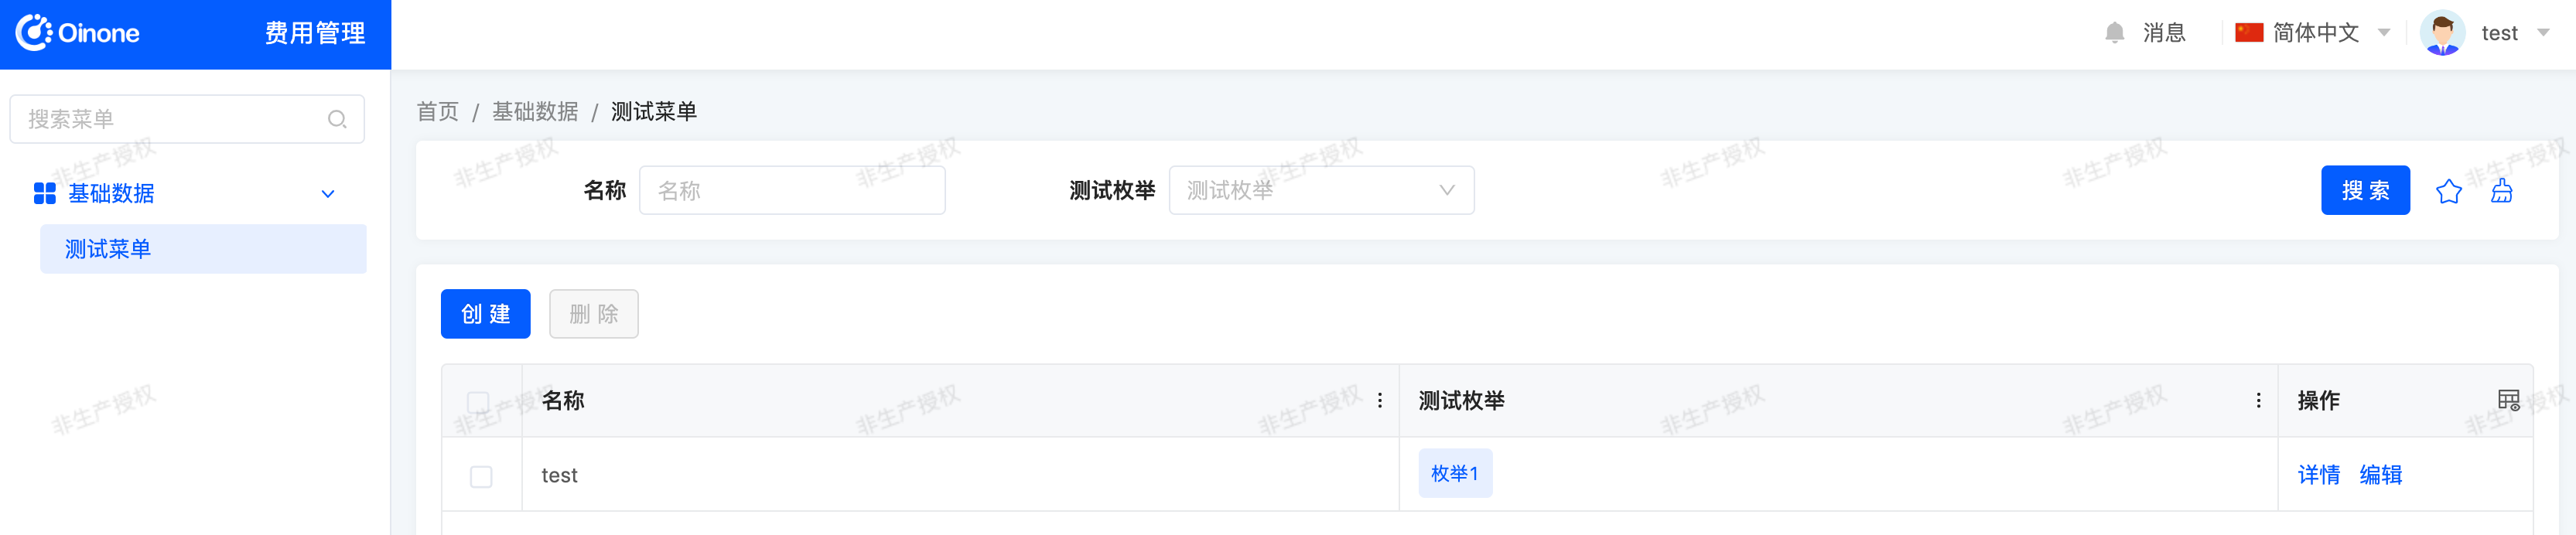
- After the test user logs in again, the "Creation Time" and "Modification Time" fields are invisible in the "Test Menu" list. If the newly added data name does not contain the "test" string, the data row will be invisible.
Tip: Field Permission Configuration
When configuring field permissions, be sure to uncheck the "Visible" and "Editable" options for all fields; otherwise, the field permissions will not take effect.
Note: Field Permissions and Data Permissions
The Enterprise Edition includes the functions of field permissions and data permissions, while the Community Edition does not have these functions.
Exercise
Data permission settings for Project Management: Grant the "test" role row-level data permissions for the Project Information model corresponding to the [Expense Management - Basic Data - Project Management] menu, i.e., only view data where the "Project Name" field value contains the "test" string, following the "Test Menu" example.
Now we can finally interact with the user interface!