In the previous chapter, we learned that Oinone can generate default views for a given model. However, in practical business applications, default views often fail to meet requirements. Therefore, we need to organize fields logically at a minimum.
Views are defined in XML files and are instances of the base.view model. In our expense management module, we need to organize fields logically with the following requirements:
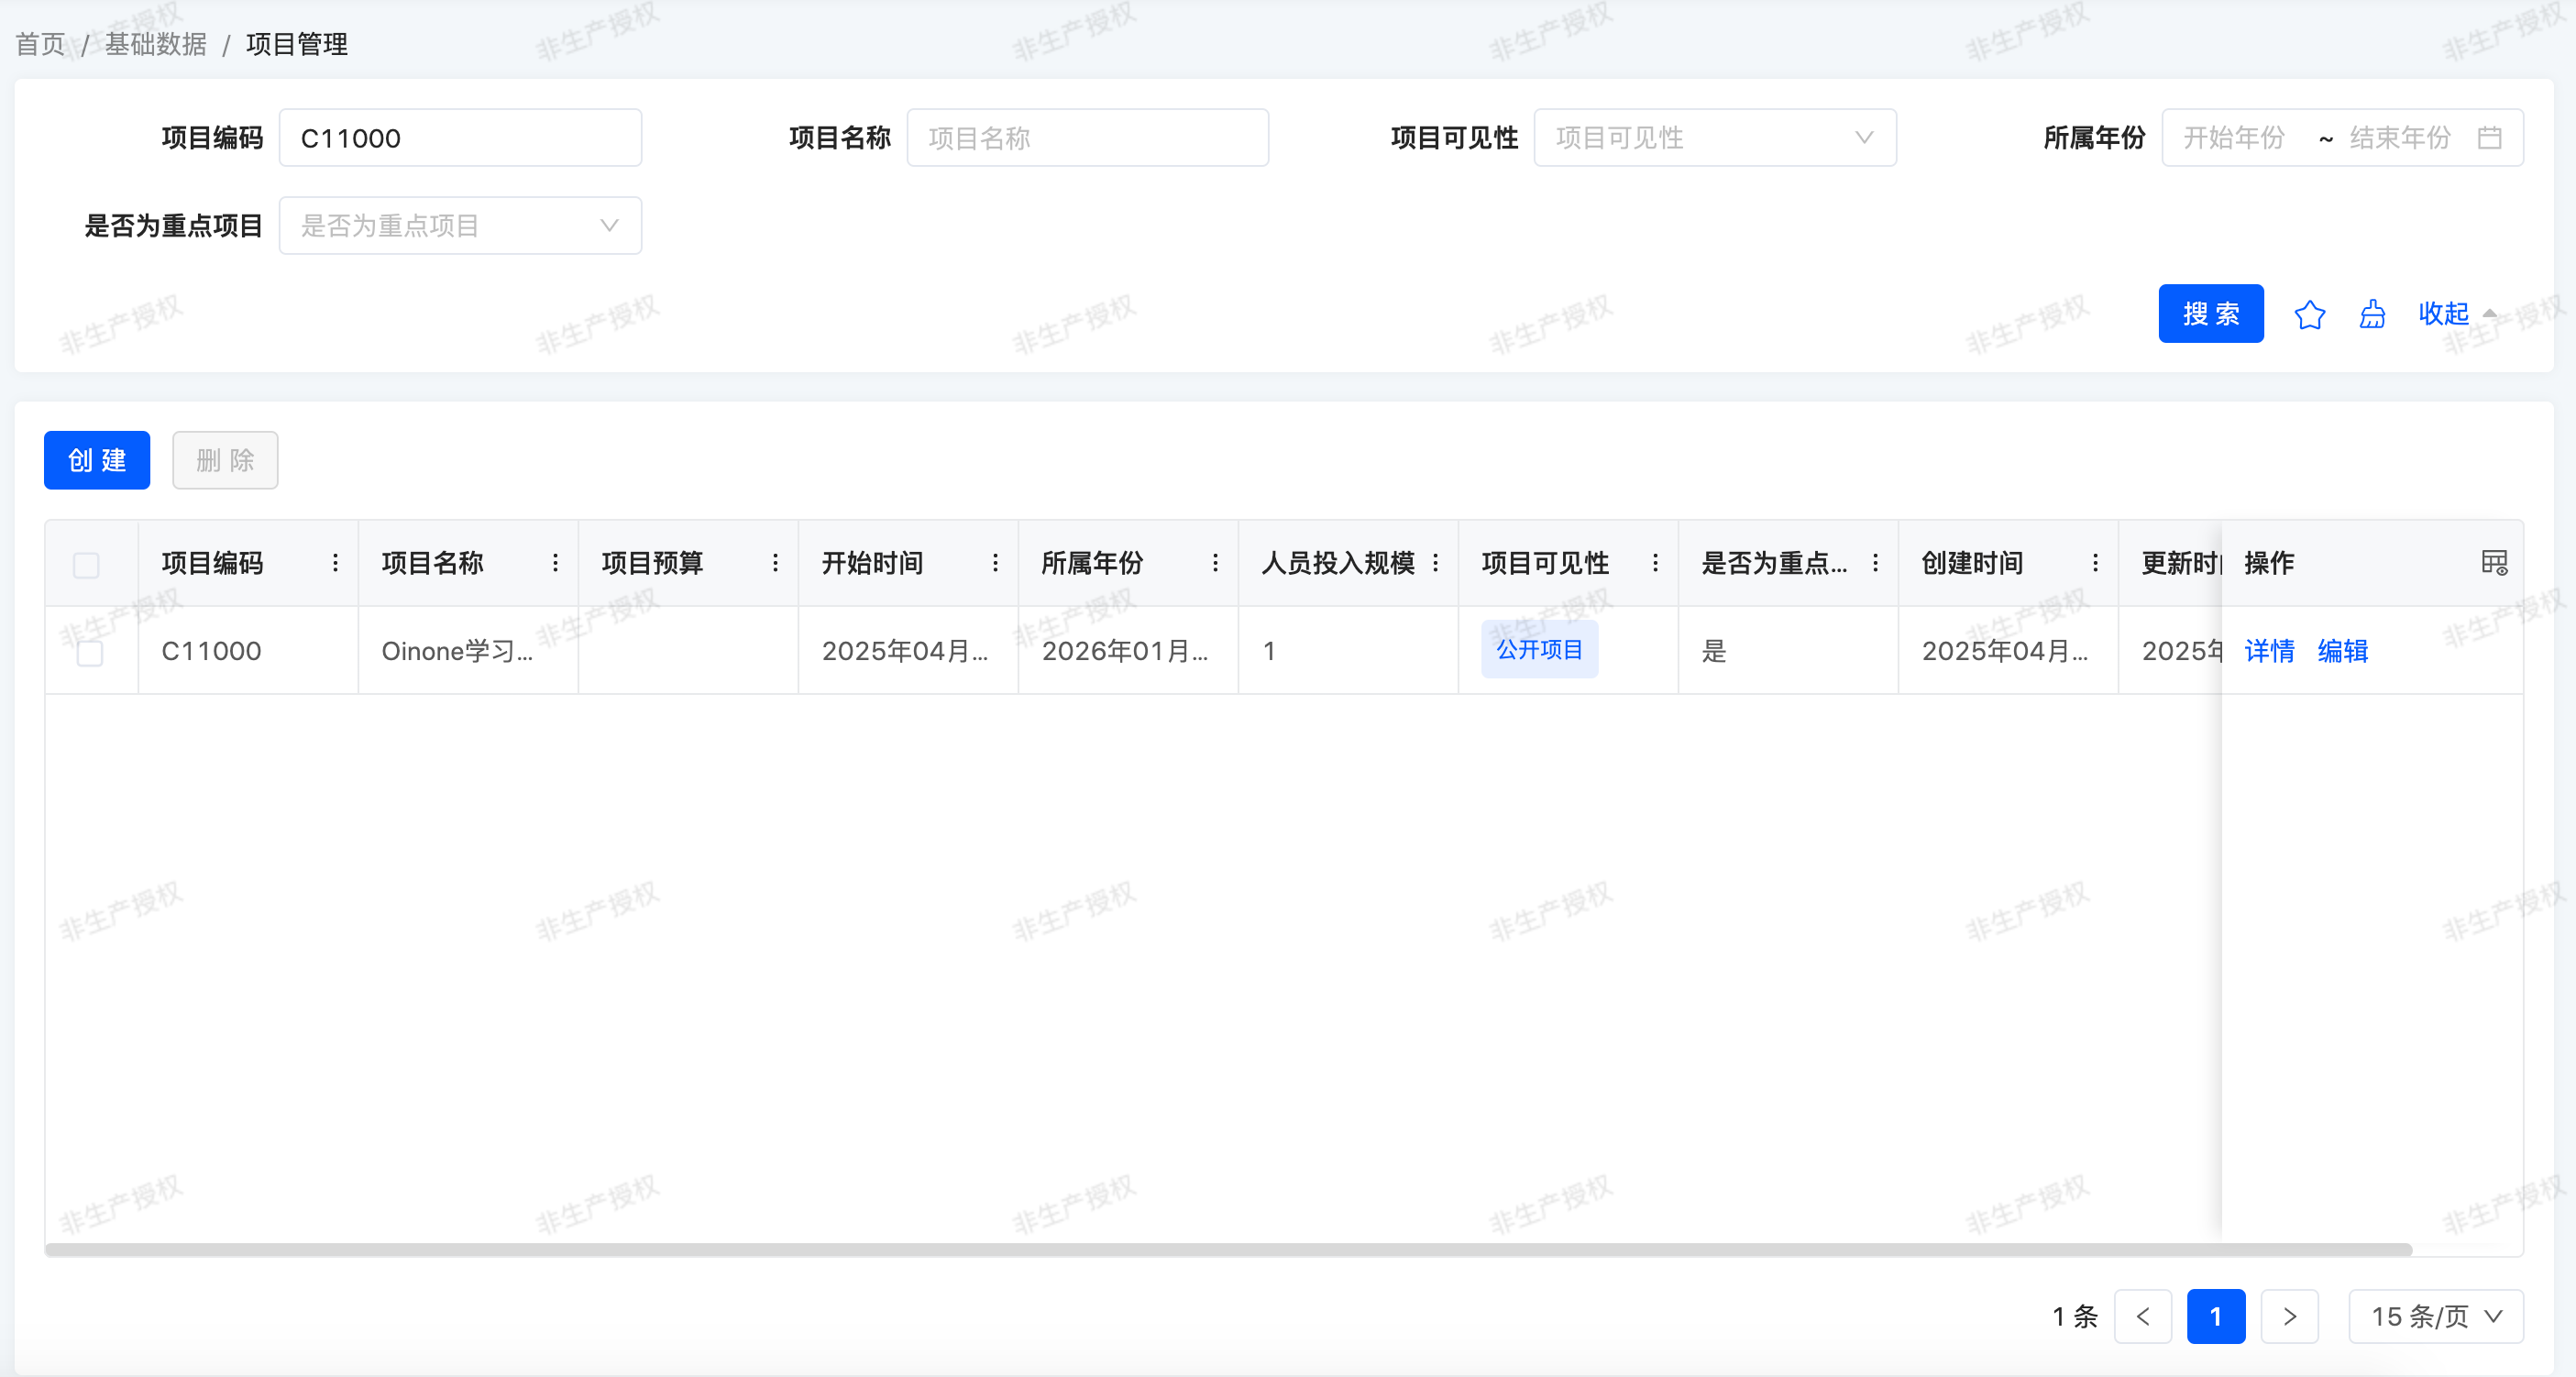
- In the table view, hide project details and adjust the order.
- In table searches, enable filtering based on more fields, specifically providing a filter for "project visibility" and changing code filtering from partial match to exact match.
- In the form view, group fields for display.
I. Table View
Reference: Related documentation can be found in "Table View".
Objectives: By the end of this section, the table view should appear as follows:
A table view displays records in a table format. Its root element is <view> with type="TABLE". The most basic table view lists all fields to display in the table (each field corresponds to a column), as shown in the example below:
<view name="tableView1" type="TABLE" cols="2" model="expenses.TestModel" enableSequence="false">
  <template slot="actions" autoFill="true"/>
  <template slot="rowActions" autoFill="true"/>
  <template slot="fields">
    <field span="1" invisible="true" priority="5" data="id" label="ID" readonly="true"/>
    <field span="1" priority="101" data="name" label="名称"/>
    <field span="1" priority="102" data="date" label="日期字段"/>
    <field span="1" priority="103" data="code" label="编码"/>
    <field span="1" priority="104" data="testEnum" label="测试枚举">
      <options>
        <option name="enum1" displayName="枚举1" value="enum1" state="ACTIVE"/>
        <option name="enum2" displayName="枚举2" value="enum1" state="ACTIVE"/>
      </options>
    </field>
    <field span="1" priority="200" data="createDate" label="创建时间" readonly="true"/>
    <field span="1" priority="210" data="writeDate" label="更新时间" readonly="true"/>
    <field span="1" priority="220" data="createUid" label="创建人ID"/>
    <field span="1" priority="230" data="writeUid" label="更新人ID"/>
  </template>
  <template slot="search" cols="4">
    <field span="1" offset="0" priority="101" data="name" label="名称" queryMode="DOMAIN" operator="=="/>
  </template>
</view>In the search field definition, add an operator=X option where X accepts a supported RSQL operator. The default for strings is "=like=", and "==" represents exact match filtering.
Any model with an access path has a simple example in the database: the default view corresponding to that model.
mysql> use trutorials_base;
Database changed
mysql> select template from base_view where model='expenses.TestModel' and name ='tableView' and type='TABLE' and is_deleted = 0;Modify this to achieve the desired interactive form.
Place the modified XML file test_model_table.xml in the src/main/resource/pamirs/views/expenses/template directory of the trutorials-expenses-core project.
Warning: Important reminder about potential consequences
In this chapter, you may perform copy-paste operations. Ensure that the name attribute value of each view under the same model is unique. For example, if you directly replace the default table view tableView of the expenses.TestModel model without modifying the name attribute, you will lack a reference when writing subsequent views. Therefore, the example modifies the name attribute value to tableView1.
As mentioned in previous chapters, the default view has a priority of 88, and custom views have a default priority of 77. Lower priority values mean the view is displayed first. You can also manually specify the view priority using <view priority="77">. When the menu's ViewAction does not specify a specific view, the newly configured view is displayed according to the priority rule.
Exercise
Add a custom table view:
Define a table view for the
expenses.ProjectInfomodel in an appropriate XML file. Refer to this section's objectives to determine the fields to display and change code filtering from partial match to exact match in table searches.
As usual, restart the server and refresh the browser to view the results.
II. Form View
Reference: Related documentation can be found in "Form View".
Objectives: By the end of this section, the form view should appear as follows:
A form view is used to create and edit single records. Its root element is <view> with type="FORM", composed of advanced structural elements (groups and tabs) and interactive elements (buttons and fields), as shown in the example below:
<view name="formView1" type="FORM" cols="2" model="expenses.TestModel">
    <template slot="actions" autoFill="true"/>
    <template slot="fields">
        <pack widget="group" title="基础信息">
            <field span="1" invisible="true" priority="5" data="id" label="ID" readonly="true"/>
            <field span="1" offset="0" priority="101" data="name" label="名称" defaultValue="Ux配置的默认值" queryMode="DOMAIN"/>
            <field span="1" offset="0" priority="103" data="code" label="编码" hint="为空时自动生成" readonly="true" queryMode="DOMAIN"/>
        </pack>
        <pack widget="group" title="时间相关">
            <field span="1" priority="102" data="date" label="日期字段"/>
        </pack>
        <pack widget="tabs">
            <pack widget="group" title="枚举相关" cols="1">
                <field span="1" priority="104" data="testEnum" label="测试枚举">
                    <options>
                        <option name="enum1" displayName="枚举1" value="enum1" state="ACTIVE"/>
                        <option name="enum2" displayName="枚举2" value="enum1" state="ACTIVE"/>
                    </options>
                </field>
            </pack>
        </pack>
    </template>
</view>Any model with an access path has a simple example in the database: the default view corresponding to that model.
mysql> select template from base_view where model='expenses.TestModel' and name ='formView' and type='FORM' and is_deleted = 0;Modify this to achieve the desired interactive form.
Place the modified XML file test_model_form.xml in the src/main/resource/pamirs/views/expenses/template directory of the trutorials-expenses-core project.
Warning: Important reminder about potential consequences
In this chapter, you may perform copy-paste operations. Ensure that the name attribute value of each view under the same model is unique; otherwise, replacing the default view will leave you without a reference for subsequent view writing.
If you accidentally replace the default view, don't worry—simply modify the name attribute value of the custom view, and the default view will be restored automatically.
Exercise
Add a custom form view:
Define a form view for the
expenses.ProjectInfomodel in an appropriate XML file. Refer to this section's objectives to determine the fields to display.
Restart the server and refresh the browser to view the results.
III. Detail View
A detail view is used to view single records. Its root element is <view> with type="DETAIL", composed of advanced structural elements (groups and tabs) and interactive elements (buttons and fields). Similar to the form view, any model with an access path has a simple example in the database: the default view corresponding to that model.
mysql> select template from base_view where model='expenses.TestModel' and name ='detailView' and type='DETAIL' and is_deleted = 0;Modify this to achieve the desired interactive form.
Place the modified XML file test_model_detail.xml in the src/main/resource/pamirs/views/expenses/template directory of the trutorials-expenses-core project.
Exercise
Add a custom detail view:
Define a detail view for the
expenses.ProjectInfomodel in an appropriate XML file. Use your creativity!
Restart the server and refresh the browser to view the results.
Looks good! So far, we can create models and design user interfaces that align with business logic. However, one key component is missing: associations between models.
Tip:
In addition to using Ux annotations and XML configuration, we recommend using the designer for auxiliary development. Designer-developed XML views can be copied from database records into project code and loaded when the module starts. They can also be distributed using the import/export functions of the apps module.