Chapter 9:Ready For Some Action
So far, we have primarily built modules by declaring fields and views. In the previous chapter, we introduced business logic with the constructFun mechanism. In any real-world business scenario, we want to associate some business logic with action buttons. Taking our expense management module as an example, we hope to implement the following functions:
- Void or approve projects
- Accept or reject expense bills
Some may say we can already complete these operations by manually changing statuses, but this is inconvenient. Additionally, we want to add extra processing logic: when an expense bill is accepted, we need to update the project's reimbursed amount.
I. Single Record Actions
Reference: Documentation related to this topic can be found in "Actions" and "Error Management".
Objective: By the end of this section, you should be able to:
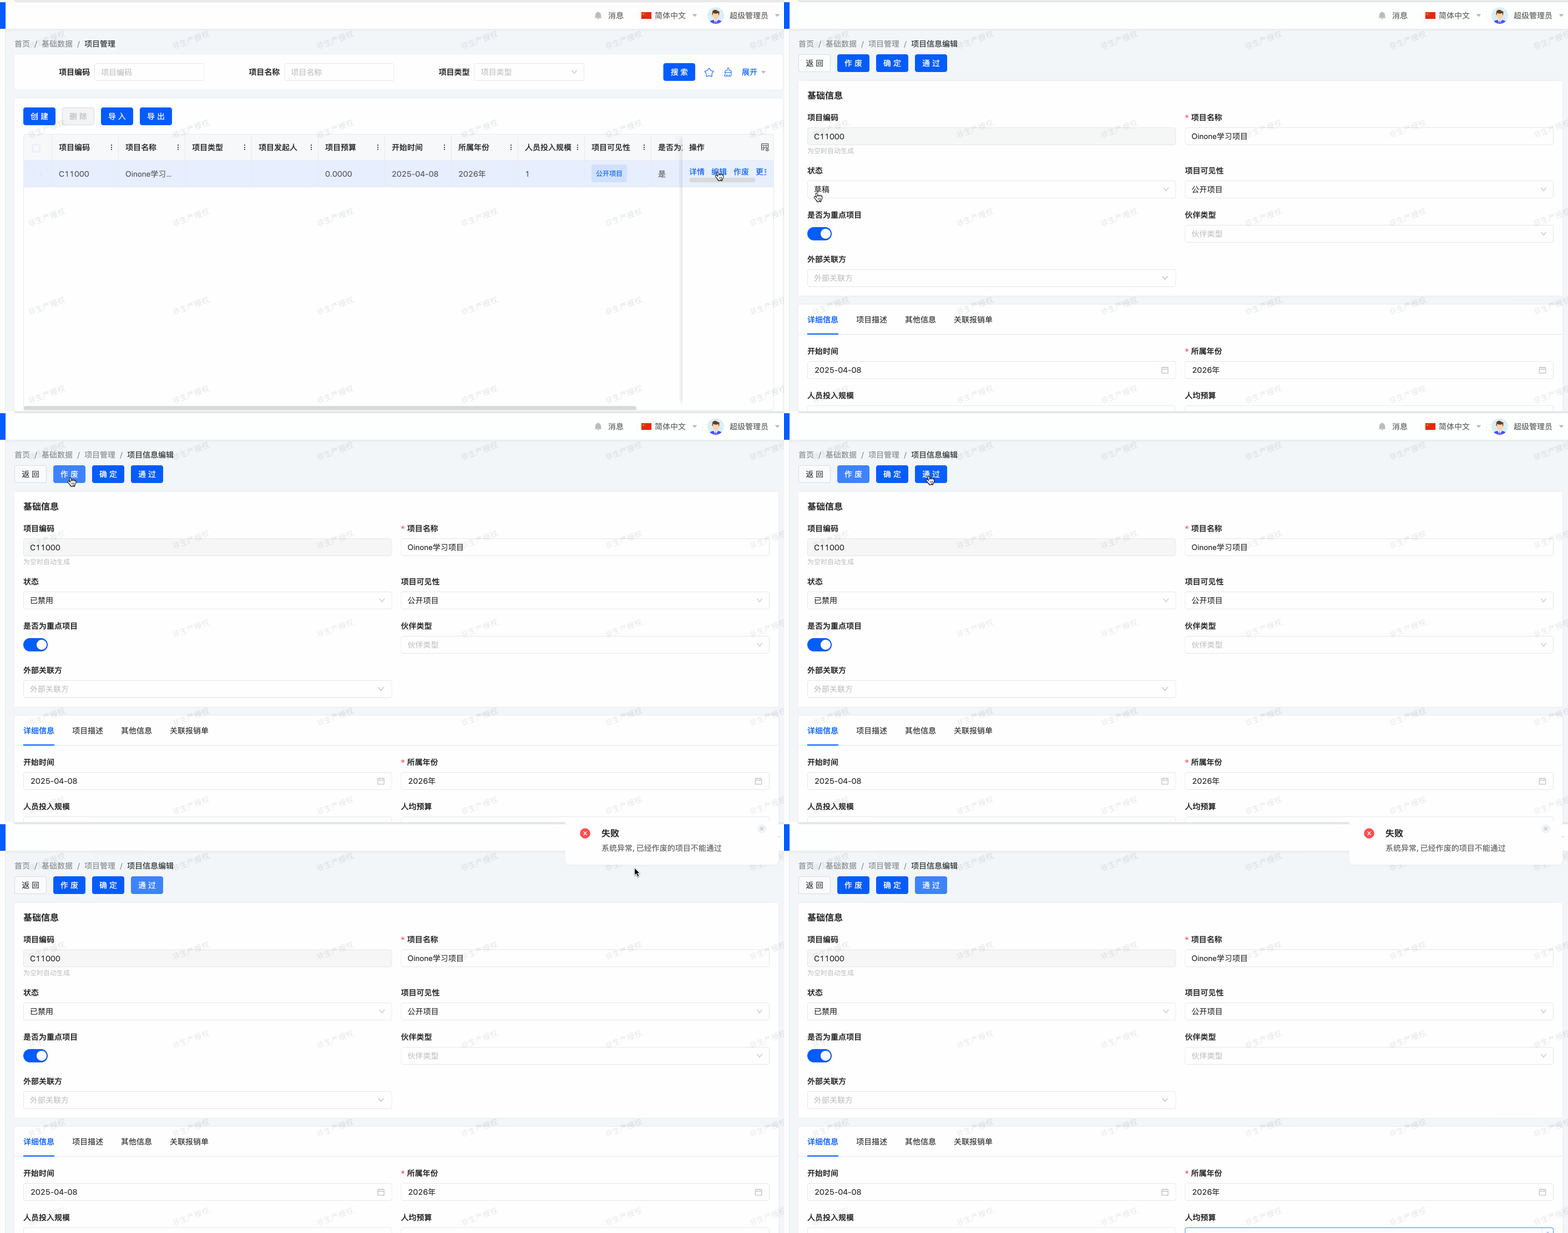
- Void or approve projects:
- Void and approve operations
- Voided projects cannot be approved, and approved projects cannot be voided. For clarity, a status field has been added to the view.

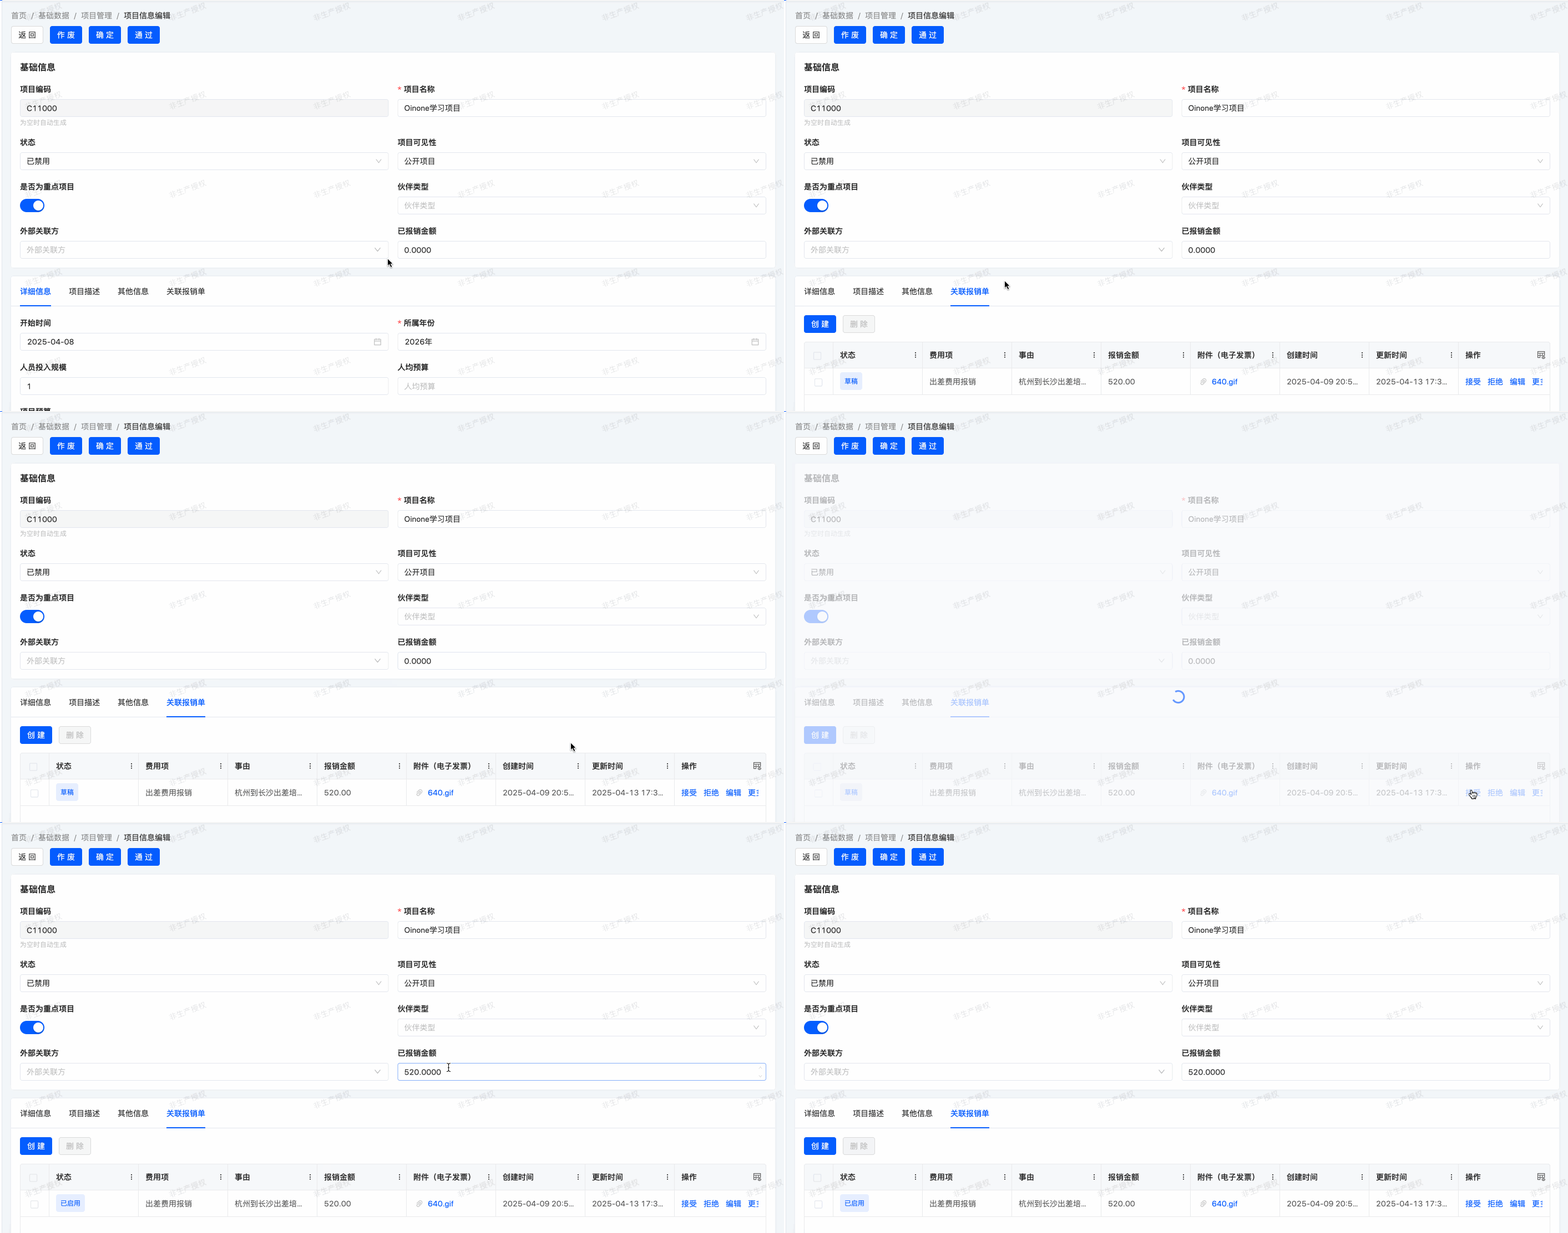
- Accept or reject expense bills:
- Accept or reject expense operations
- Once an expense is accepted, the project's reimbursed amount should be set.

In our expense management module, we want to associate business logic with several buttons. The most common approach is:
package pro.shushi.oinone.trutorials.expenses.api.model;

import pro.shushi.pamirs.meta.annotation.Action;
import pro.shushi.pamirs.meta.annotation.Field;
import pro.shushi.pamirs.meta.annotation.Model;
import pro.shushi.pamirs.meta.base.IdModel;
import pro.shushi.pamirs.meta.constant.ExpConstants;
import pro.shushi.pamirs.meta.enmu.ViewTypeEnum;

@Model.model(TestActionModel.MODEL_MODEL)
@Model(displayName = "TestAction模型")
public class TestActionModel extends IdModel {
    public static final String MODEL_MODEL="expenses.TestActionModel";

    @Field(displayName = "名称")
    private String name;

    @Action.Advanced(invisible = ExpConstants.idValueNotExist)
    @Action(displayName = "actionDoSomething", bindingType = ViewTypeEnum.FORM)
    public TestActionModel actionDoSomething(TestActionModel testActionModel){
        testActionModel.setName("Something");
        return testActionModel;
    }
}
Alternatively, Actions can be defined in independent Java classes. During this process, simply use the @Model.model(TestActionModel.MODEL_MODEL) annotation to achieve association with the corresponding model.
package pro.shushi.oinone.trutorials.expenses.core.action;

import org.springframework.stereotype.Component;
import pro.shushi.oinone.trutorials.expenses.api.model.TestActionModel;
import pro.shushi.pamirs.meta.annotation.Action;
import pro.shushi.pamirs.meta.annotation.Model;
import pro.shushi.pamirs.meta.constant.ExpConstants;
import pro.shushi.pamirs.meta.enmu.ViewTypeEnum;

@Model.model(TestActionModel.MODEL_MODEL)
@Component
public class TestActionModelAction {

    @Action.Advanced(invisible = ExpConstants.idValueNotExist)
    @Action(displayName = "actionDoSomething", bindingType = {ViewTypeEnum.FORM,ViewTypeEnum.TABLE})
    public TestActionModel actionDoSomething(TestActionModel testActionModel){
        testActionModel.setName("Something");
        testActionModel.updateById();
        return testActionModel;
    }
}
When configuring model operations, use @Action series annotations:
@Action.Advanced(invisible = ExpConstants.idValueNotExist): This annotation sets that when the Id field value is empty, related operations will be hidden. This is because both creation and editing jump to the same form view, and there is no need to display the operation during creation. This attribute can also be overridden in XML files.@Action(displayName = "actionDoSomething", bindingType = {ViewTypeEnum.FORM,ViewTypeEnum.TABLE}): This annotation mainly describes the operation and basic display rules, specifically:name: If not configured, the default value is the Java method name.bindingType: Specifies which view types the operation can appear in, such as table view, form view, detail view, etc.contextType: If not configured, it defaults to single record. This means the operation will appear in the row actions of the table view and the actions area of the form view.
- @Action essentially declares an operation, defines a function with API-level openness, and binds the operation to the corresponding function, enabling the operation to trigger the associated function's execution in the corresponding call scenario. Remember the
constructFunwe defined in the previous chapter? It was just an ordinary function.
Tip:
From the perspective of Java project management, we strongly recommend the second writing approach. Specifically, models and interface classes are suitable for definition in the api package path, while business logic implementation classes are recommended to be placed in the core package path. The first writing approach was used when introducing the constructFun mechanism in the previous chapter, and now it is advisable to separate the code according to the second approach to optimize project structure and management.
Add buttons in the view, for example, in the Form view:
<view name="formView" type="FORM" cols="2" model="expenses.TestActionModel">
  <template slot="actions" autoFill="true"/>
  <template slot="fields">
    <pack widget="group" title="基础信息">
      <field span="1" invisible="true" priority="5" data="id" label="ID" readonly="true"/>
      <field span="1" priority="101" data="name" label="名称"/>
    </pack>
  </template>
</view>
The view enables the autoFill mechanism by default, which can automatically filter and fill operations within the given model that meet specific requirements, eliminating the need for manual additional settings. Another approach is to use a whitelist mechanism, writing all operations to be displayed under the actions tag:
<view name="formView" type="FORM" cols="2" model="expenses.TestActionModel">
  <template slot="actions">
        <action name="actionDoSomething" type="primary"/>
    </template>
  <template slot="fields">
    <pack widget="group" title="基础信息">
      <field span="1" invisible="true" priority="5" data="id" label="ID" readonly="true"/>
      <field span="1" priority="101" data="name" label="名称"/>
    </pack>
  </template>
</view>
Exercise
- Add the following fields to
expenses.ProjectInfo
| Field | Display Name | Type | Java Type |
|---|---|---|---|
| status | Status | ENUM | pro.shushi.pamirs.core.common.enmu.DataStatusEnum |
| reimbursedAmount | Reimbursed Amount | FLOAT | BigDecimal |
- Also add the field
statustoexpenses.ExpenseBill- Add the new fields to the table and form views of your
expenses.ProjectInfomodel.- Void or approve projects:
- Add "Void" and "Approve" buttons to the
expenses.ProjectInfomodel. Voided projects cannot be marked as approved, and approved projects cannot be voided.- Refer to the first image in the objectives for expected results.
- Tip: To throw an error, use the
PamirsExceptionexception. There are many examples in Oinone source code.- Accept or reject expense bills:
- Add "Accept" and "Reject" buttons to the table subview of the
expenseBillsfield in the form view of theexpenses.ProjectInfomodel. By default, the subview actions tag does not use the autoFill mechanism; you need to actively add it and configure the attribute:<action refreshRoot = "true"/>to refresh the main view.- Refer to the second image in the objectives for expected results.
- When an expense is accepted, set the corresponding project's reimbursed amount.
II. Batch Actions
For batch operations, the corresponding method must first be able to handle multiple records. By declaring contextType as ActionContextTypeEnum.SINGLE_AND_BATCH, it indicates that the method supports selecting one or multiple records at the interaction level. Of course, declaring it as ActionContextTypeEnum.BATCH means the operation will only become clickable when multiple records are selected. The most common approach is:
@Action(
    displayName = "批量操作",
    label = "批量操作",
    contextType = ActionContextTypeEnum.SINGLE_AND_BATCH
)
public  List<TestActionModel> actionBatch(List<TestActionModel> dataList) {
    for(TestActionModel data:dataList){
        //do something
    }
    return dataList;
}
In the next chapter, we will learn how to prevent incorrect data entry in Oinone.