I. Overview
The content of this chapter will guide developers to set up a local development environment and complete the main content of collaborative development with the Oinone Designer, ensuring that subsequent learning steps can proceed smoothly.
Tip:
Before starting the tutorial in this chapter, you need to have at least installed the Docker environment on your machine and successfully deployed the Oinone Designer.
II. Enable Access to the Oinone Designer Service
Since there are too many middleware required to set up the backend development environment, for convenience, we only need to simply configure to share the environment already set up by the Designer to quickly start the development work of the front-end/back-end.
(I) Configure the HOST_IP Parameter
Add the following parameters to the .env file to enable access to the dubbo and rocketmq services:
HOST_IP=192.168.1.100Tip:
- 192.168.1.100: The IP address of your host machine
For more information about the .env file, please refer to: Oinone Designer Configuration Guide
(II) Use the Front-End of the Oinone Designer to Access the Back-End of the Business Project
Add the following parameters to the .env file to enable access to the business project service:
# oinone biz service expose port in the browser
OINONE_BIZ_PORT=89
OINONE_BIZ_BACKEND_SERVER=http://192.168.1.100:8191
OINONE_BIZ_OPENAPI_SERVER=http://192.168.1.100:8193Tip:
- 192.168.1.100: The IP address of your host machine
- 8191: The default port of the Spring Server for the business project
- 8193: The default port of the EIP for the business project
The default ports can be obtained from the application.yml configuration in the backend project provided in the tutorial.
For more information about the .env file, please refer to: Oinone Designer Configuration Guide
(III) Restart the Oinone Designer
# MacOS/Linux
docker compose down -v
docker compose up -d

# Windows
docker compose -p oinone down -v
docker compose -p oinone up -dIII. Set Up the Backend Development Environment
(I) Obtain the Backend Project Provided in the Tutorial
Github
# clone with https
git clone https://github.com/oinone/oinone-backend-tutorials.git

# clone with ssh
git clone git@github.com:oinone/oinone-backend-tutorials.gitGitee
# clone with https
git clone https://gitee.com/oinone/oinone-backend-tutorials.git

# clone with ssh
git clone git@gitee.com:oinone/oinone-backend-tutorials.git(II) Modify the application-dev.yml Configuration File
1. Use the OSS Directory Provided by the Oinone Designer (Optional)
cdn:
  oss:
    # The access path for the Designer images
    downloadUrl: http://127.0.0.1:88
    # The absolute path of the OSS directory for the Designer images
localFolderUrl: <path-to-oss>2. Configure the Connection Information for the Middleware (Optional)
If the port information of the already started Oinone Designer has not been modified, there is no need to make any changes.
Zookeeper Connection Configuration
dubbo:
  registry:
    address: zookeeper://127.0.0.1:2182
pamirs:
  zookeeper:
zkConnectString: 127.0.0.1:2182Redis Connection Configuration
spring:
  data:
    redis:
      database: 0
      host: 127.0.0.1
      port: 6378
password: Abc@1234MySQL Connection Configuration
pamirs:
  datasource:
    base:
      driverClassName: com.mysql.cj.jdbc.Driver
      url: jdbc:mysql://127.0.0.1:3307/oinone_base?useSSL=false&allowPublicKeyRetrieval=true&useServerPrepStmts=true&cachePrepStmts=true&useUnicode=true&characterEncoding=utf8&serverTimezone=Asia/Shanghai&autoReconnect=true&allowMultiQueries=true
      username: root
      password: Abc@1234
    pamirs:
      driverClassName: com.mysql.cj.jdbc.Driver
      url: jdbc:mysql://127.0.0.1:3307/oinone_pamirs?useSSL=false&allowPublicKeyRetrieval=true&useServerPrepStmts=true&cachePrepStmts=true&useUnicode=true&characterEncoding=utf8&serverTimezone=Asia/Shanghai&autoReconnect=true&allowMultiQueries=true
      username: root
      password: Abc@1234
    biz_data:
      driverClassName: com.mysql.cj.jdbc.Driver
      url: jdbc:mysql://127.0.0.1:3307/oinone_biz_data?useSSL=false&allowPublicKeyRetrieval=true&useServerPrepStmts=true&cachePrepStmts=true&useUnicode=true&characterEncoding=utf8&serverTimezone=Asia/Shanghai&autoReconnect=true&allowMultiQueries=true
      username: root
password: Abc@1234Note
When sharing the Designer environment for development, the base, pamirs, and biz_data corresponding to the data sources cannot be deleted or modified. Only the connection configurations of url, username, and password need to be modified.
RocketMQ Connection Configuration
spring:
  rocketmq:
name-server: 127.0.0.1:19876(III) Start the Backend Service
1. Add JVM Parameters for IDEA Startup
Tip
After opening the project in IDEA for the first time, you need to configure Maven, JDK, etc. You can refer to: Appendix 1: IDEA Environment Configuration
After the configuration is completed, open TutorialsApplication.java in IDEA and click the startup icon on the left to run Run 'TutorialsAppli....main()'. However, it cannot be started normally in this way.
Click Edit Configurations -> Modify Options -> Add VM options in sequence.
Add the following content to the VM options input box that appears.
--add-opens=jdk.compiler/com.sun.tools.javac.api=ALL-UNNAMED
--add-opens=jdk.compiler/com.sun.tools.javac.code=ALL-UNNAMED
--add-opens=jdk.compiler/com.sun.tools.javac.comp=ALL-UNNAMED
--add-opens=jdk.compiler/com.sun.tools.javac.file=ALL-UNNAMED
--add-opens=jdk.compiler/com.sun.tools.javac.jvm=ALL-UNNAMED
--add-opens=jdk.compiler/com.sun.tools.javac.launcher=ALL-UNNAMED
--add-opens=jdk.compiler/com.sun.tools.javac.main=ALL-UNNAMED
--add-opens=jdk.compiler/com.sun.tools.javac.model=ALL-UNNAMED
--add-opens=jdk.compiler/com.sun.tools.javac.parser=ALL-UNNAMED
--add-opens=jdk.compiler/com.sun.tools.javac.platform=ALL-UNNAMED
--add-opens=jdk.compiler/com.sun.tools.javac.processing=ALL-UNNAMED
--add-opens=jdk.compiler/com.sun.tools.javac.resources=ALL-UNNAMED
--add-opens=jdk.compiler/com.sun.tools.javac.tree=ALL-UNNAMED
--add-opens=jdk.compiler/com.sun.tools.javac.util=ALL-UNNAMED
--add-opens=jdk.compiler/com.sun.source.tree=ALL-UNNAMED
--add-opens=java.base/java.lang=ALL-UNNAMED
--add-opens=java.base/java.lang.annotation=ALL-UNNAMED
--add-opens=java.base/java.lang.constant=ALL-UNNAMED
--add-opens=java.base/java.lang.invoke=ALL-UNNAMED
--add-opens=java.base/java.lang.module=ALL-UNNAMED
--add-opens=java.base/java.lang.ref=ALL-UNNAMED
--add-opens=java.base/java.lang.reflect=ALL-UNNAMED
--add-opens=java.base/java.lang.runtime=ALL-UNNAMED
--add-opens=java.base/java.io=ALL-UNNAMED
--add-opens=java.base/java.lang=ALL-UNNAMED
--add-opens=java.base/java.math=ALL-UNNAMED
--add-opens=java.base/java.net=ALL-UNNAMED
--add-opens=java.base/java.nio=ALL-UNNAMED
--add-opens=java.base/java.security=ALL-UNNAMED
--add-opens=java.base/java.text=ALL-UNNAMED
--add-opens=java.base/java.time=ALL-UNNAMED
--add-opens=java.base/java.util=ALL-UNNAMED
--add-opens=java.xml/com.sun.org.apache.xpath.internal.jaxp=ALL-UNNAMED
--add-opens=java.base/jdk.internal.access=ALL-UNNAMED2. Start the Backend Service of the Business Project
You can start it normally in IDEA like a Spring Boot project.
(IV) Access the Oinone Business Project
Open the following URL in your browser: http://127.0.0.1:89
Enter the username/password: admin/admin
At this point, you can start learning all the content of the backend framework.
Note
- 89: The port configured in Use the Front-End of the Oinone Designer to Connect to the Back-End of the Business Project
IV. Set Up the Front-End Development Environment
(I) Obtain the Front-End Project Provided in the Tutorial
Github
# clone with https
git clone https://github.com/oinone/oinone-frontend-tutorials.git

# clone with ssh
git clone git@github.com:oinone/oinone-frontend-tutorials.gitGitee
# clone with https
git clone https://gitee.com/oinone/oinone-frontend-tutorials.git

# clone with ssh
git clone git@gitee.com:oinone/oinone-frontend-tutorials.gitTip
In Appendix 2: Frontend Environment Configuration, we provide the installation commands for the recommended development environment, which you can use as needed.
After opening the project in WebStorm for the first time, you need to configure Prettier, ESLint, etc. You can refer to: Appendix 3: WebStorm Environment Configuration
(II) Configure vue.config.js to Access the Oinone Designer (Optional)
If the port information of the already started Designer has not been modified, there is no need to make any changes.
devServer: {
  port: 8080,
  allowedHosts: 'all',
  compress: false,
  proxy: {
    '/pamirs': {
      changeOrigin: true,
      // Request the backend address
      target: 'http://127.0.0.1:8091'
      // The demonstration environment address provided by Oinone
      // target: 'https://demo.oinone.top'
    }
  }
}(III) Obtain Static Resources
Copy or create a symbolic link of the oss directory from the volumes directory of the Oinone Designer to the public directory.
The directory structure is as follows:
.
├── public
│   ├── favicon.ico
│   ├── index.html
│   └── oss
│       ├── images
│       └── oinone
├── src
│   ├── main.ts
│   ├── shim-translate.d.ts
│   ├── shim-vue.d.ts
│   └── shim-widget.d.ts
├── package.json
├── playwright.config.ts
├── tsconfig.json
├── vue.config.js
├── LICENSE
└── README.MDTip:
If you use a symbolic link to map the oss directory to the public directory, the static resources will be upgraded synchronously with the Designer.
Example: ln -s /<path-to-oss> oss
(IV) Start the Front-End Service
PS: Users in China can enable the taobao registry by modifying the built-in .npmrc to speed up the installation.
npm install && npm run dev(V) Access the Front-End Service
Open the following URL in your browser: http://127.0.0.1:8080
Enter the username/password: admin/admin
At this point, you can start learning all the content of the front-end framework.
Note
- 8080: The port configured in
vue.config.js
Appendix 1: IDEA Environment Configuration
(I) Install IDEA Plugins
1. Download the Corresponding Plugin According to the IDEA Version
| IDEA Version | Corresponding Plugin |
|---|---|
| 2023.2 | pamirs-intellij-plugin-2023.2.zip |
| 2023.3 | pamirs-intellij-plugin-2023.3.zip |
| 2024.1 | pamirs-intellij-plugin-2024.1.zip |
| 2024.2 | pamirs-intellij-plugin-2024.2.zip |
| 2024.3 | pamirs-intellij-plugin-2024.3.zip |
| 2025.1 | pamirs-intellij-plugin-2025.1.zip |
| 2025.2 | pamirs-intellij-plugin-2025.2.zip |
Tip:
If there is a new version of IDEA but Oinone has not provided the corresponding plugin in time, you can contact us for support.
2. Install the Plugin in IDEA Plugins
Mac: Click the Preferences menu (shortcut key: command + ,)
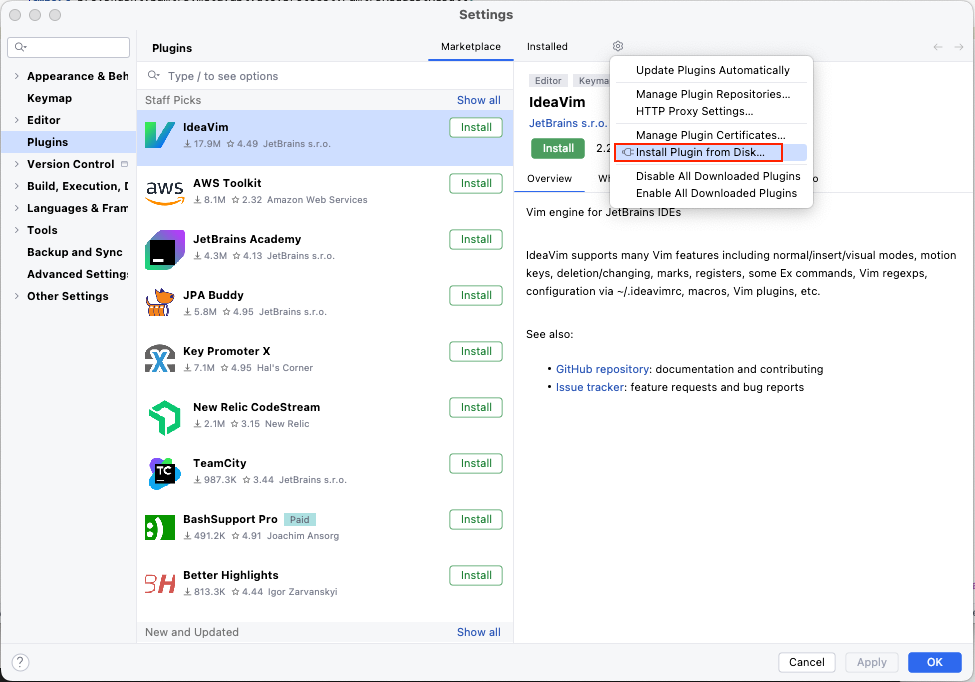
Windows: Click the menu item File => Settings => Plugins
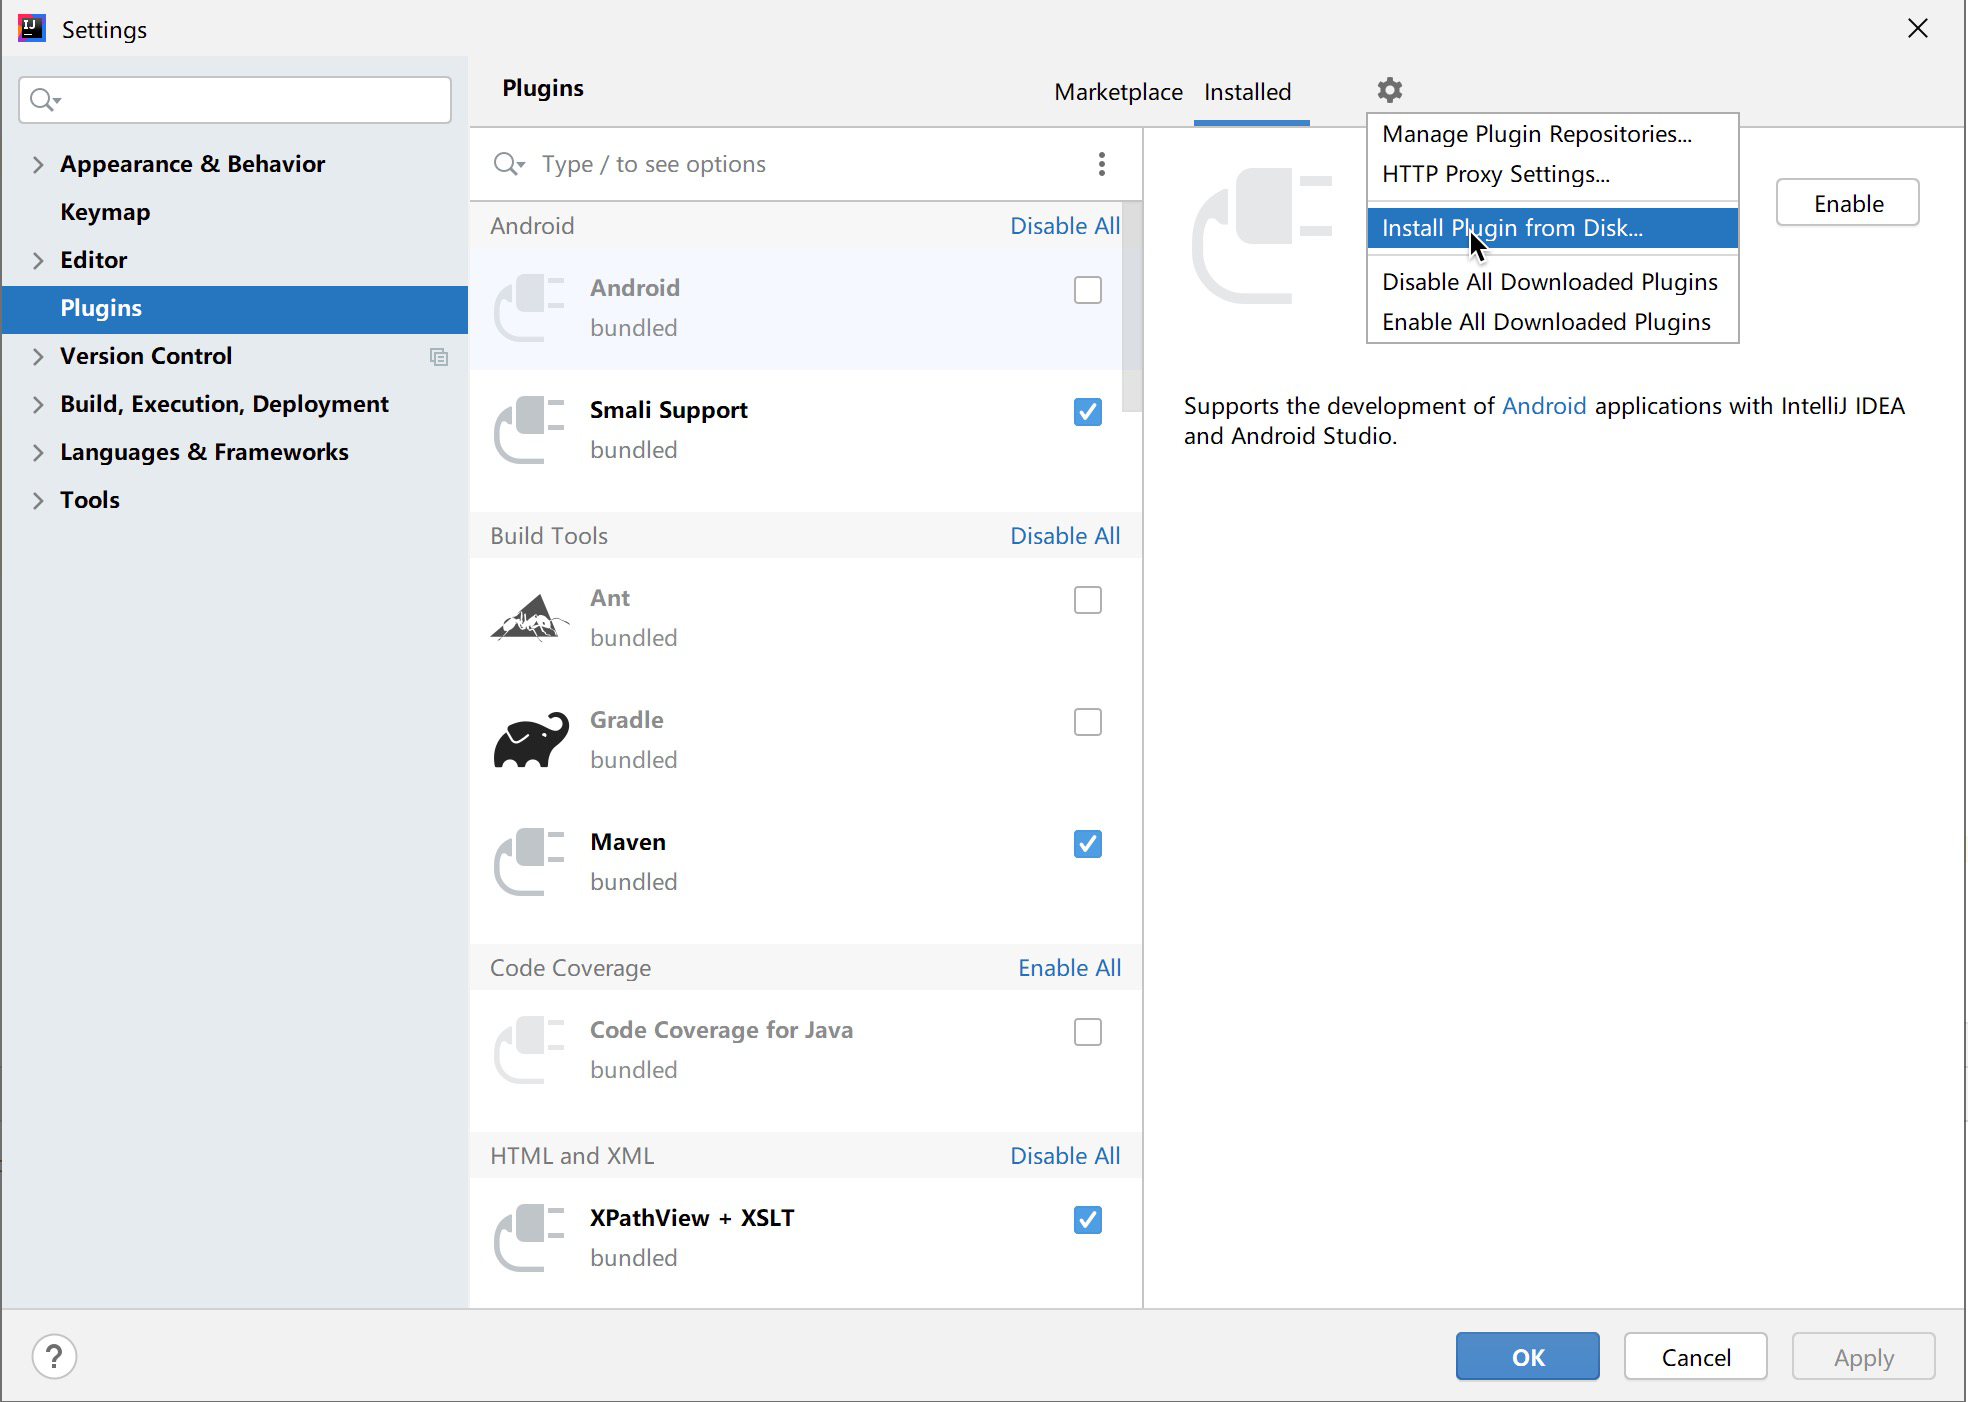
Tip:
When installing the plugin, select the .zip file without unzipping it.
(II) DB GUI Tool
Many people like to use Datagrip, MySQLWorkbench, or DBeaver as database management tools. You can choose one according to your preference.
(III) Maven Tool
1. Installation
Refer to: Maven Installation and Precautions
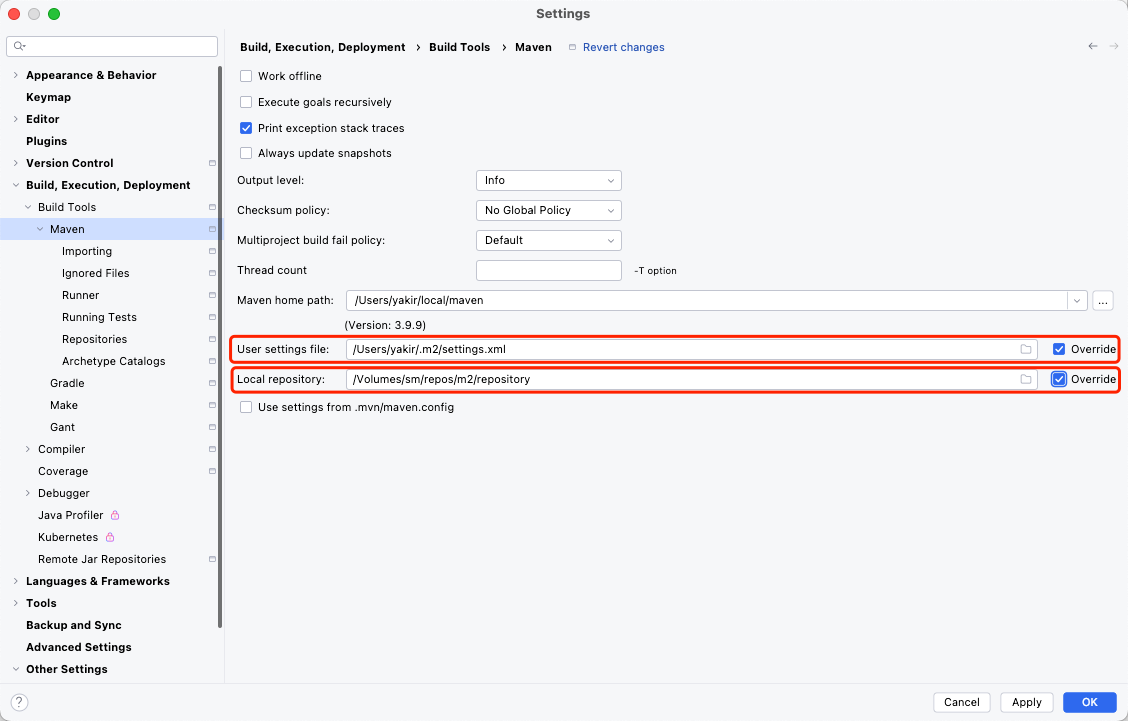
2. Configuration
It is recommended to place the Maven configuration file settings.xml in the .m2 folder under the user directory.
If there is no user-level Maven configuration, you may need to configure the Maven preferences in IDEA.
(IV) GraphQL API Debugging Tool
Commonly used GraphQL debugging tools include Postman, Insomnia, etc. When using these tools, you can combine the Environment and placeholder functions to facilitate interface debugging.
Appendix 2: Frontend Environment Configuration
# Install nvm version management tool
brew install nvm

# Configure ~/.zshrc environment variables (brew will configure it automatically after installation, just run source ~/.zshrc to make it take effect in the current terminal)
# export NVM_DIR="$HOME/.nvm"
# [ -s "$NVM_DIR/nvm.sh" ] && \. "$NVM_DIR/nvm.sh"
# [ -s "$NVM_DIR/bash_completion" ] && \. "$NVM_DIR/bash_completion"

# Install node@22.13.0
nvm install 22.13.0
nvm use 22.13.0

# Set 22.13.0 as the default version
nvm alias default 22.13.0

# Install global toolset
npm install -g lerna@9.0.3 rimraf@6.1.2Appendix 3: WebStorm Environment Configuration
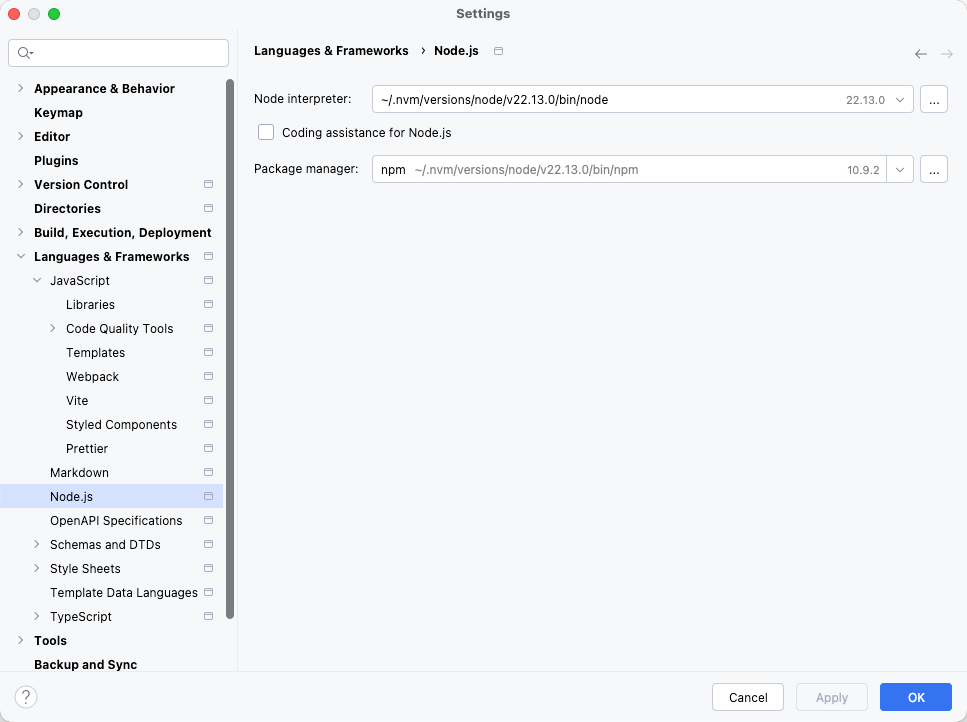
Node.js Configuration
Versions above 7.0.0 use v22.13.0 for development.
TypeScript Configuration
# Install typescript 4.x
npm install -g typescript@^4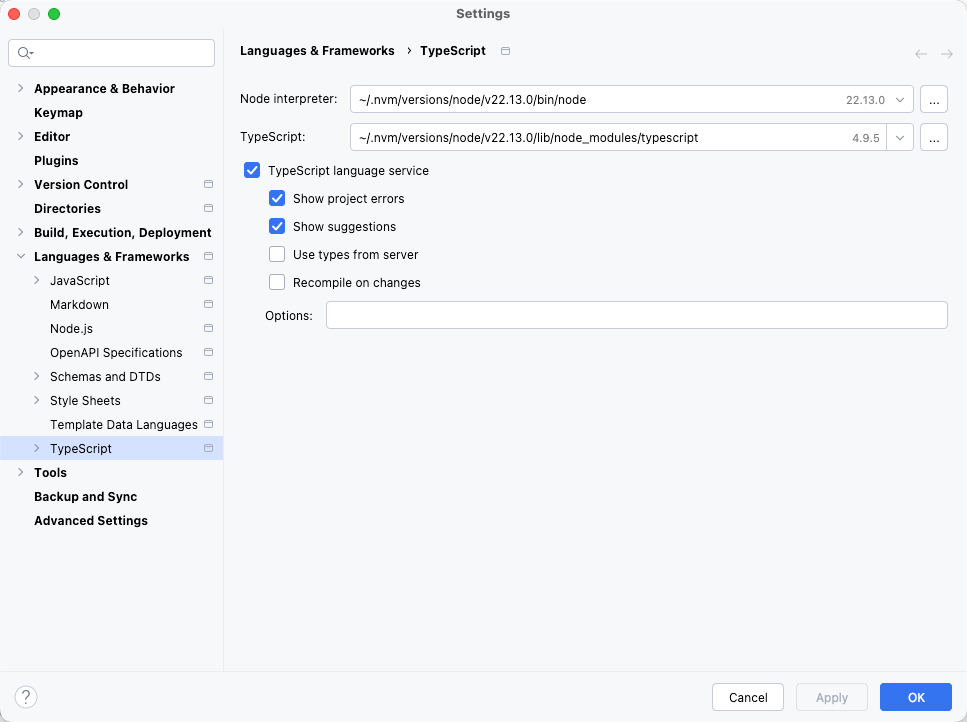
Vue Configuration
# Install Vue Language Server 3.x
npm install -g @vue/language-server@^3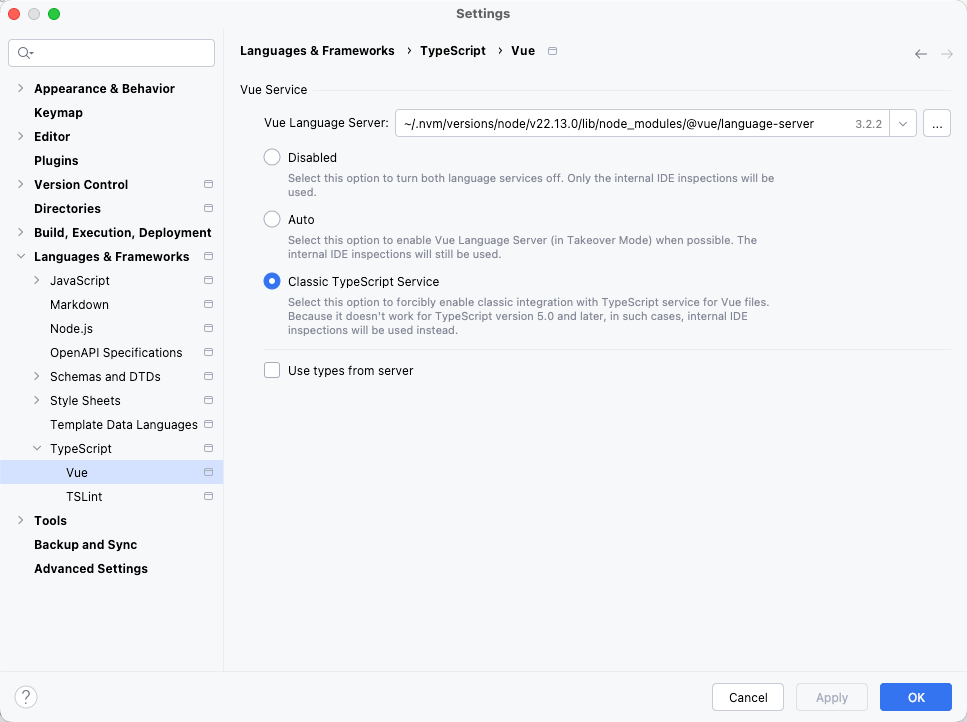
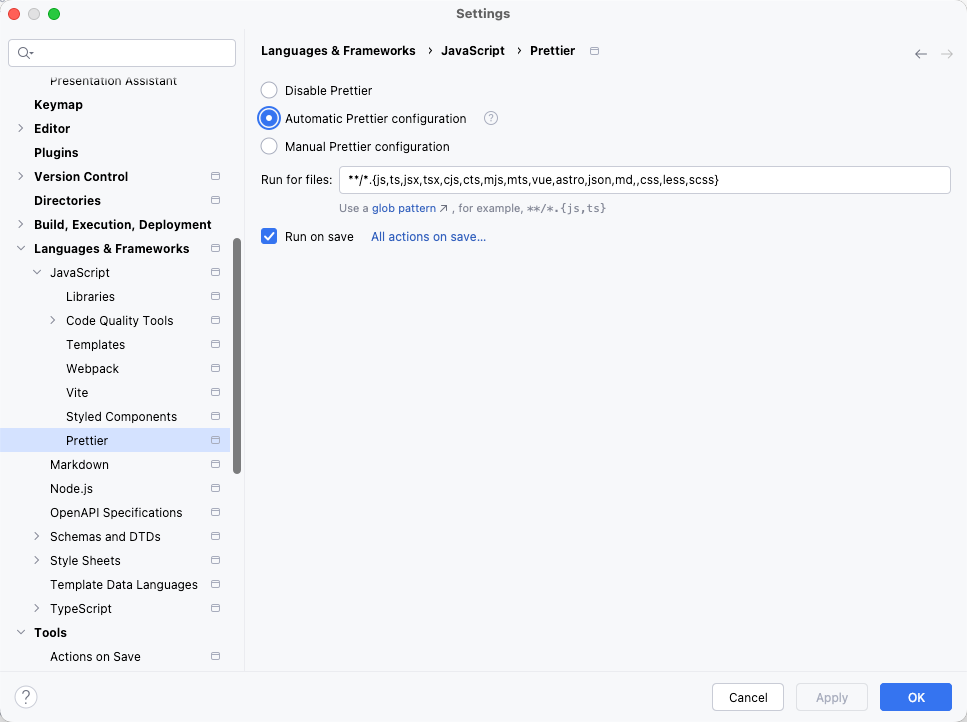
Prettier Configuration
- Run for files:
**/*.{js,ts,jsx,tsx,cjs,cts,mjs,mts,vue,astro,json,md,,css,less,scss}
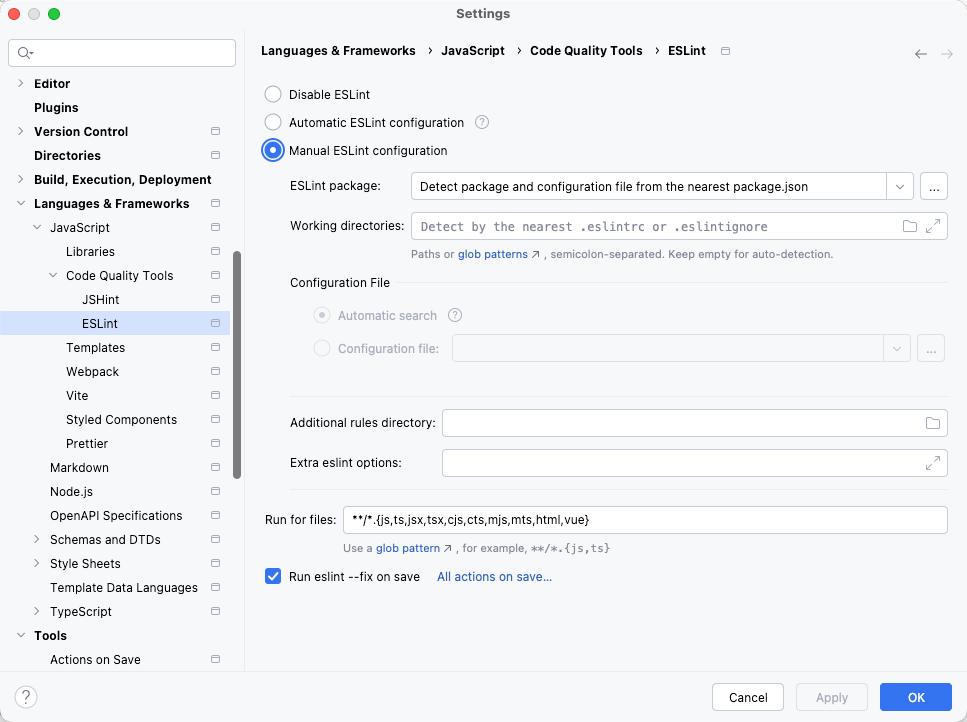
ESLint Configuration
- Run for files:
**/*.{js,ts,jsx,tsx,cjs,cts,mjs,mts,html,vue}