Deploy Oinone through the cloud marketplace
Ⅰ. Overview
The image of the Shushi Oinone Enterprise-level Low-Code R&D Platform in the Cloud Marketplace includes structure packages for the operating system, middleware, and Oinone no-code designer. With only minimal configuration modifications, it can be launched with one click, helping users quickly set up an Oinone Enterprise Edition environment.
Ⅱ. Purchase Alibaba Cloud ECS Instance
Purchase an Alibaba Cloud ECS (Elastic Compute Service) instance and select the "Shushi Oinone Enterprise-level Low-Code R&D Platform" image.
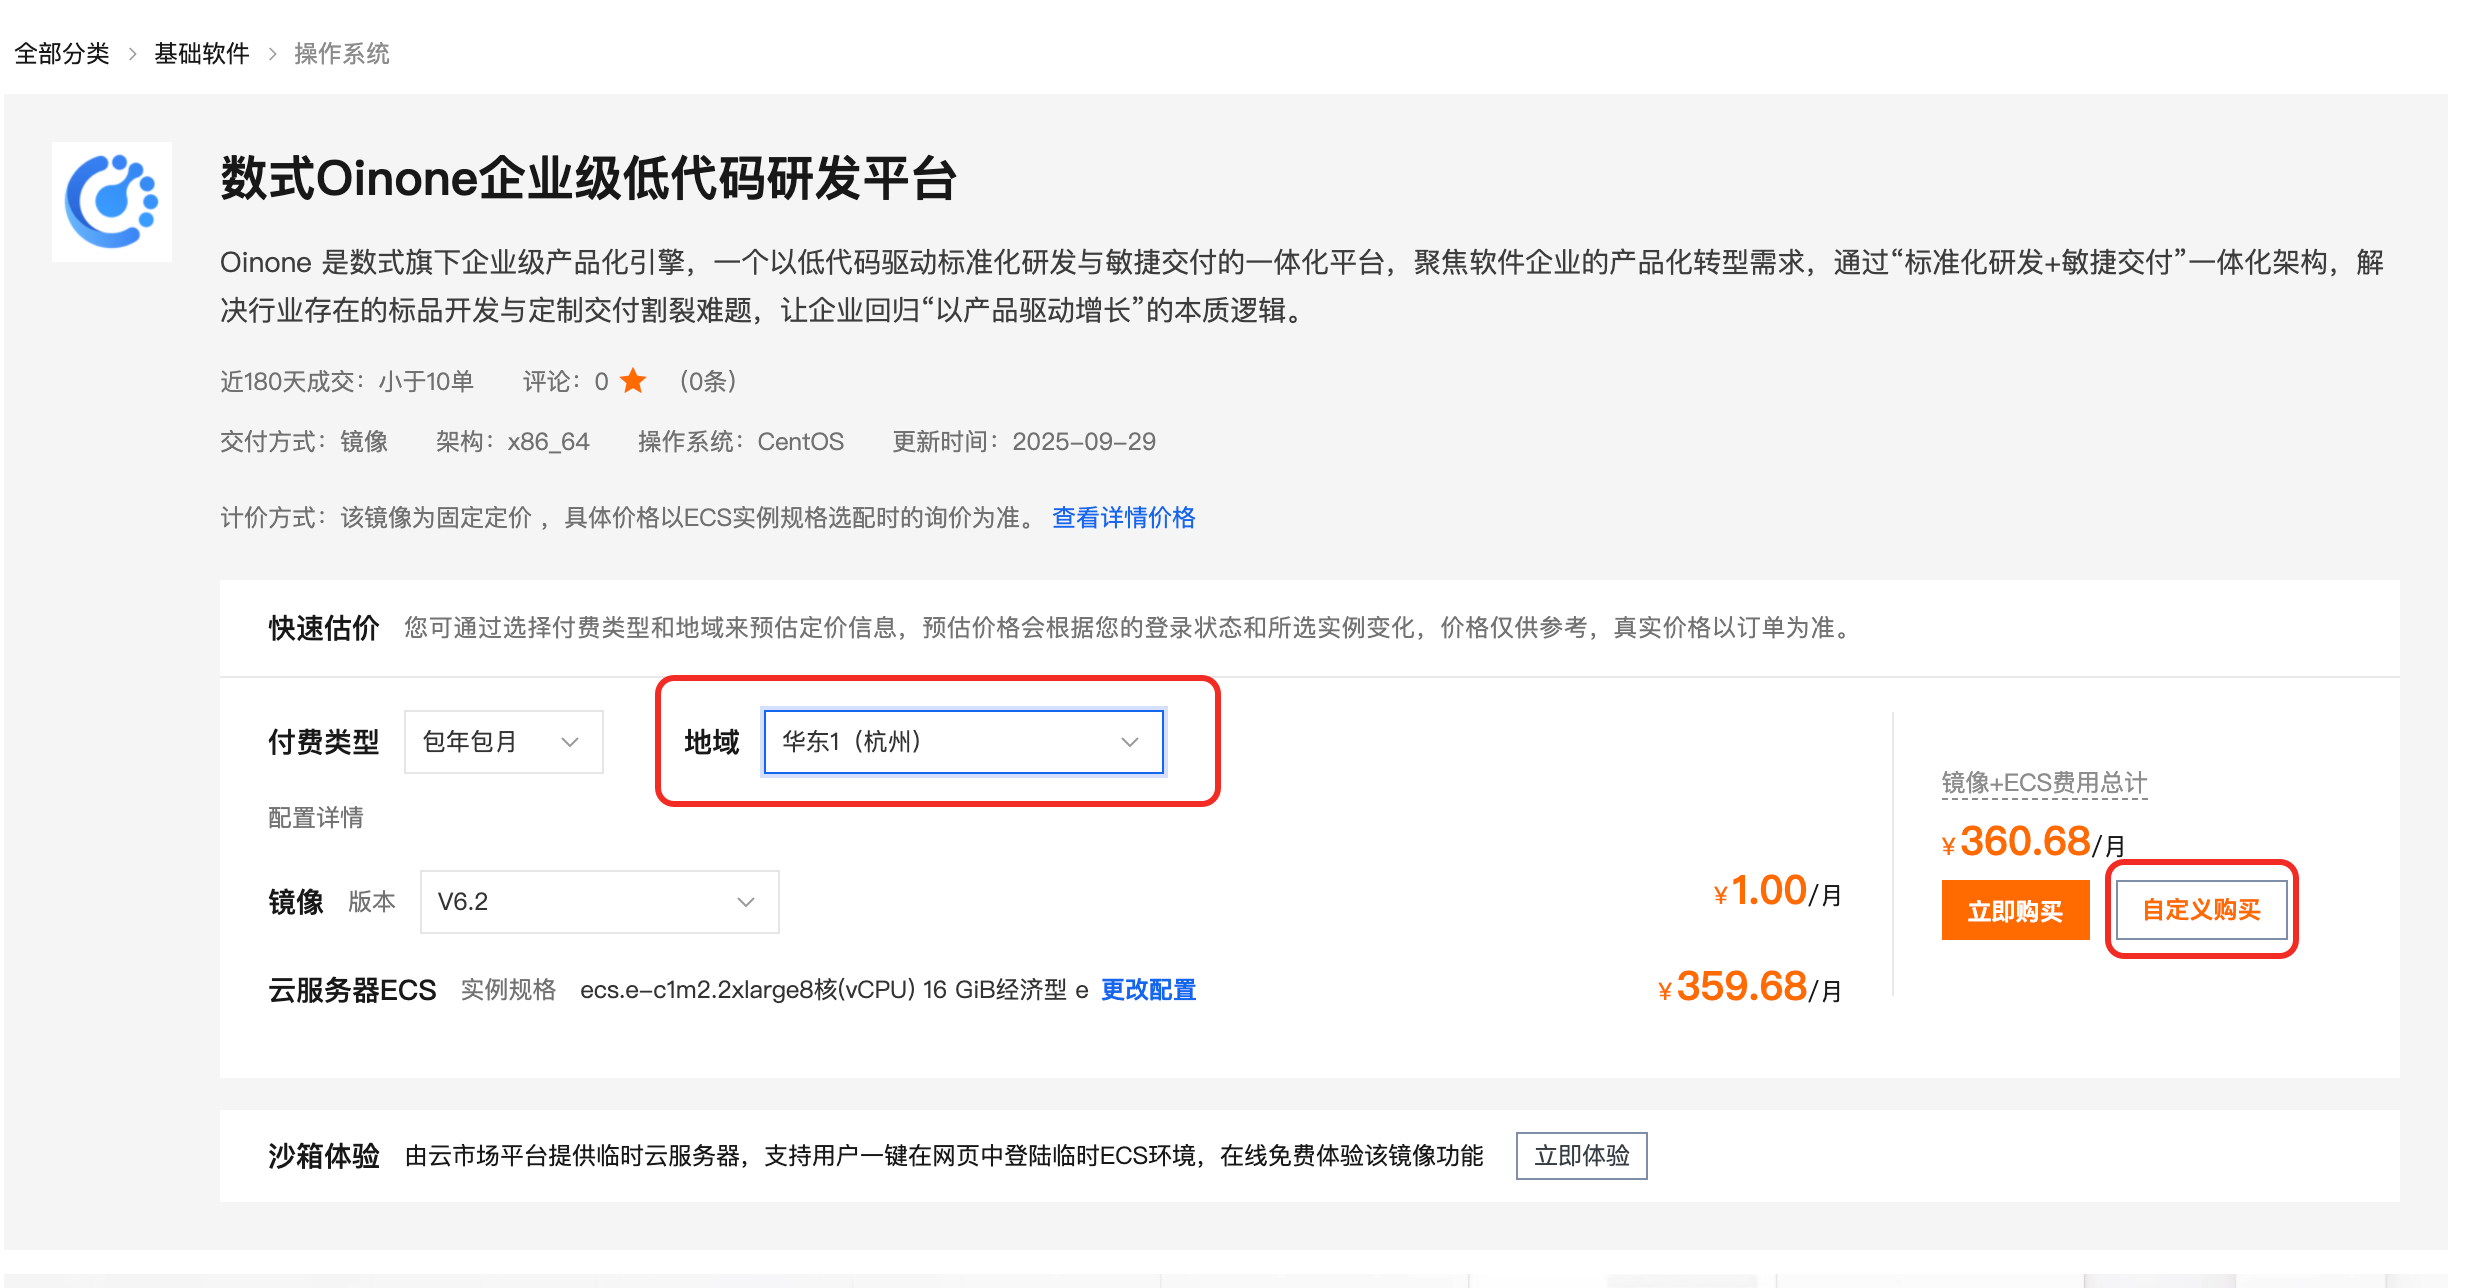
(Ⅰ) Shushi Oinone Enterprise-level Low-Code R&D Platform (Cloud Marketplace)
(Ⅱ) Select 【Region】 and Click 【Purchase】
- The region can remain unchanged.
- If internal network interconnection with an existing ECS instance is required, select the same region for the new instance.
(Ⅲ) Purchase the ECS Instance
Choose the billing method based on your needs. It is recommended to select a specification with 4 vCPUs and 16GB+ memory.
- The image includes a database (MySQL), middleware (Redis/RocketMQ/Zookeeper/Nginx), and the Oinone Enterprise Edition designer application. Sufficient resources must be ensured.
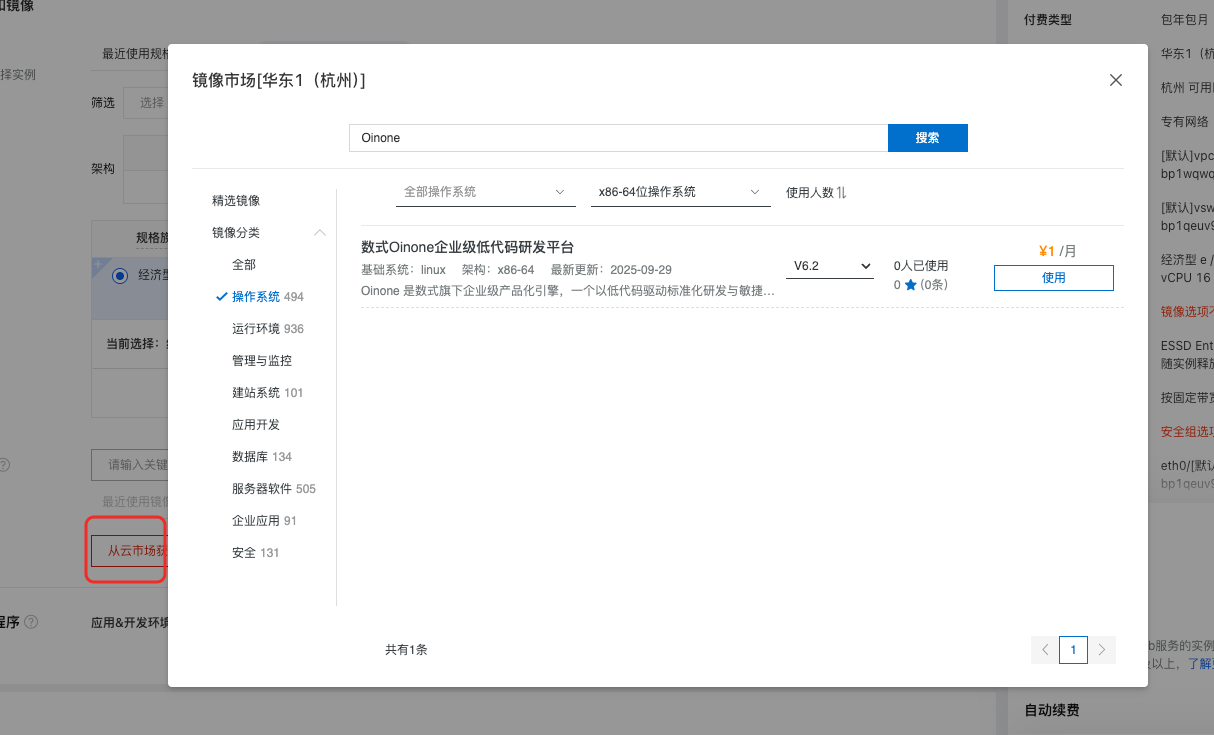
For the image, select 【Cloud Marketplace Image】 -> Shushi Oinone Enterprise-level Low-Code R&D Platform V6.2.
- Note: The actual version may vary with official Oinone releases.
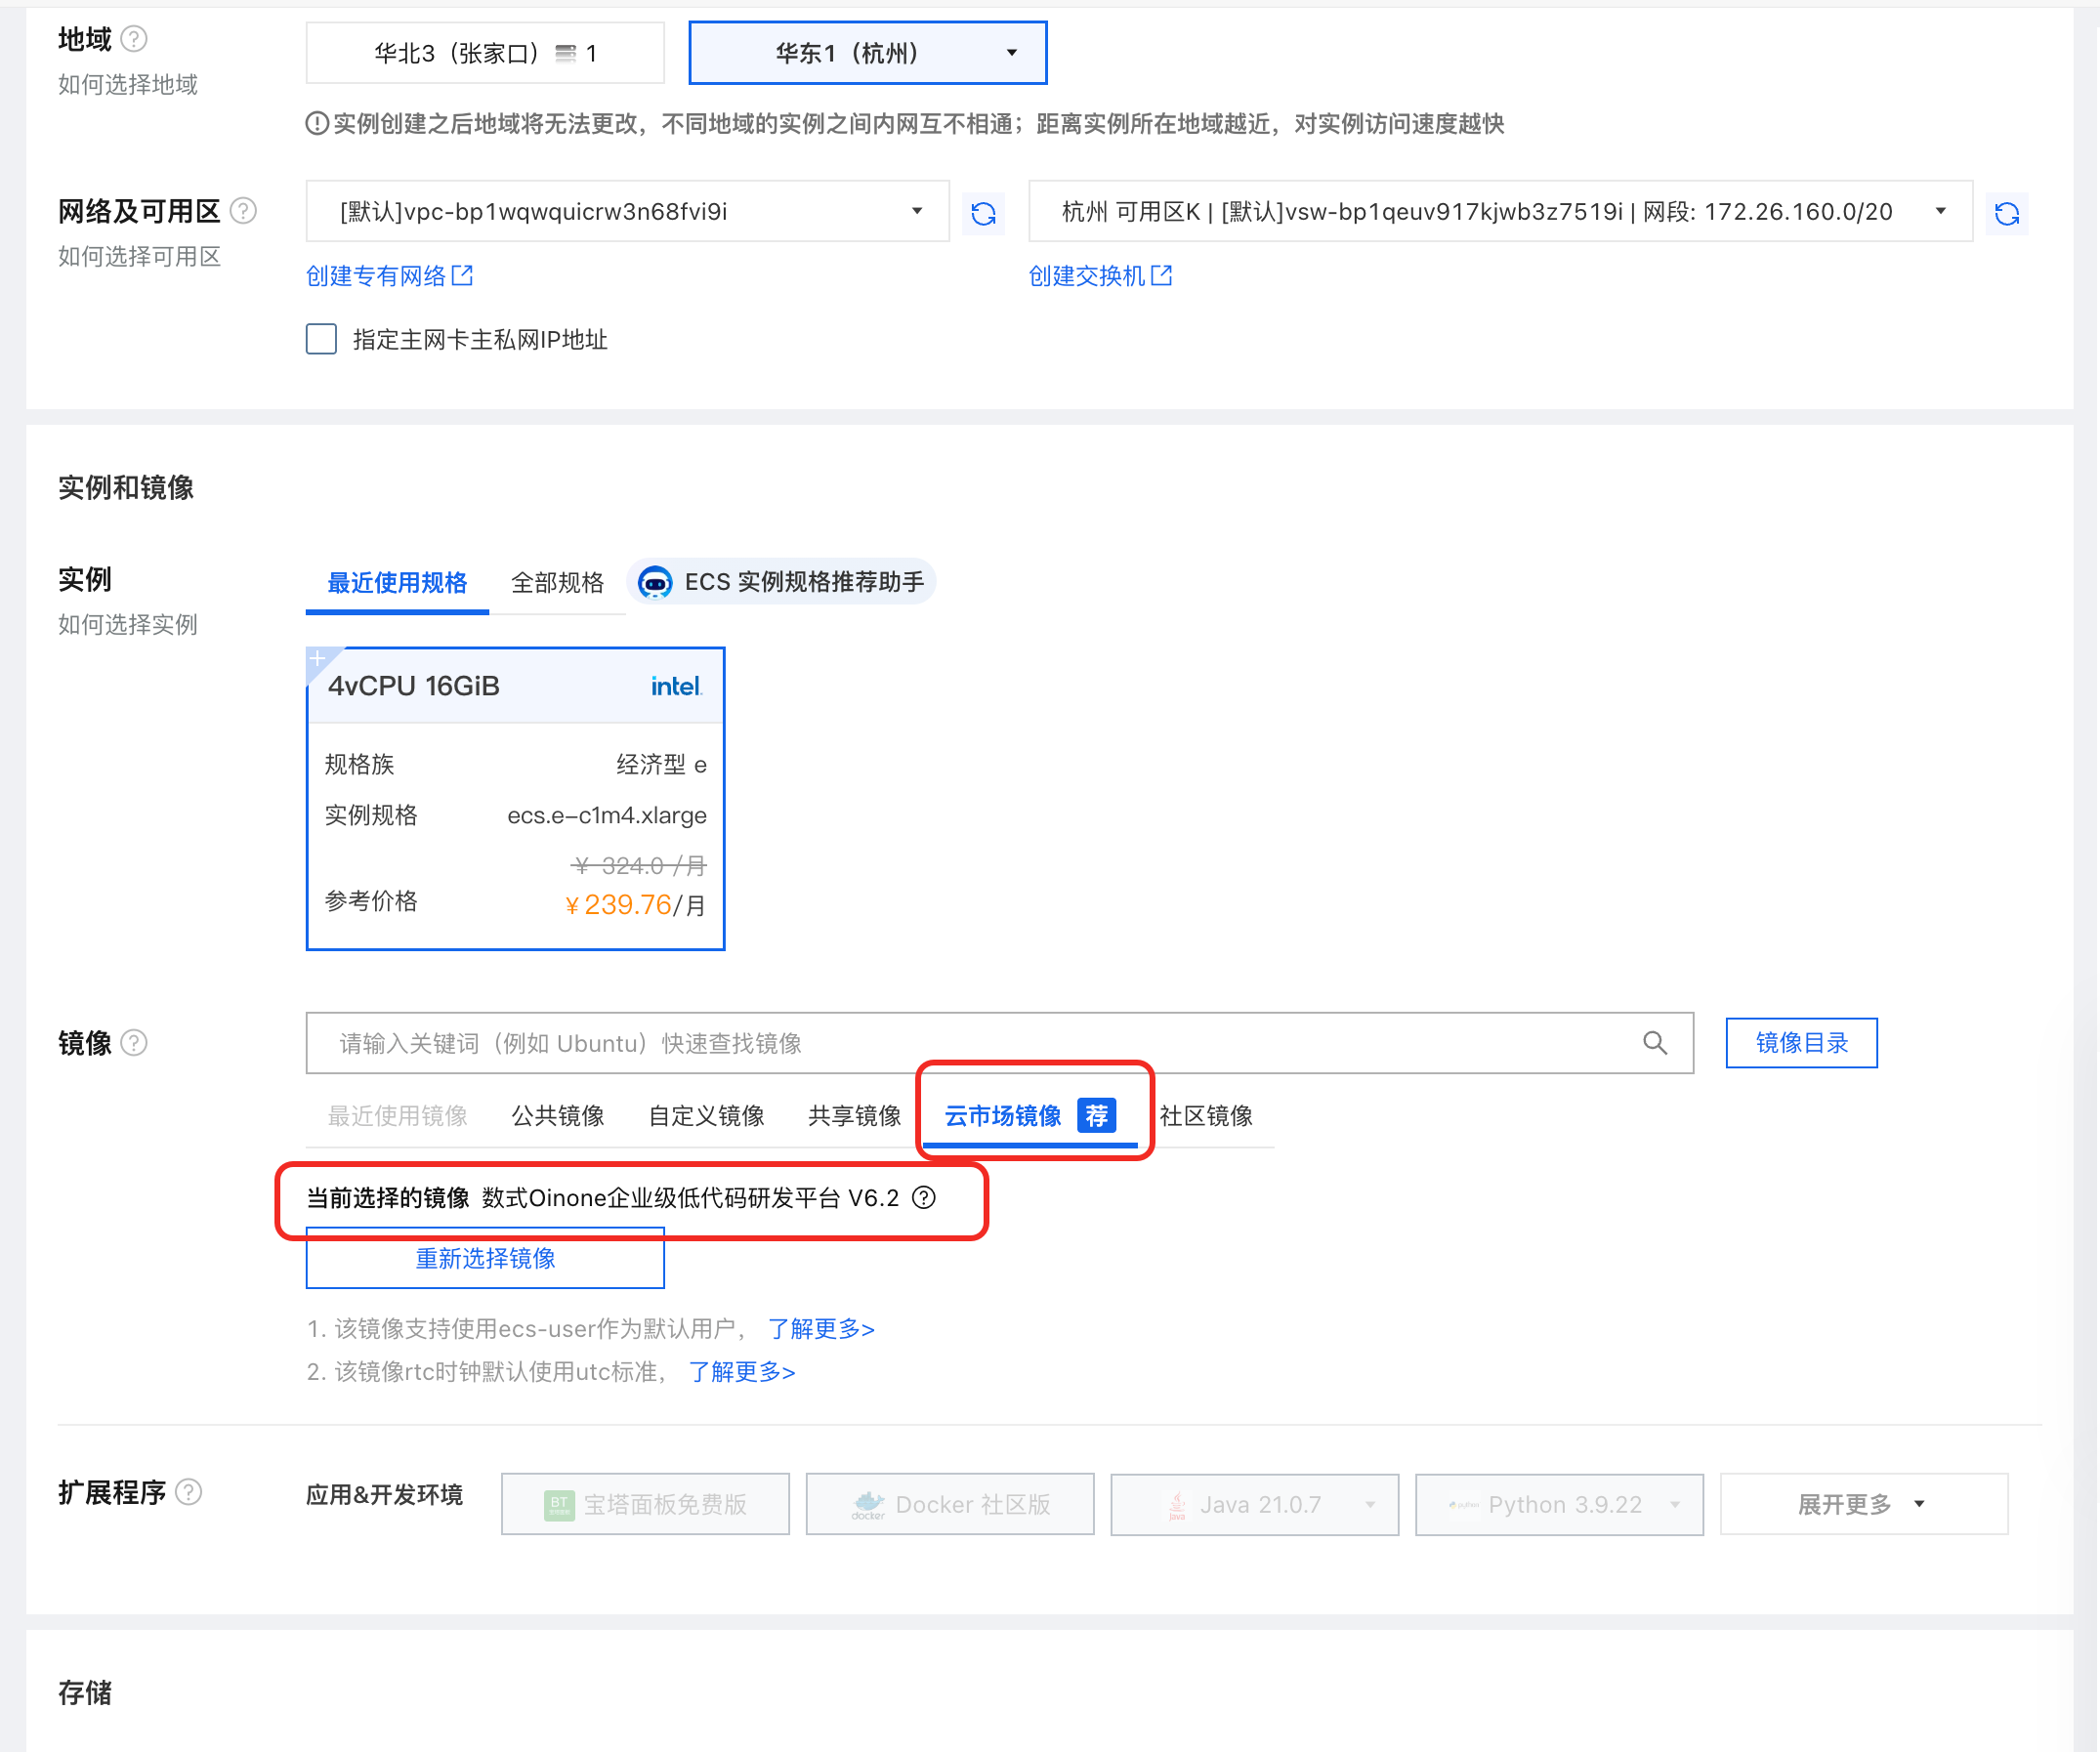
- Alternatively, from the ECS purchase page, click 【Explore More Options from Cloud Marketplace】 to select the Shushi Oinone Low-Code Platform image.
- A bandwidth of 5M+ is recommended. Configure other settings according to the ECS purchase prompts.
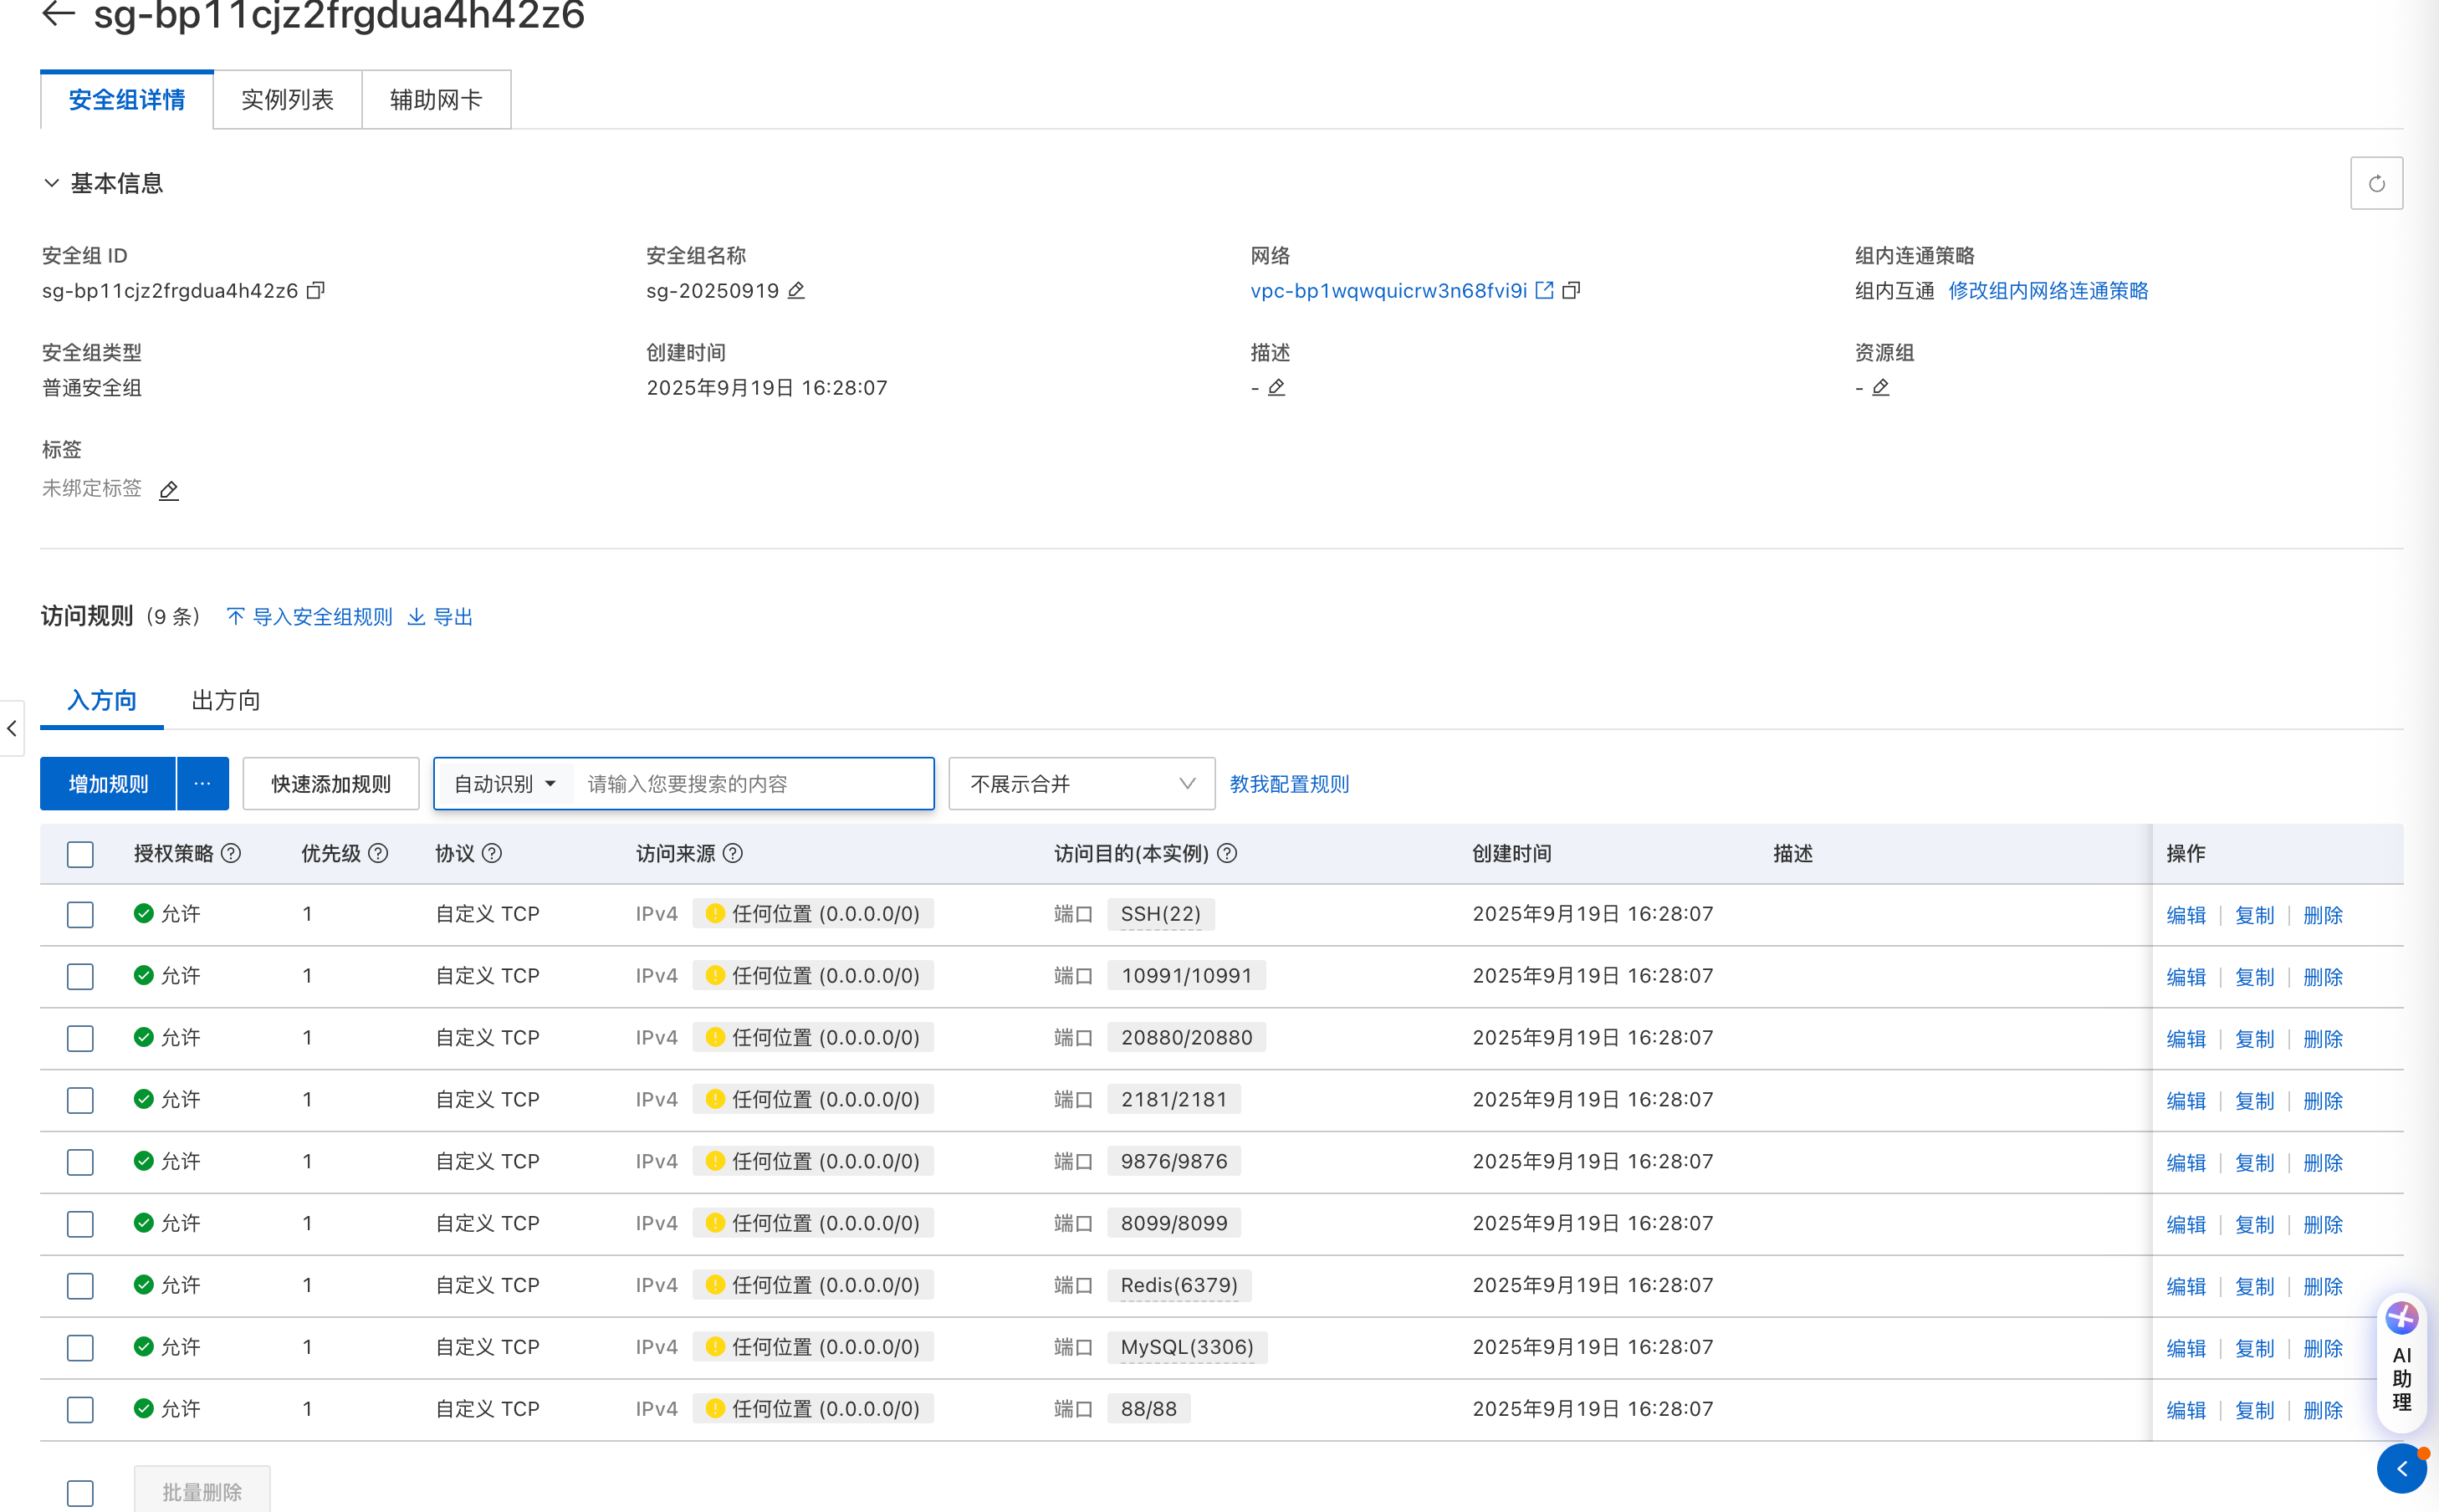
(Ⅳ) ECS Instance Configuration
- Configure the ECS security group and open the following necessary ports:
- 22: SSH port
- 88: Designer web access port
- 8099: Designer backend Java service port
- 9876: RocketMQ NameServer port
- 10991: RocketMQ Broker port
- 6379: Redis cache port
- 3306: MySQL database port
- 2181: Zookeeper port
- 20880: Dubbo communication port
- Set the root password to enable SSH login.
Ⅲ. Run Oinone Enterprise Edition
(Ⅰ) Understand the Deployment Package Directory
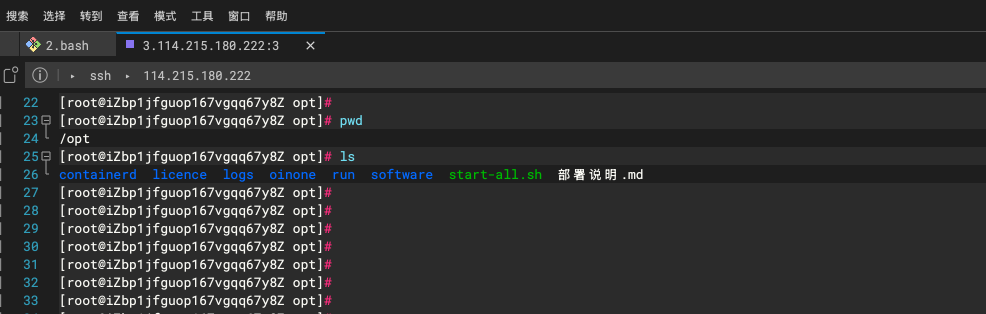
After logging into the instance, switch to the directory: /opt. The corresponding file list and directory structure are as follows:
|___licence
|   |__xxxx-trial (provided by Shushi).lic
|___logs
|___oinone
    |__oinone-op-ds-all-mini
|___run
|   |__start-oinone.sh
|   |__start-software.sh
|___software
|   |___nginx
|   |___redis-6.2.7
|   |___rocketmq-all-4.7.1
|   |___zookeeper-3.5.10
|___start-all.sh
|___Deployment Guide.md
(Ⅱ) Replace the License File
Copy the license file provided by Shushi (typically named like xxxx-trial.lic) to the licence directory mentioned above.
(Ⅲ) Modify Necessary Configurations
Use vi to open start-all.sh, modify the necessary parameters for configuration, and save the file.
# ==================== Configuration Information (Mandatory) Start ===================
# Public IP of the deployment server (modify according to actual conditions)
export PUBLIC_IP=xx.xx.xx.xx
# Internal/Private IP of the deployment server (modify according to actual conditions)
export PRIVATE_IP=xx.xx.xx.xx

# License information provided by Oinone (modify according to Shushi's provision)
# Example: If the license file is named demo-trial.lic, then LIC_SUBJECT = demo
export LIC_SUBJECT=xxxx
export LIC_FILE=xxxx-trial.lic

# Full Oinone image tag (including prefix and version number, modify according to Shushi's provision)
export OINONE_IMAGE_TAG=6.3:6.3.3
# ==================== Configuration Information (Mandatory) End =====================
(Ⅳ) Start and Access
Start the platform: Execute the following command in the terminal:
sh start-all.shAfter successful execution of the above command, log files will be generated in
/opt/logs(logs are rolled and named by date). The first startup takes approximately 350 seconds due to data initialization. The startup is successful when the log file shows a message like "Startup time elapsed...".Access the platform: Visit
http://[Public IP of the Server]:88. The default login username and password are bothadmin.
Ⅳ. Connect Local Environment to Designer Middleware
After deploying the Oinone Enterprise-level Low-Code R&D Platform as above, a no-code designer and a set of middleware are also deployed. The configuration information for each middleware is as follows:
| Middleware | Connection IP | Port | Password |
|---|---|---|---|
| MySQL | Public IP of the deployment server | 3306 | 123456@Abc |
| Redis | Public IP of the deployment server | 6379 | 123456@Abc |
| Zookeeper | Public IP of the deployment server | 2181 | |
| MQ (RocketMQ) | Public IP of the deployment server | 9876 |
When real-time linkage between the local project and the no-code designer is required, the database and middleware of the local project must be consistent with those of the designer. Modify bootstrap.yml and application-dev.yml of the local project, and update the connection configurations for ZK, Redis, MySQL, and MQ in the project to match the corresponding configurations listed above.