When data fields need to follow specific encoding rules, you can design the encoding of models or fields in the Model Designer. After the settings are completed, the encoding will be displayed in real-time for easy viewing and adjustment at any time.
I. Filtering
1. Function Introduction
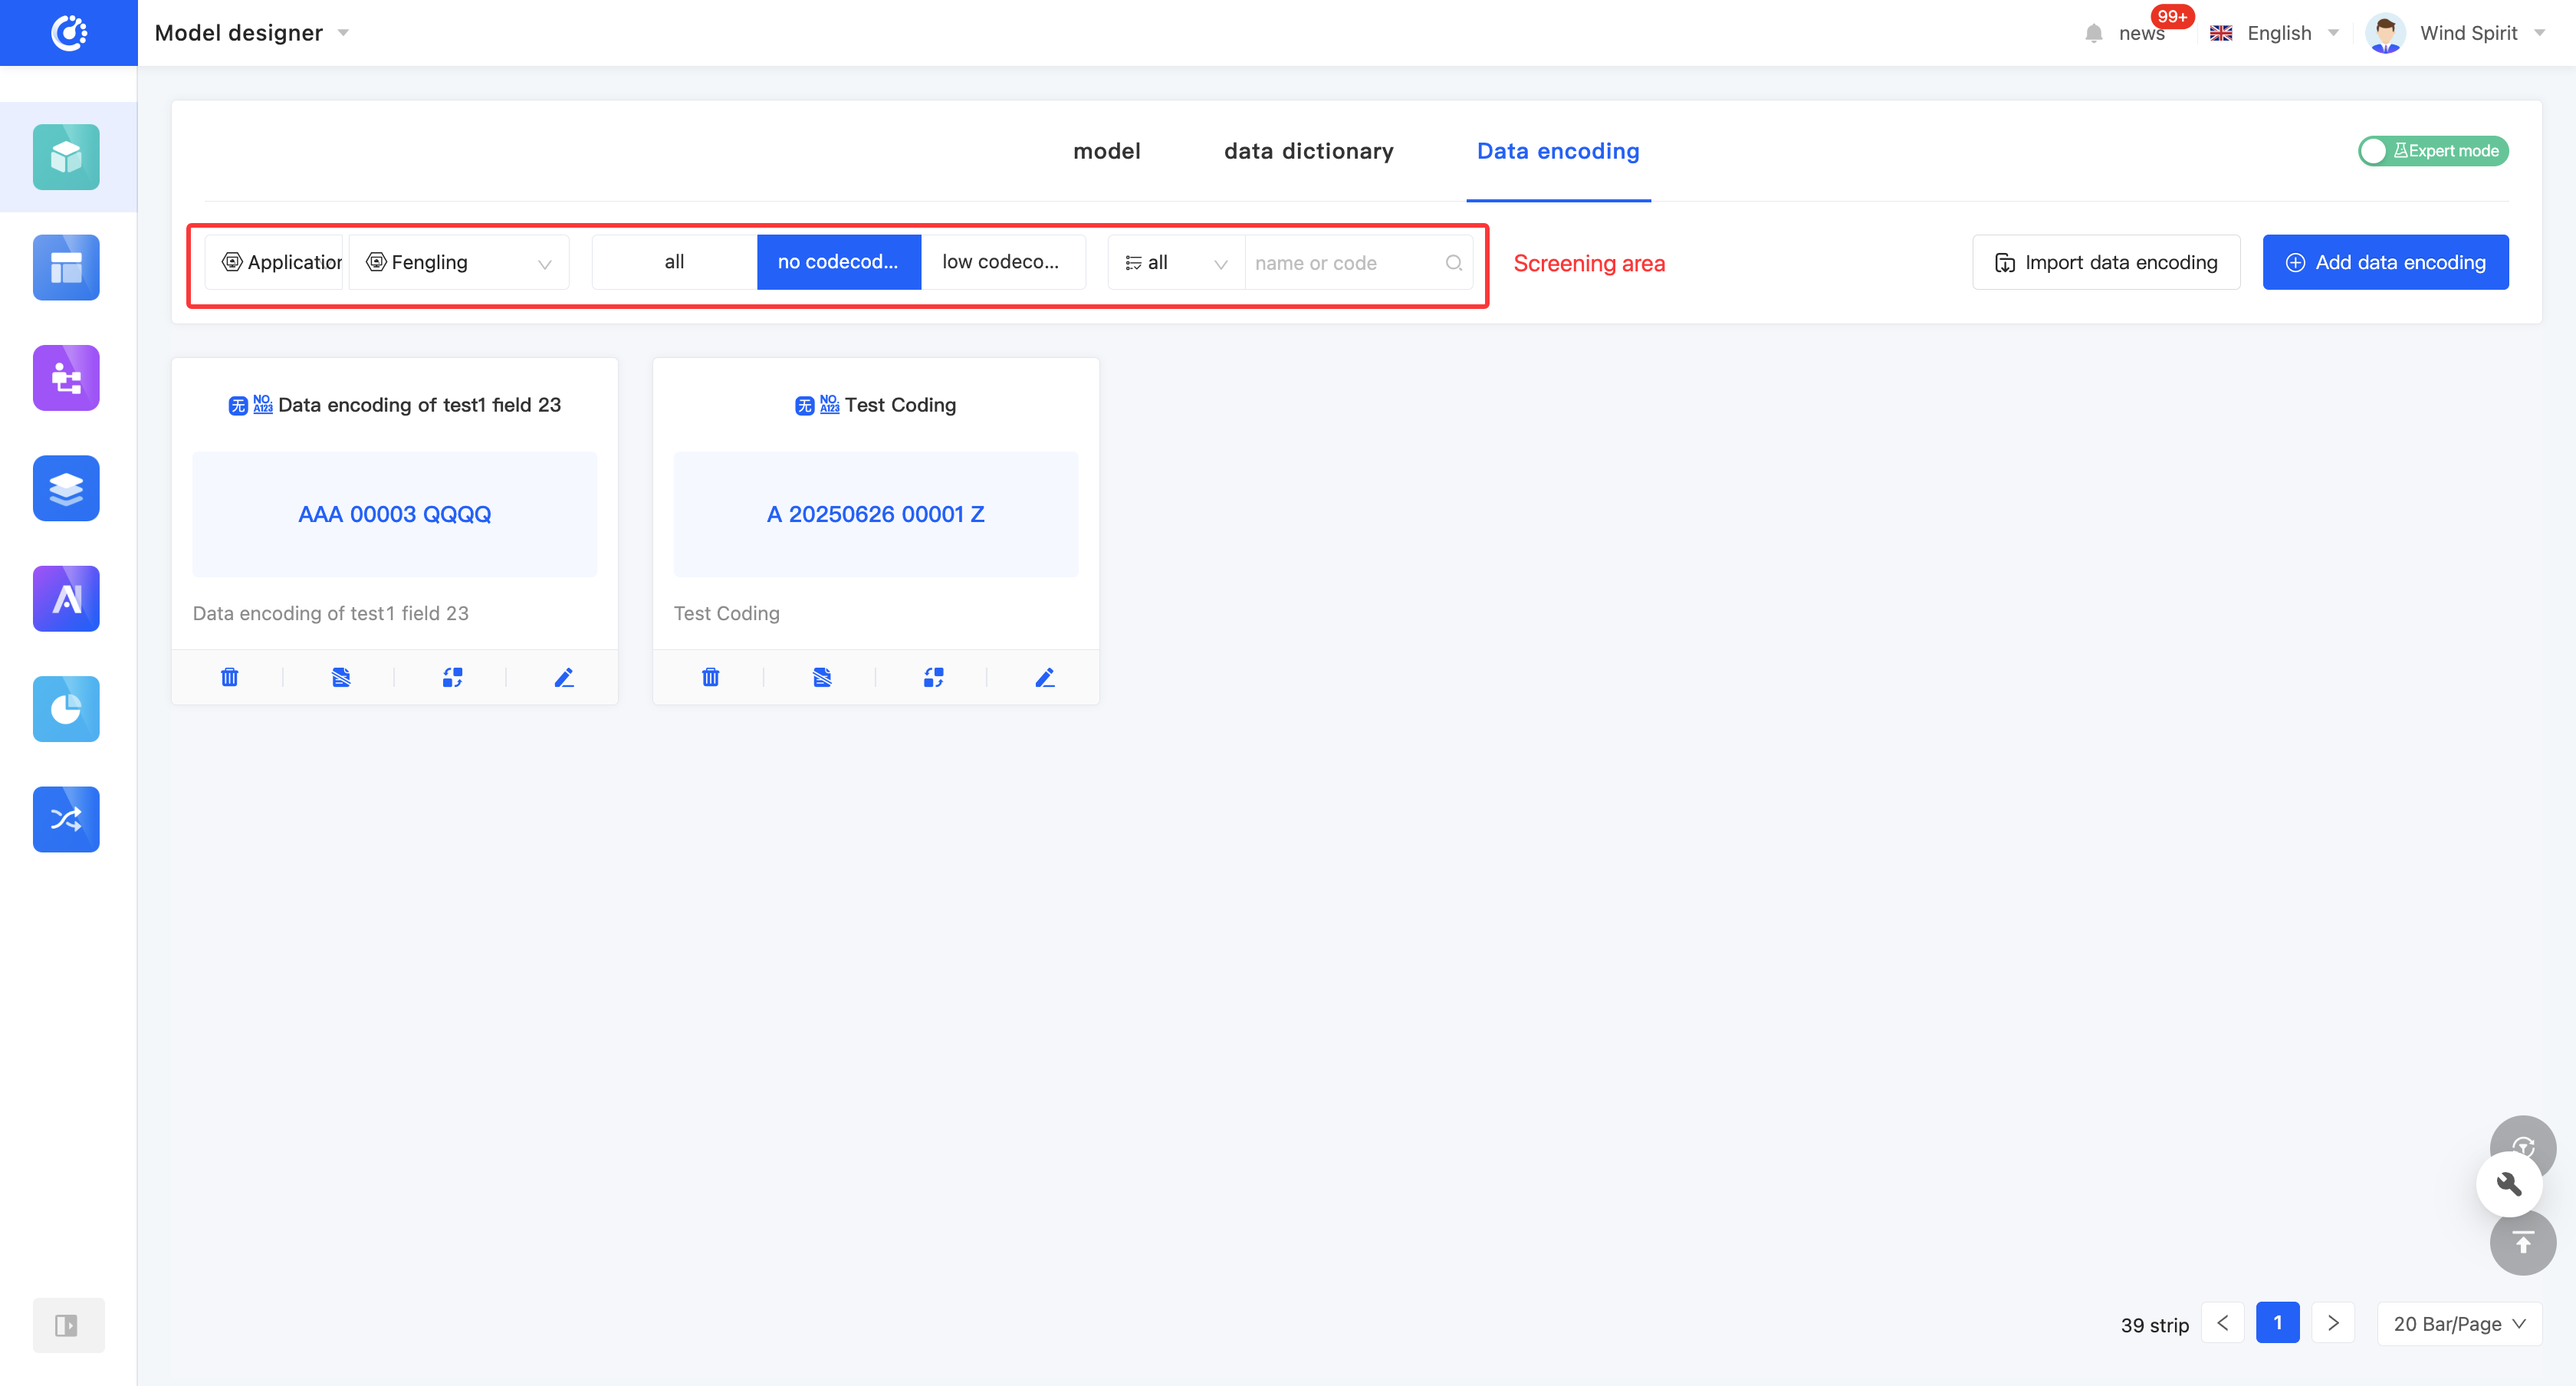
According to actual needs, select the application/module, data encoding type, or enter the name to customize the filtering conditions for precise filtering of data encoding. It supports clearing all filtering conditions with one click.
Note
In the drop-down selection of application/module filtering options, only a preliminary filtering of applications or modules on the platform is performed. In actual filtering operations, you still need to further select specific applications or modules to complete the configuration. Similarly, only when all filtering options are correctly configured can the correct data encoding be filtered out.
2. Operation Method
- Select or enter conditions in the filtering area to filter the data encoding.
- Click "Reset Filter" to clear all existing filtering conditions.
II. Import Data Encoding
1. Function Introduction
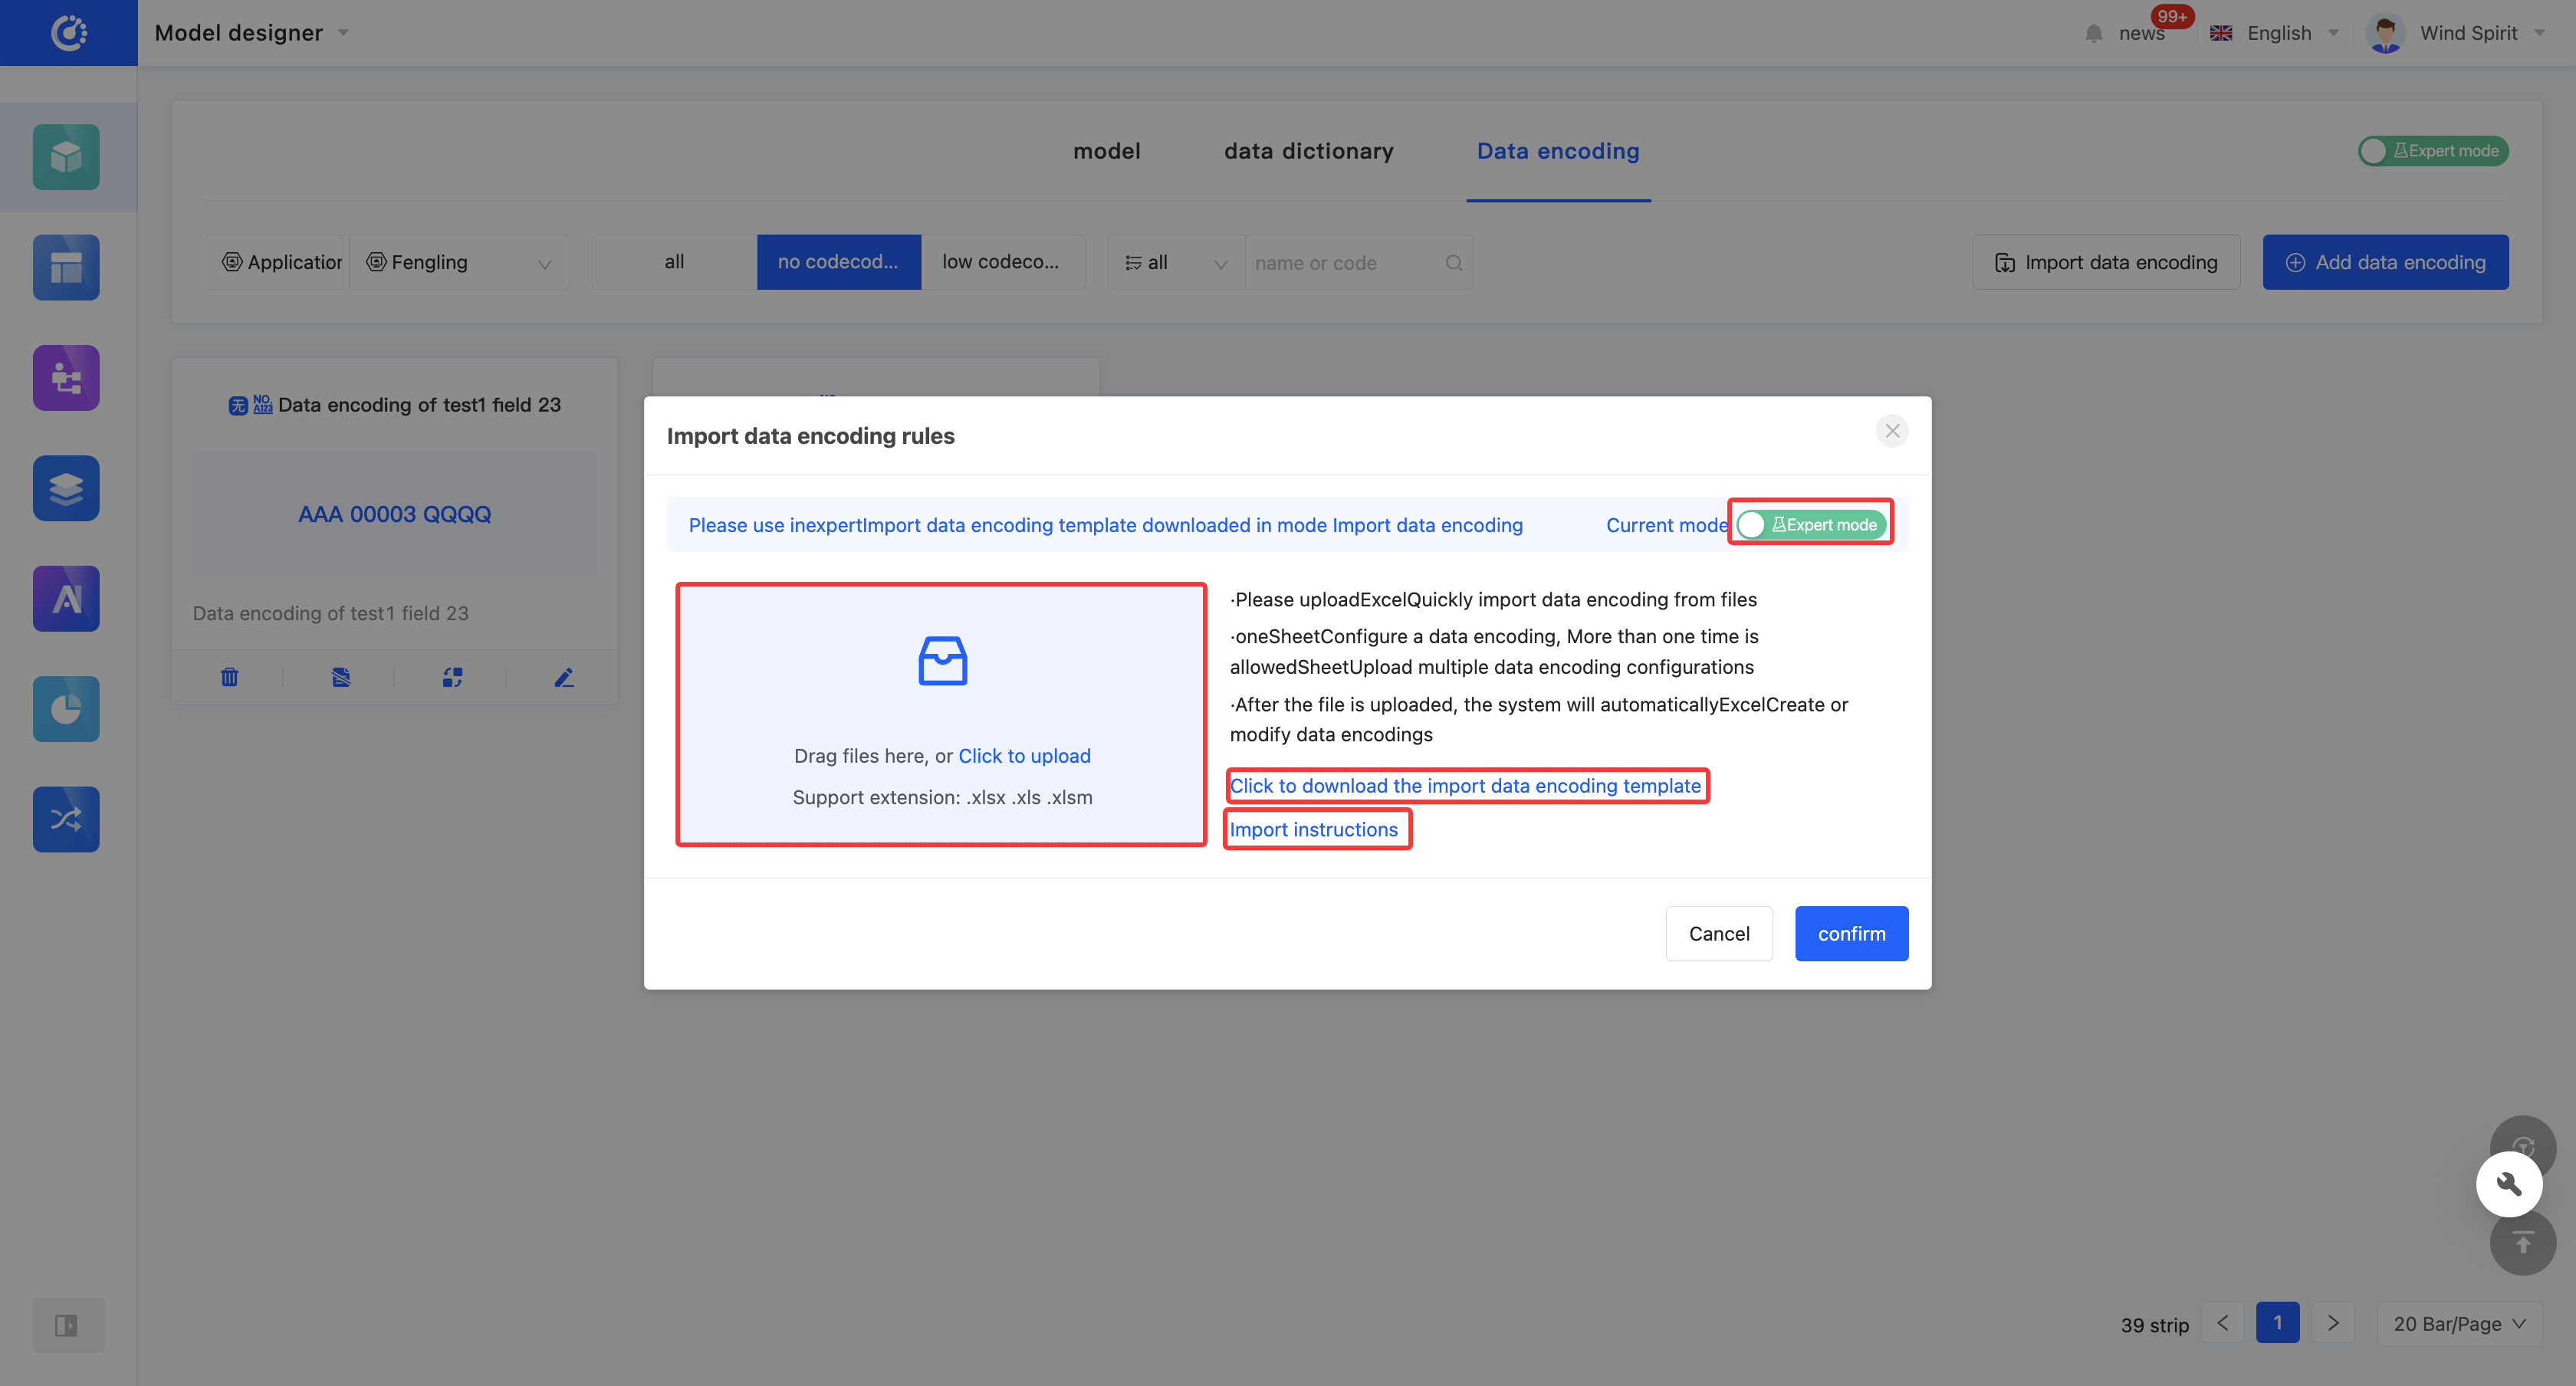
Importing data encoding is an efficient way to add data encoding. You can download the import template provided by the platform, fill in the relevant information according to the established rules, and then import the file into the system to quickly complete the addition of data encoding.
- Import Template: The platform provides import templates for models. Different templates are provided under different operation modes, and you can switch the operation modes.
Note
The import templates provided in the no-code mode and the expert mode are different:
- In the no-code mode, the template only provides basic model information, with a small amount and is easy to fill in.
- In the expert mode, the template provides rich model information, with detailed content and more professional information.
- Import Instructions: It elaborates on the meaning and filling rules of each item in the import template, which can help users fill in the import file accurately. Corresponding import instructions are provided according to different operation modes to ensure that users can successfully complete the import process.
- Upload File: Only files with the extensions .xlsx, .xls, and .xlsm are supported for upload.
Note
When uploading a file, you should upload the file corresponding to the current operation mode.
2. Operation Method
- Click "Import Data Encoding" and select the affiliated application.

- Click the "Current Mode" button to switch the operation mode.
- Click "Click to download the import data encoding template" to download the import template corresponding to the mode.
- Click "Import Instructions" to view the import instructions corresponding to the mode.
- Click "Click to upload" or drag the file to the specified location to upload the file.
III. Add Data Encoding
1. Function Introduction
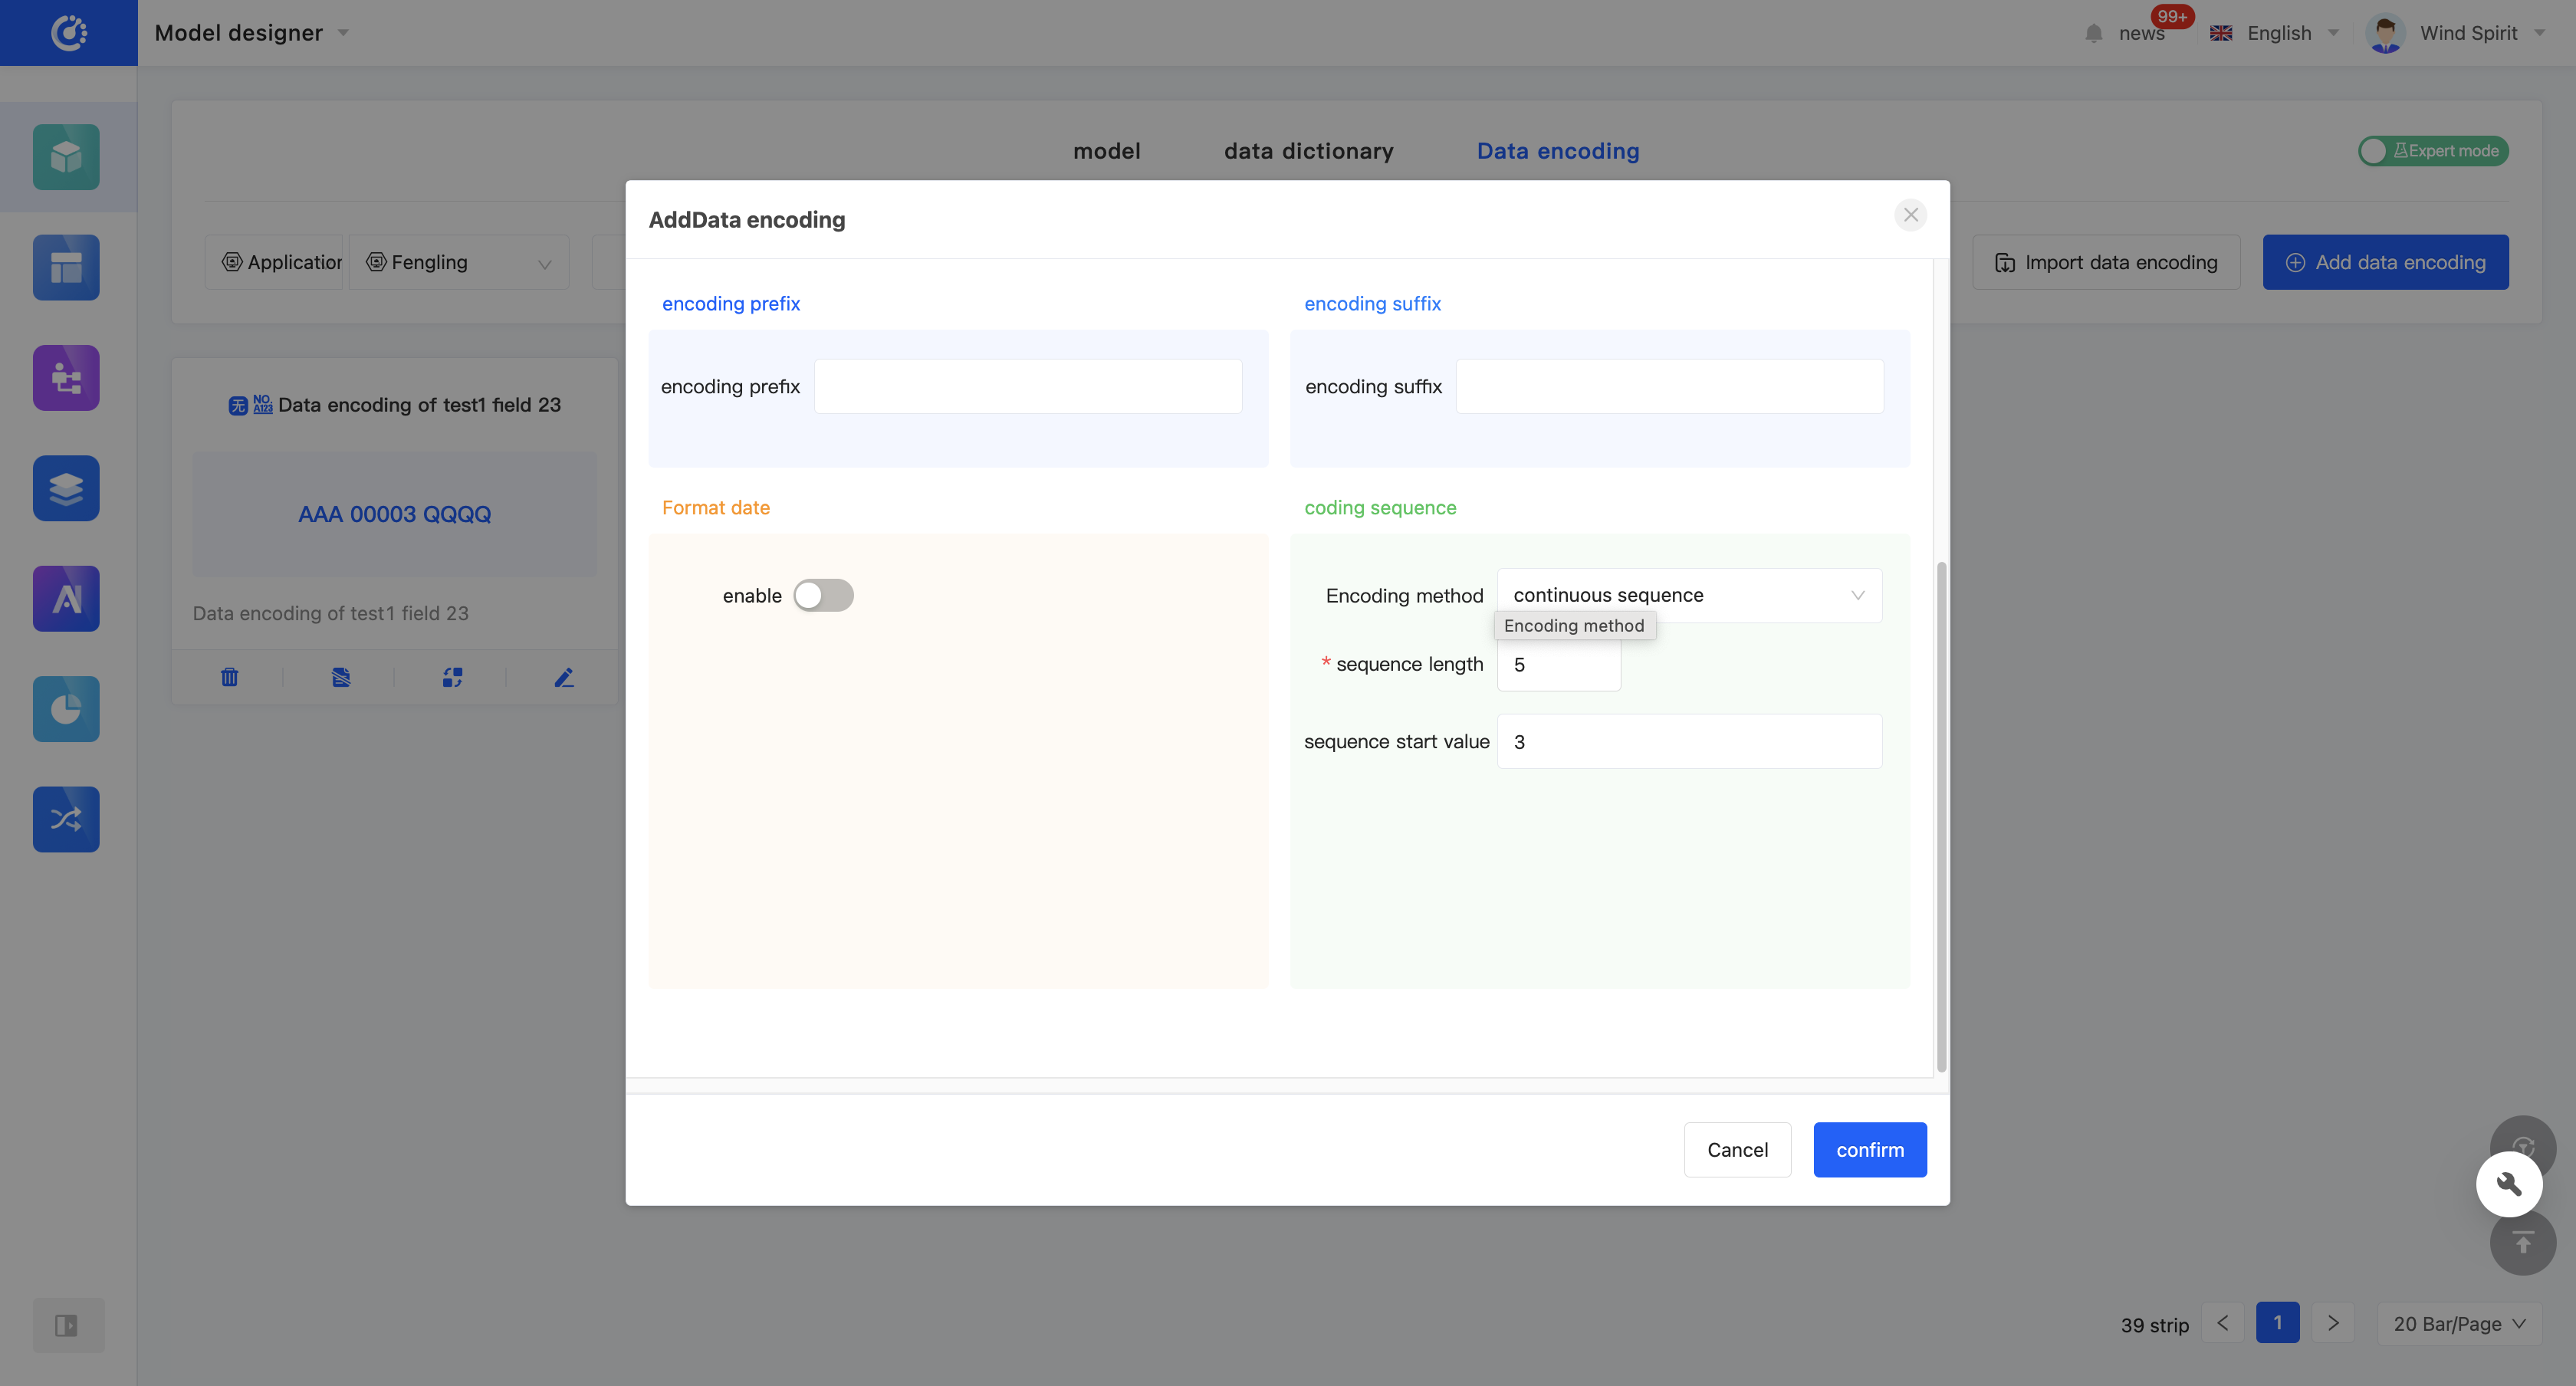
You can create no-code encoding through the Model Designer. When creating, you can edit information such as the encoding name, code name (only in the expert mode), encoding prefix/suffix, formatted date format, and encoding sequence.
Tip
You can also customize and add data encoding when editing a model or field in the model.
- Encoding Prefix/Suffix: It must start with a letter and only support numbers or letters, with a maximum of 8 characters.
- Formatted Date: It is turned off by default, which means the data encoding does not include the date. After the switch is turned on:
- The default date format is "YYYYMMDD", and it can also be switched to "YYMMDD, YYMM, YYYY, YY".
- Sequence Reset Cycle: It is related to the selection of the formatted date. The data encoding sequence will be reset according to the set cycle.
Note
If you choose the "YYYYMMDD" format, the available options include "Year", "Month", and "Day"; if you choose the "YYYY" format, only "Year" can be selected.
- Encoding Sequence: You can choose a continuous sequence or a non-continuous sequence. For a non-continuous sequence, you need to set the sequence length, sequence start value, step type, and step; for a continuous sequence, you only need to set the sequence length and sequence start value.
- Sequence Length: The number of digits included in the sequence, which can be set to an integer between 1 and 18.
- Sequence Start Value: The start value of the data encoding sequence, with a default value of 3.
- Step Type: The default value is "Custom Step", and it can also be set to "Random Step between 1 and 10".
- Step: When "Custom Step" is selected, the set step is the actual step. When "Random Step between 1 and 10" is selected, the actual step is a random integer between 1 and the set value.
2. Operation Method
Click "Add Data Encoding", select the affiliated application/module to add. After clicking "Add", a pop-up window will appear. After filling in the information, click "OK" to successfully create the data encoding.

IV. Modify Data Encoding
1. Function Introduction
The successfully created data encoding can be modified.
Note
- Only partial information supports modification, and some information is fixed at the time of creation. Therefore, you need to fill in the information carefully when creating.
2. Operation Method
Click the "Modify" icon to modify the data encoding.
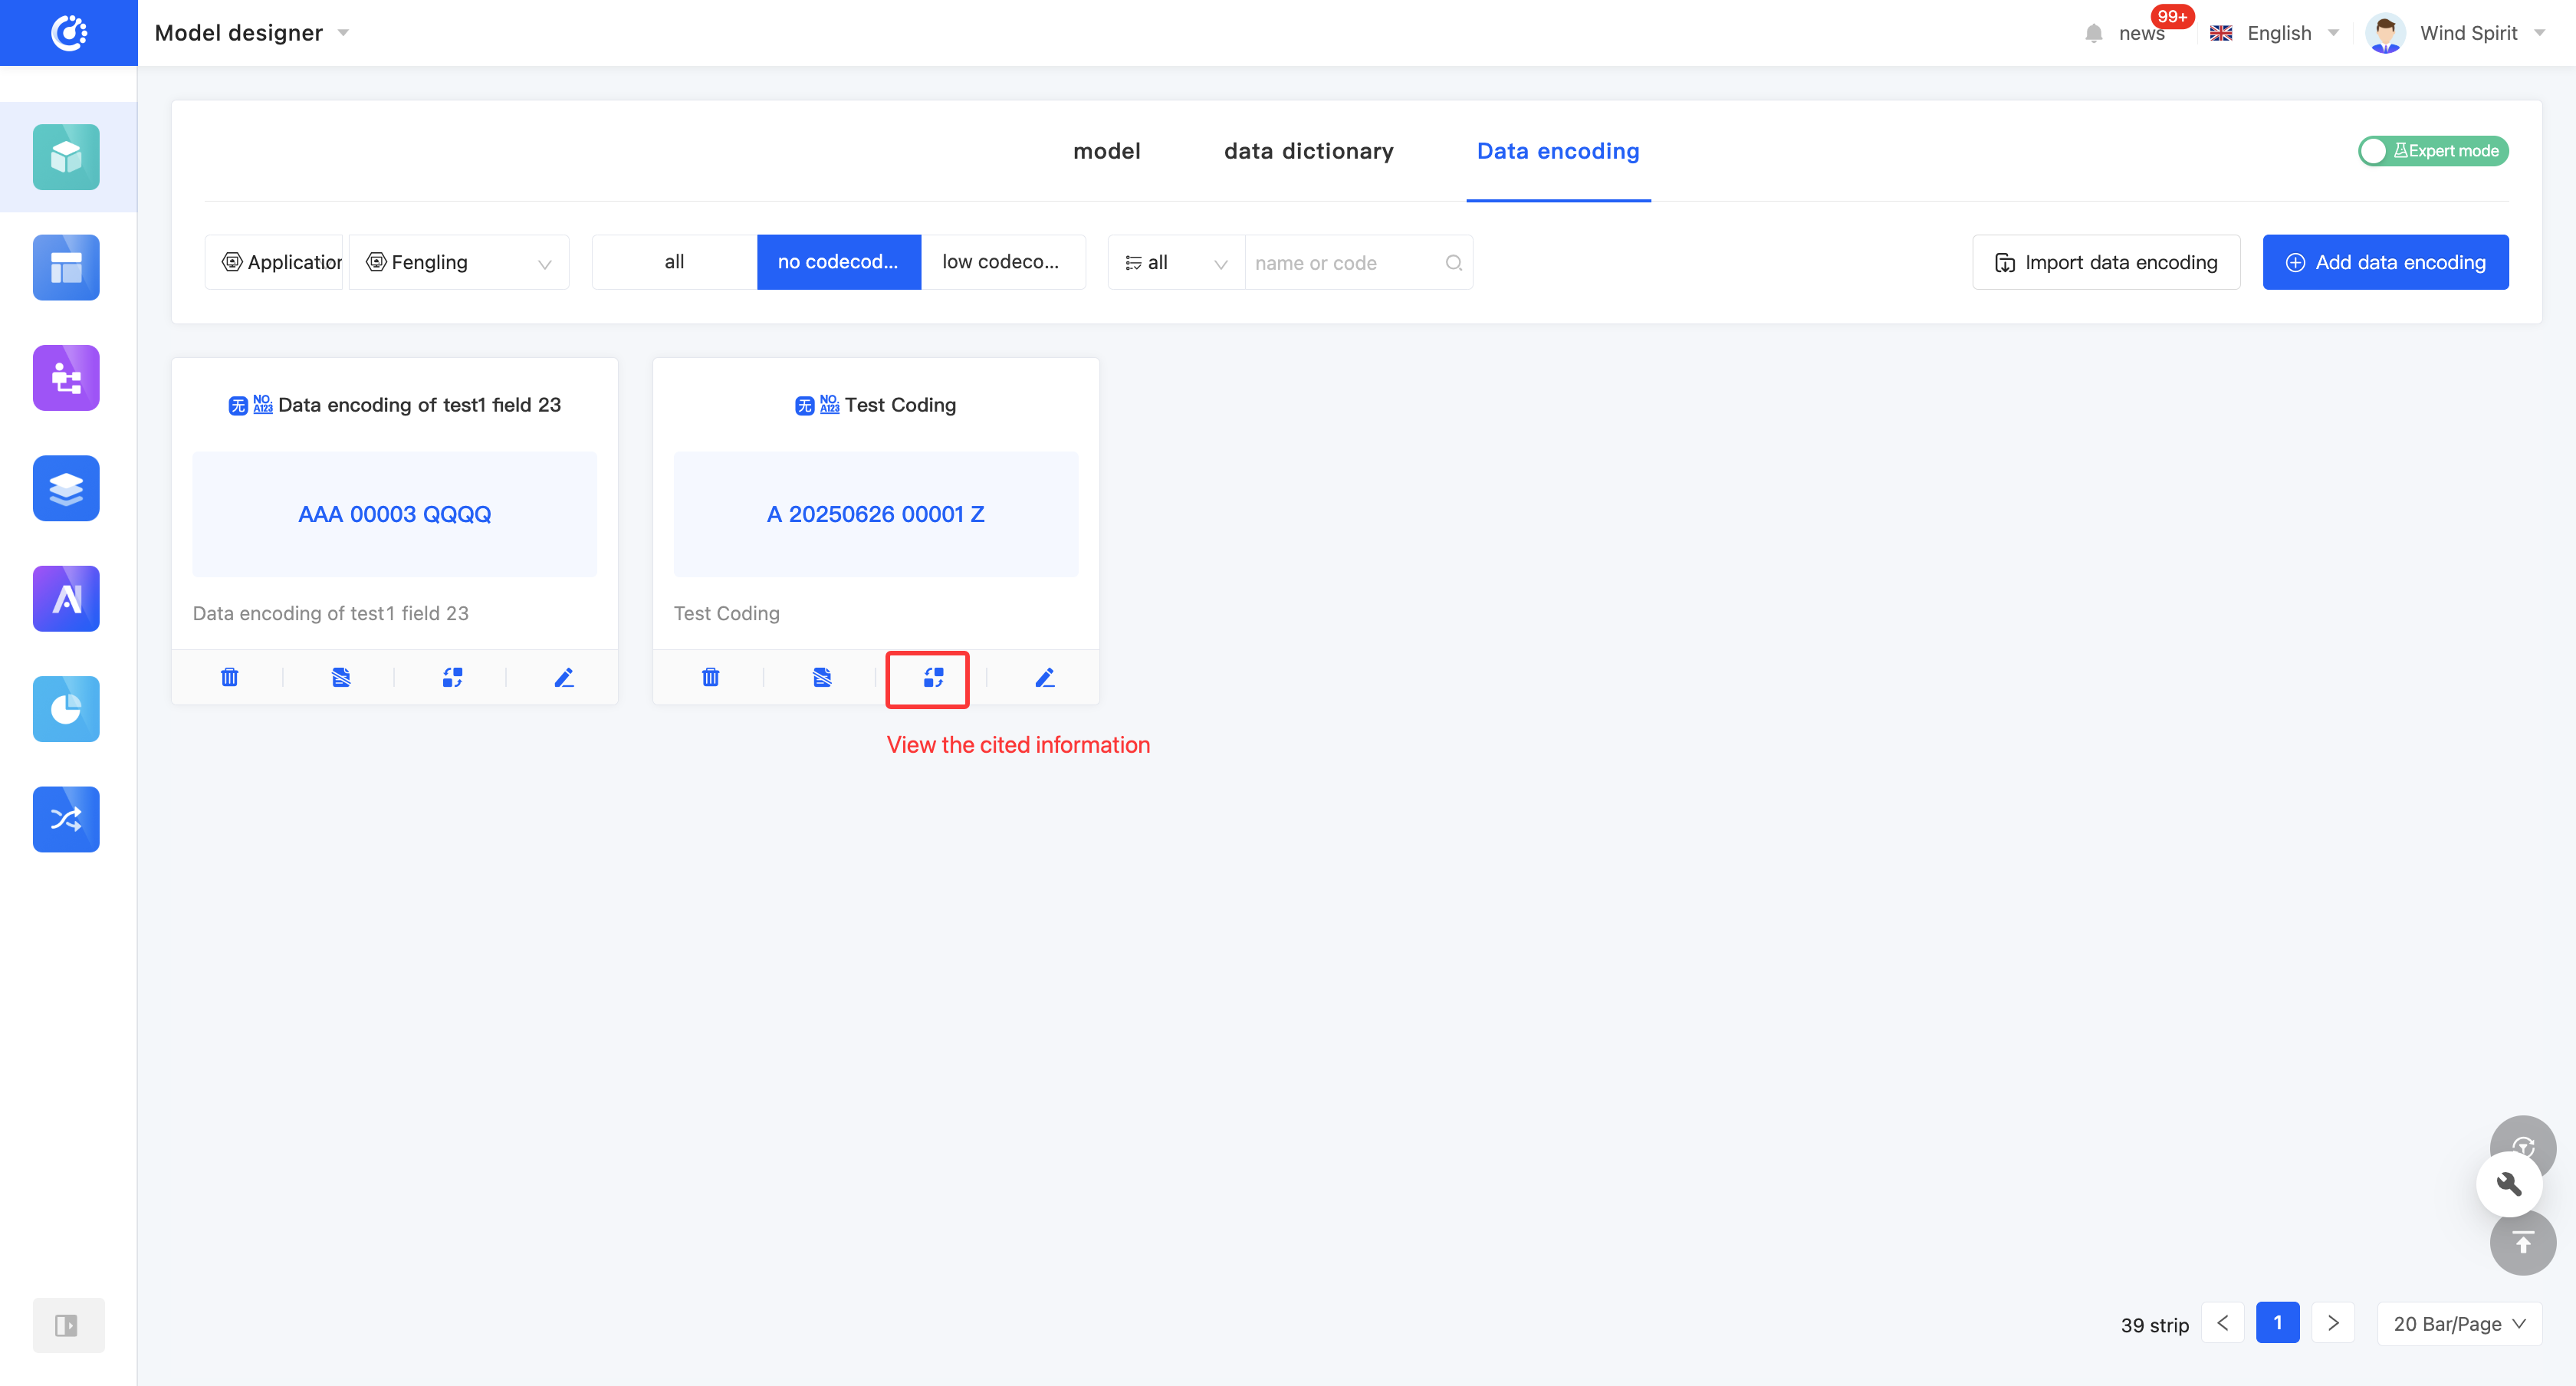
V. View Reference Relationships
1. Function Introduction
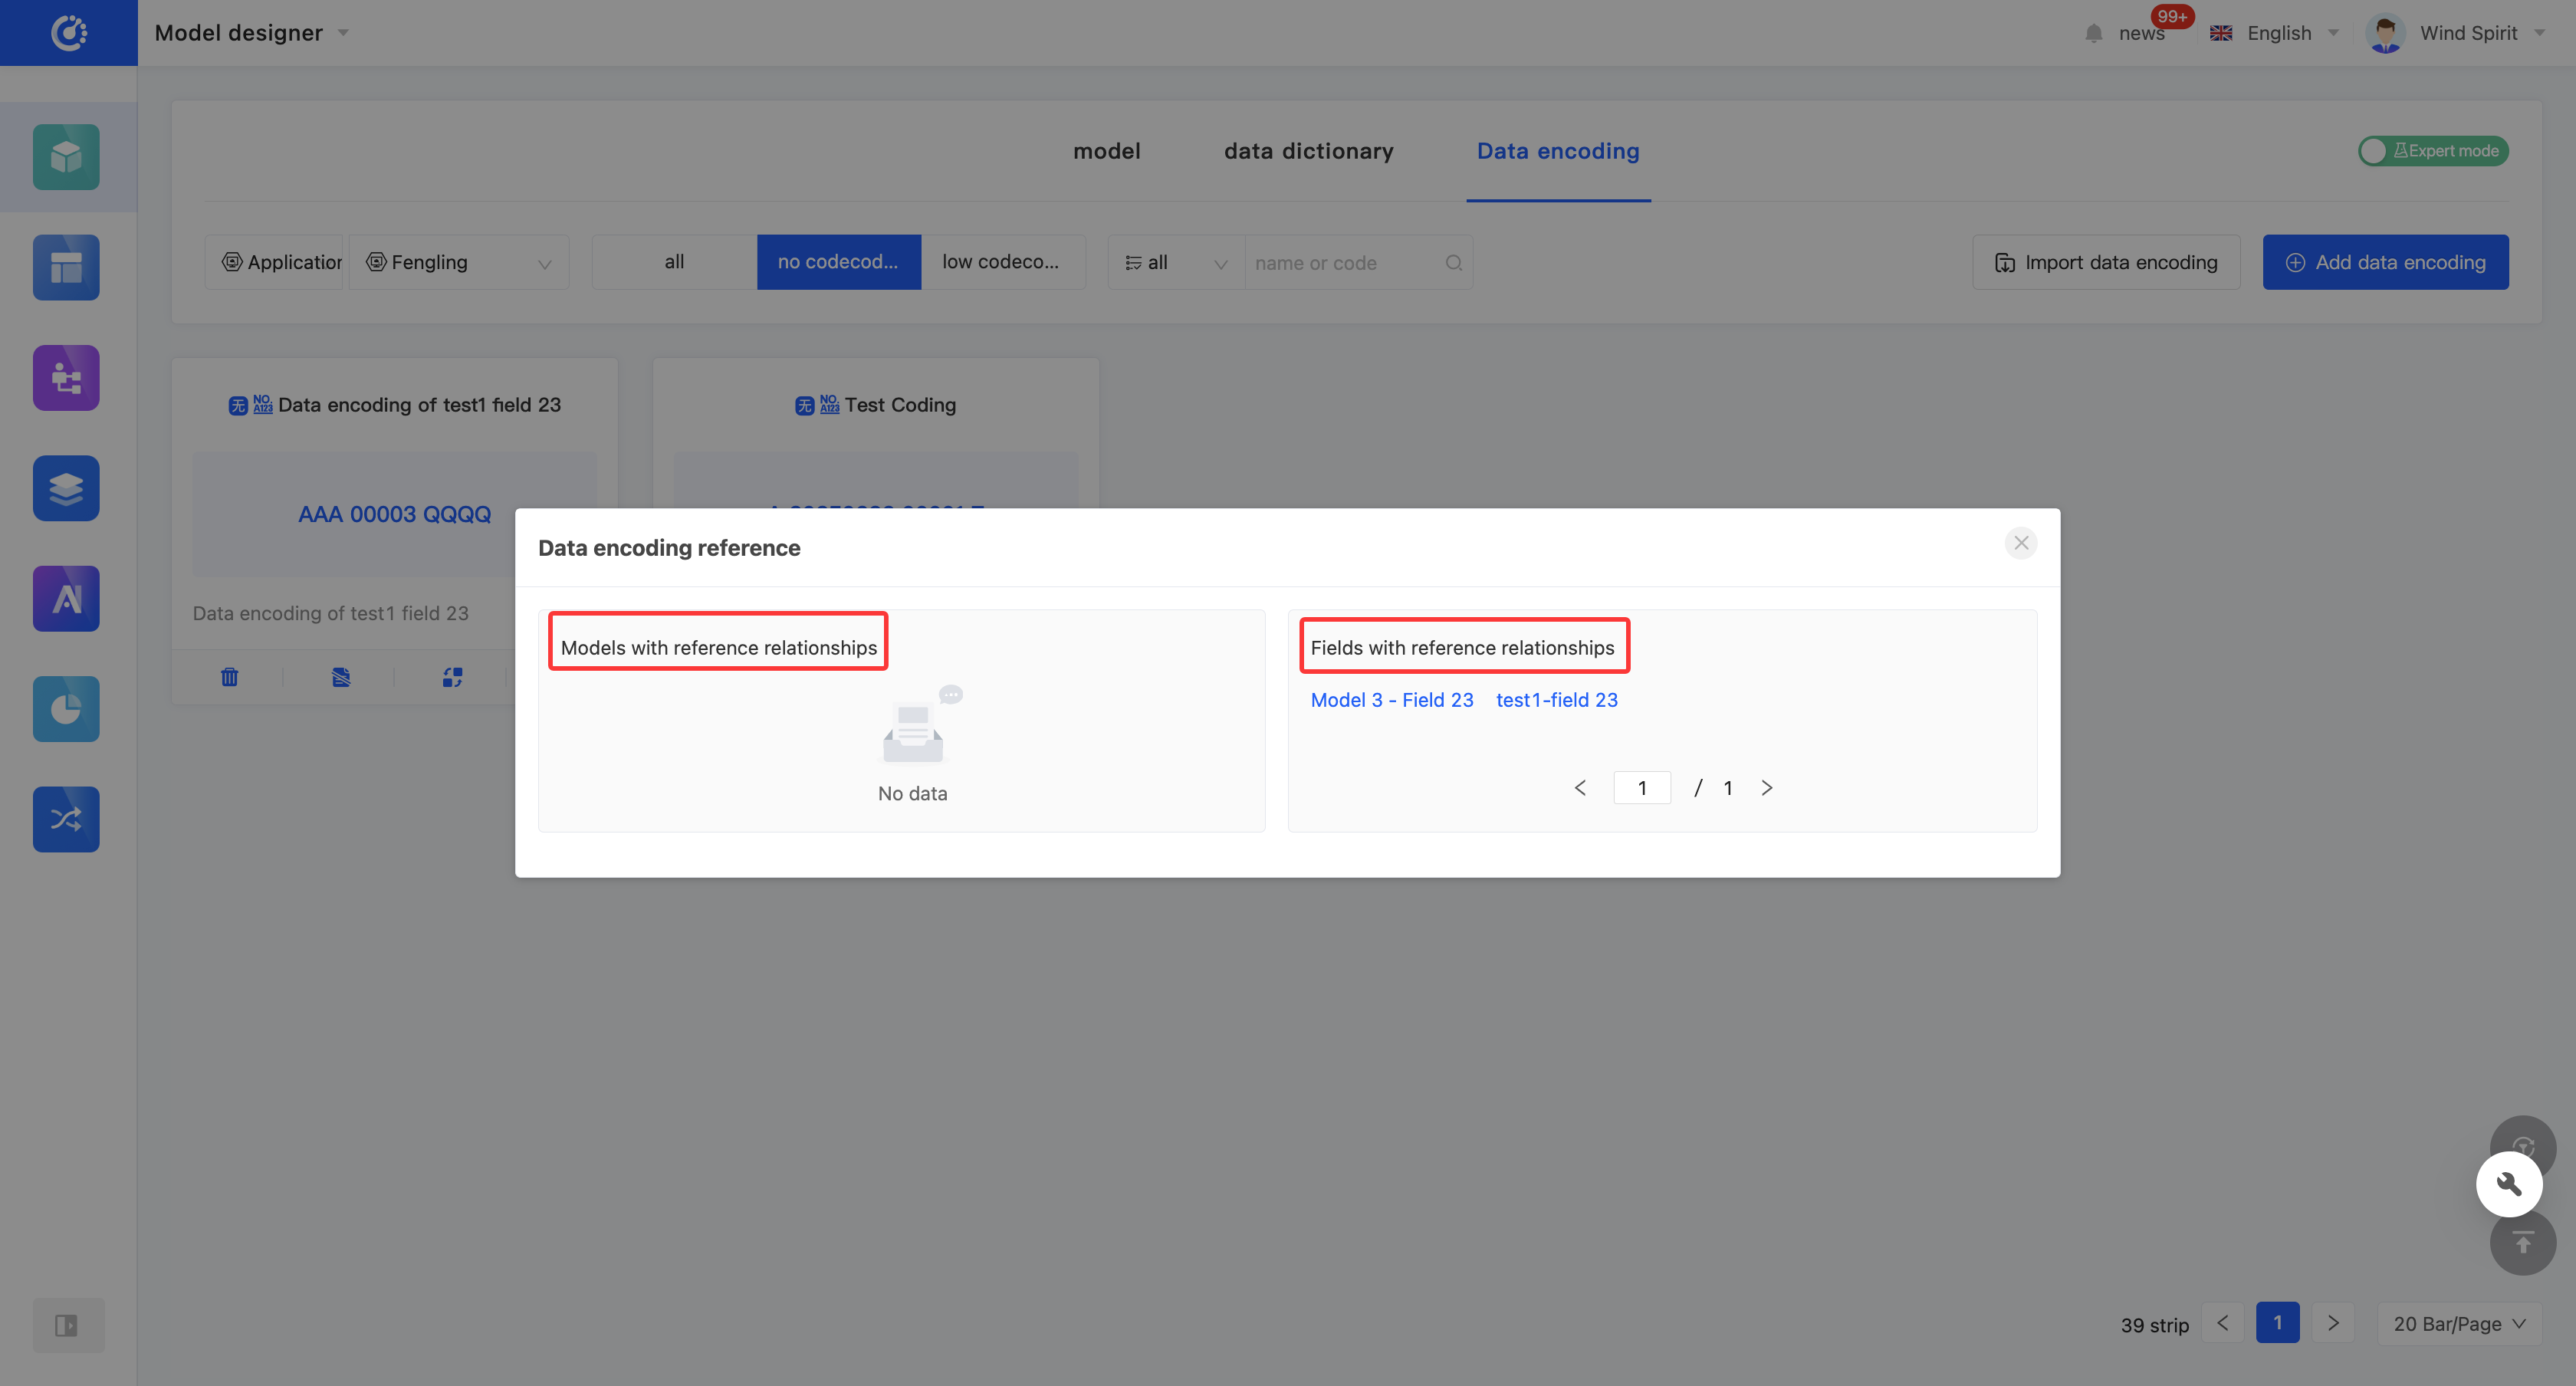
Through this function, you can view various elements that have reference relationships with the data encoding, including other models and fields. Each relationship is displayed in a list, and the list items are links that can lead to the corresponding design pages; the content is the corresponding content.
Example
The list item of a field with a reference relationship displays the name of the field, and the list item links to the design page of the corresponding field.
2. Operation Method
Click the "View Referenced Information" icon to view the reference relationships.
VI. Disable/Enable Data Encoding
1. Function Introduction
For data encoding that is not currently in use, you can perform the disable operation. If needed in the future, you only need to set the disabled data encoding to the enabled state to put it back into use. In addition, the disabled data encoding still supports operations such as editing.
Note
The disabled data encoding will no longer be displayed in the optional list when referenced in other designers.
2. Operation Method
Click "Disable", the data encoding will be set to the disabled state, and the button will change to "Set to Enabled"; click again, and the data encoding will be set to the enabled state.

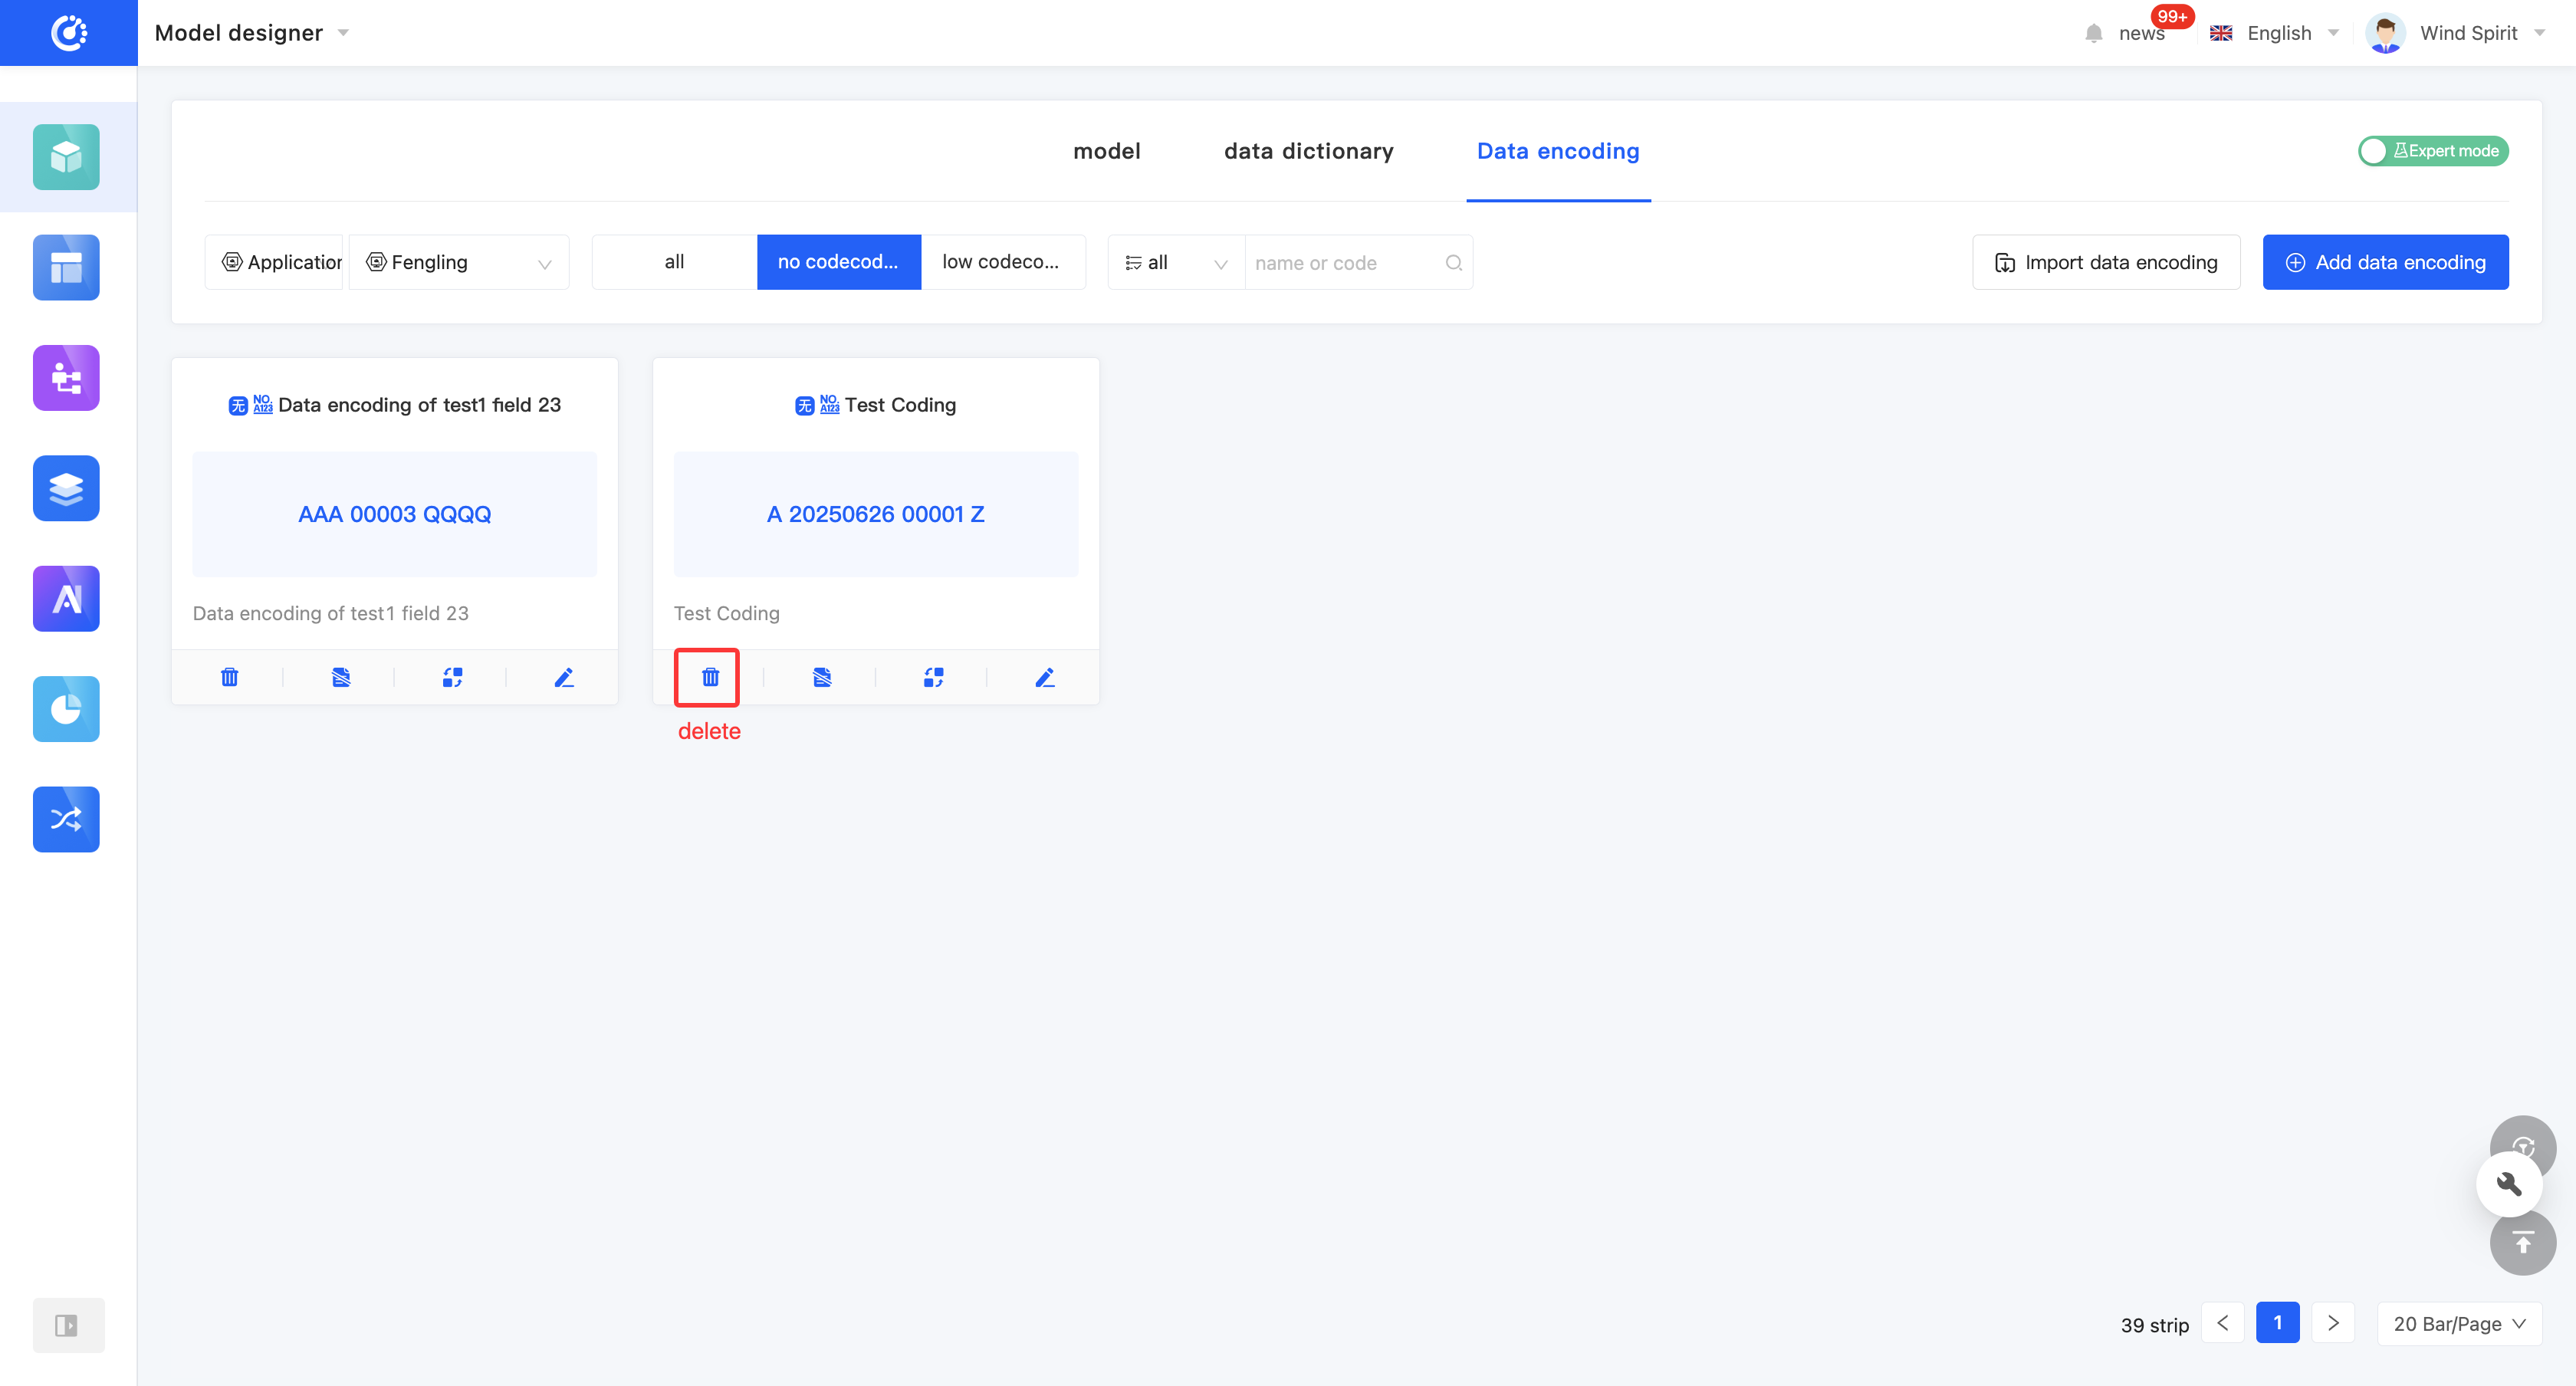
VII. Delete Data Encoding
1. Function Introduction
When the data encoding is no longer in use, you can choose to delete it. Low-code encoding is not allowed to be deleted.
Note
Before deletion, you need to ensure that the data encoding is not referenced by other designers; otherwise, the deletion operation cannot be performed.
Warning
The deleted data encoding will no longer appear in the encoding list, and this operation cannot be undone. Please execute it with caution!
2. Operation Method
Click "Delete" to delete the data encoding.
VIII. Attachment: Glossary
| Term | Description |
|---|---|
| No-code Encoding | Encoding designed through no-code designers (such as the Model Designer and UI Designer) is called no-code encoding. |
| Low-code Encoding | Encoding written through the low-code development framework or automatically generated by the system during no-code design is called low-code encoding. |