I. Integration Management
(I) Integration Interfaces
Interface statistical function optimization description:
The statistical function of the original integrated interface is adjusted from statistics of all historical records to statistics of yesterday's data only.
The system will automatically perform the statistical task at 1:45 AM every day, and automatically generate the statistical results of yesterday.
1. Function Introduction
Integration interfaces comprehensively display all APIs included in the connectors within the Integration Designer, including interface information and invocation status. They provide a convenient management method to achieve unified management of all interfaces.
2. Operation Methods
- Filtering: Enter or select corresponding filtering criteria according to actual scenario requirements to filter integration applications.
- Enabling: Change the enabled status of the interface by controlling the switch state.
- Ignore Log Frequency Configuration: Change the log frequency of the interface by controlling the switch state.
Note
If the "Ignore Log Frequency Configuration" switch is not enabled, the system will only record part of the log content. Under normal operation, this configuration can be disabled to save resources. If problems occur during operation, this configuration can be enabled, and the system will fully record the detailed request and response information of interface logs for troubleshooting and review.

(II) Circuit Breaking Configuration
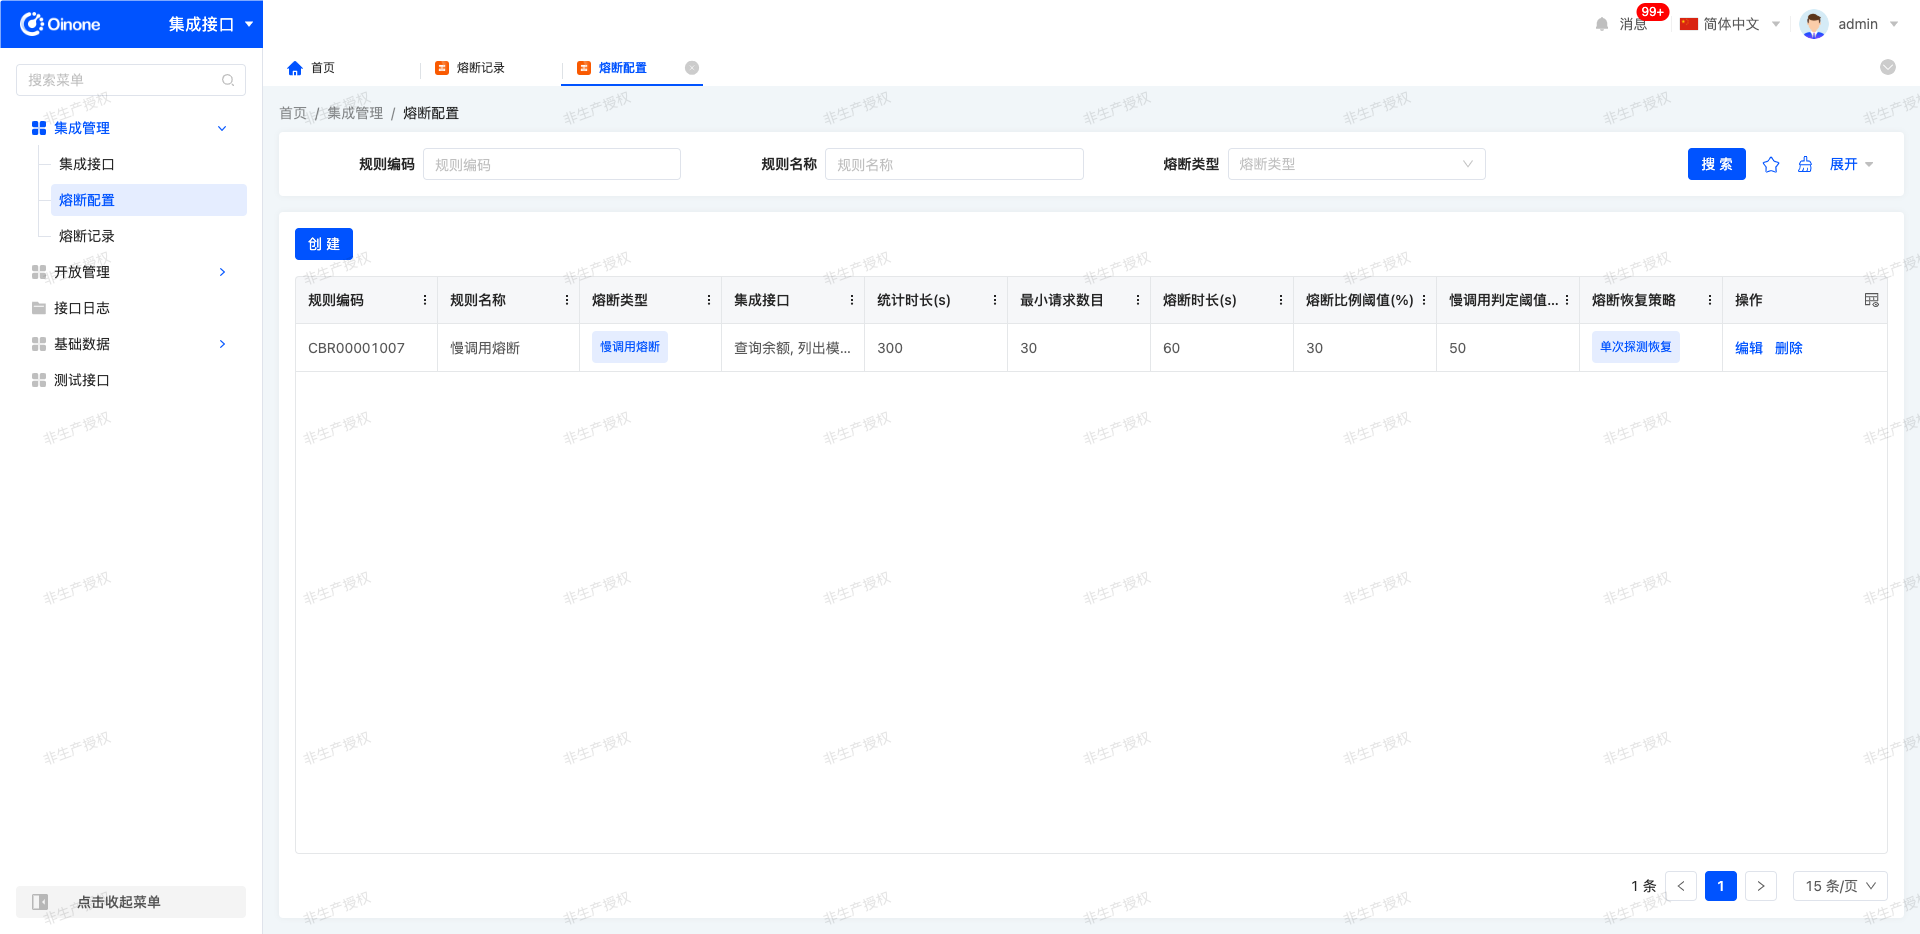
1. Function Introduction
Circuit breaking mechanism and rate limiting mechanism are used to ensure the high availability of platform interfaces. When the system load is too high or the interface response is too slow, the circuit breaking mechanism will be automatically triggered to stop interface requests, thereby preventing system crash.
2. Operation Methods
- Filtering: Enter or select corresponding filtering criteria according to actual scenario requirements to filter circuit breaking rules.
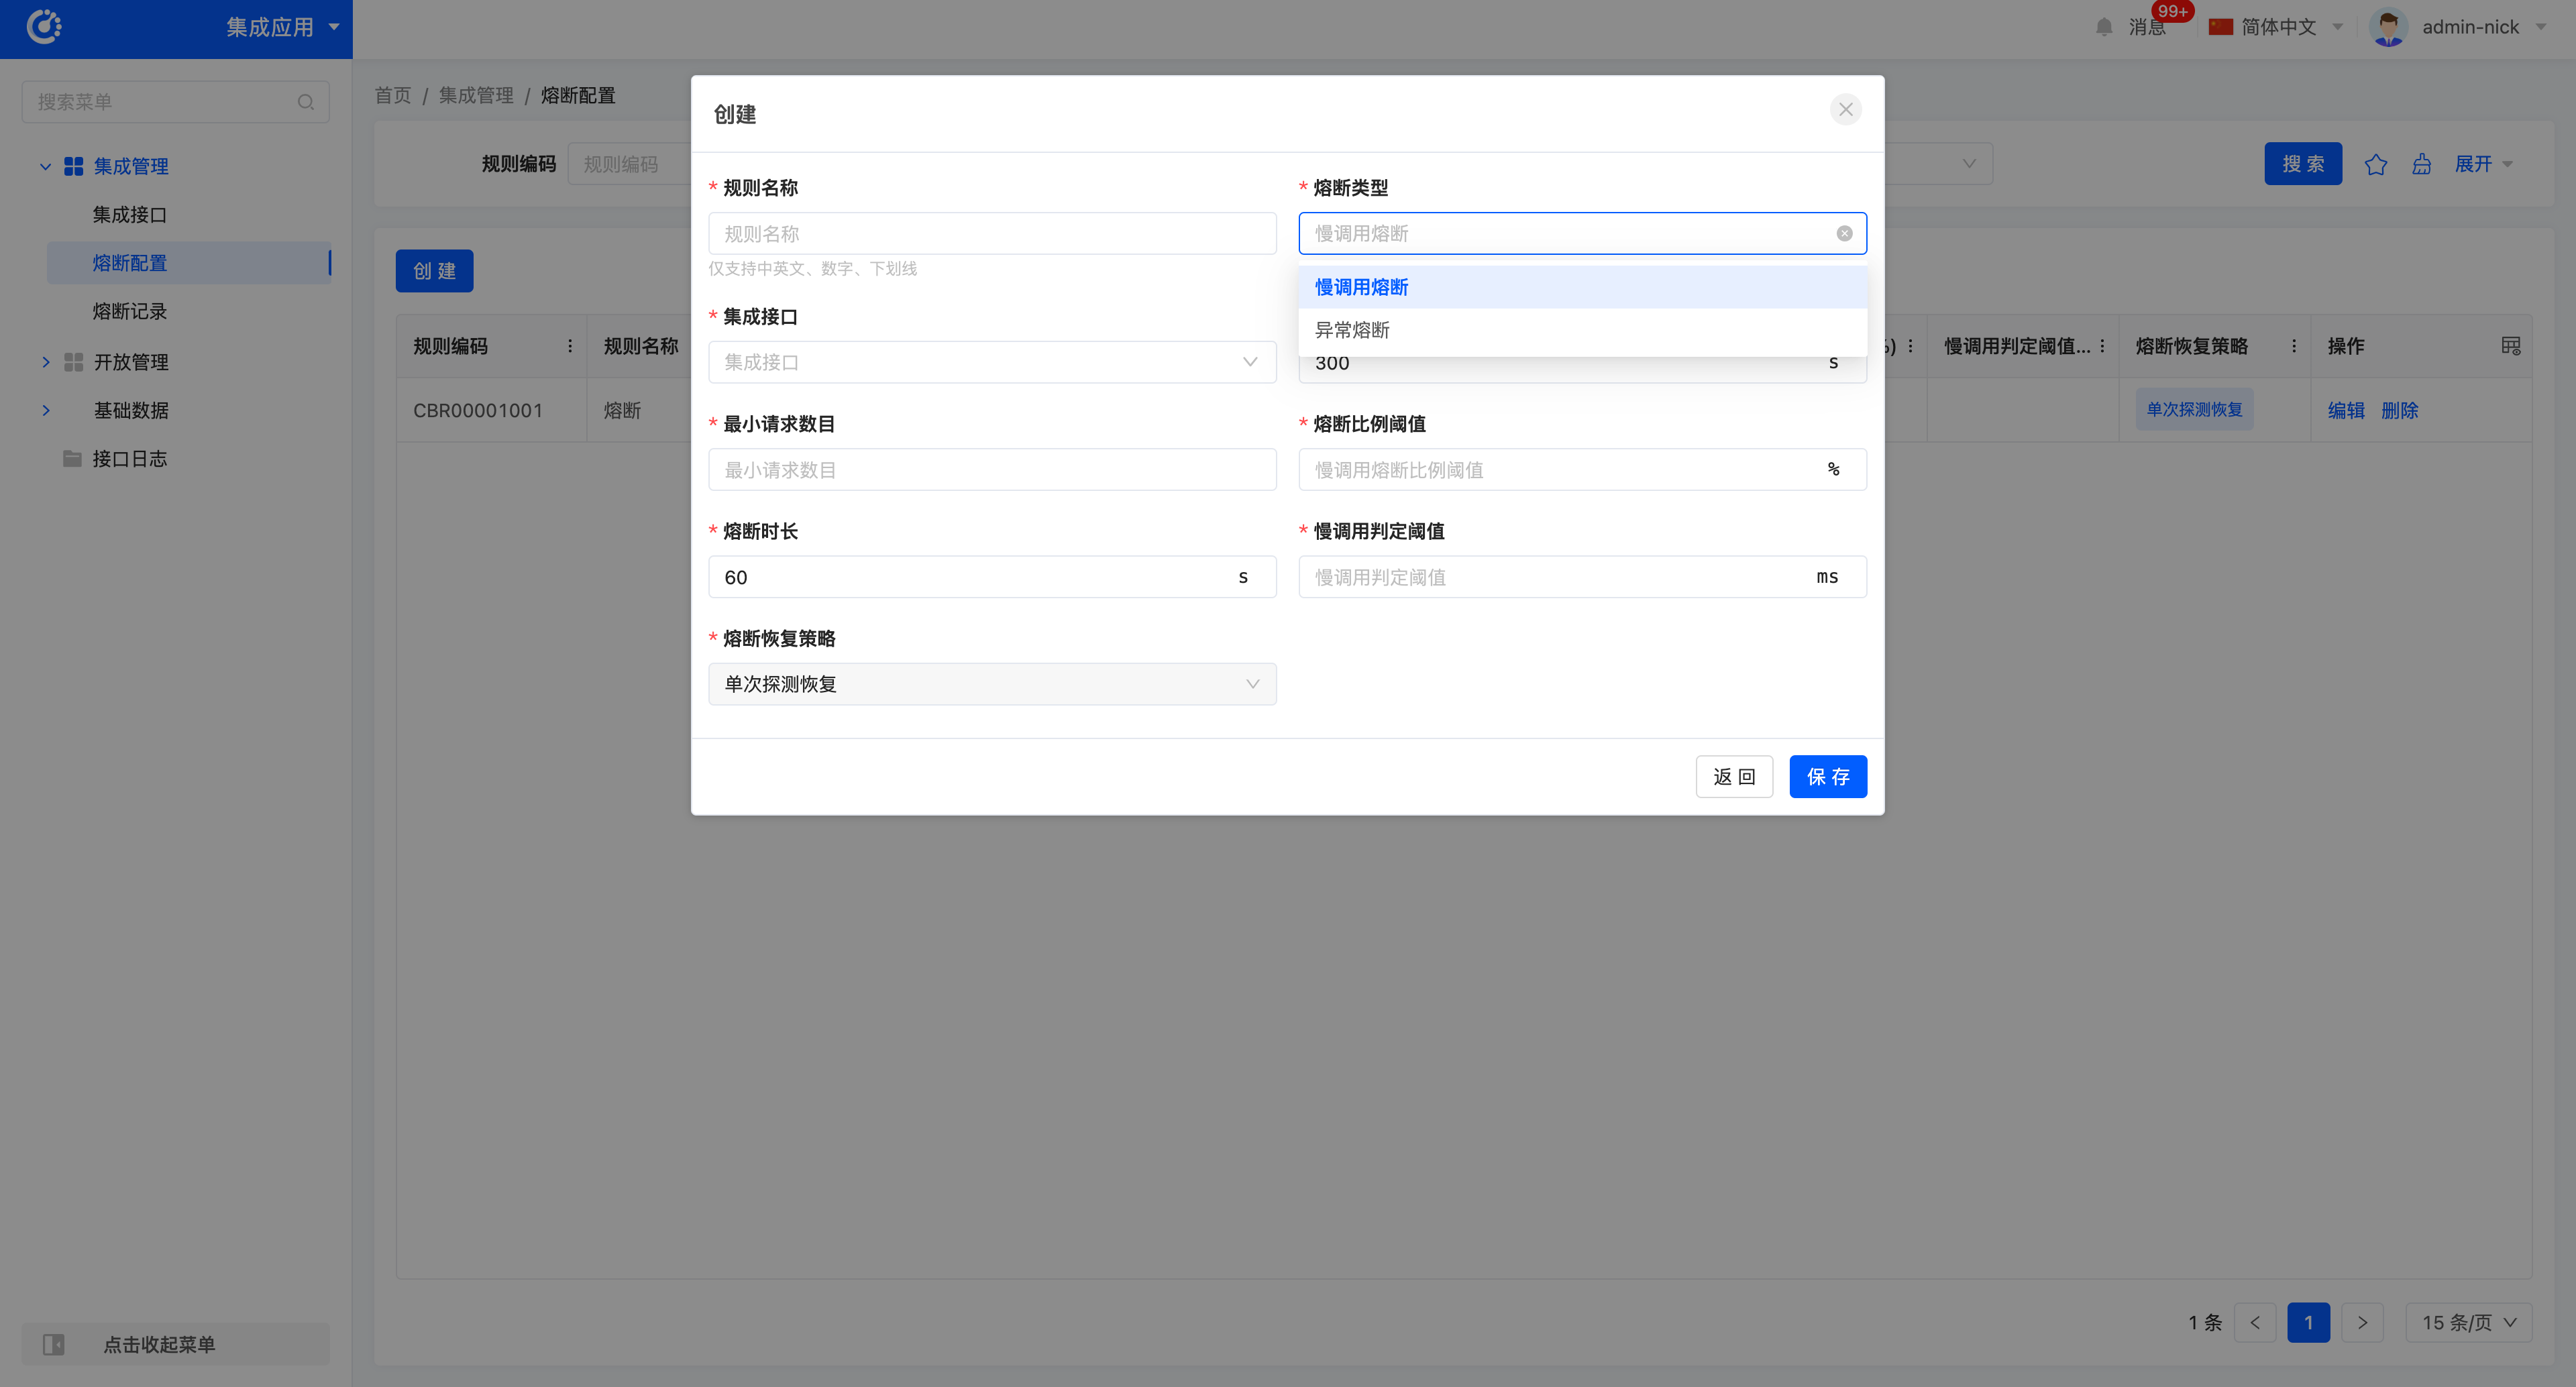
- Creation:
- Log in to the platform and navigate to Integration Applications → Integration Management → Circuit Breaking Configuration.
- Click Create to add a new circuit breaking rule.
- Fill in the circuit breaking rule configuration form, setting fields such as circuit breaking type, integration application, and statistics duration.
- Click Save to complete the configuration.
Tip
The circuit breaking mechanism is used to protect the system from overload. The platform supports slow call circuit breaking and exception circuit breaking.
Circuit Breaking Rules:
- Slow Call Circuit Breaking: Triggered when the response time of an interface exceeds the set threshold and the proportion of slow calls exceeds the set threshold.
- Exception Circuit Breaking: Triggered when the proportion of exception responses of an interface exceeds the set threshold.
- Editing:
- Navigate to Integration Applications → Integration Management → Circuit Breaking Configuration, and select the circuit breaking rule to be edited.
- Click Edit, modify the relevant fields of the rule, and click Save to update the rule.
Tip
After a circuit breaking rule is updated, interfaces that are already in a circuit broken state will be reset to an available state.
- Deletion: Click Delete to remove an existing circuit breaking rule.
(III) Circuit Breaking Records
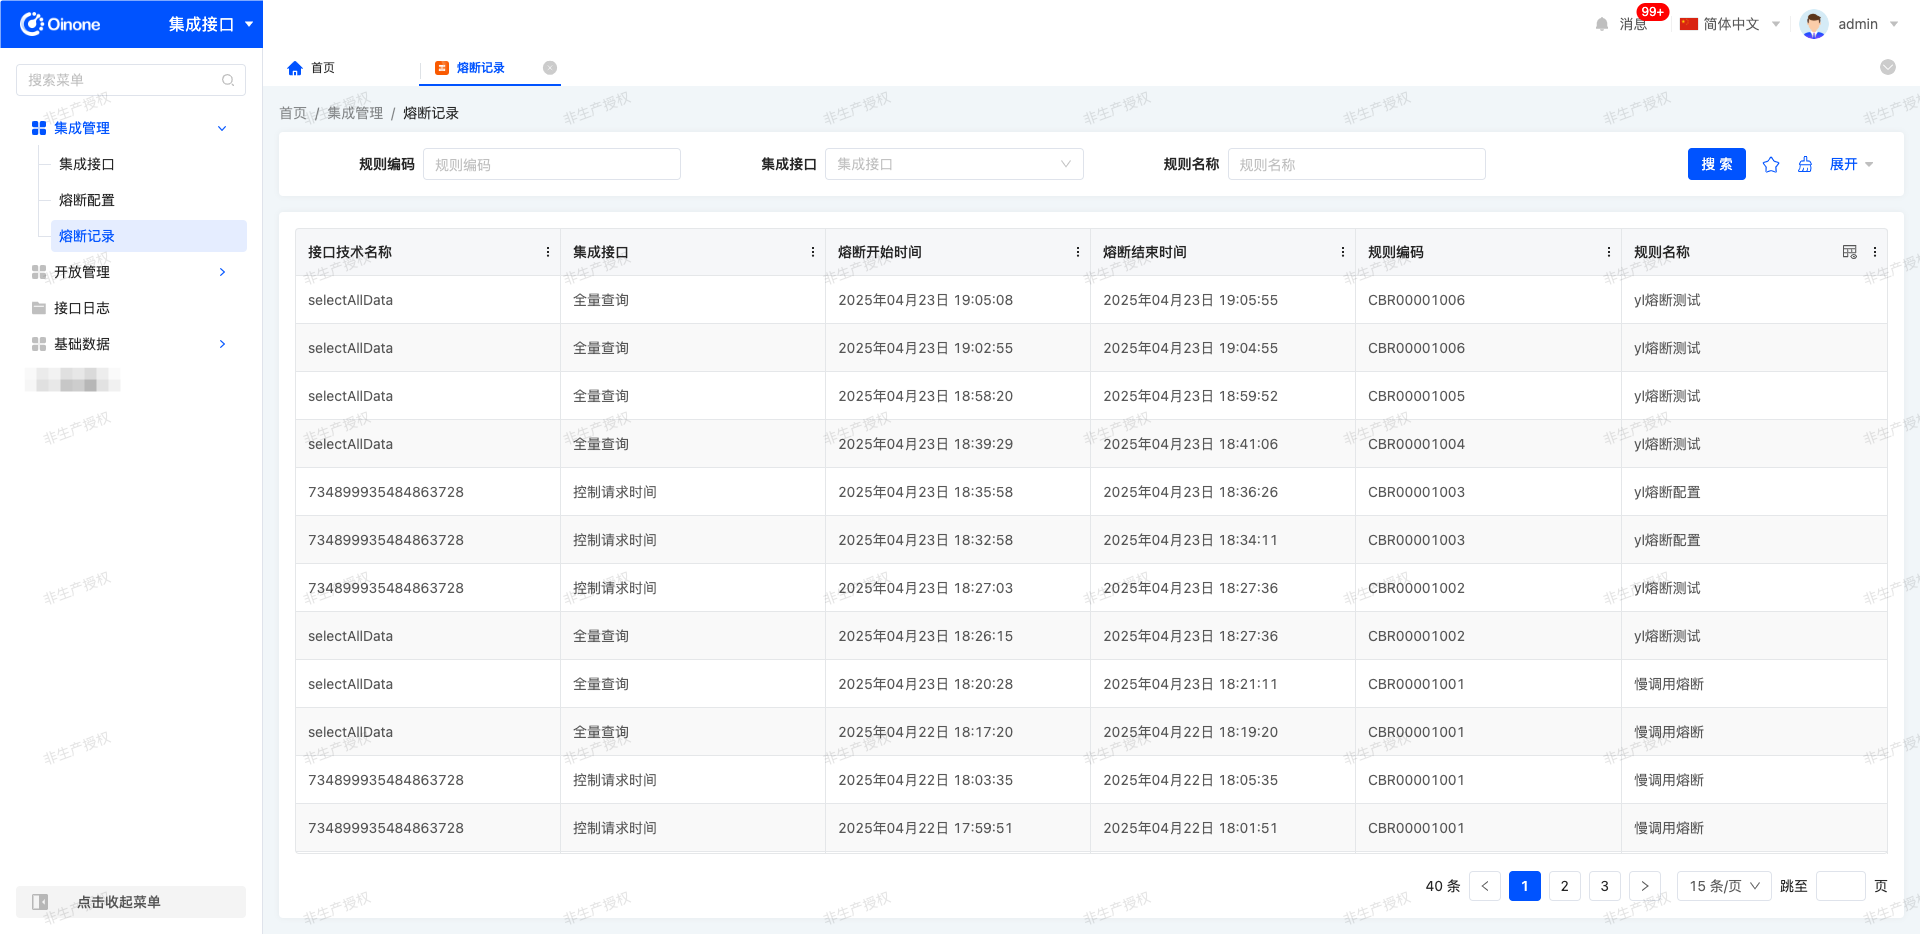
1. Function Introduction
Circuit breaking records are used to detailedly record information about interface circuit breaking events. When an interface call triggers a preset circuit breaking rule, the system will automatically generate a circuit breaking record. This record supports real-time tracing of details such as the circuit breaking time of the corresponding interface, providing data support for fault analysis and strategy optimization.
2. Operation Methods
- View Logs: Navigate to Integration Applications → Integration Management → Circuit Breaking Records to view relevant logs.
- Filtering: Filter circuit breaking records by fields such as integration interface name and circuit breaking type according to actual needs.
II. Open Management
(I) Open Interfaces
Interface statistical function optimization description:
The original open interface statistical function is adjusted from statistics of all historical records to statistics of yesterday's data only.
The system will automatically perform the statistical task at 1:45 AM every day, and automatically generate the statistical results of yesterday.
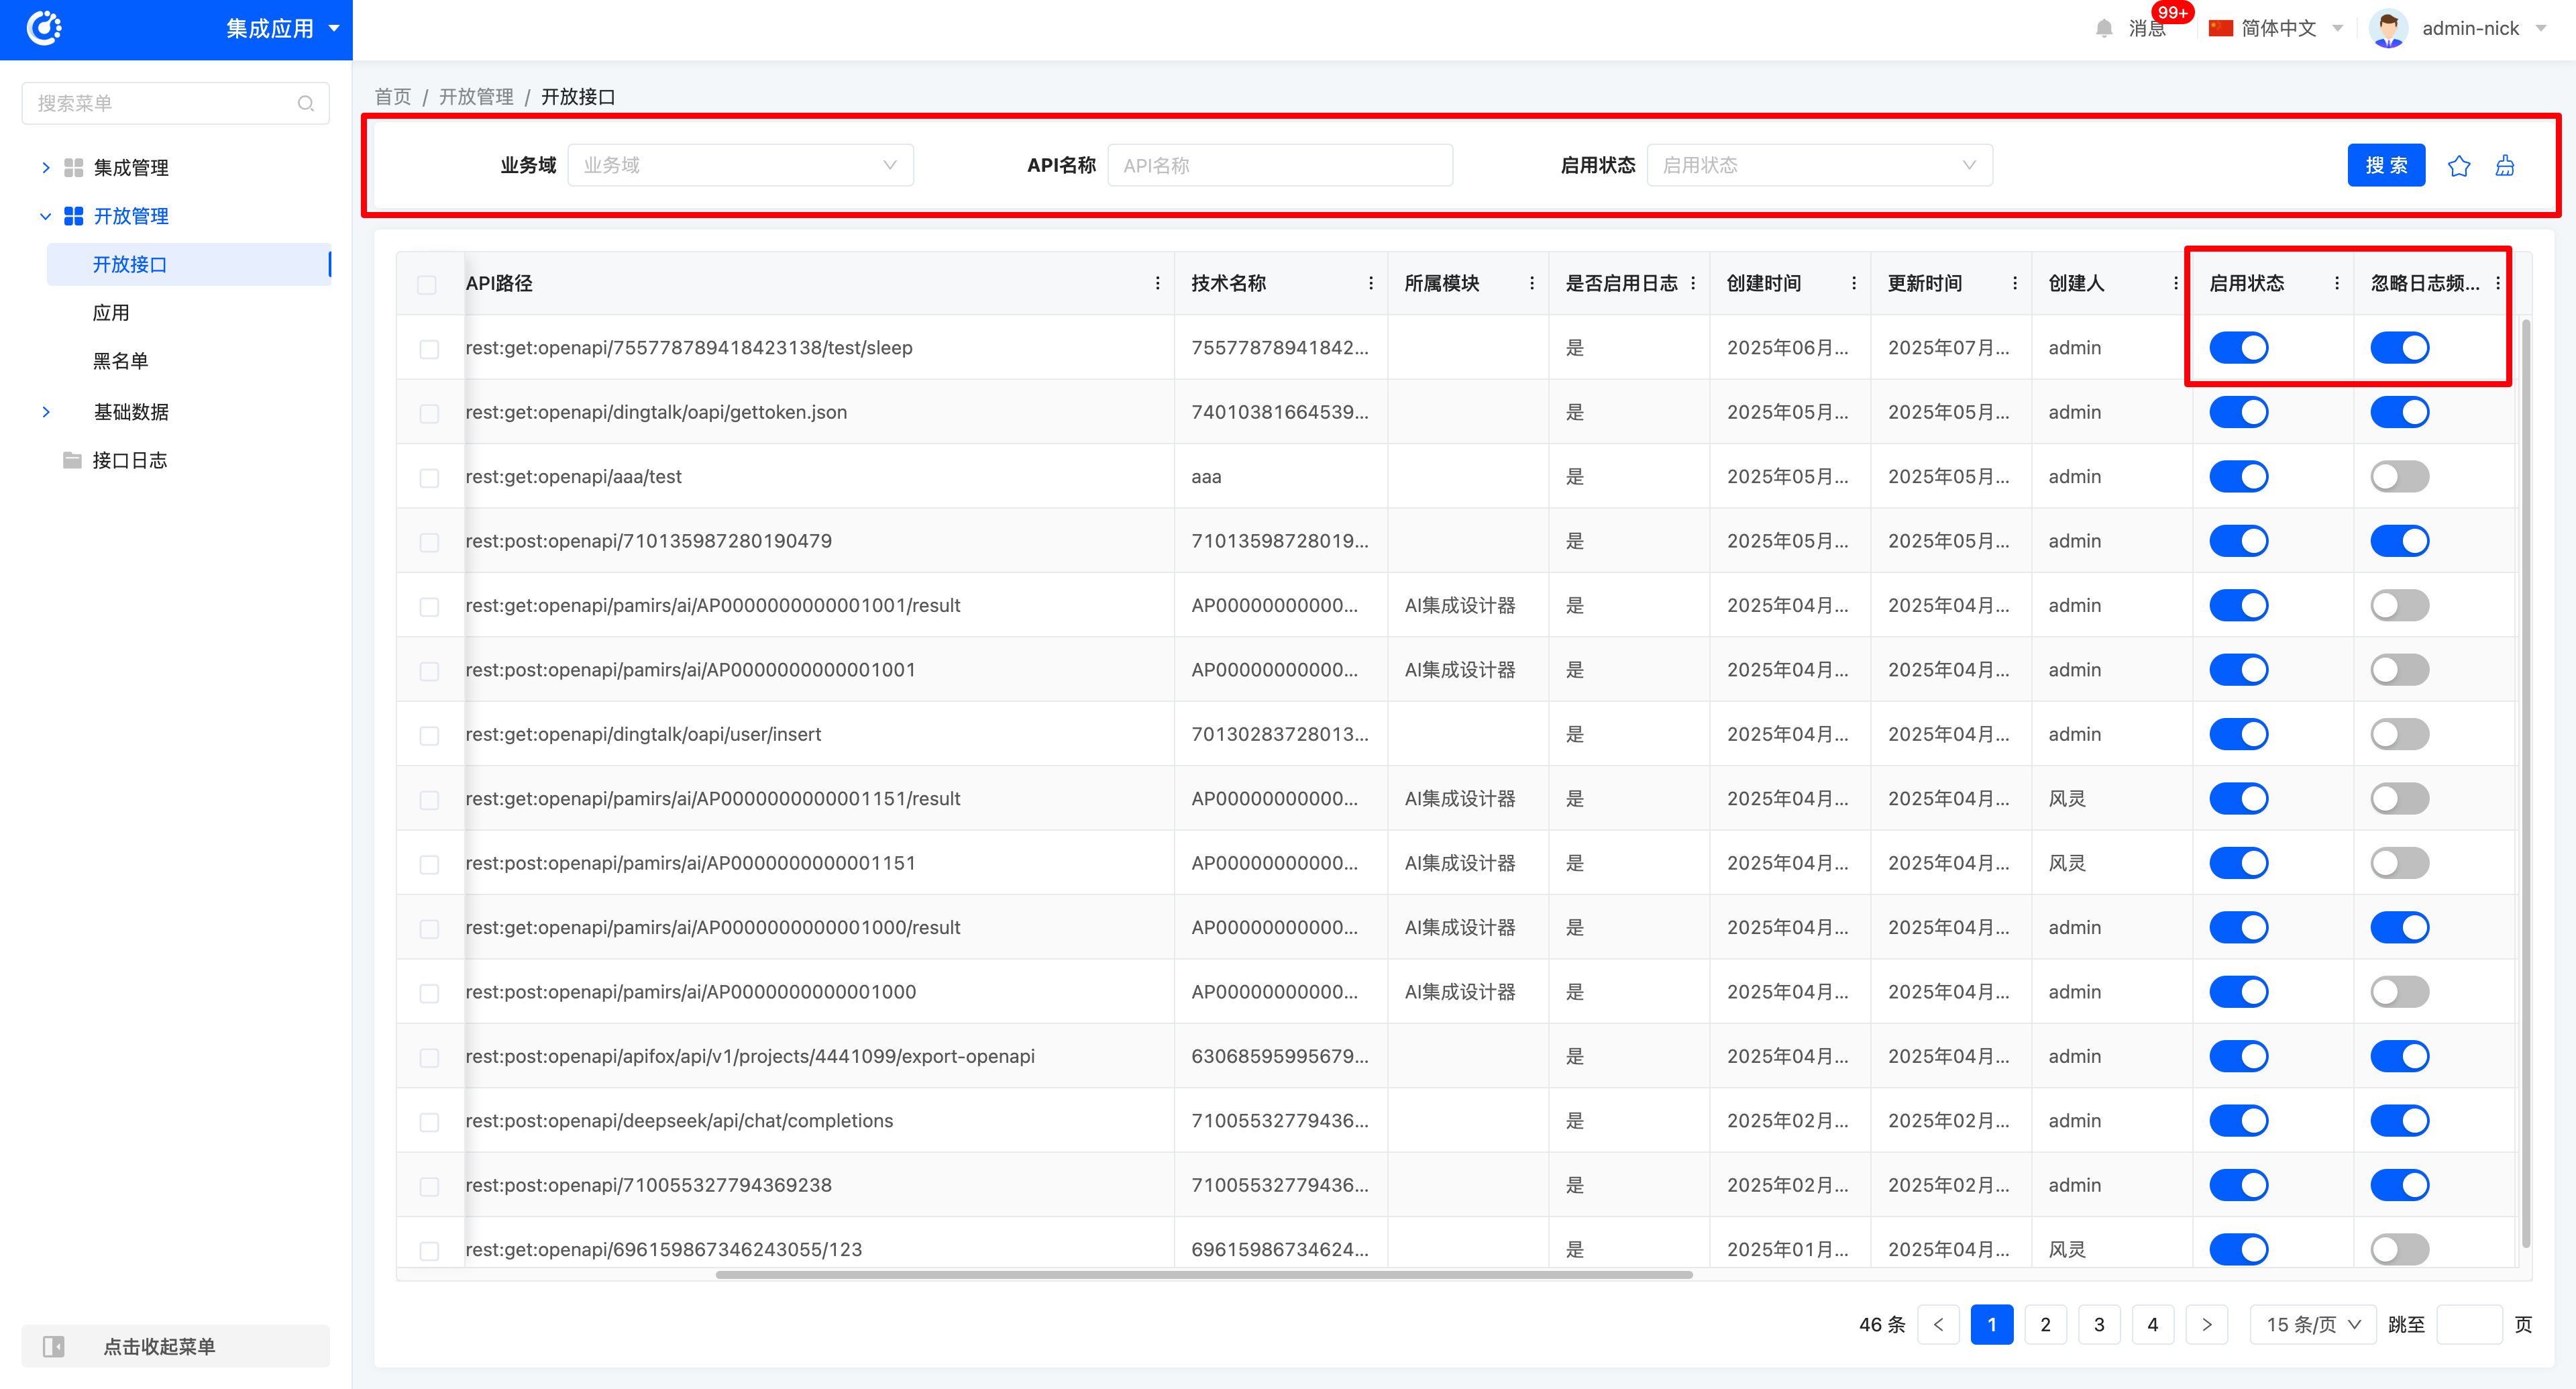
1. Function Introduction
It supports opening up system capabilities to the outside, including but not limited to key business interfaces such as product information query interface and shipping order query interface. It facilitates unified management and maintenance of open interfaces.
Tip
For more introductions to open interfaces, please refer to the "Integration Designer - Open Platform" document.
2. Operation Methods
- Filtering: Enter or select corresponding filtering criteria according to actual scenario requirements to filter open interfaces.
- Enabling: Change the enabled status of the interface by controlling the switch state.
- Ignore Log Frequency Configuration: Change the log frequency of the interface by controlling the switch state.
Note
If the "Ignore Log Frequency Configuration" switch is not enabled, the system will only record part of the log content. Under normal operation, this configuration can be disabled to save resources. If problems occur during operation, this configuration can be enabled, and the system will fully record the detailed request and response information of interface logs for troubleshooting and review.
(II) Applications
1. Function Introduction
It supports opening up system capabilities to the outside and allows multiple interfaces to be integrated into a single application for external opening, providing users with a convenient and efficient way to open up capabilities.
Tip
For more introductions to applications, please refer to the "Integration Designer - Open Platform" document.
2. Operation Methods
- Filtering: Enter or select corresponding filtering criteria according to actual scenario requirements to filter applications.
- Addition: Click "Add Application", enter the required configuration information and save to successfully create a new application.
- Enabling: Change the enabled status of the application by controlling the switch state.
- View Secret Key: Click "View Secret Key" to view the secret key of the application.
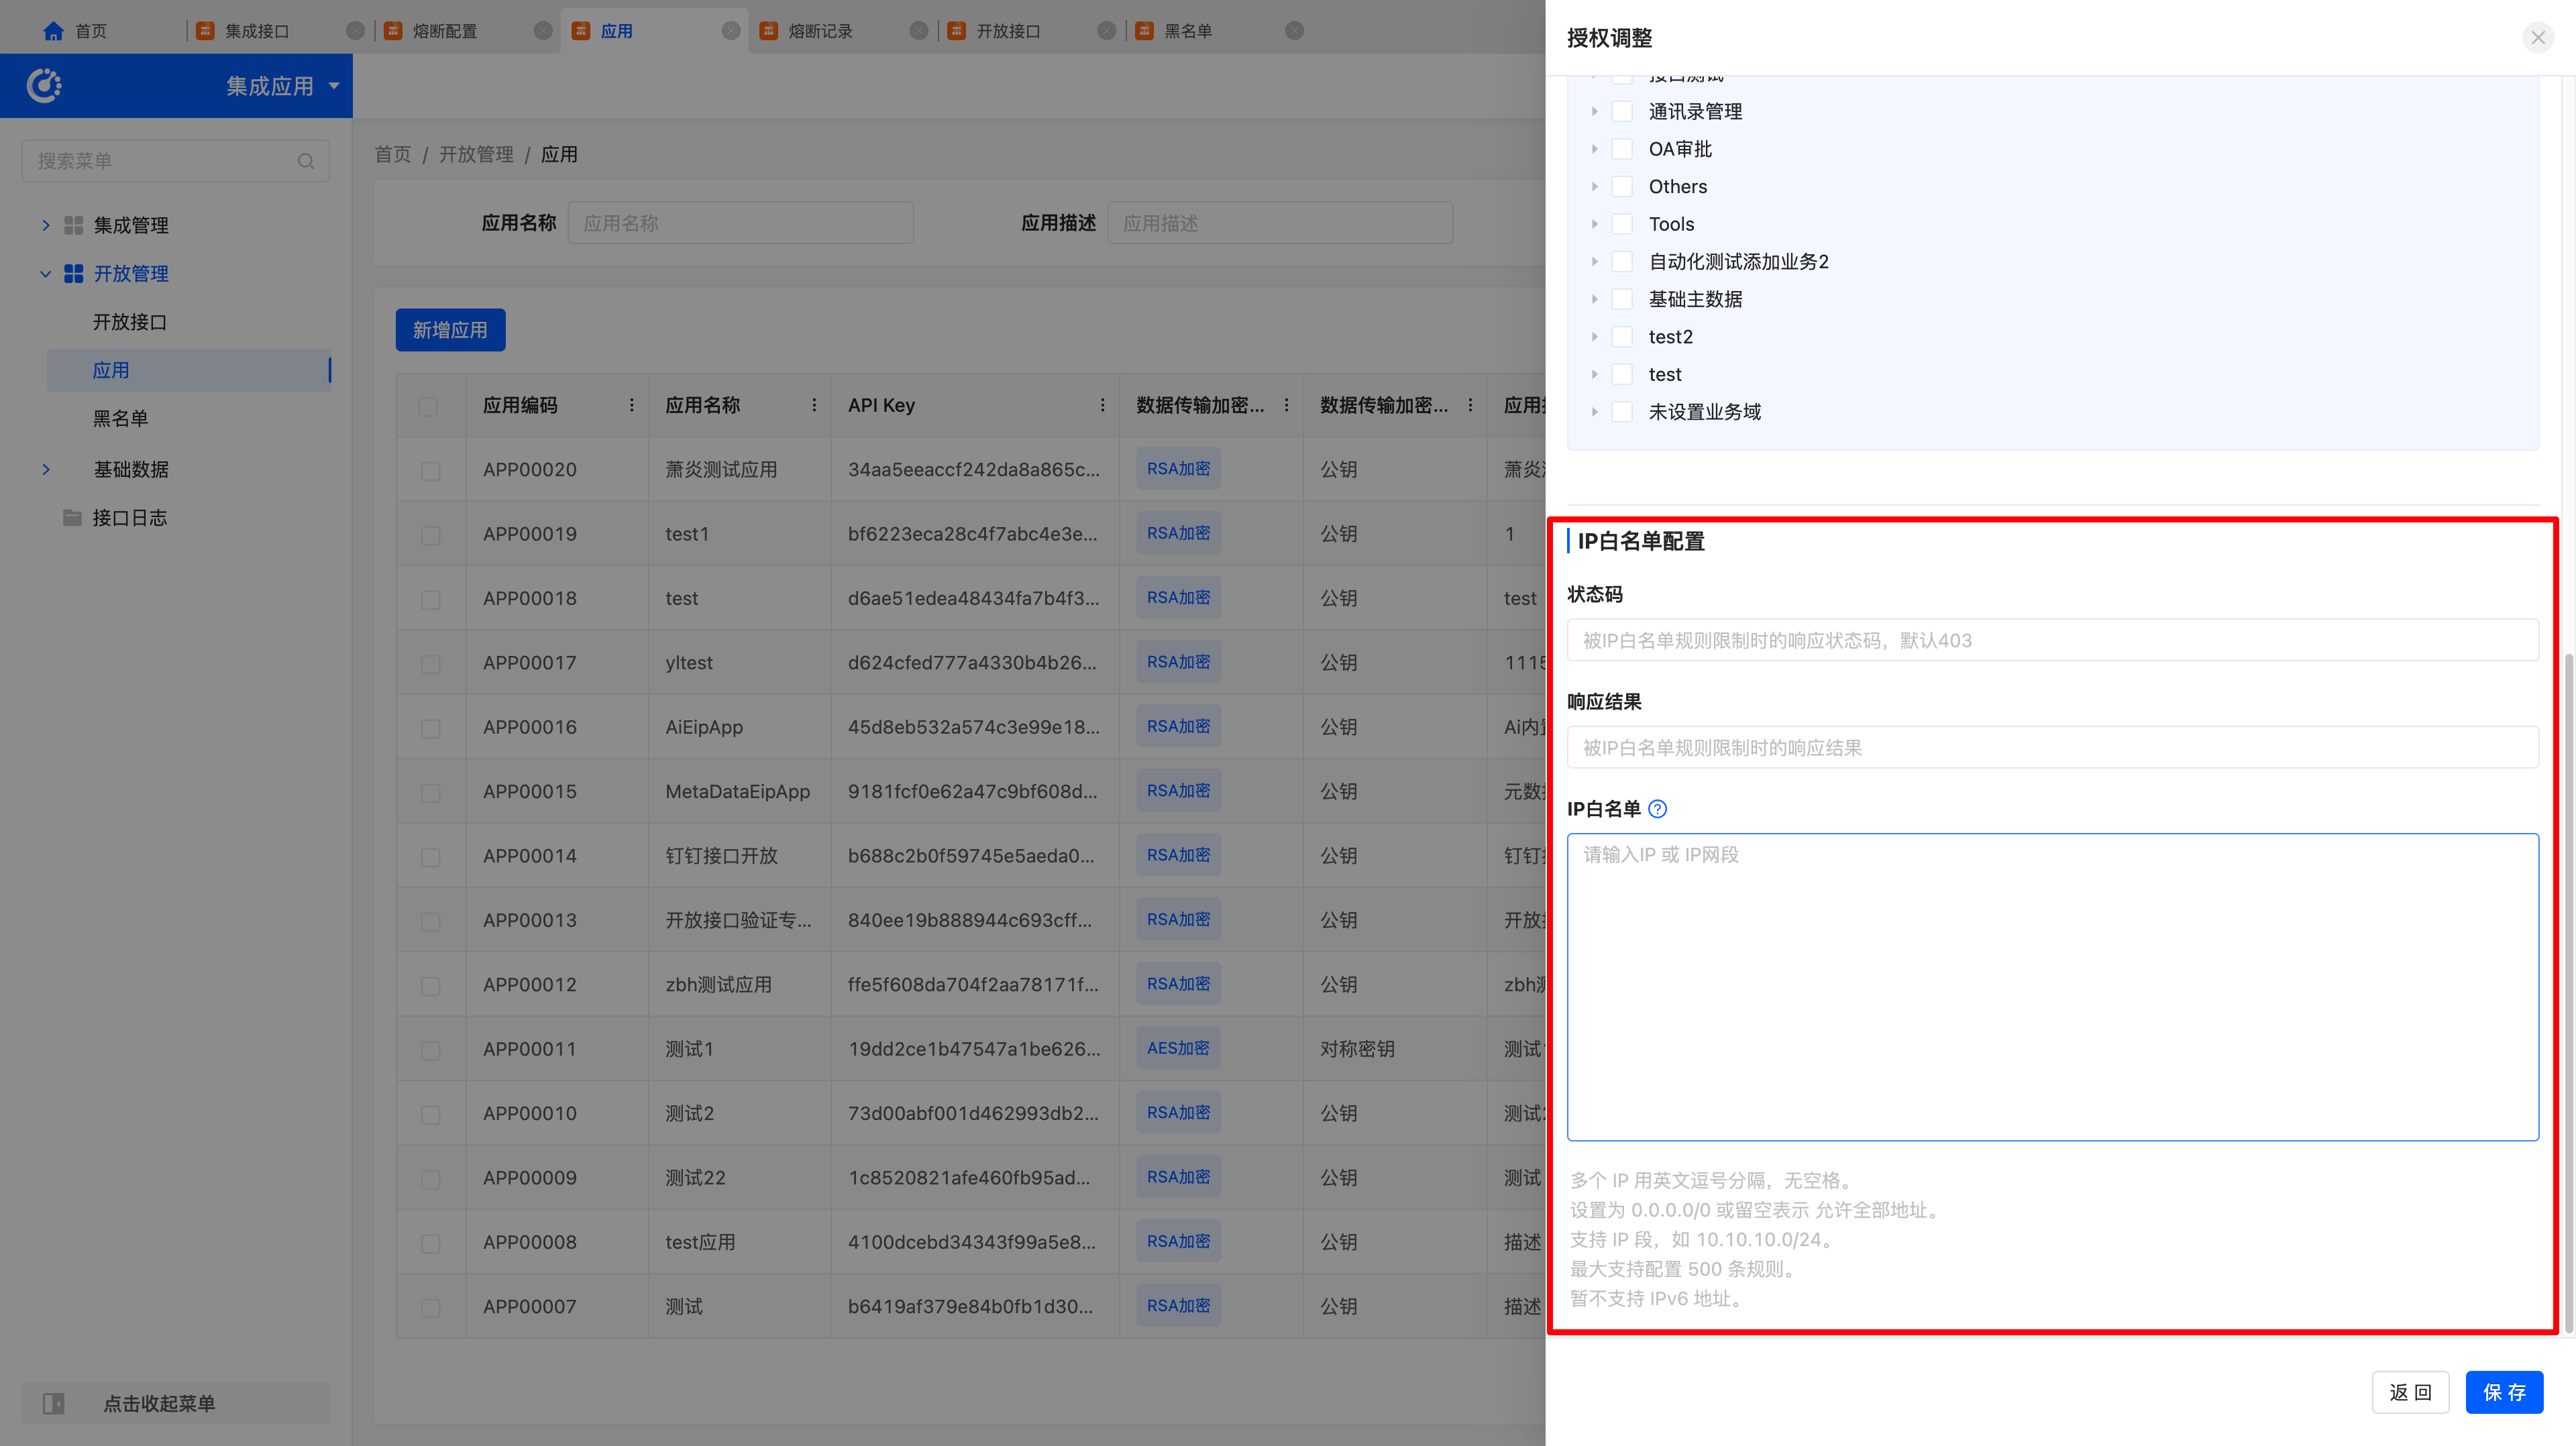
- Authorization Adjustment: Click "Authorization Adjustment" to adjust the scope of interfaces allowed to be opened in the application.
- IP Whitelist: Used to restrict the source IP addresses for interface access. Only IP addresses in the whitelist can access the interfaces provided by the platform.

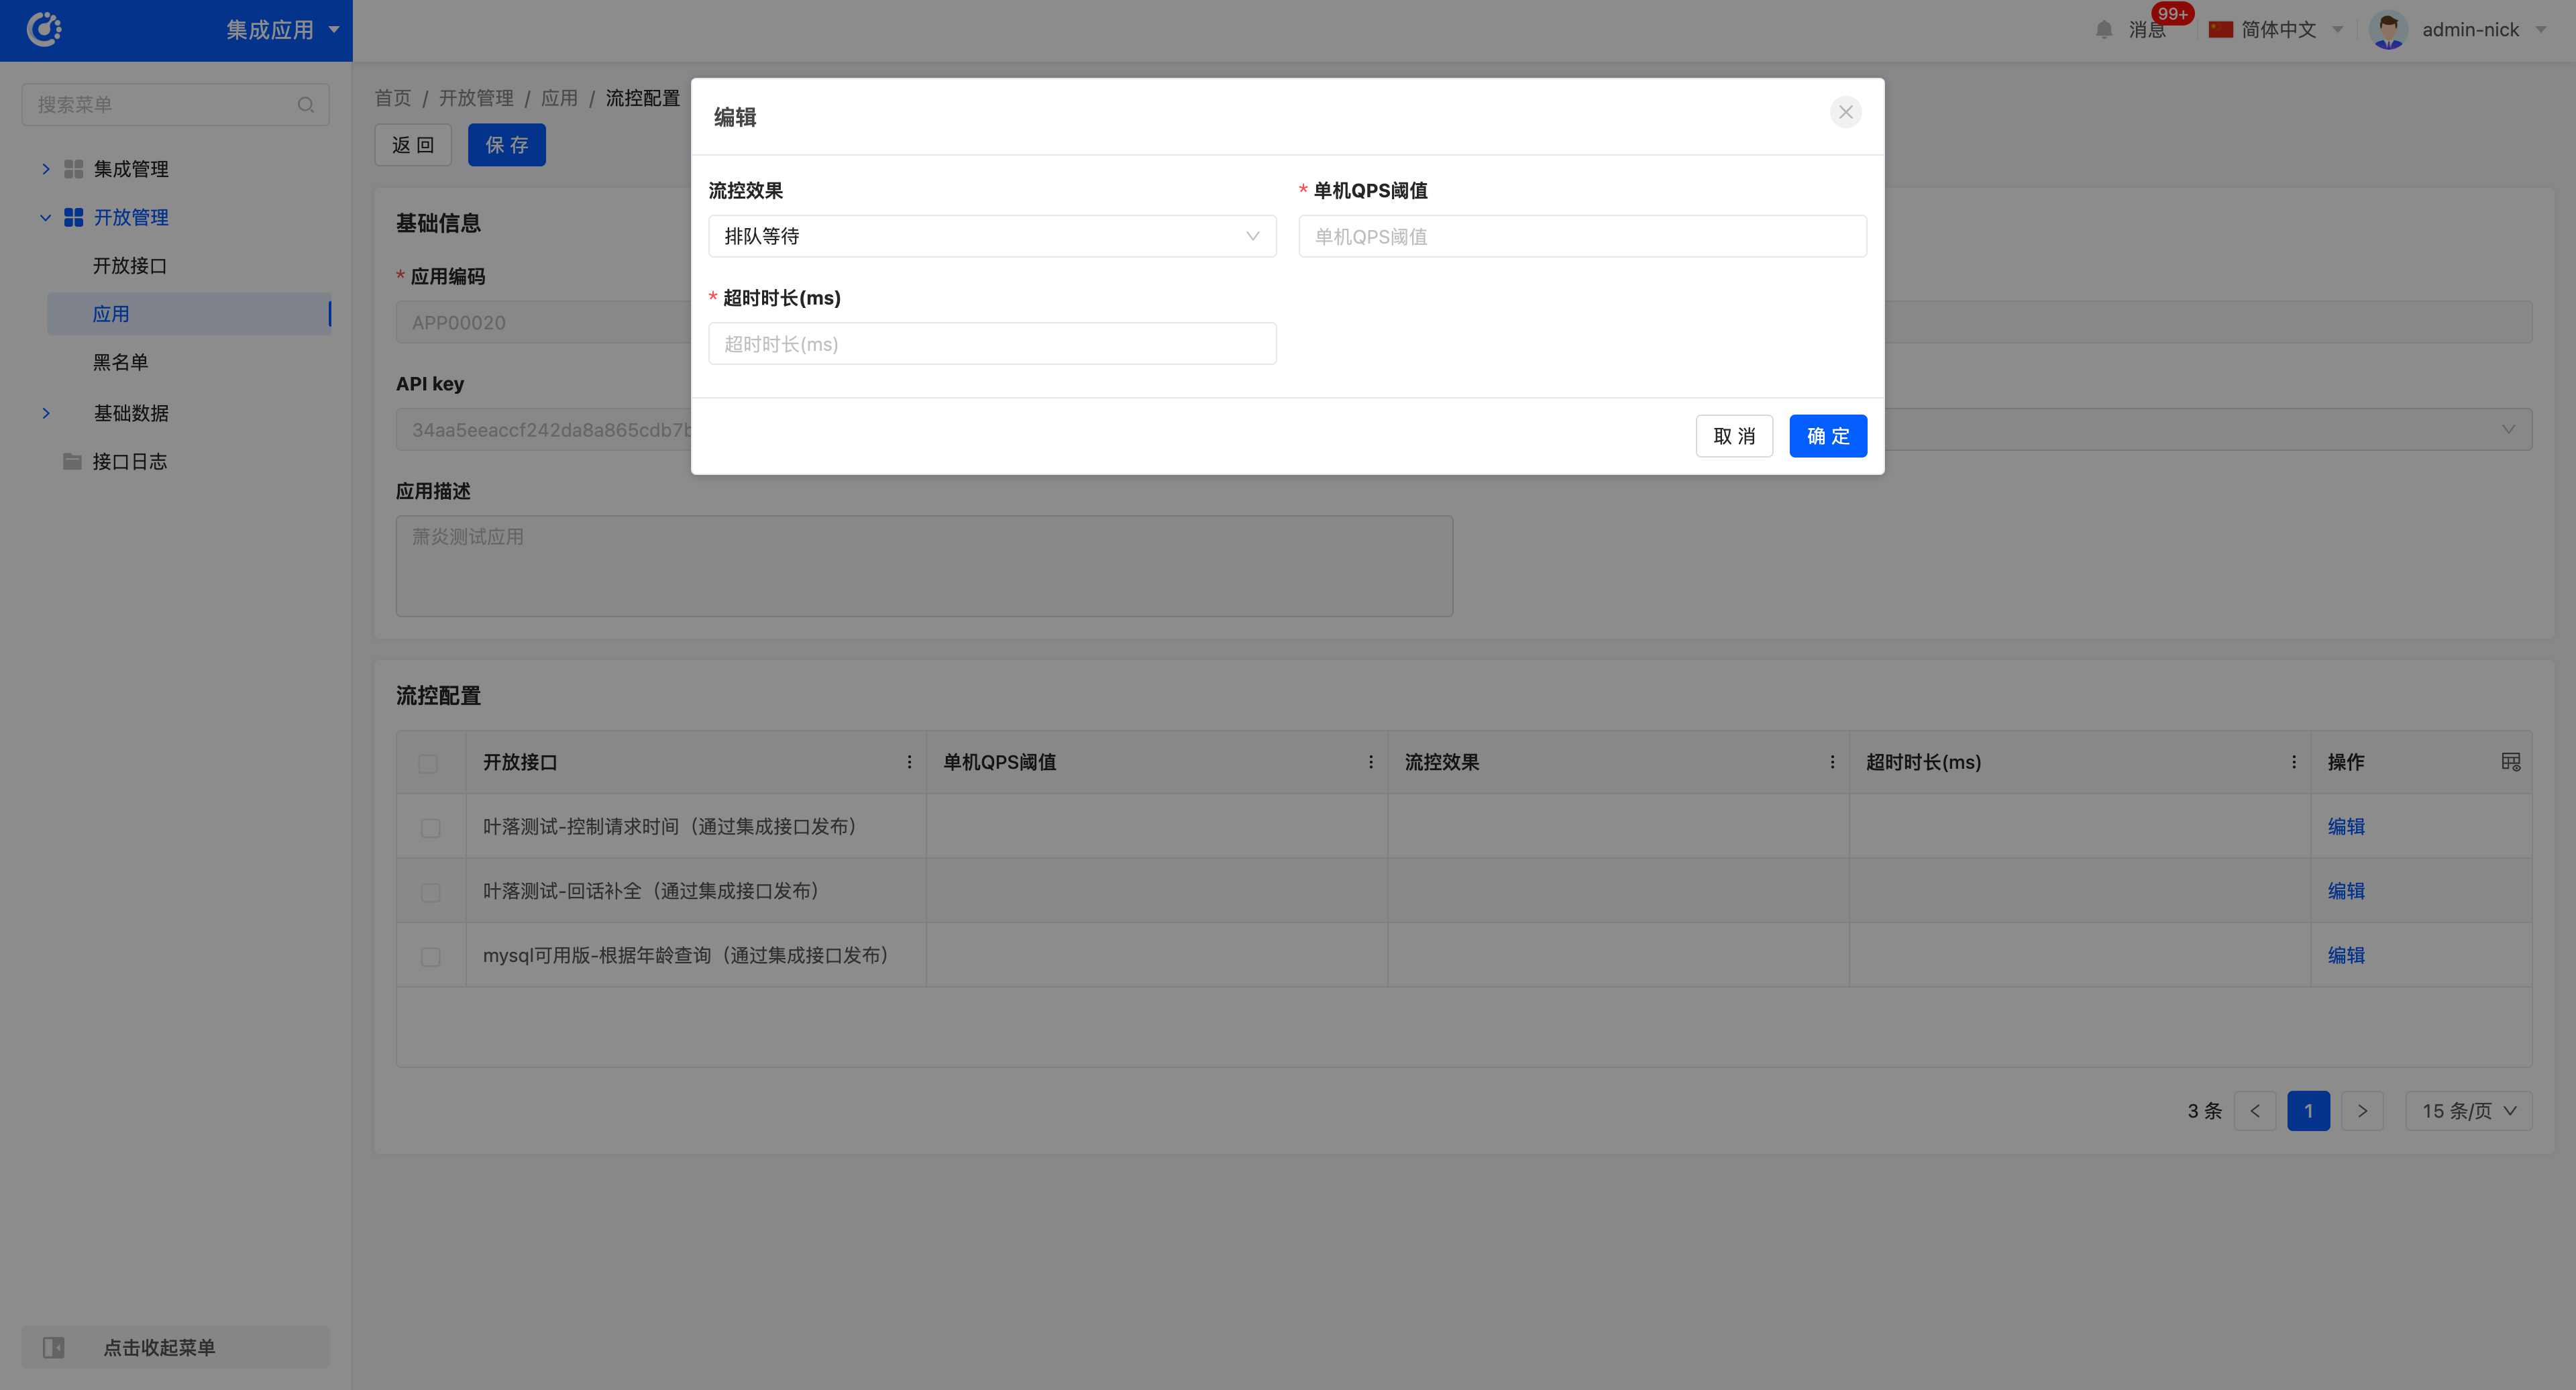
- Flow Control Configuration: Click "Flow Control Configuration" to configure the application. (The flow control mechanism manages and limits system request traffic to prevent system crash due to overload. It ensures that interface request traffic is within the system's capacity to avoid performance issues caused by interface overload.)
- Creation:
- Log in to the platform and navigate to Integration Applications → Open Management → Applications → Flow Control Configuration.
- Click Flow Control Configuration.
- Select an open interface for editing and fill in the flow control rule configuration form, including:
- Single-machine QPS Threshold: The maximum QPS allowed per instance.
- Flow Control Effect: Select the flow control effect (Fast Failure or Queuing Wait).
- Timeout Duration: Set the timeout duration for queuing wait (unit: ms).
- After configuration, click Confirm.
- Creation:
Tip
The flow control mechanism supports single-machine QPS threshold limitation and two flow control effects:
- Fast Failure: When requests exceed the rate limit threshold, the system directly returns error information.
- Queuing Wait: When requests exceed the rate limit threshold, the system will queue the excess requests until there are available processing resources in the queue.
- Editing:
    * Navigate to Integration Applications → Open Management → Applications → Flow Control Configuration, and select the flow control rule to be edited.
    * Click Edit, modify the relevant fields of the flow control rule, and click Confirm to update the rule.
(III) Blacklist
1. Function Introduction
The IP Blacklist function is used to enhance platform security by blocking non-compliant IP requests and preventing malicious access. By setting a blacklist, you can control which IPs are denied access to the platform.
- IP-based blacklist blocking mechanism effectively prevents malicious requests.
- The system first checks the whitelist; only after passing the whitelist check will it check the blacklist. Even if an IP is in the whitelist, if it is also in the blacklist, it will still be denied access.
- Supports flexible configuration and real-time effect. IP blacklists can be configured manually or via batch import.
2. Operation Methods
- View: View currently configured blacklist records.
- Add: Add new IPs or IP CIDR blocks.
- Add a blacklist rule:
- Application: Select an application (required).
- IP: Enter a single IP or CIDR block (required).
- Response Message: The return message when blocked by the blacklist.
- Status Code: The returned HTTP status code (default 403).
- Add a blacklist rule:

- Edit: Modify existing blacklist records.
- Delete: Remove records from the blacklist.
- Batch Import: Support batch adding rules via template import.
III. Interface Logs
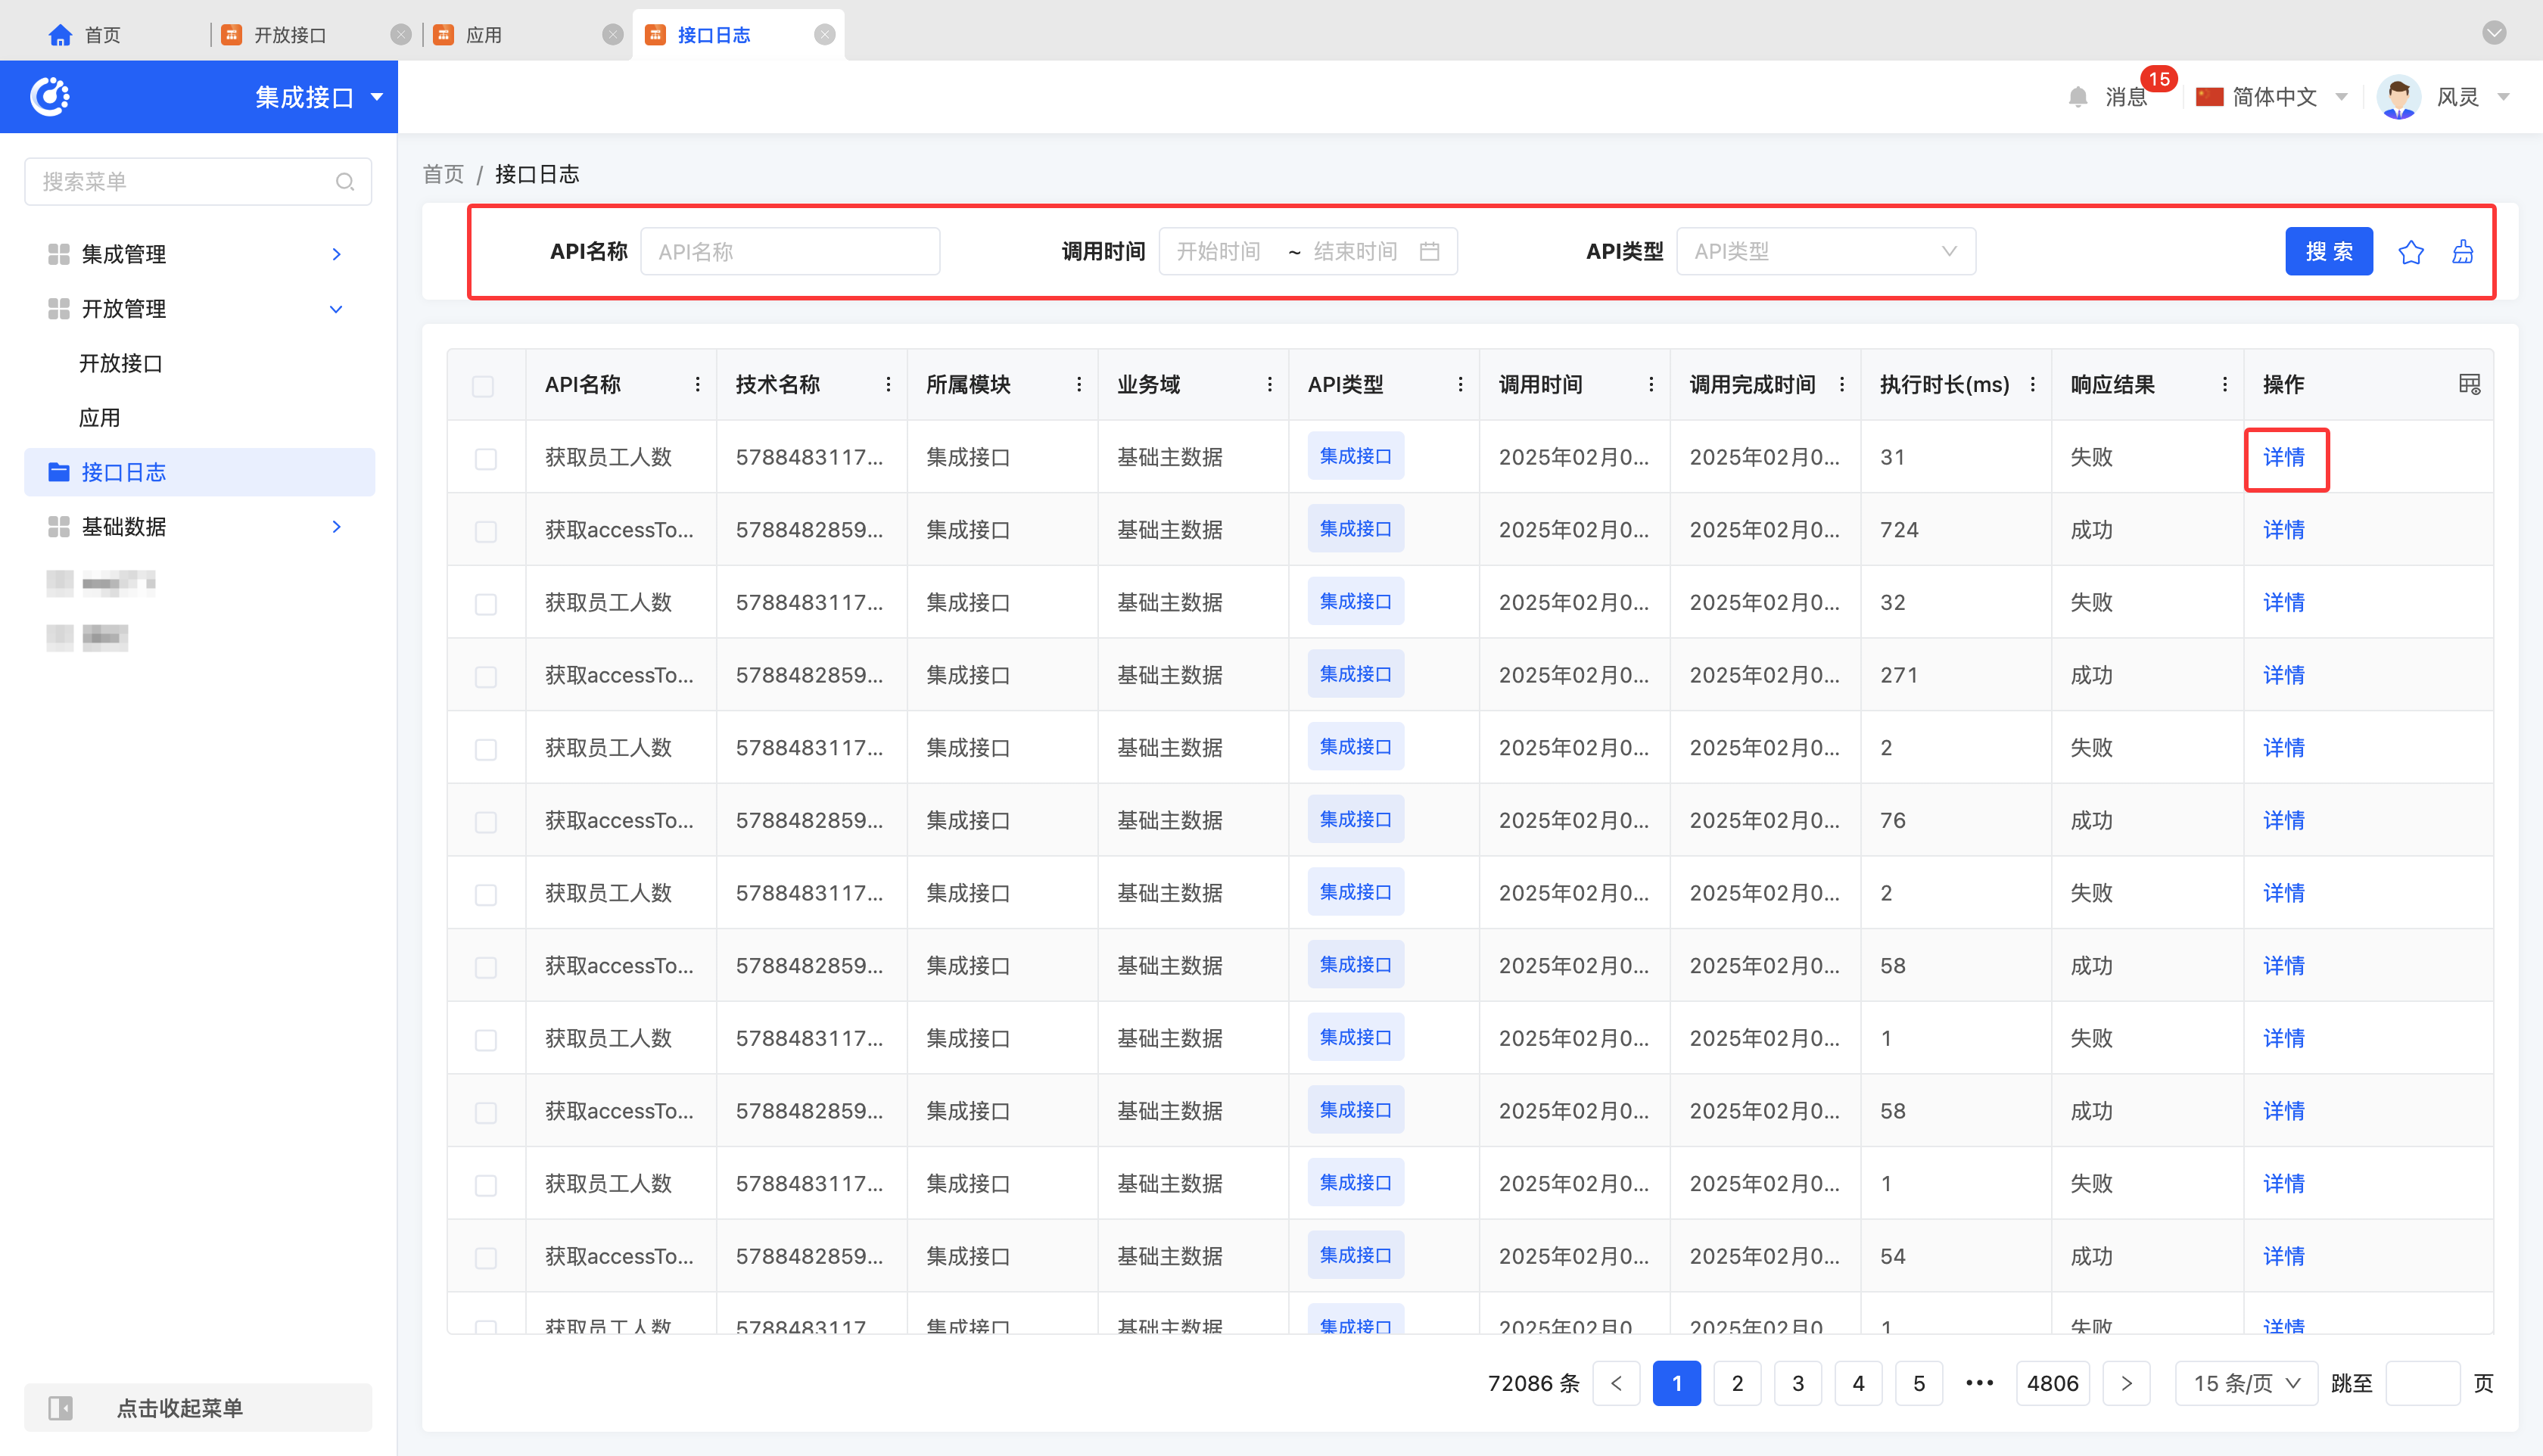
1. Function Introduction
Interface logs are used to record interface call status. When integrating resources and using interfaces, you can check whether the interface is successfully called in the interface logs and make corresponding adjustments and optimizations based on the interface's execution status.
Tip
For more introductions to interface logs, please refer to the "Integration Designer - Interface Logs" document.
2. Operation Methods
- Filtering: Enter or select corresponding filtering criteria according to actual scenario requirements to filter interface logs.
- Details: Click "Details" to view detailed information of the selected application log, including basic information, execution information, and parameter information.
IV. Basic Data
(I) Business Domains
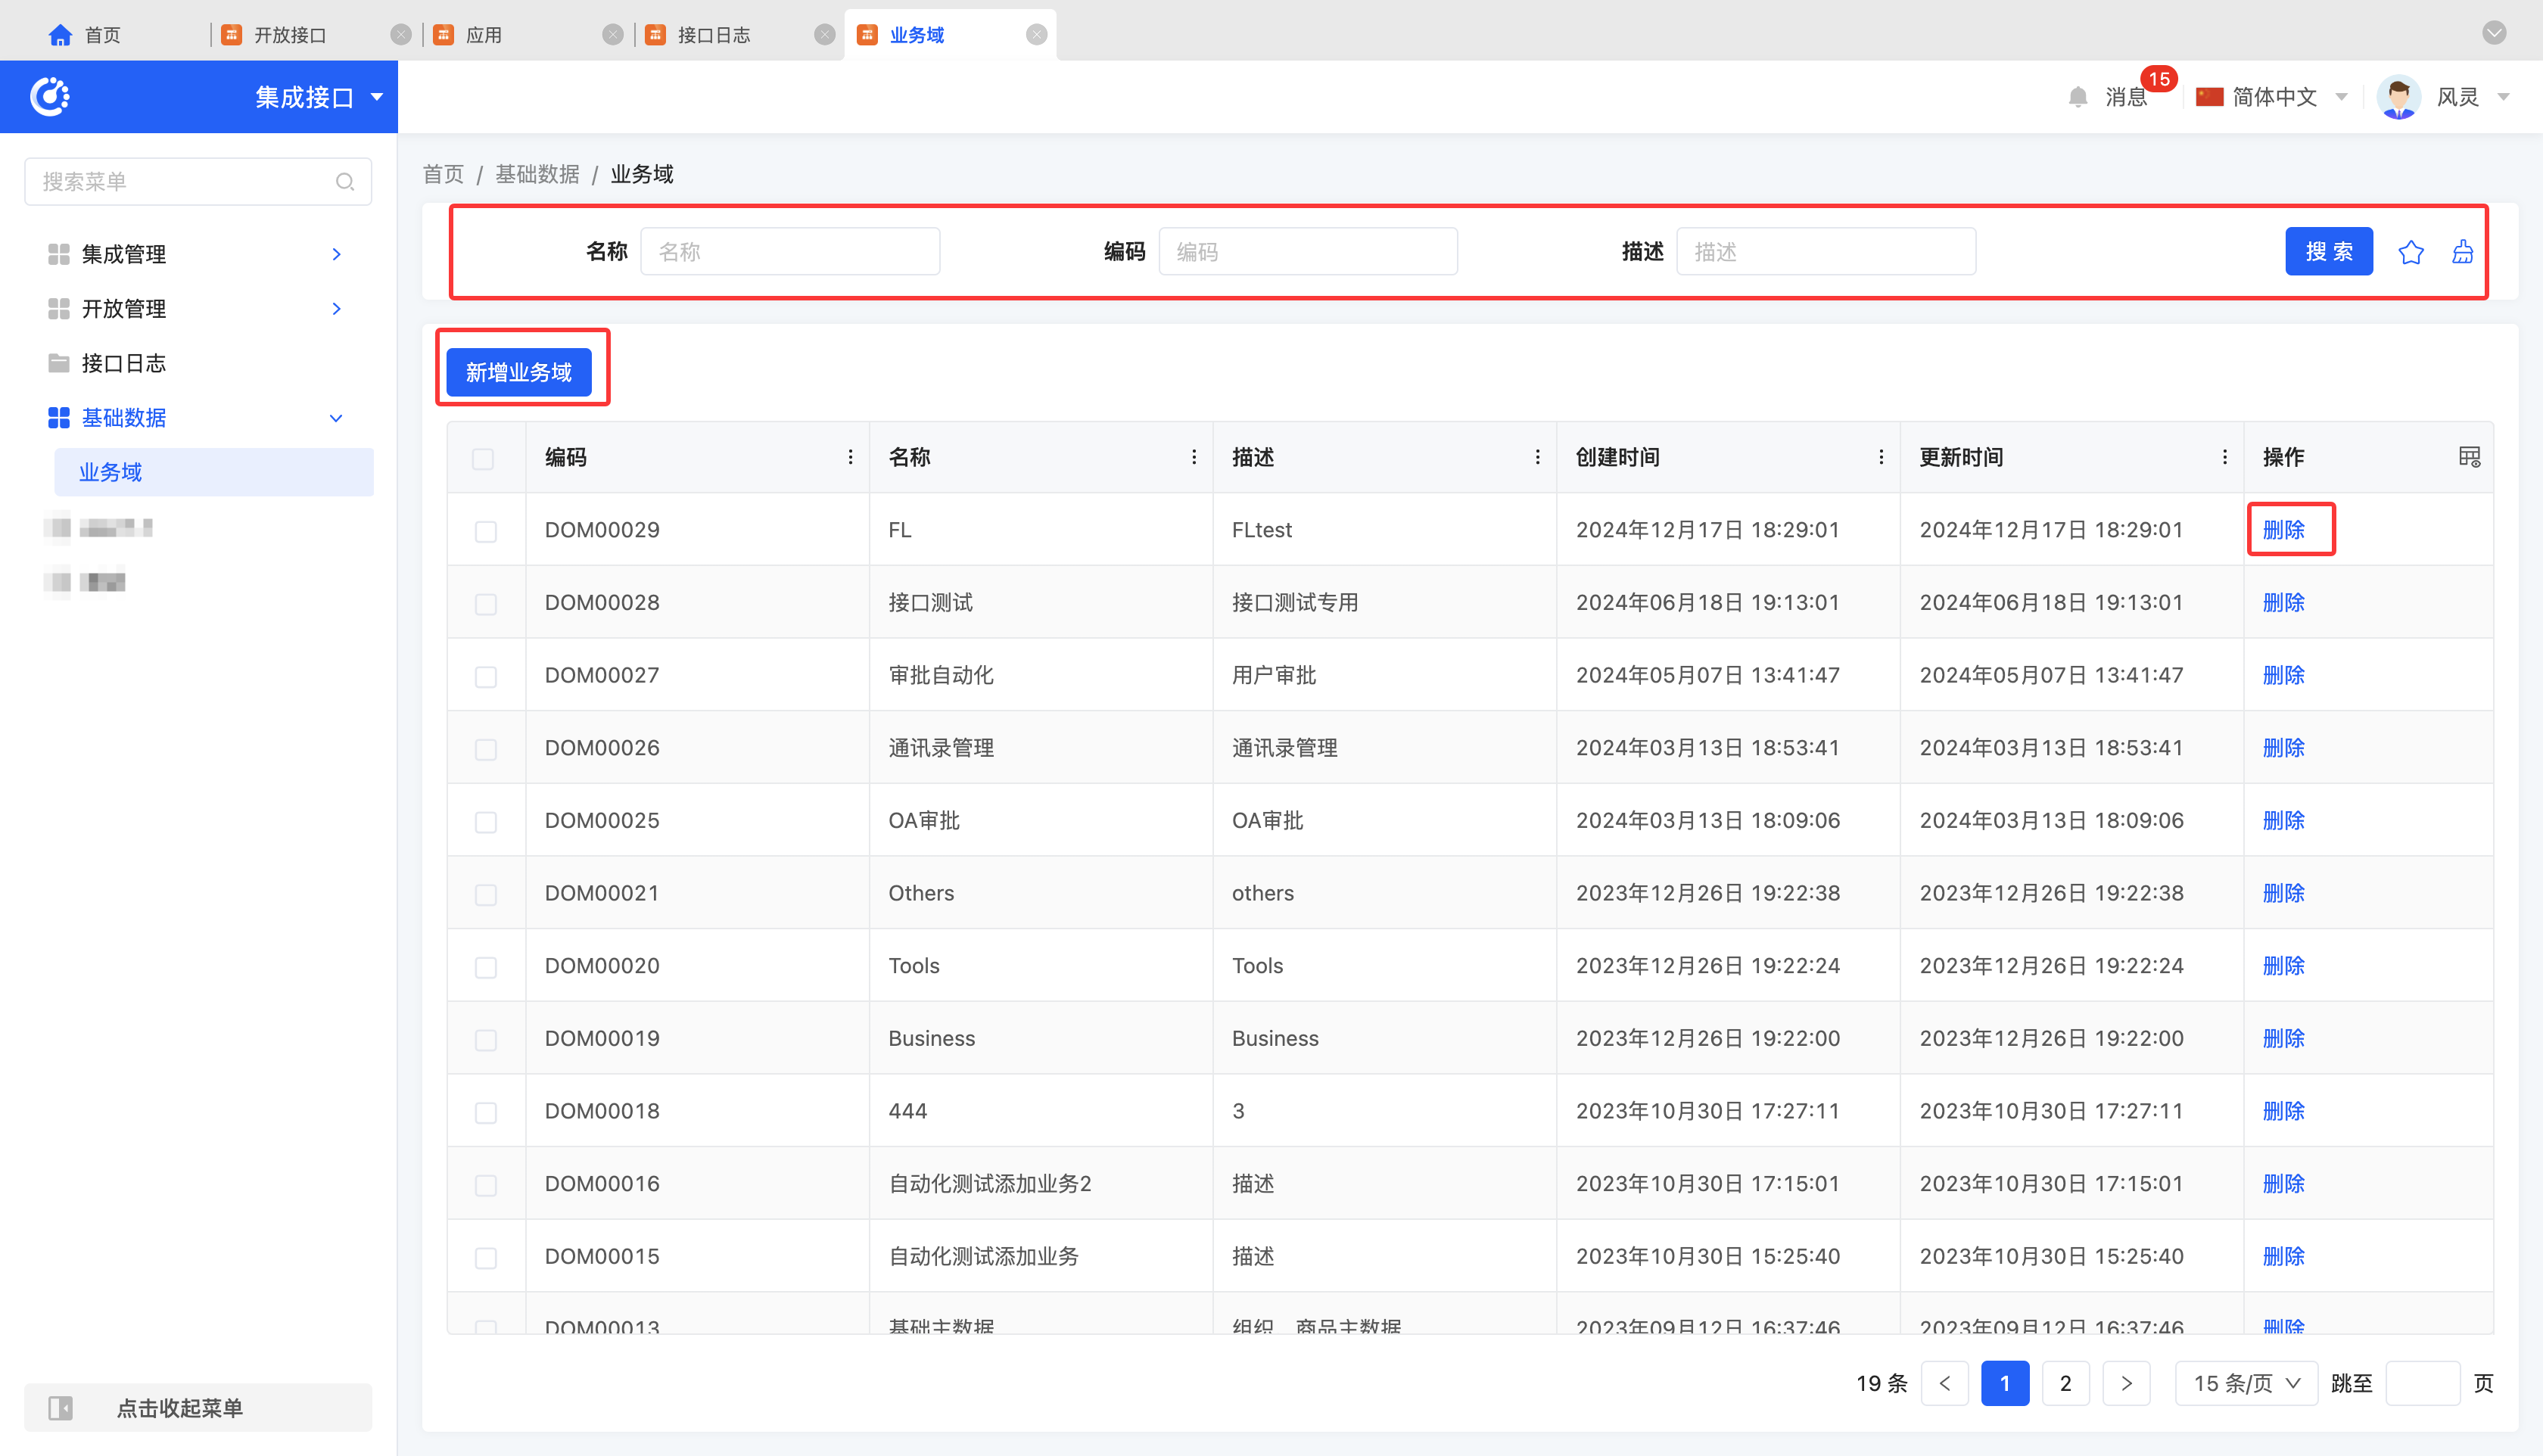
1. Function Introduction
Integration applications and open interfaces can be systematically classified and managed by business domains to improve management efficiency and accuracy.
Tip
For more introductions to business domains, please refer to the "Integration Designer - Business Domains" document.
2. Operation Methods
- Filtering: Enter or select corresponding filtering criteria according to actual scenario requirements to filter business domains.
- Add: Click "Create", enter the required configuration information and save to successfully create a new business domain.
- Delete: Select a business domain and click "Delete" to remove the business domain.