The Oinone Application Center integrates various applications and modules, aiming to provide users with rich and diverse functional options to meet the needs in different scenarios. These applications cover multiple fields such as business collaboration, data analysis, and operation management. Users can easily find the required applications in the Application Center according to their actual needs and quickly put them into practical use through simple configuration.
I. App Finder
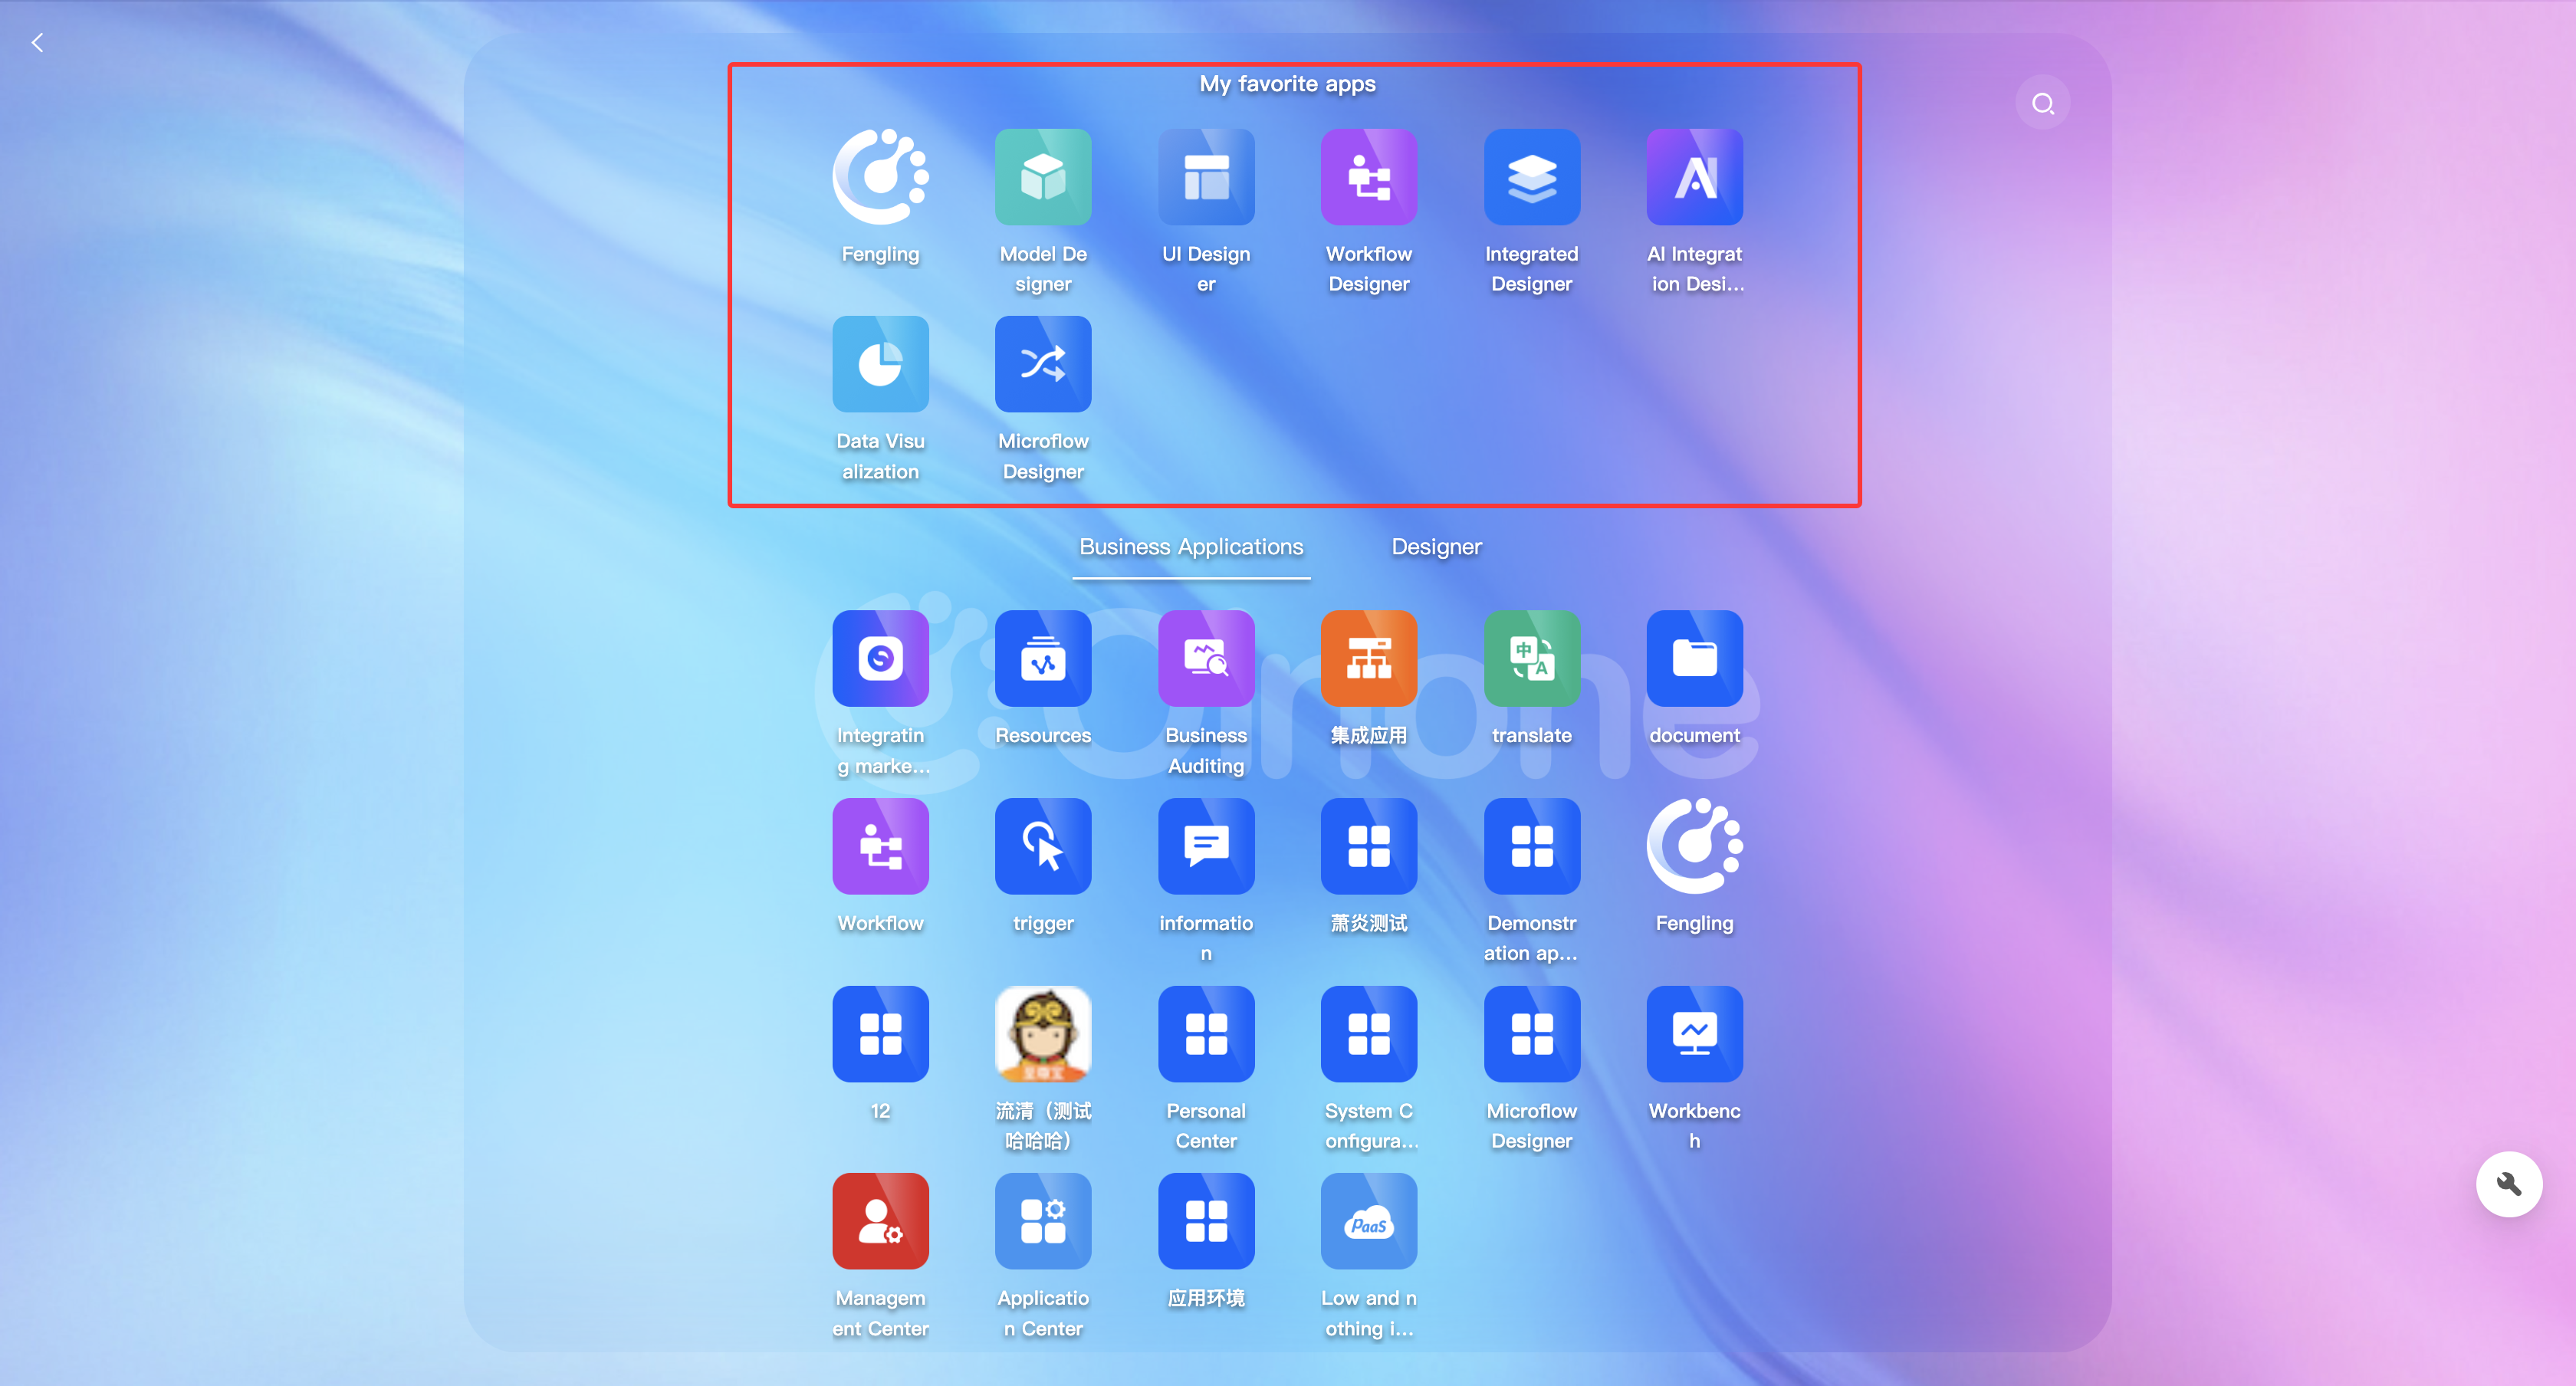
1. Function Introduction
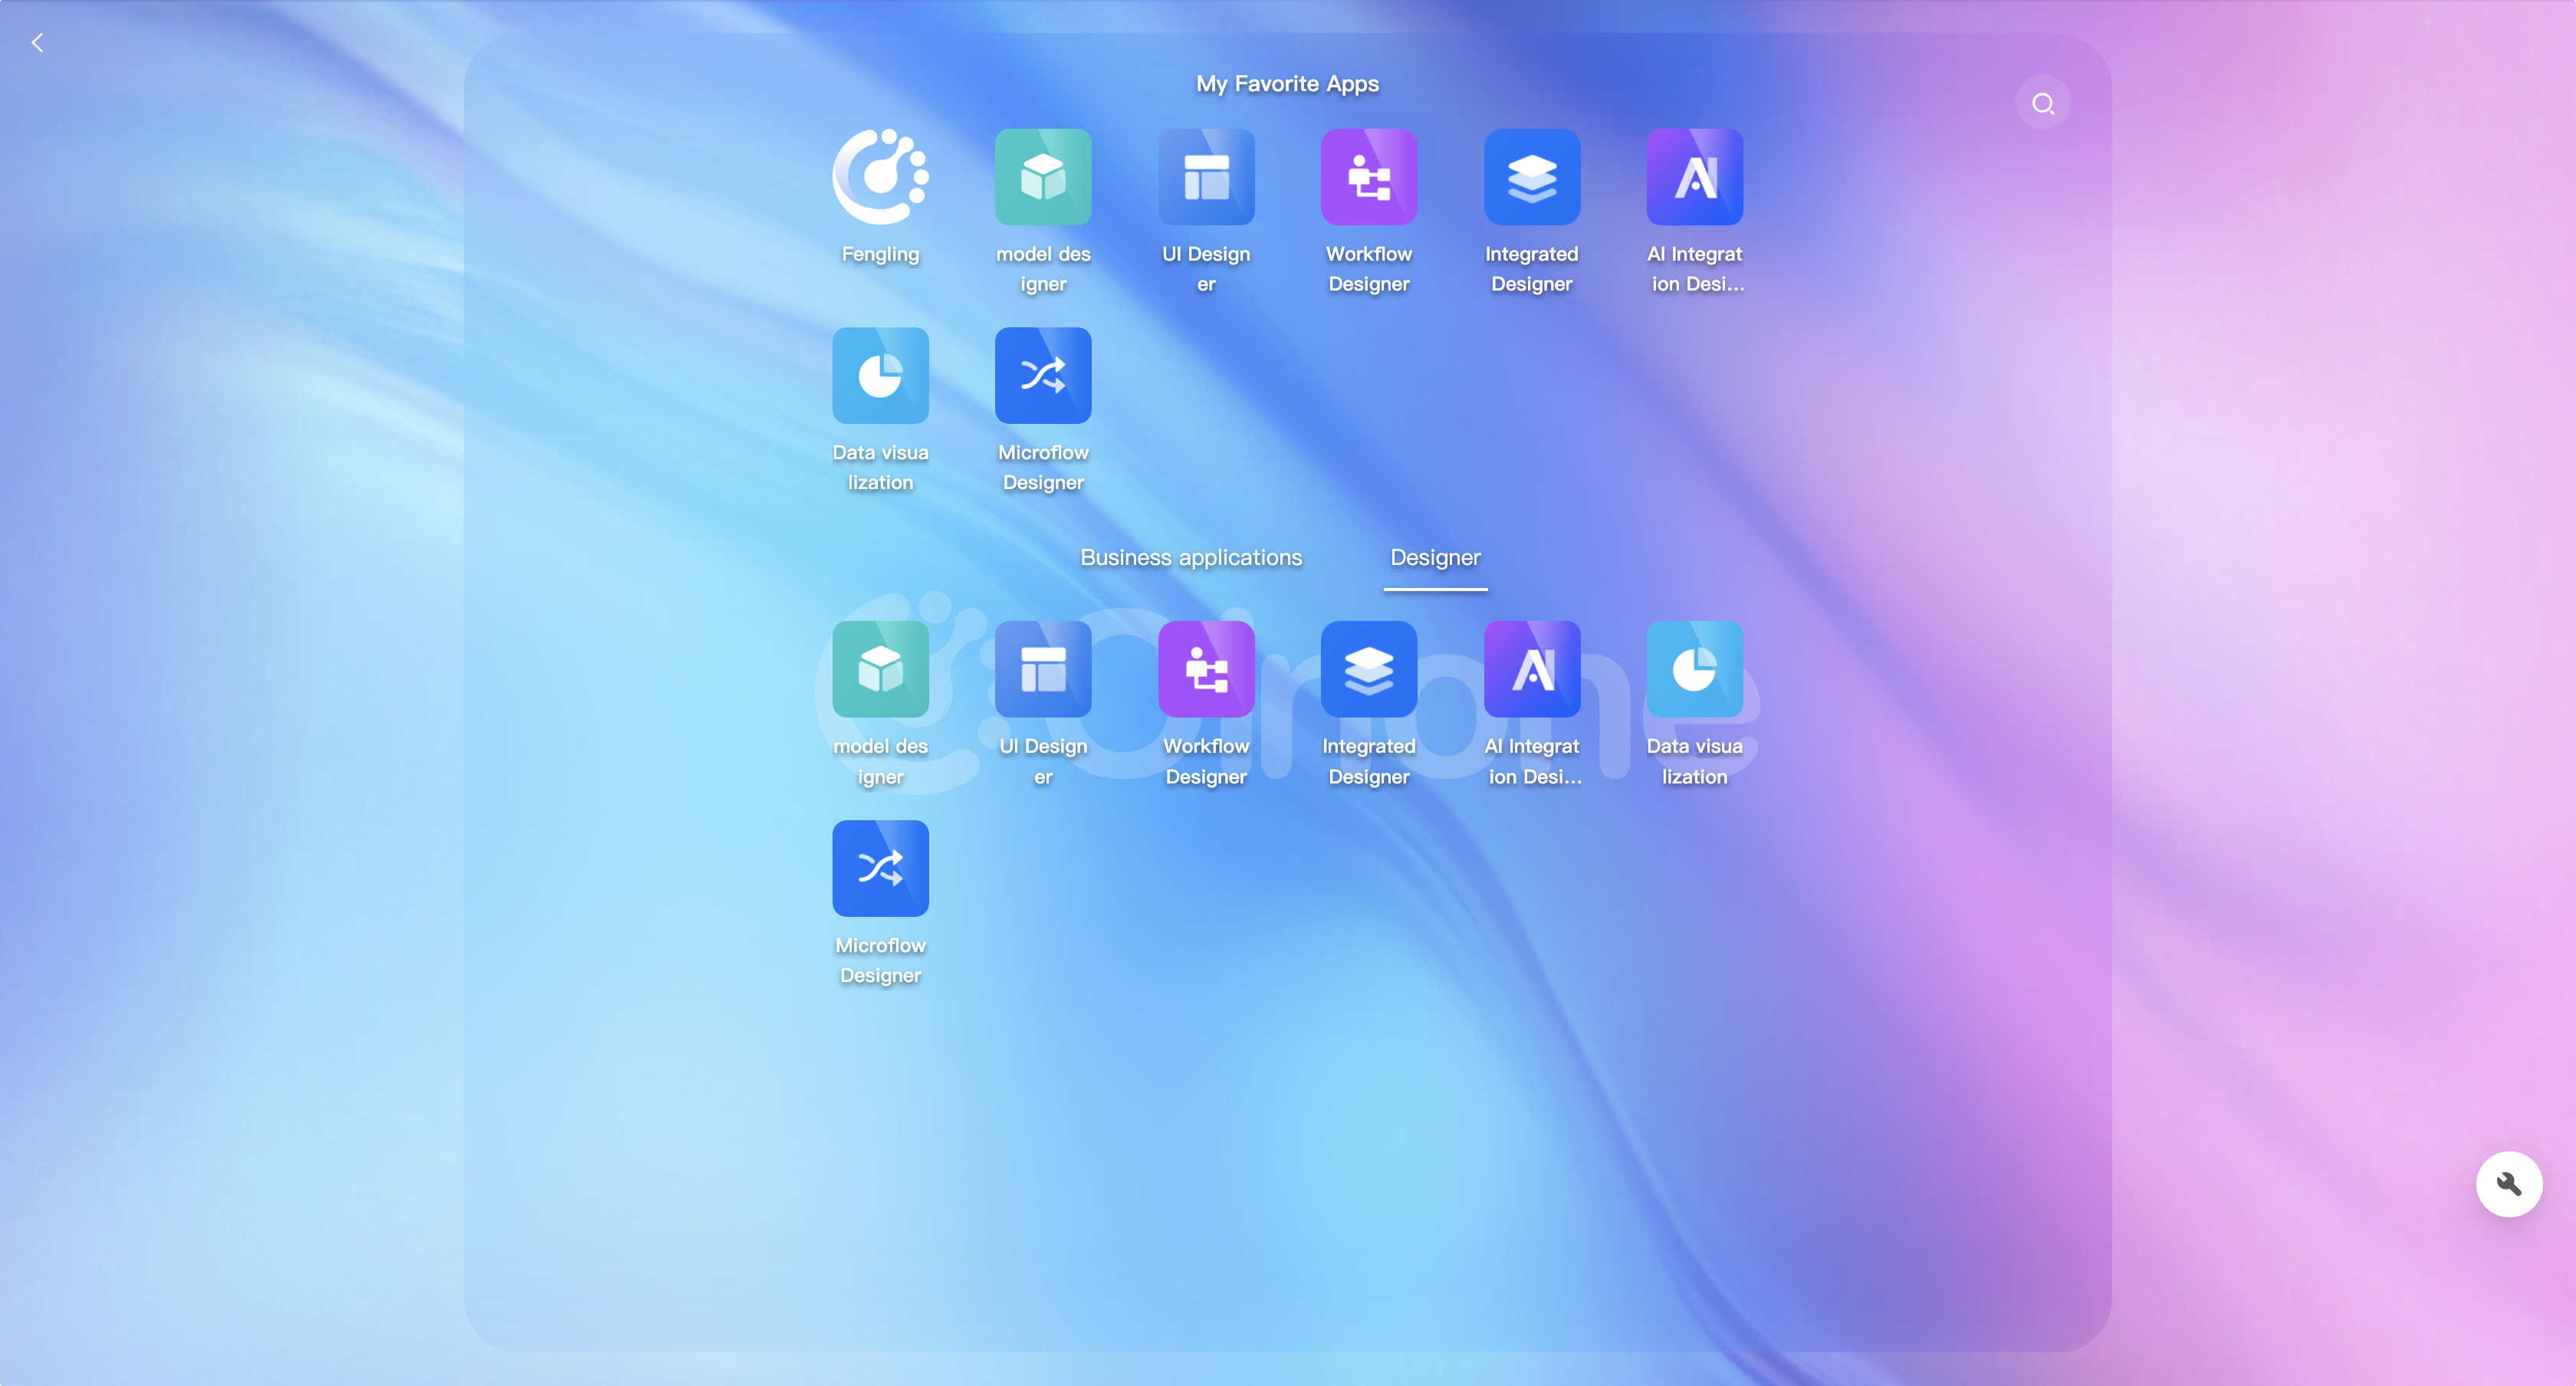
The Oinone platform provides App Finder, which displays the installed applications, including My Favorite Applications, Business Applications, and Designers, and supports search.
- Business Applications: Applications related to business that users can operate.
- Designers: Designer applications provided by the platform, i.e., the platform's no-code capabilities, including: Model Designer, Interface Designer, Process Designer, Integration Designer, AI Integration Designer, Data Visualization, and Microflow Designer.
- My Favorite Applications: Applications favorited in the Application Center.
2. Operation Method
Click the blue area in each application to enter App Finder.

II. Application List
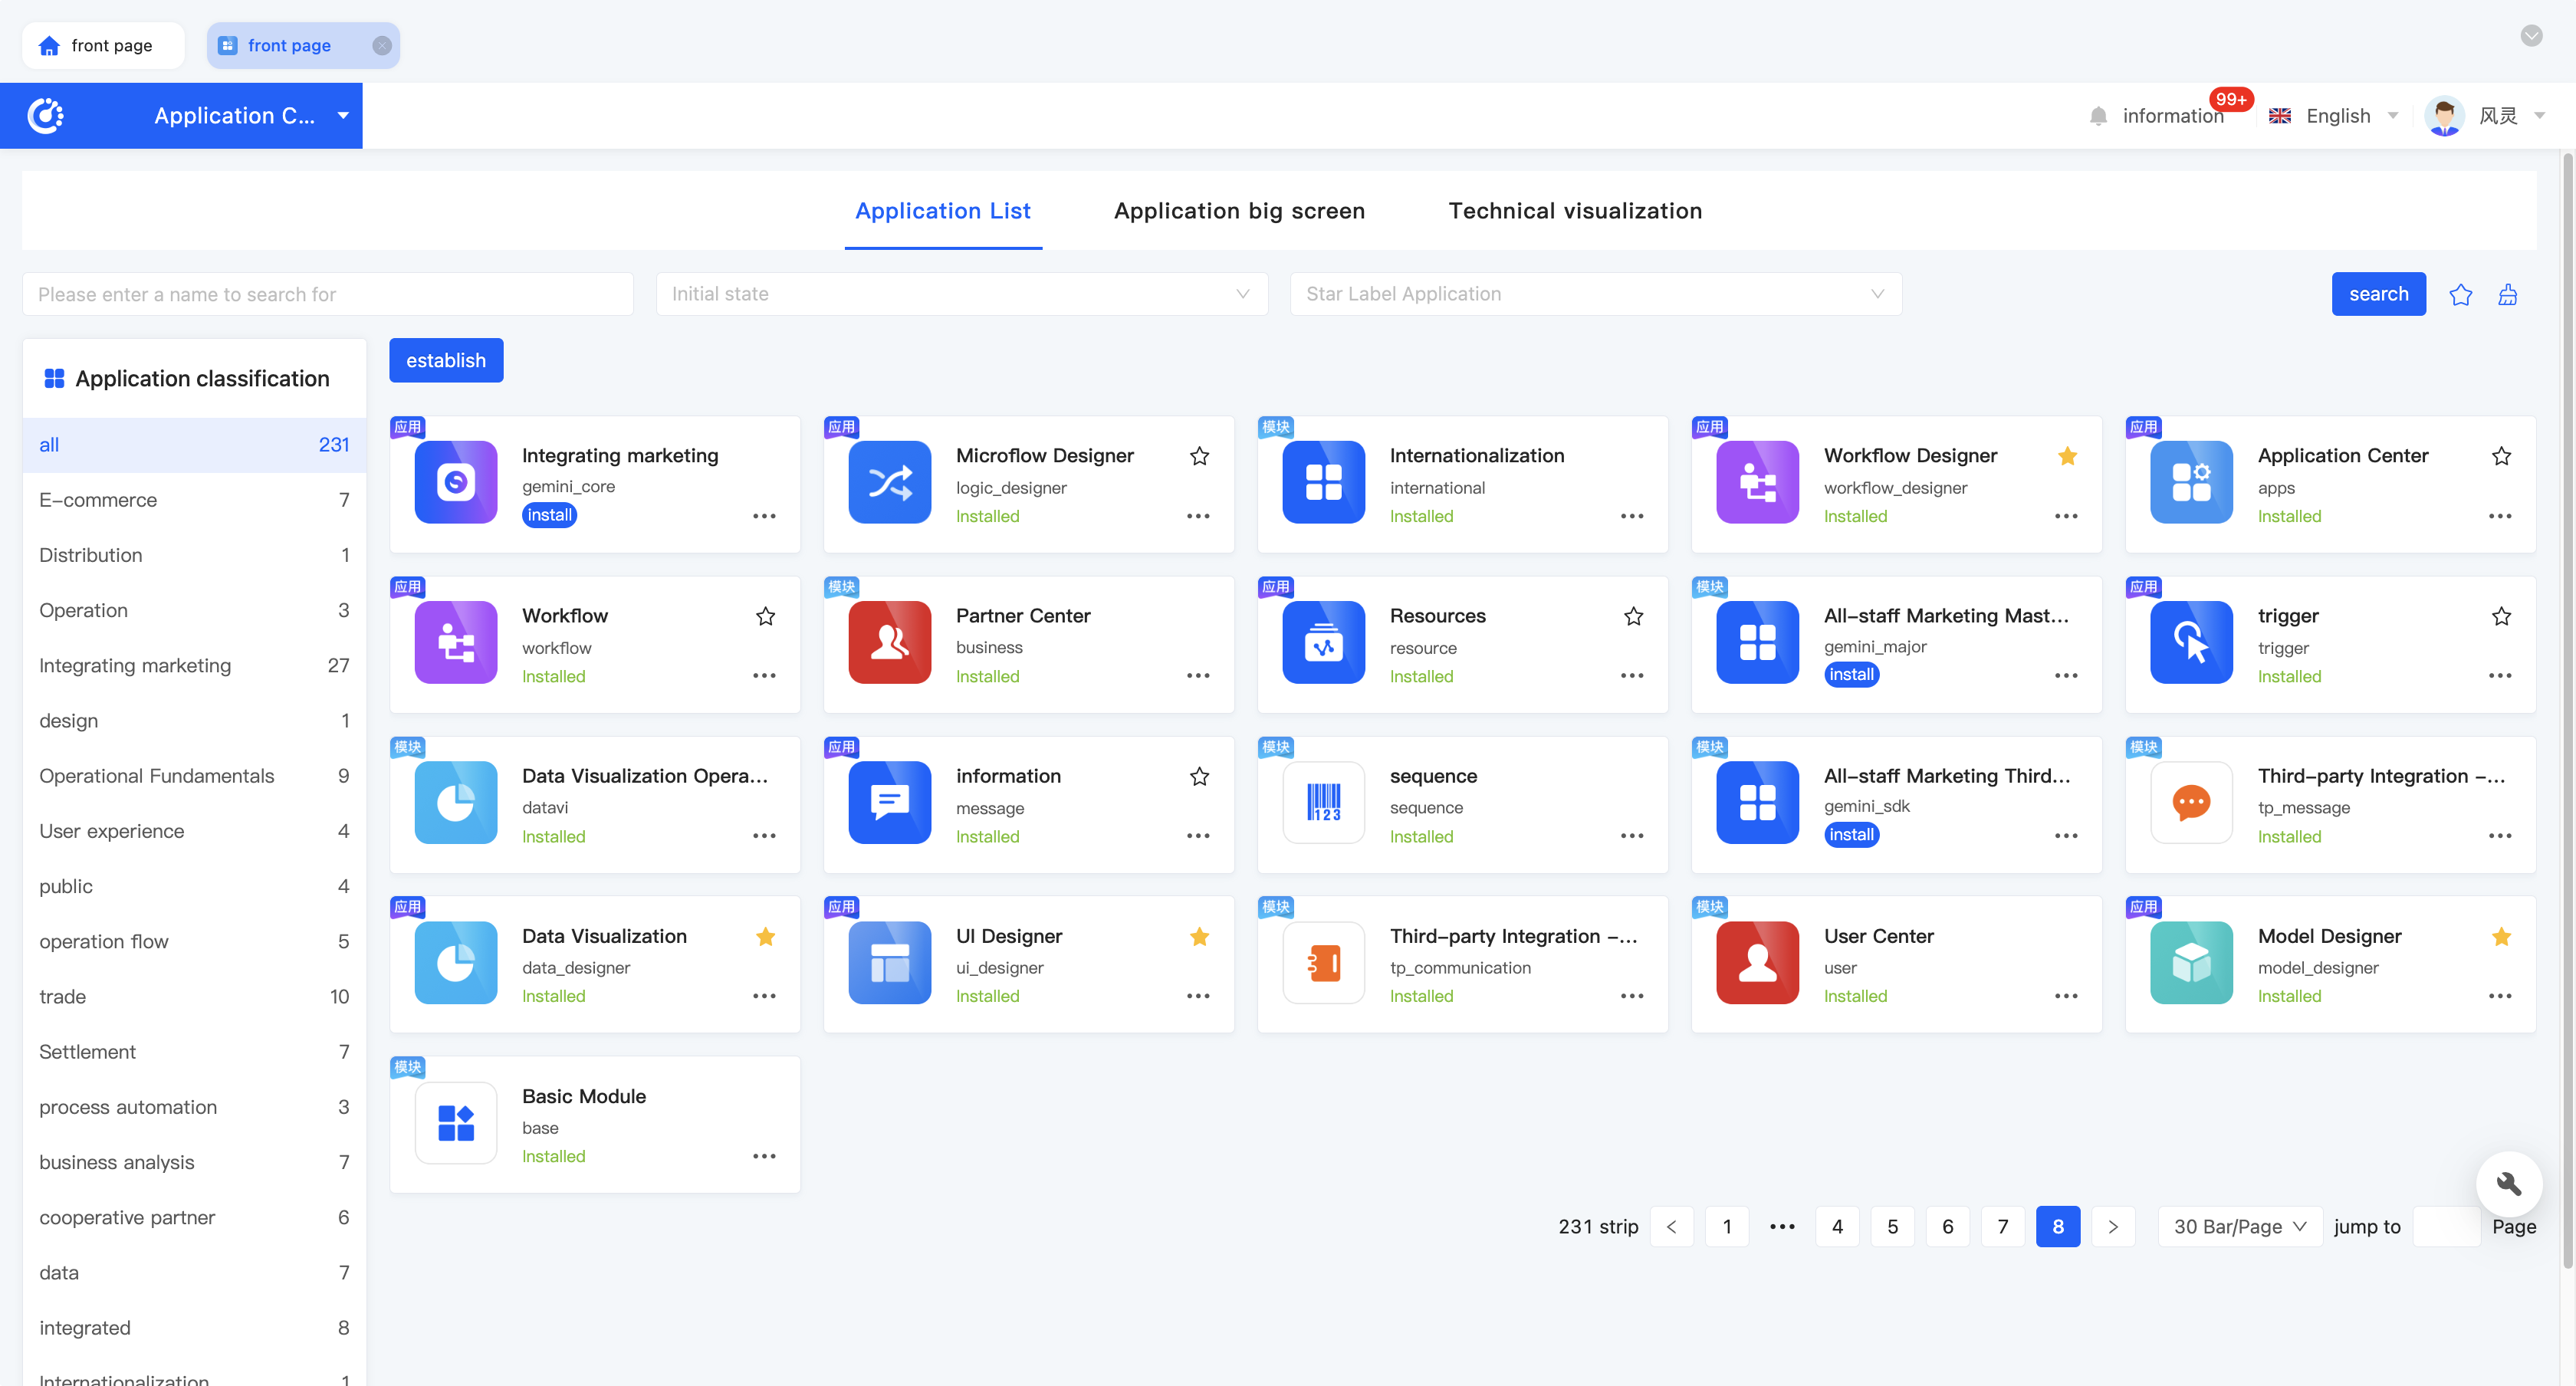
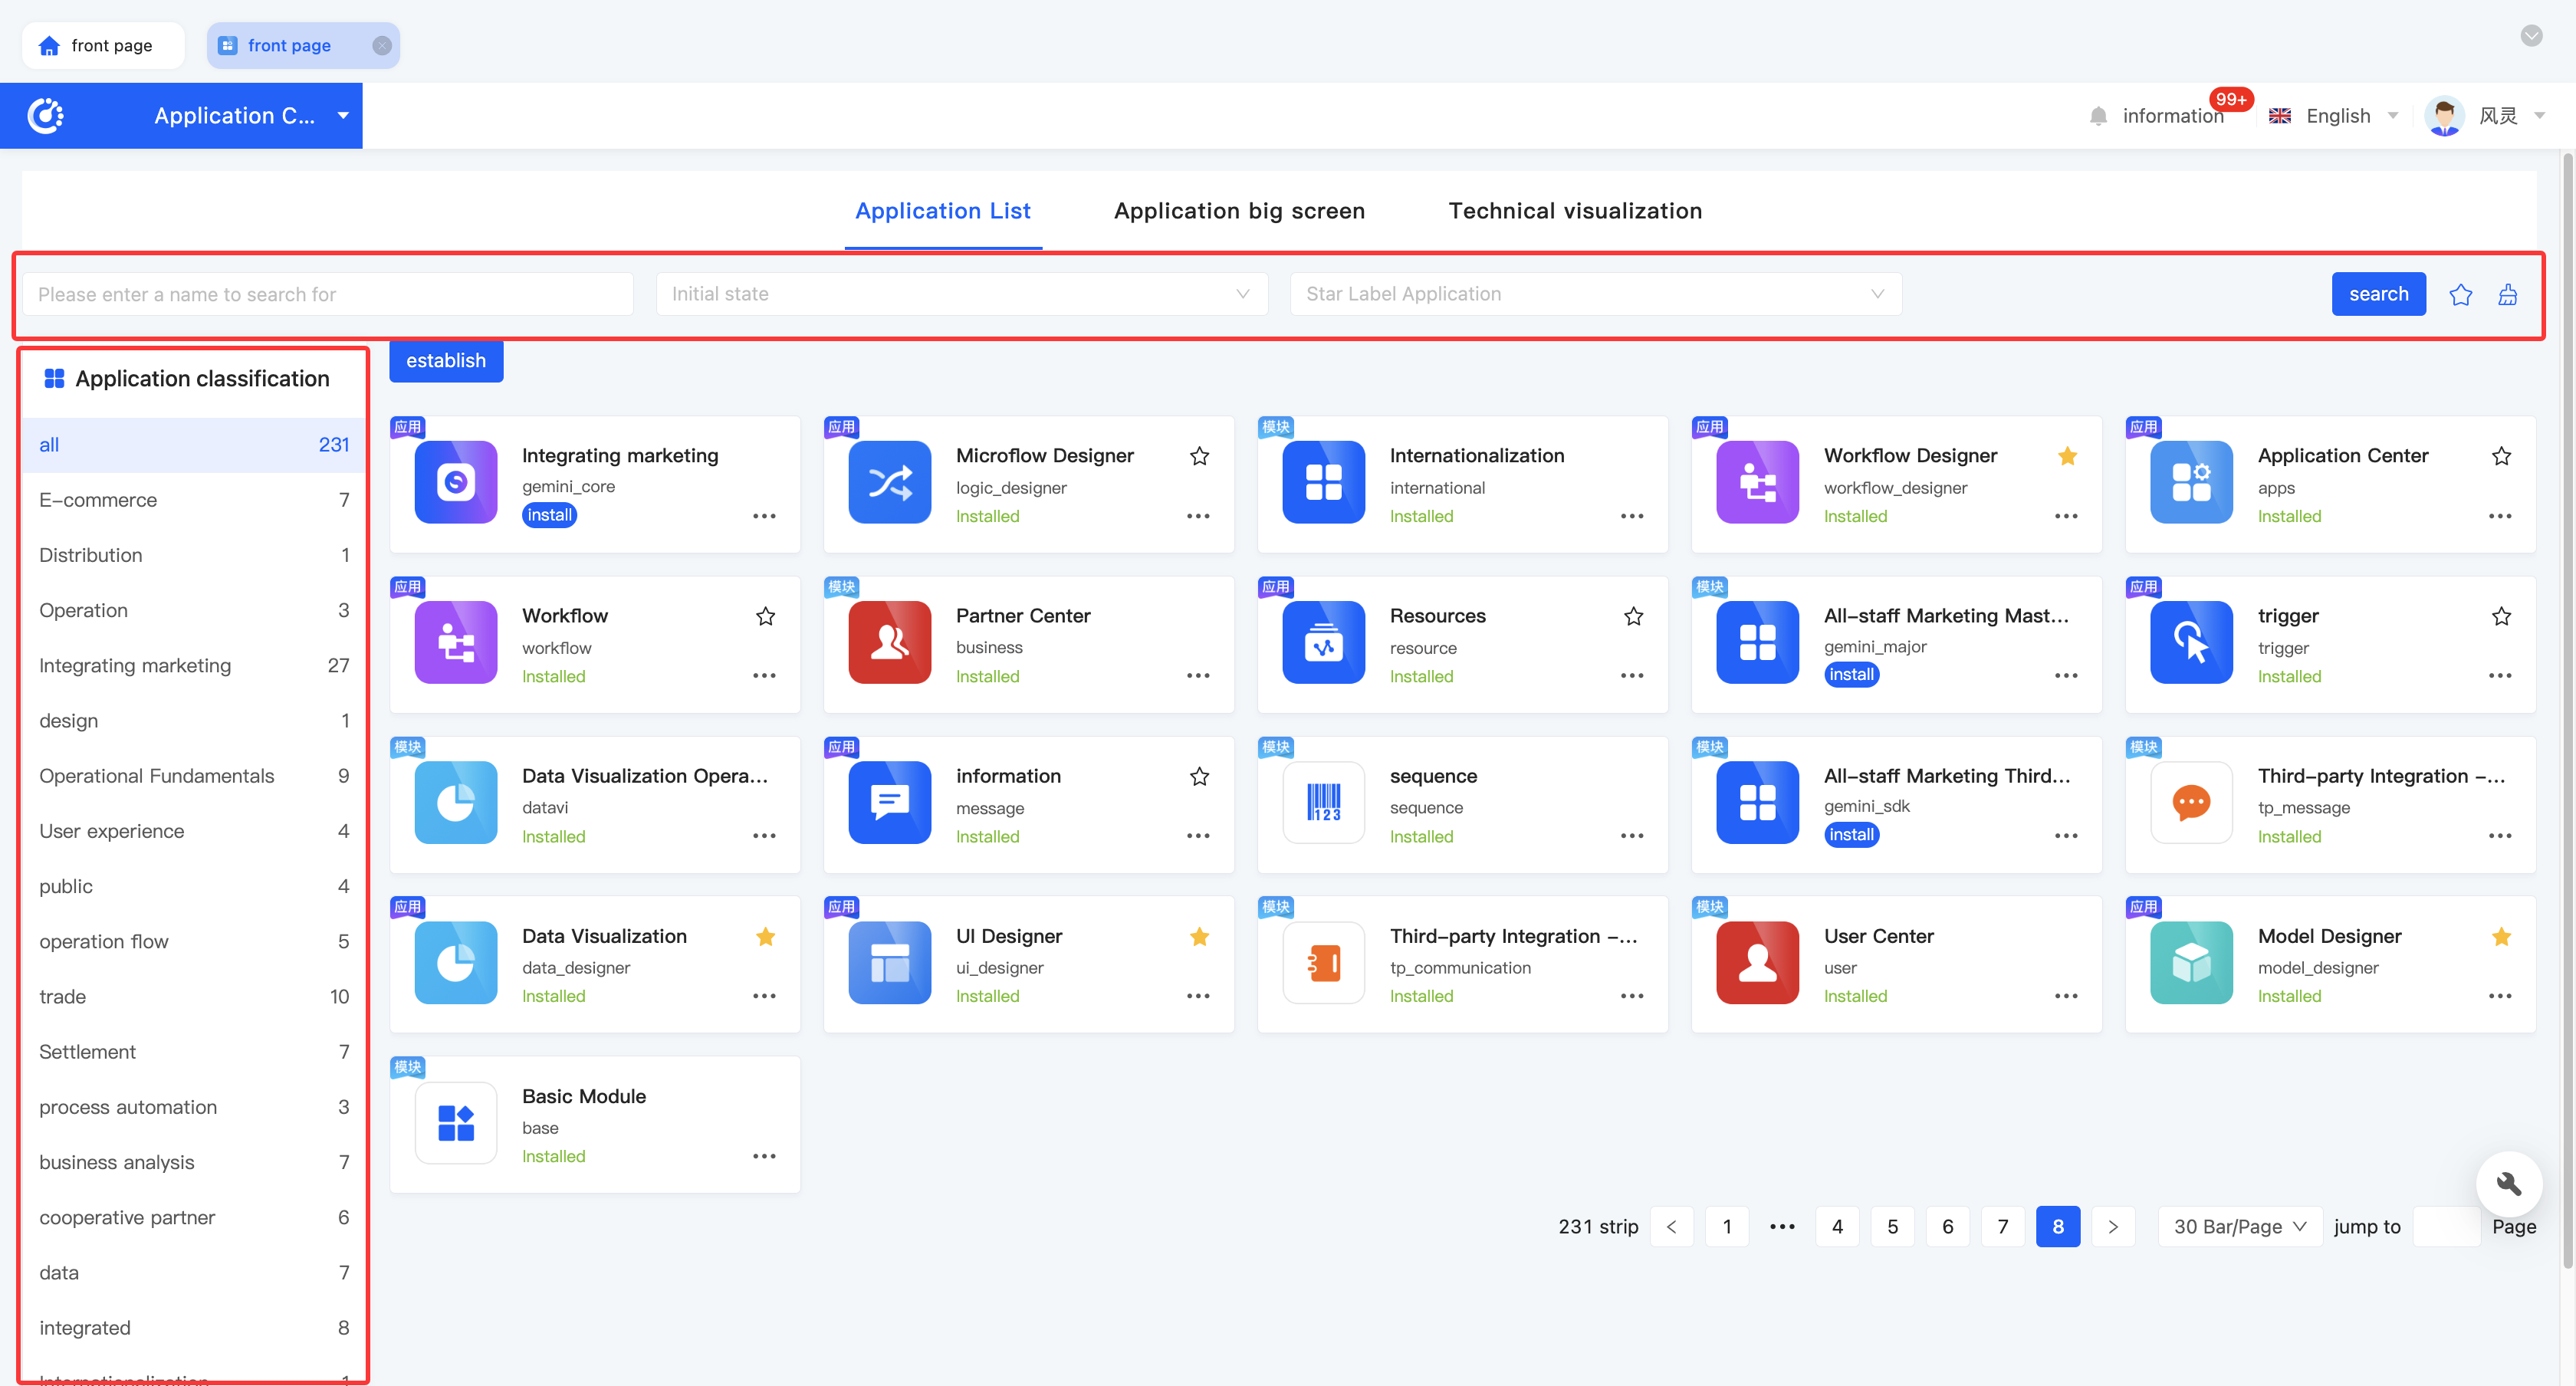
In the application list, you can manage all applications on the platform, providing functions such as search, creation, favorite, installation, uninstallation, and editing of applications.
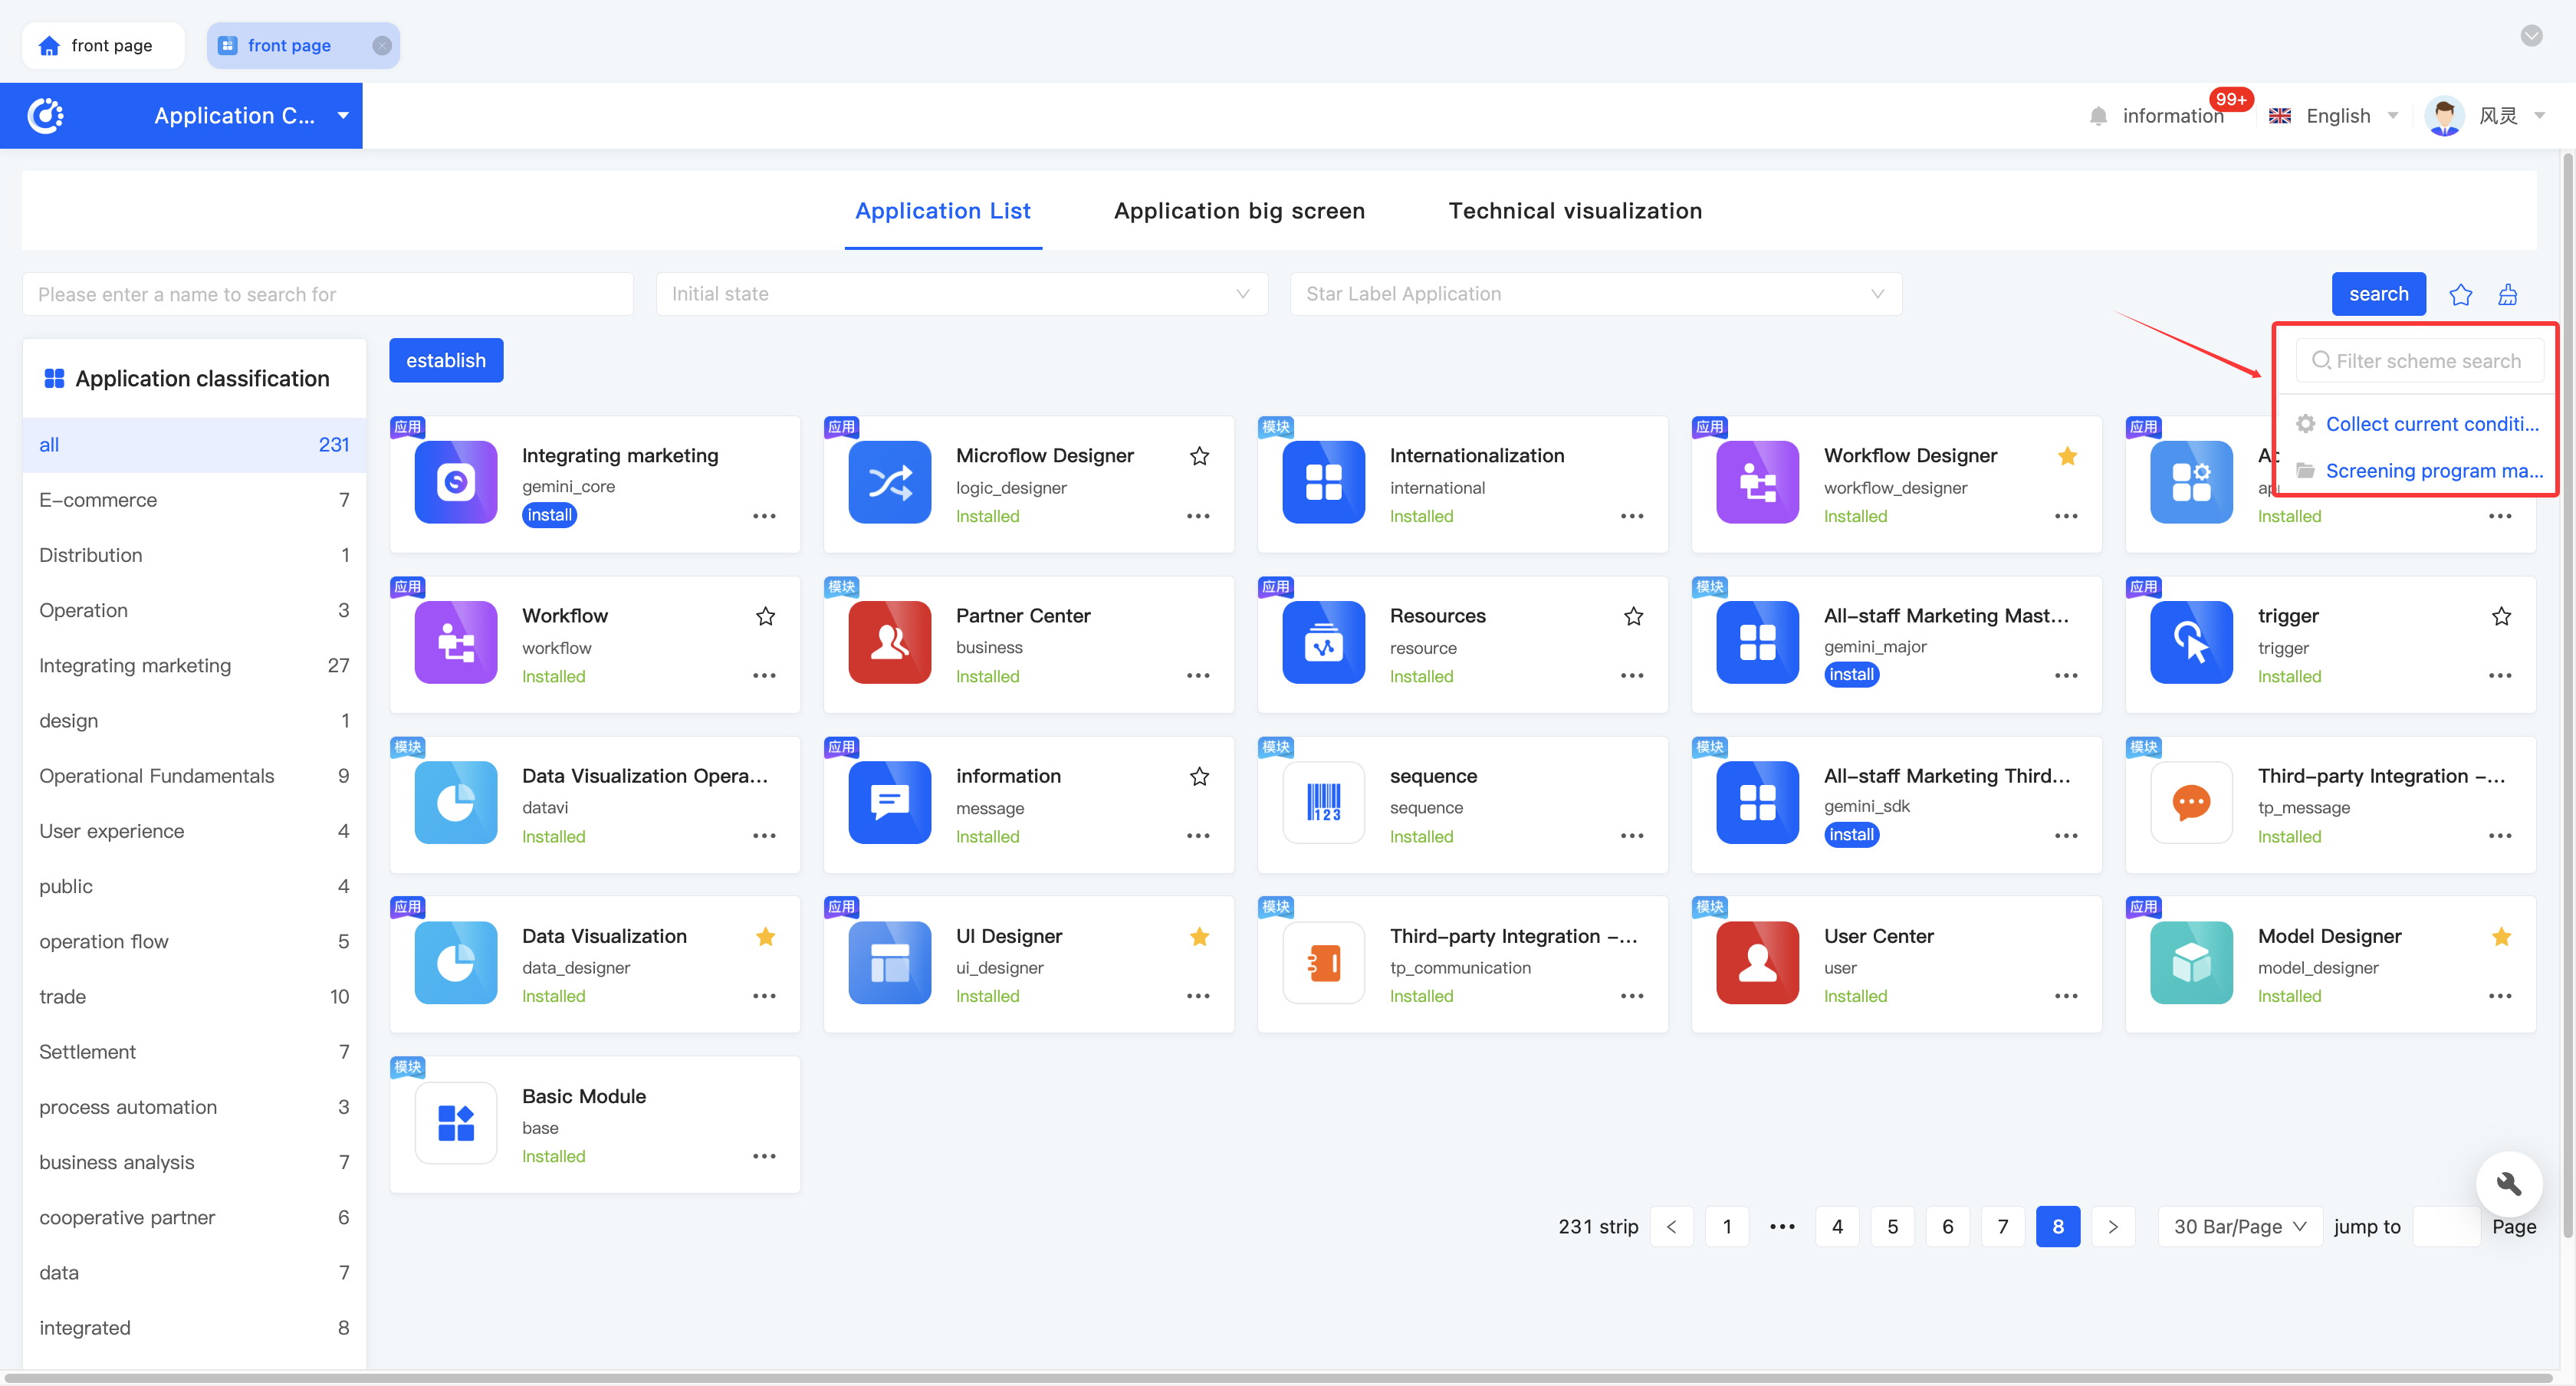
(I) Search
1. Function Introduction
According to actual business needs, you can customize the filtering conditions for applications or modules. Under the current filtering conditions, the corresponding application or module list will be displayed, which is convenient for designing different applications or modules.
Tip
For commonly used filter option combinations, you can add them to the filter scheme, and then you can directly select a scheme in the filter scheme to filter the processes with one click.
2. Operation Method
- Filter: Select or enter conditions in the filter area and click "Search" to filter applications or modules.
- Clear All: Click the "Clear" icon to clear all conditions in the current filter area with one click.
- Manage Filter Schemes: Move the mouse to the "Filter Schemes" icon to manage filter schemes.
- Add: After selecting or entering filter conditions in the filter area, click "Favorite Current Conditions" and enter the scheme name in the pop-up window to add the current filter condition combination to the filter scheme.
- Search: Enter the scheme name in the input box.
- Modify: Click "Manage Filter Schemes", select a scheme in the pop-up window, and click the scheme name to modify the scheme name.
- Delete: Select a scheme in the scheme list and click the "Delete" icon to delete the filter scheme.
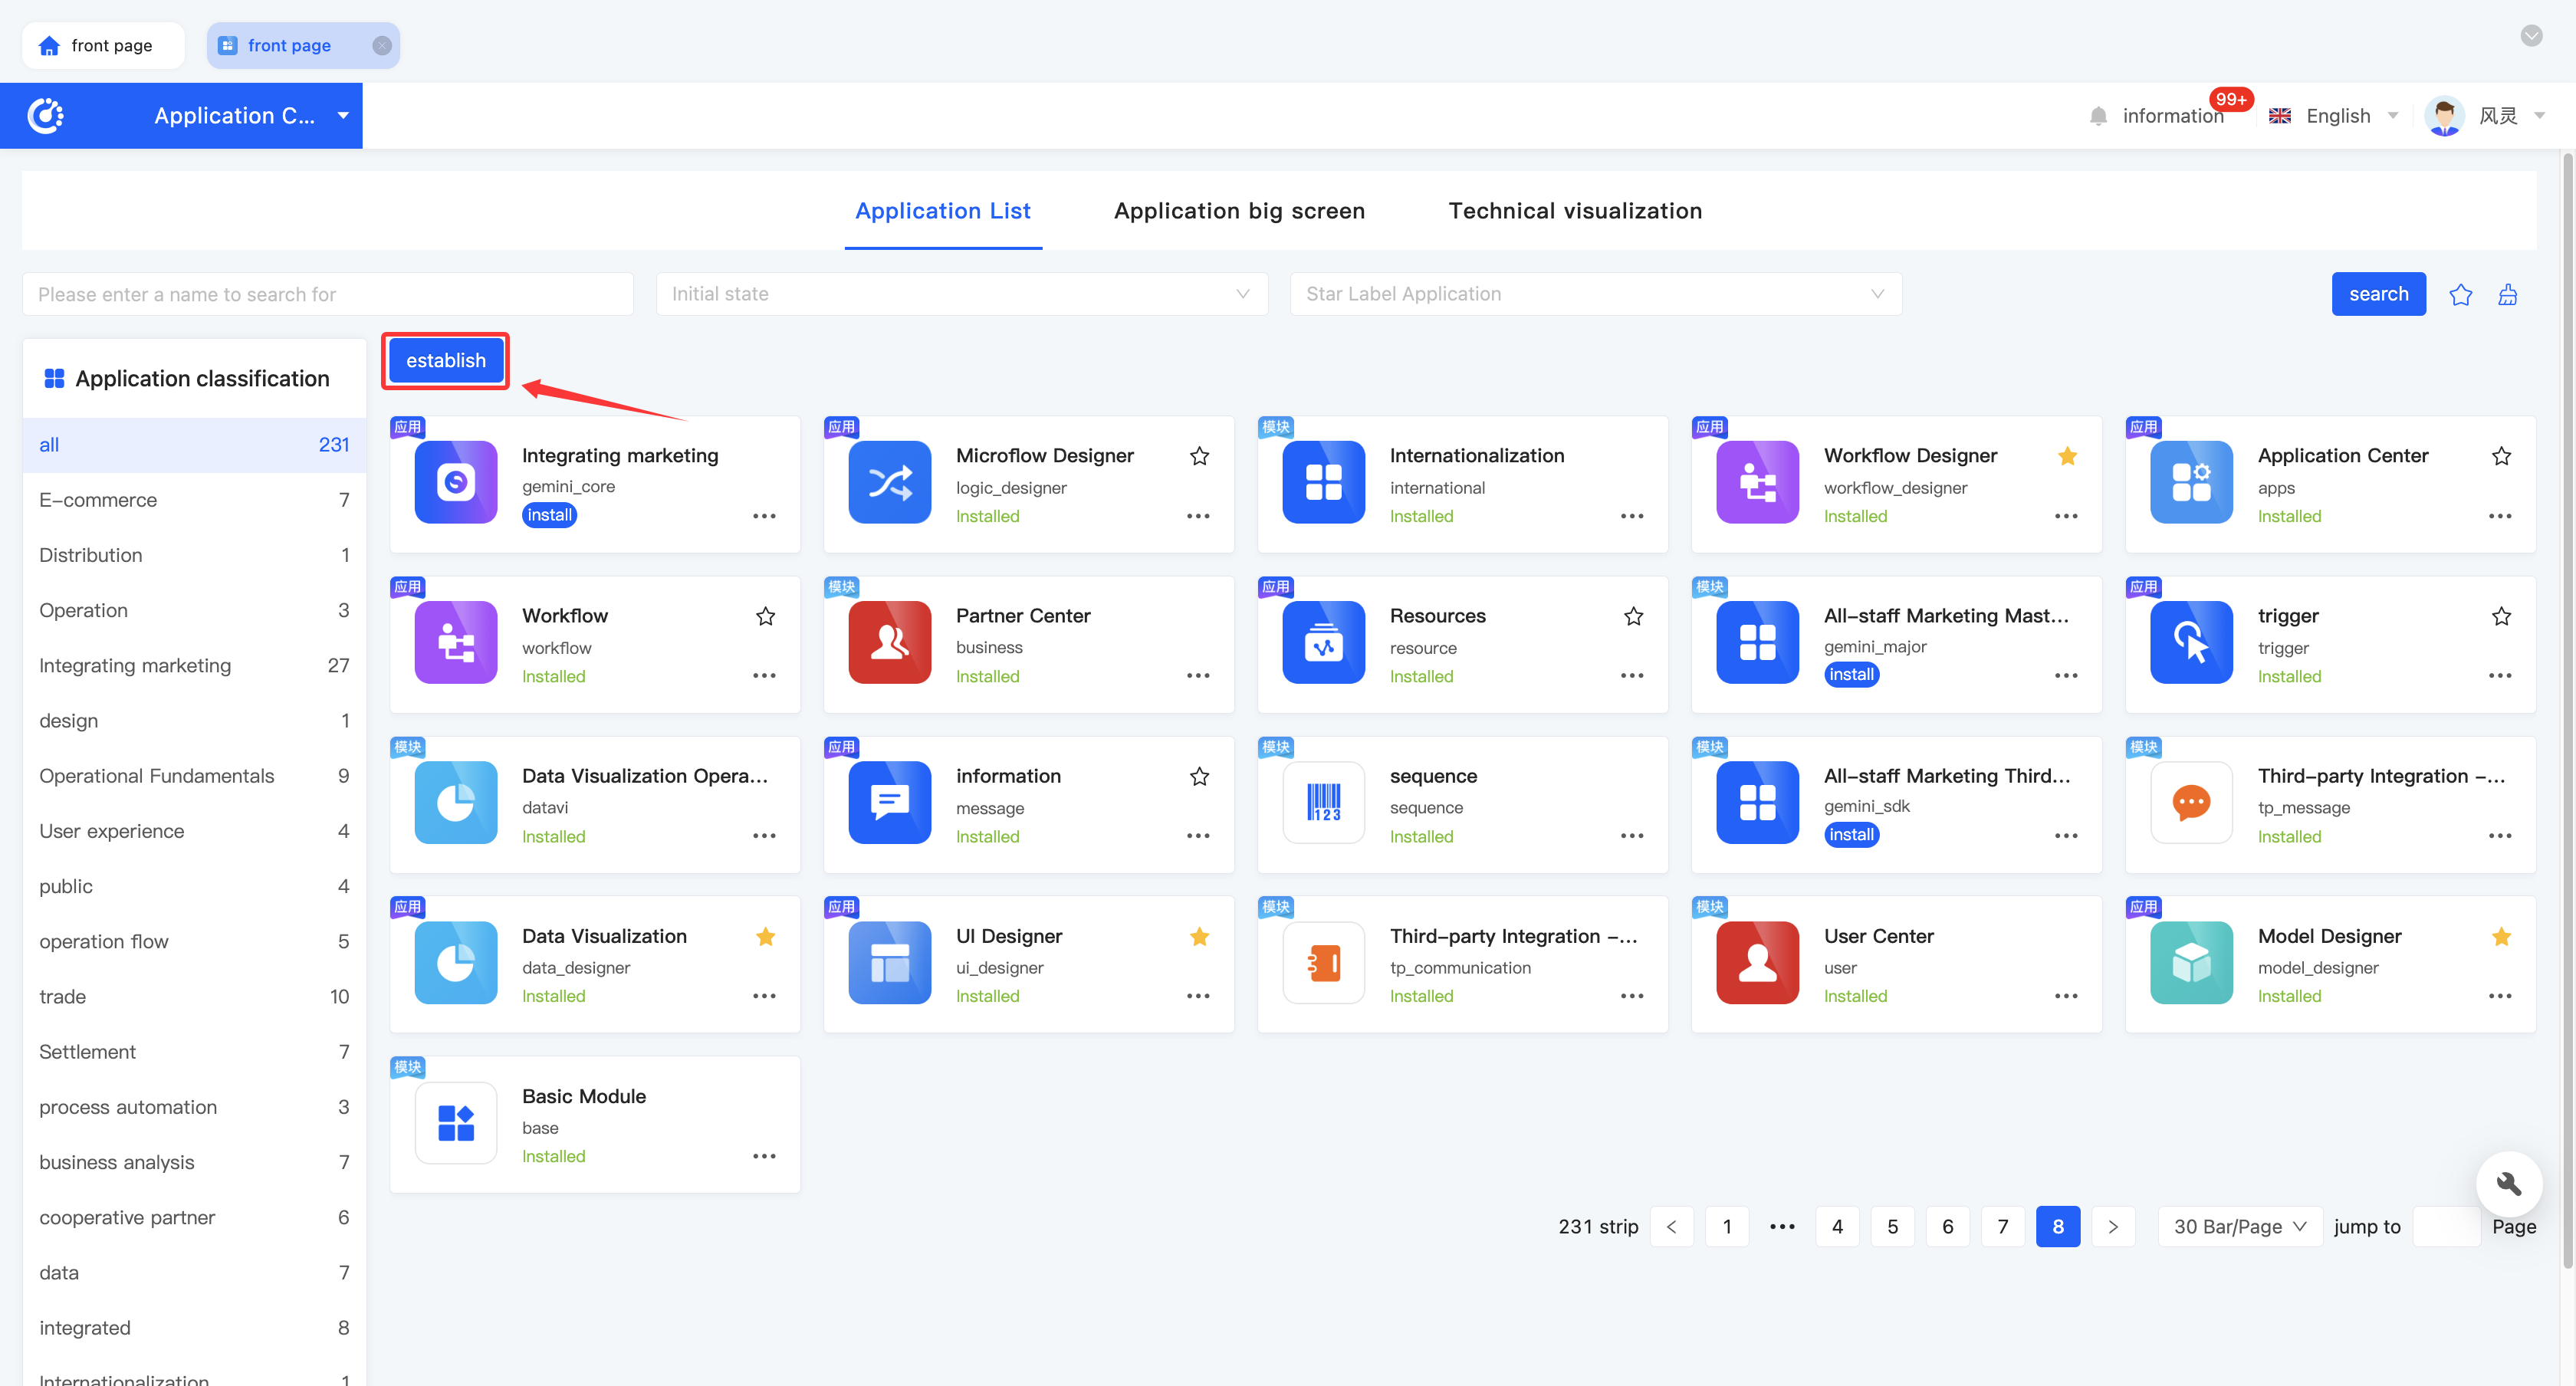
(II) Create
1. Function Introduction
It supports creating applications or modules according to specific business needs. You can select the type, define the application name, technical name, dependent modules, upstream modules, classification, and client type.
Note
- Application types are divided into applications and modules. The difference between them is:
- Applications have front-end pages, and users can operate data on the front-end pages.
- Modules do not have front-end pages and serve other applications or modules.
- Most applications need to depend on some basic modules, such as files and resources. After dependency, you can use the capabilities of the dependent applications/modules. For example, after depending on the file module, you can use the import and export capabilities.
- Upstream modules only allow you to select the applications/modules that have been depended on. When an application/module is selected as an upstream module, it will be integrated into the current application to meet the personalized needs in specific scenarios.
- Application classification is managed according to the business domain. Currently, the classification is provided by the platform, and users will be able to manage it by themselves in the future.
- Client types are divided into PC and mobile, and you can select multiple types. If you only select one type, the application can only be used on the selected client type.
2. Operation Method
Click "Create", fill in the information in the pop-up page, and confirm to create successfully.
(III) Edit
1. Function Introduction
For successfully created applications or modules, you can edit and modify their information according to the changing needs.
Note
Only some information can be modified, and some information is fixed at the time of creation. Therefore, you need to fill in the information carefully when creating.
2. Operation Method
Select an application or module, click "Edit", modify the information in the pop-up page, and confirm to edit successfully.

(IV) Installation and Uninstallation
1. Function Introduction
For the created applications or modules, you can choose whether to install them according to actual needs. After installation, you can start using the functions provided by the applications or modules. If you no longer need to use them in the future, you can uninstall them at any time to better manage and optimize your application environment.
Note
- Uninstalled applications will not be displayed in App Finder and cannot be accessed or used.
- Uninstalled applications or modules can be reinstalled.
- Only no-code applications or modules can be installed and uninstalled.
2. Operation Method
- Install: In the application list, select the application or module to be installed and click "Install" to install successfully.
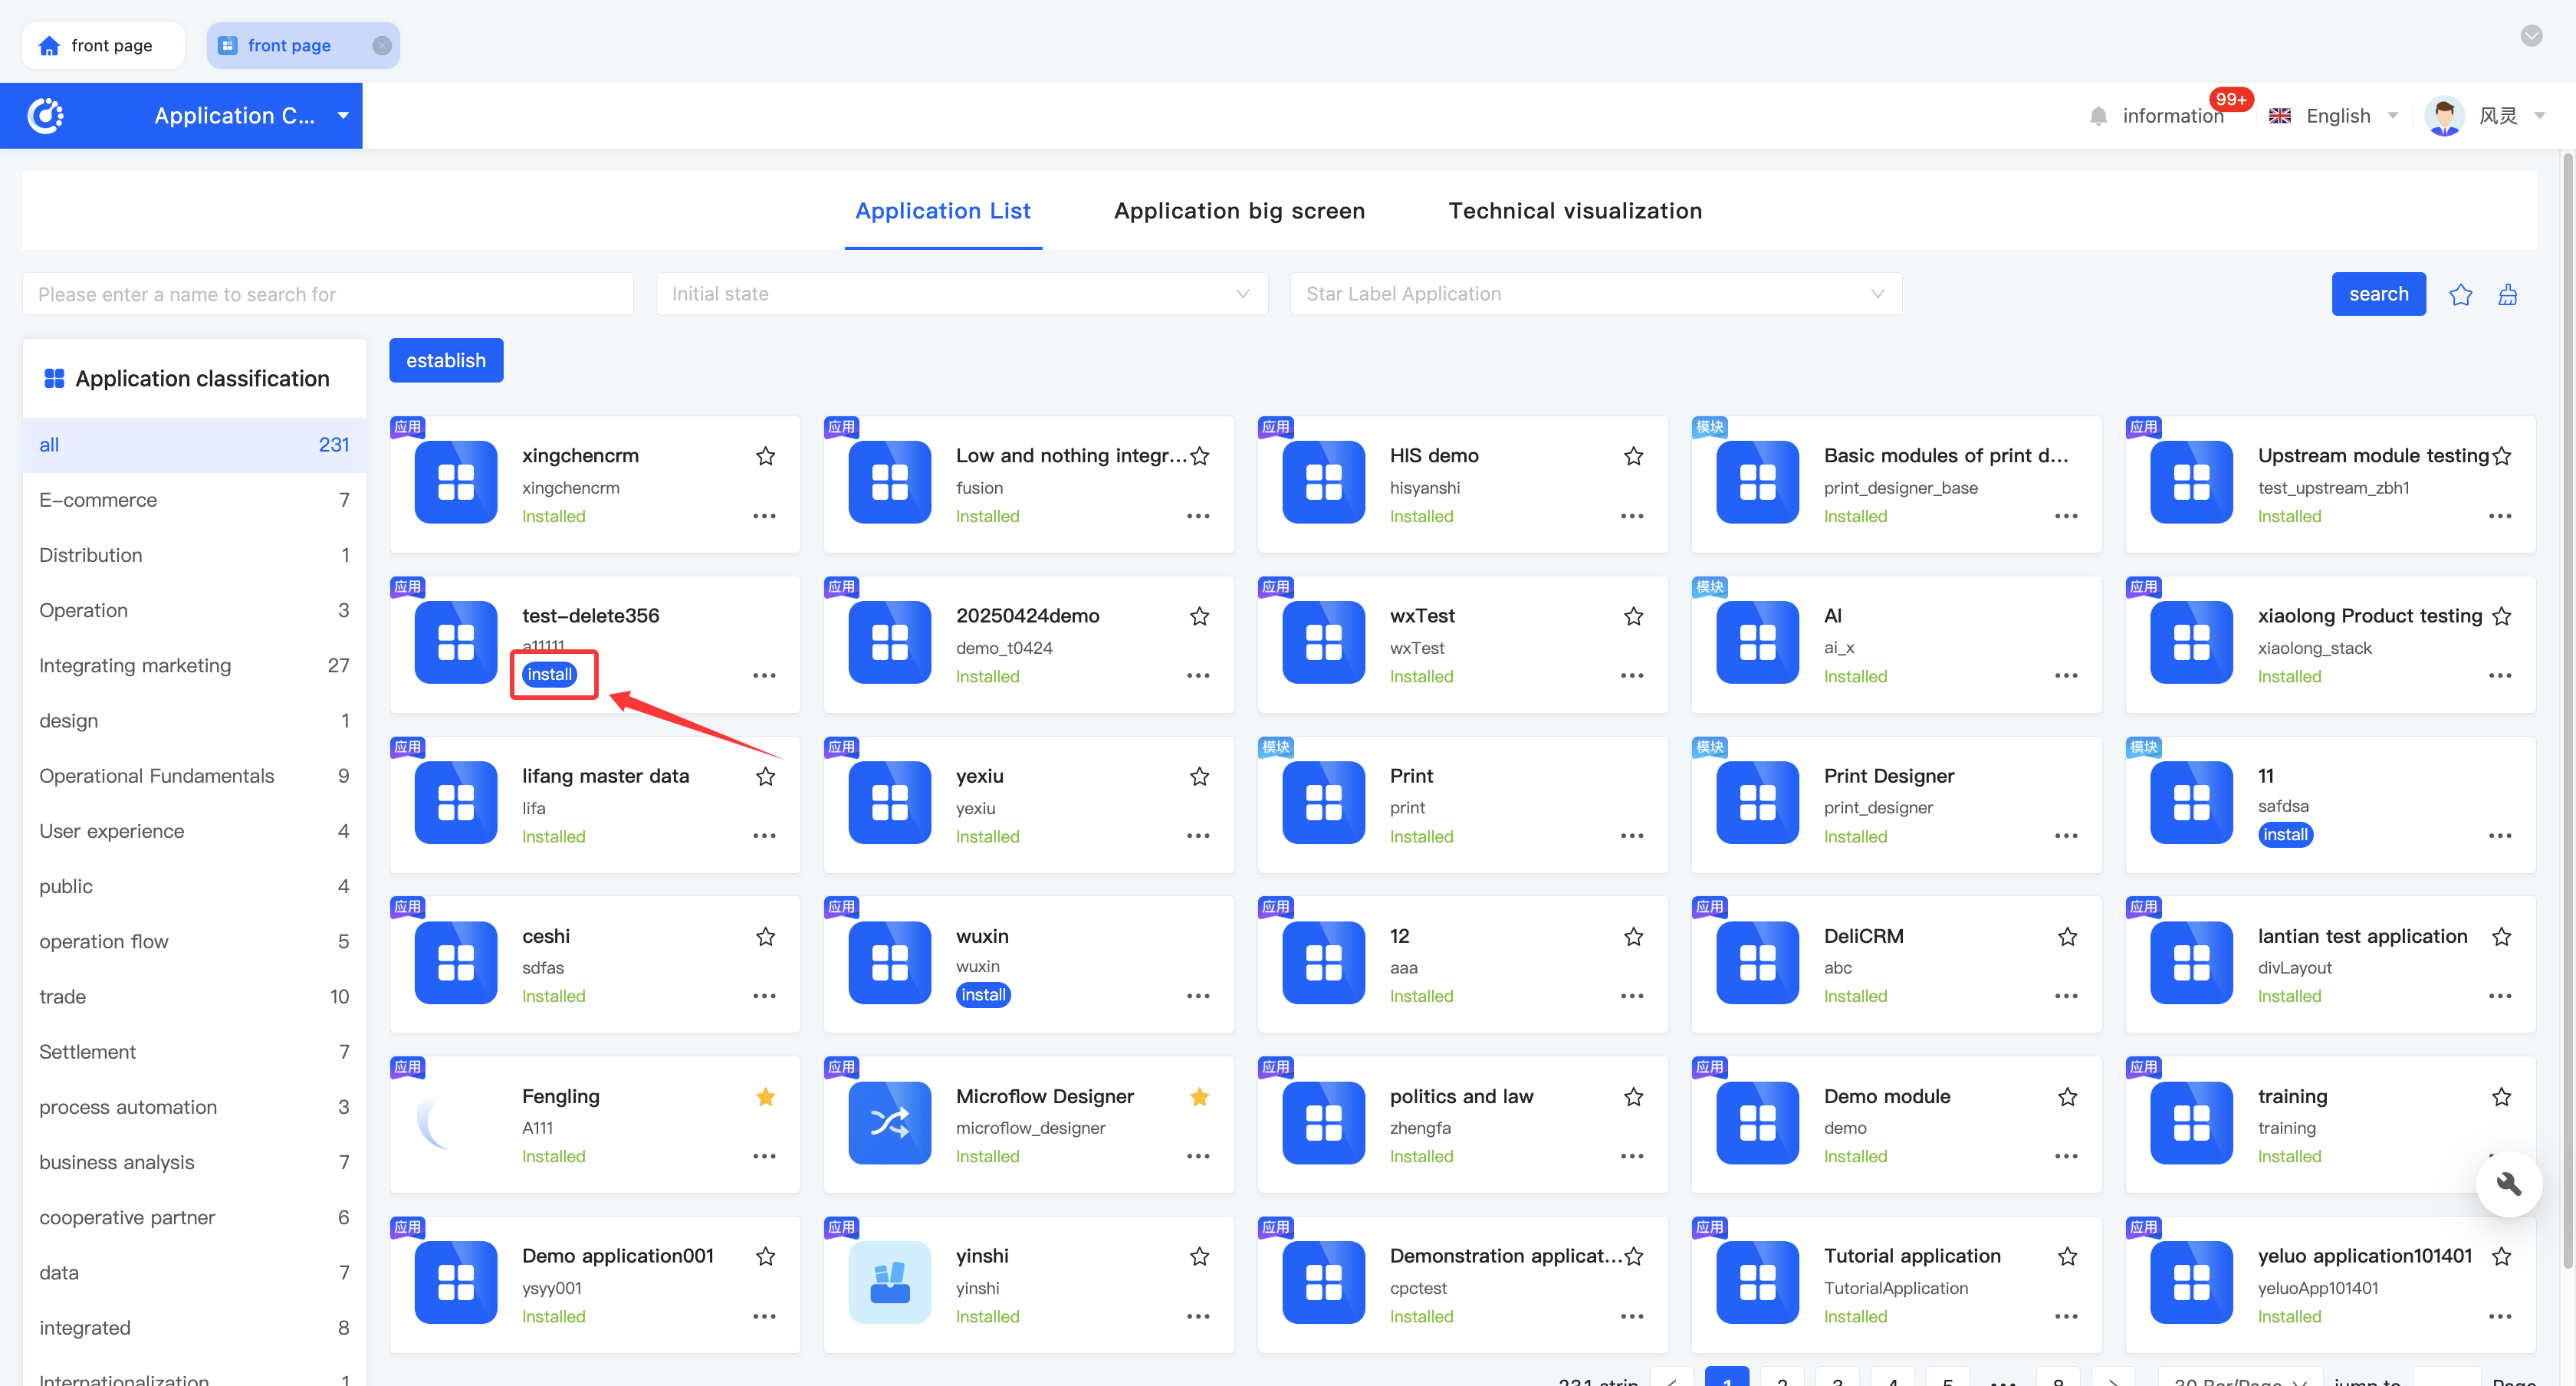
- Uninstall: In the application list, select the application or module to be uninstalled and click "Uninstall" to uninstall successfully.

(V) Favorite
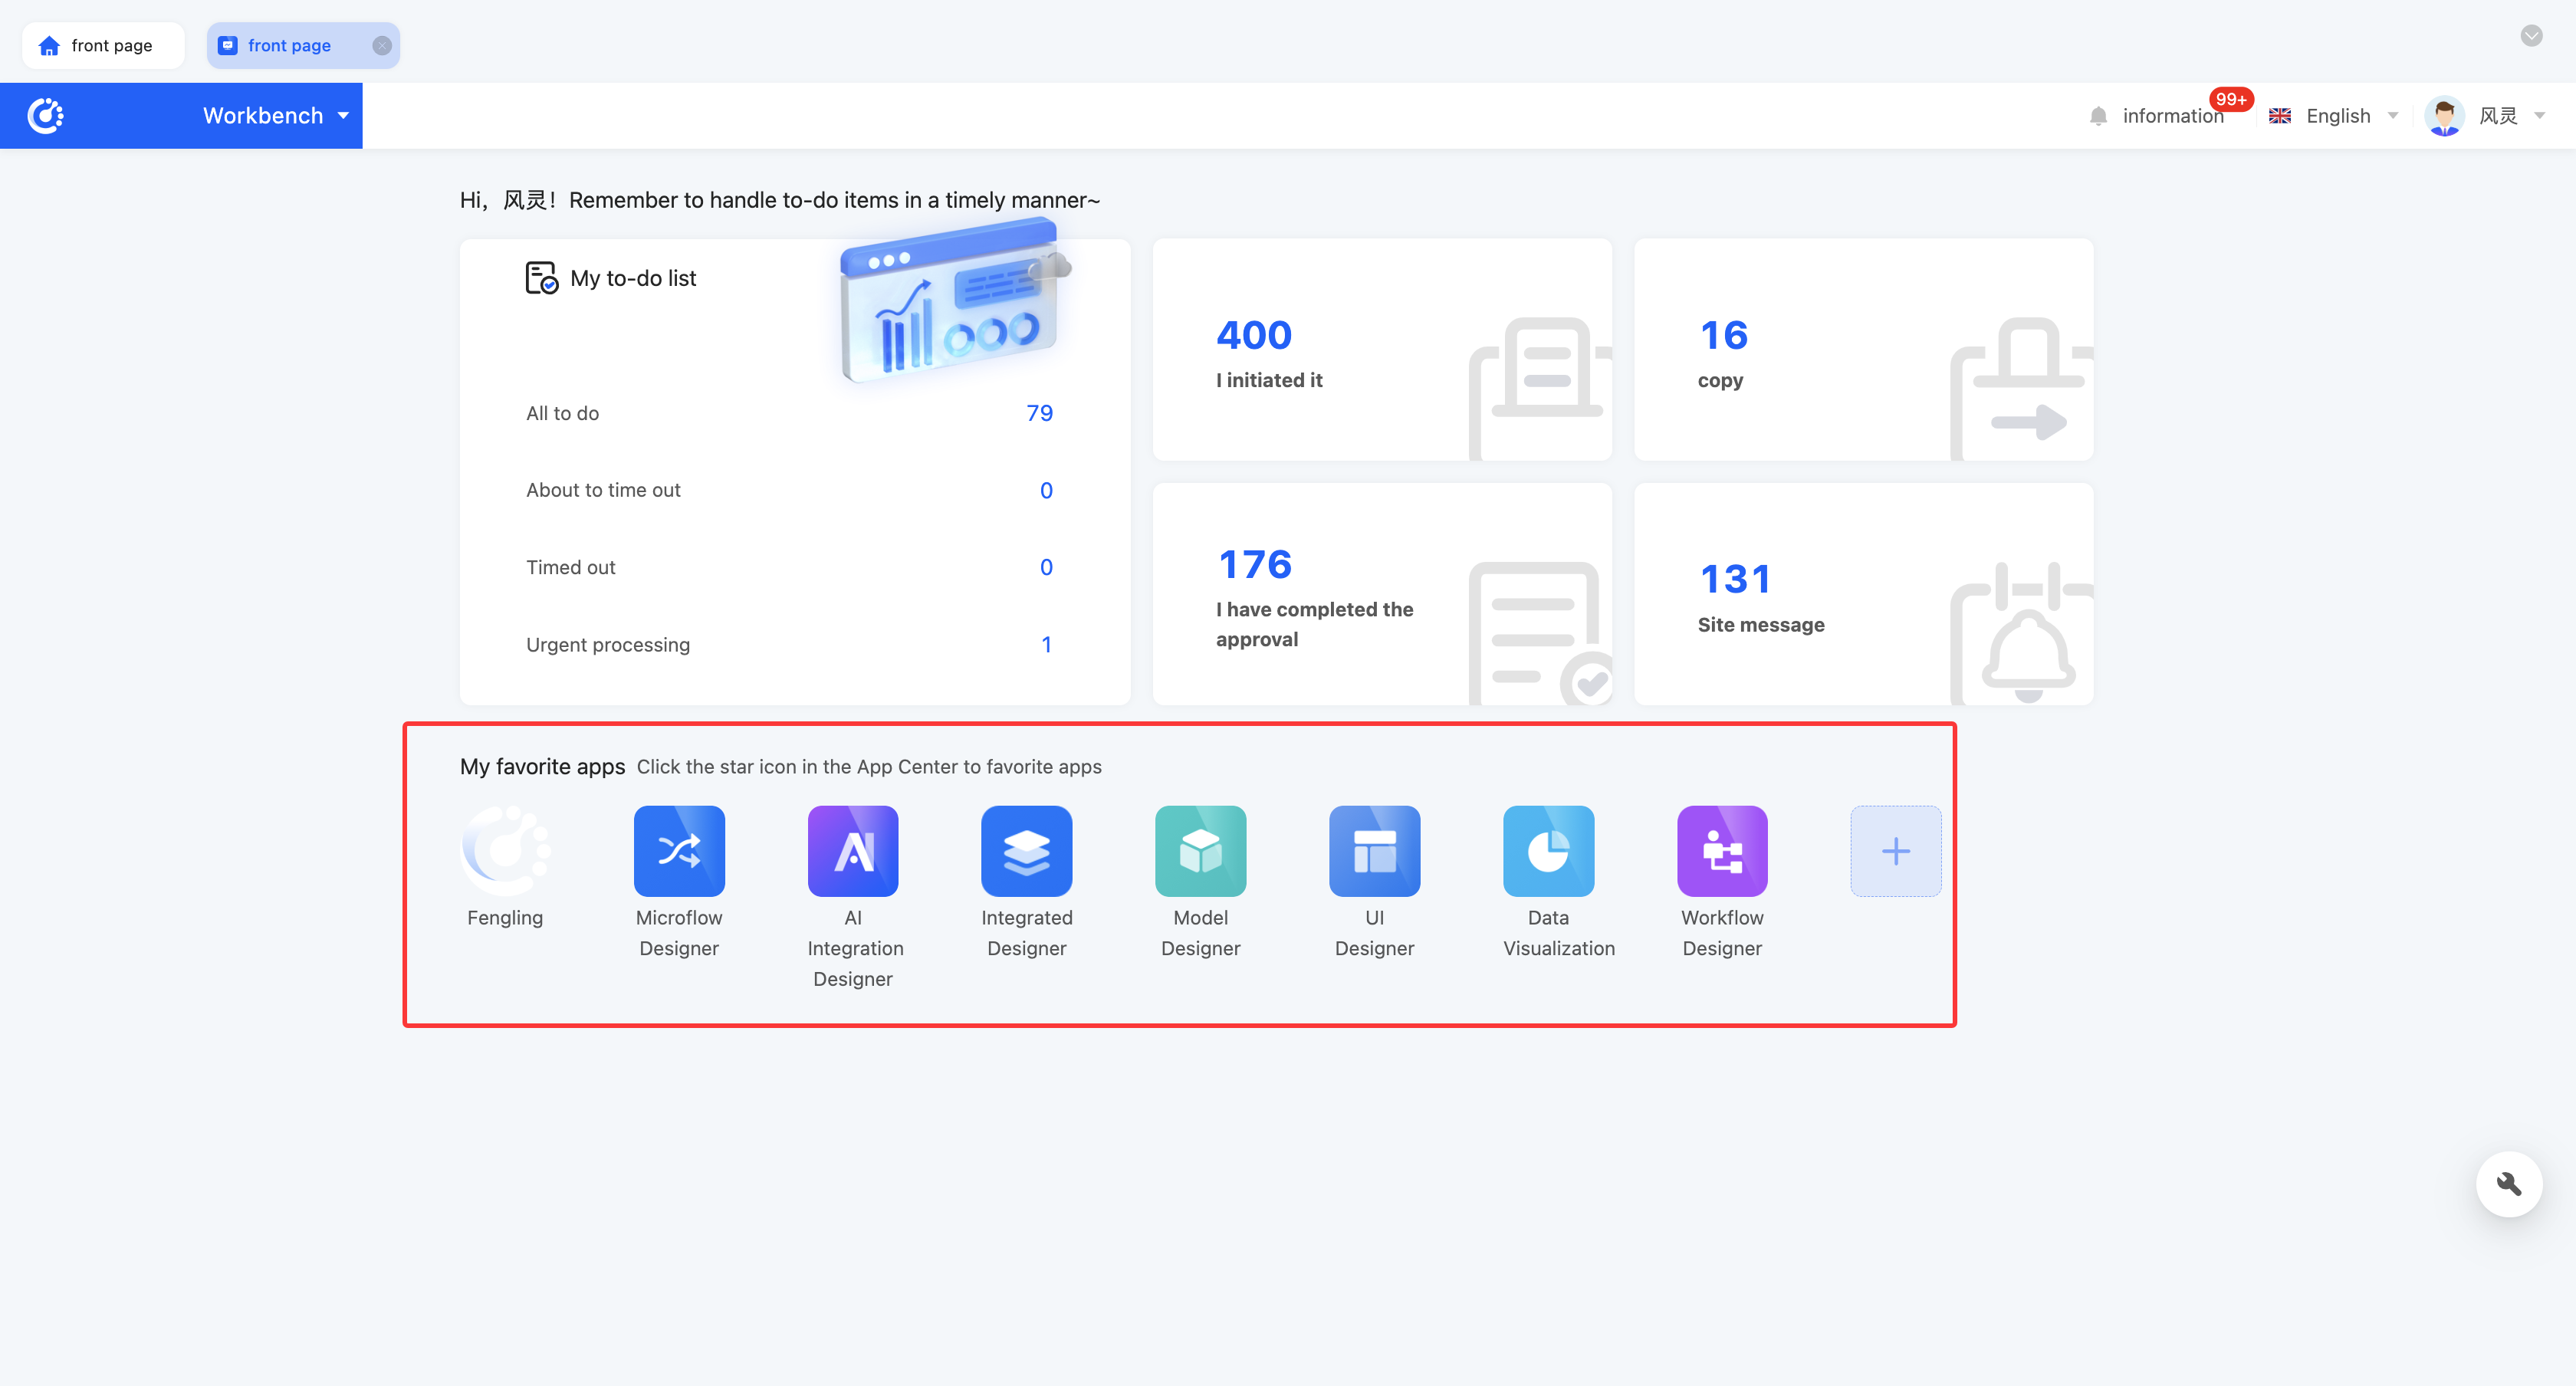
1. Function Introduction
For frequently used applications, you can choose to favorite them. The favorited applications will be displayed in the "My Favorite Applications" section of App Finder and the favorite display area of the workbench, which makes it easier to find the required applications quickly, saves search time, and improves work efficiency.
Note
This function can only be used after the application is successfully installed.
2. Operation Method
Select an application and click the star icon in the upper right corner of the application card to favorite or unfavorite the application.

(VI) Set Home Page
1. Function Introduction
You can set the home page for an application in two ways:
- Bind a menu: The home page will be the page of the bound menu.
- Bind a view: Select a model and a view under the model. The home page will be the selected view. If there is no view that can be used as the home page, you can enter the Interface Designer through the provided shortcut to create one.
- Bind a URL: Support entering a URL, and the application will automatically jump to the URL when opened. There are two jump methods: a. In-page routing: When the application is opened, the content of the target URL will be displayed in the current window. b. Open in a new window: When the application is opened, the content of the target URL will be displayed in a new window.
2. Operation Method
Select an application and click "Set Home Page" to set the home page for the application.

(VII) Shortcut Entries
1. Function Introduction
To fully display the functional features of an application, you need to build models and design pages for the application. When the no-code development method cannot meet the development needs in some special scenarios, you can use the low-code and no-code integrated technology solution (i.e., low-no integration) to deeply optimize and improve the application. For this reason, the Application Center provides shortcut entries to facilitate users to directly enter the Model Designer, Interface Designer, and low-no integration development environment to make all-round adjustments and improvements to the application.
2. Operation Method
Select an application and click "Design Page" to enter the Interface Designer.
Select an application and click "Design Model" to enter the Model Designer.
Select an application and click "Low-No Integration" to enter the low-no integration environment.

(VIII) Design Import/Export
1. Function Introduction
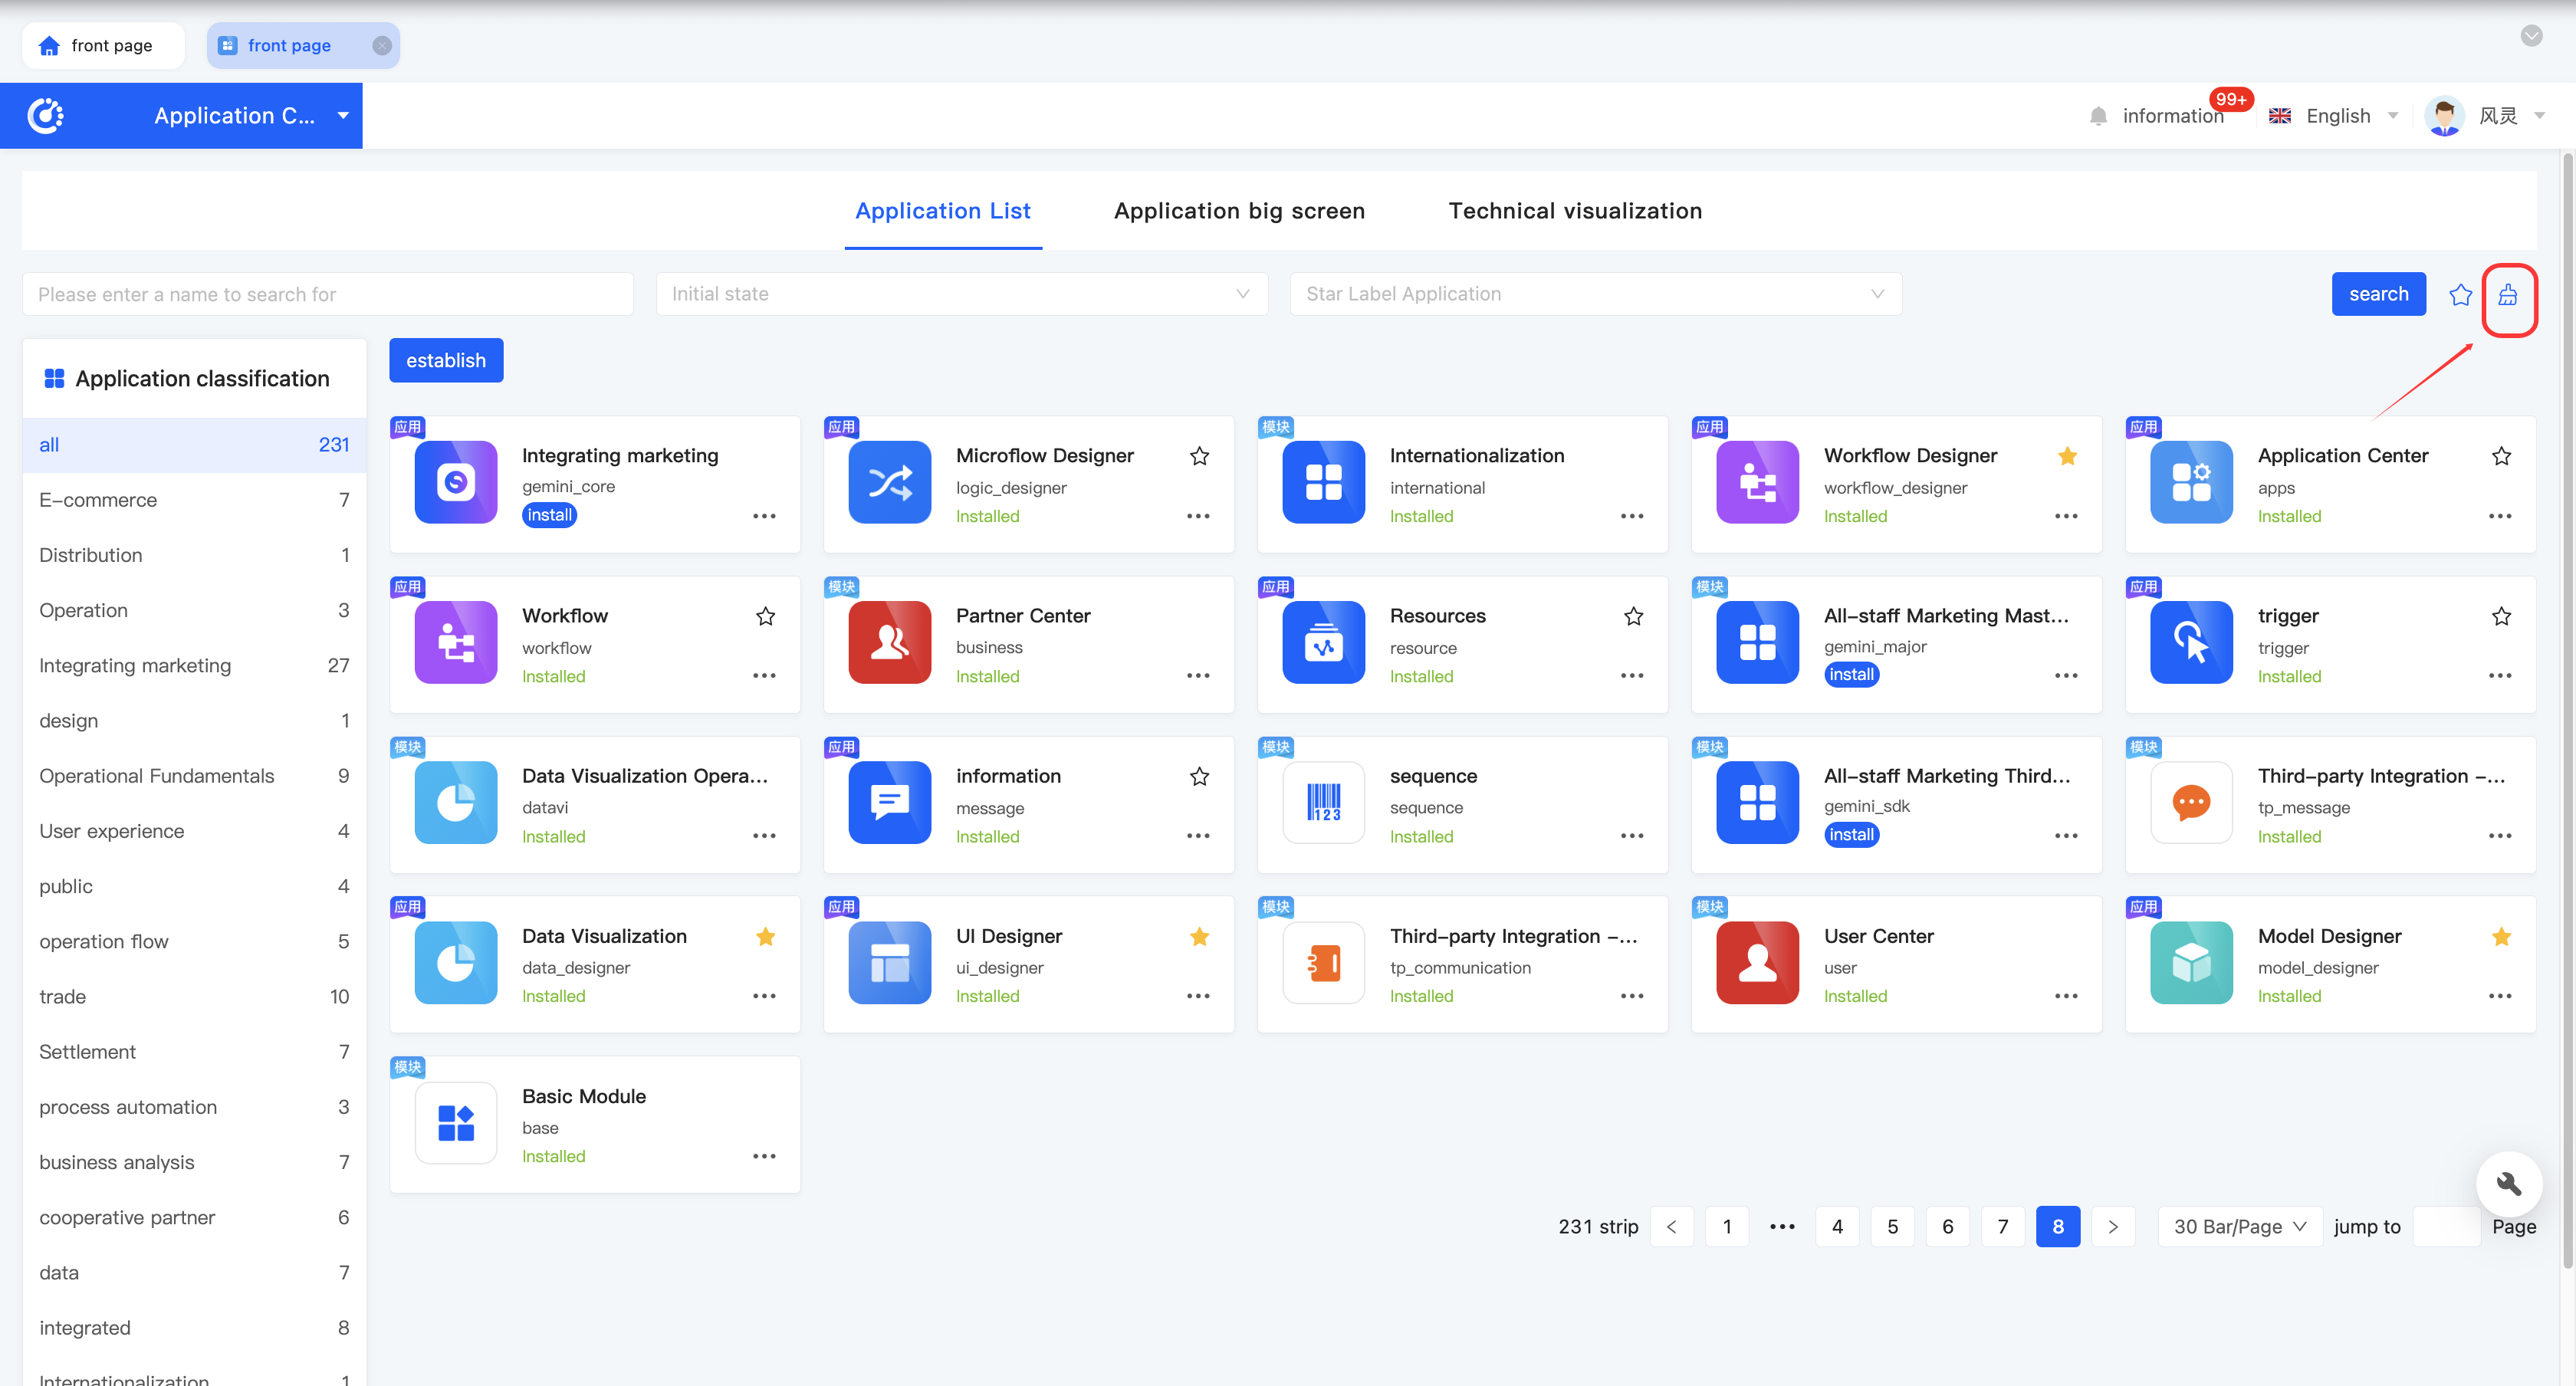
It supports importing/exporting the metadata of applications, such as model, interface, process, microflow, integration, and data visualization files. In the export process, you can choose to filter the export or export all at once.
- Filtered Export: You can selectively export files.
- One-click Export: Directly export all files.
Note
- Export can be divided into migration export and standard product export. The difference between them is:
- Migration Export: Migrate the original application to a new environment, and you can edit and modify it in the new environment.
- Standard Product Export: Export the original application to a new environment. In the new environment, you cannot make changes to it except for standard product upgrades.
- For the design metadata of the export type 'Migration Export', you can import the design data through the Application Center -> Installed Applications -> Design Import (Migration) in different environments.
- For the design metadata of the export type 'Standard Product Export', currently only supports importing through technical interfaces, and does not support visual import operations through the interface.
Tip
You can view the executed import/export tasks in "Application Environment - Design Import/Design Export".
2. Operation Method
Select an application and select one of "Design Import (Migration)" or "Design Export" to import/export the corresponding files.


Example
Export the model of an application (the same applies to other metadata).
- Select "Model Export" from the operation menu:

- Select the export type in the pop-up window, here select "Migration Export".

- If you choose "One-click Export": The export will start, and a prompt message will be displayed in the upper right corner.

- If you choose "Filtered Export", you can enter the no-code model export filtering page, select models according to actual needs, and then export. A prompt message will be displayed in the upper right corner.


Example
Import a model (the same applies to other metadata).
- Select "Model Import" from the operation menu:

- Upload the file to be imported in the pop-up window.

If the selected import file type is not a migration export file, a prompt will be displayed in the upper right corner (the same applies to other design type migration import file types):

- After the import file is correct, a prompt message will be displayed in the upper right corner.

(IX) Synchronous Deployment
1. Function Introduction
It supports synchronously deploying model, interface, process, microflow, integration, and data visualization files to an environment. You can choose to filter the deployment or deploy all at once.
- Filtered Deployment: You can selectively deploy files.
- One-click Deployment: Directly deploy all files to an environment.
Tip
The environment can be set in the application environment.
2. Operation Method
Select an application and select one of the options in "Synchronous Deployment" to synchronously deploy the corresponding files to an environment.

Example
Deploy a model (the same applies to other metadata).
- Select "Model Deployment" from the operation menu:

- Select the deployment environment in the pop-up window.

- If you choose "One-click Deployment", a prompt message will be displayed in the upper right corner of the page.

- If you choose "Filtered Deployment", enter the no-code model export filtering page, select models according to actual needs, and then synchronize. A prompt message will be displayed in the upper right corner.

(X) Application Details
1. Function Introduction
It supports viewing the detailed information of an application, including the basic information of the application, and the dependent and mutually exclusive modules or applications.
2. Operation Method
Click "Learn More" to enter the application details.

III. Application Dashboard
1. Function Introduction
The Application Dashboard displays various applications according to the classification. Applications without an application classification set will not be displayed on the Application Dashboard. For the applications displayed on the Application Dashboard, you can view the association relationships between them.
2. Operation Method
Click an application to view the association relationships between applications.


IV. Technical Visualization
1. Function Introduction
On the Technical Visualization page, the metadata of the installed modules is displayed and presented in categories.
