Tip
This tutorial extends the "Back-end Framework Tutorial". Please ensure you have completed that tutorial and use the "Expense Management (expenses)" module you built as the basis for this tutorial's exercises.
In most management information systems, data import and export functions are essential. Oinone's built-in import/export templates are automatically generated based on the fields of table views and form views. However, these import/export templates or default import/export logic may not fully meet all business scenarios. For example:
- When importing project information, if the project type name does not exist, it should be automatically created.
- When exporting project information, the corresponding reimbursement form information should be included.
Reference: Documentation related to this topic can be found in "Standard Module - Export and Import".
I. Create an Import Template for "Project Information"
Objectives: By the end of this section:
- Through the import button pop-up on the
Basic Data - Project Managementpage, select the "Project Information Import" template and download it.
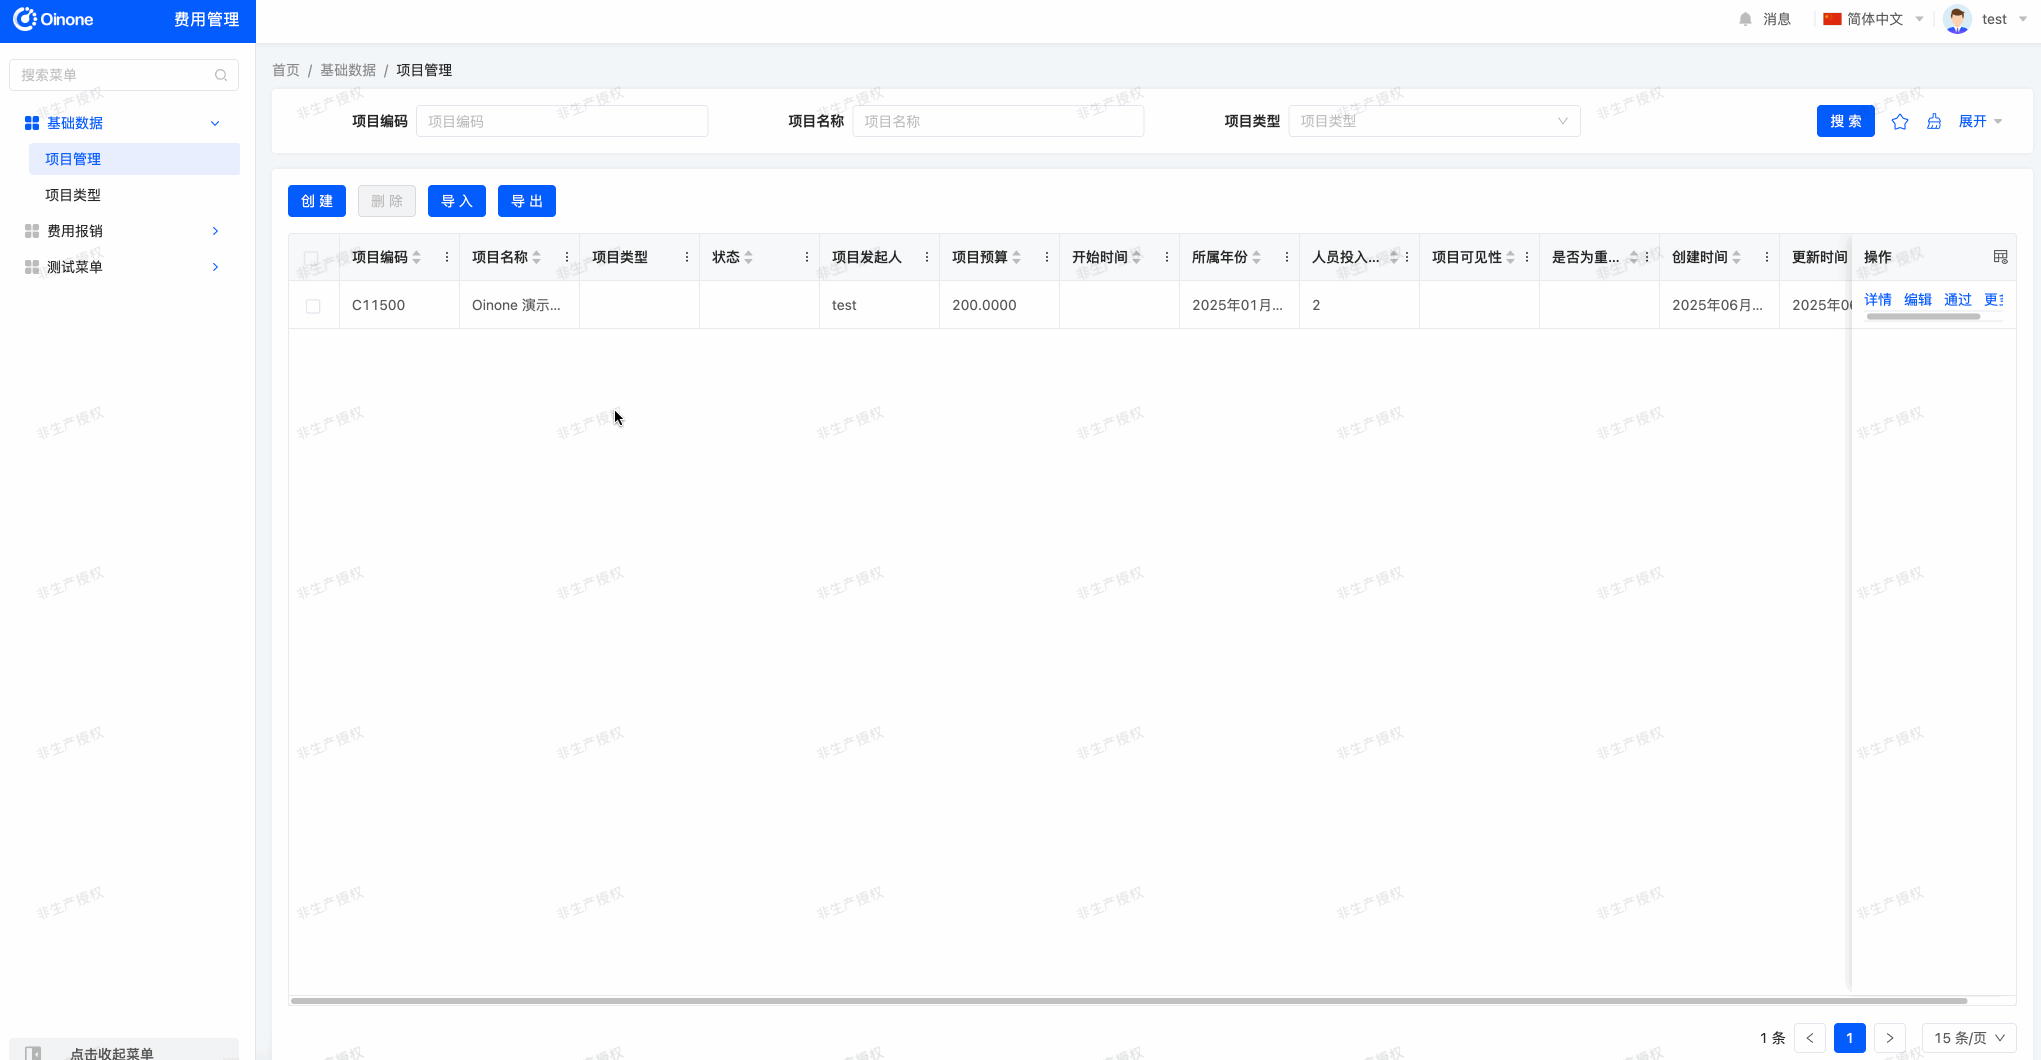
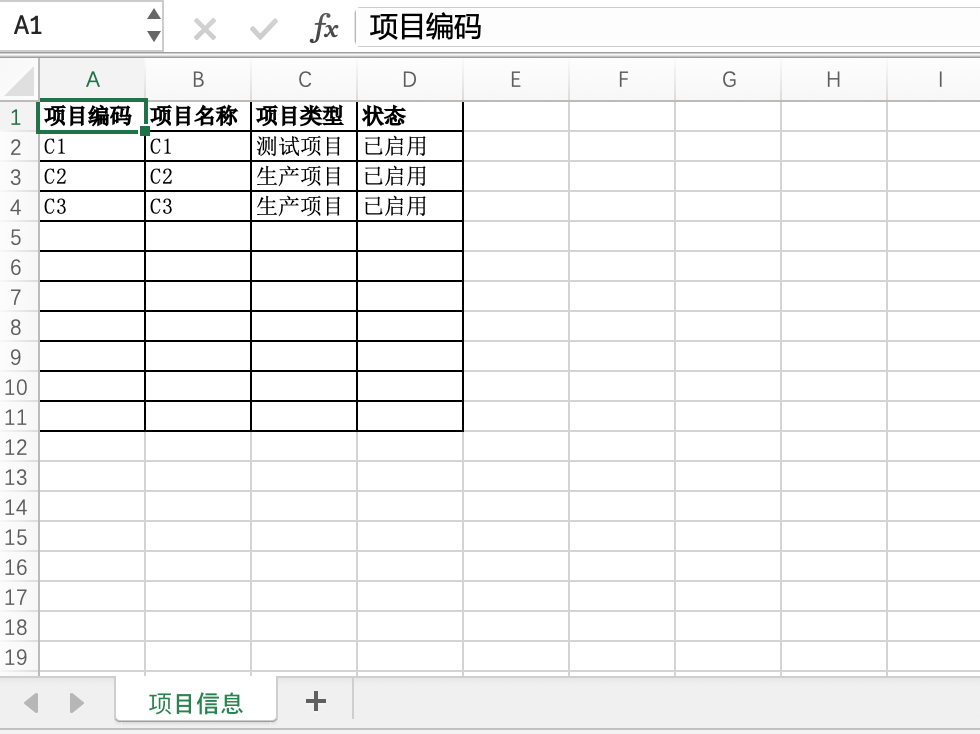
- After opening the Excel file, the following content should be visible:

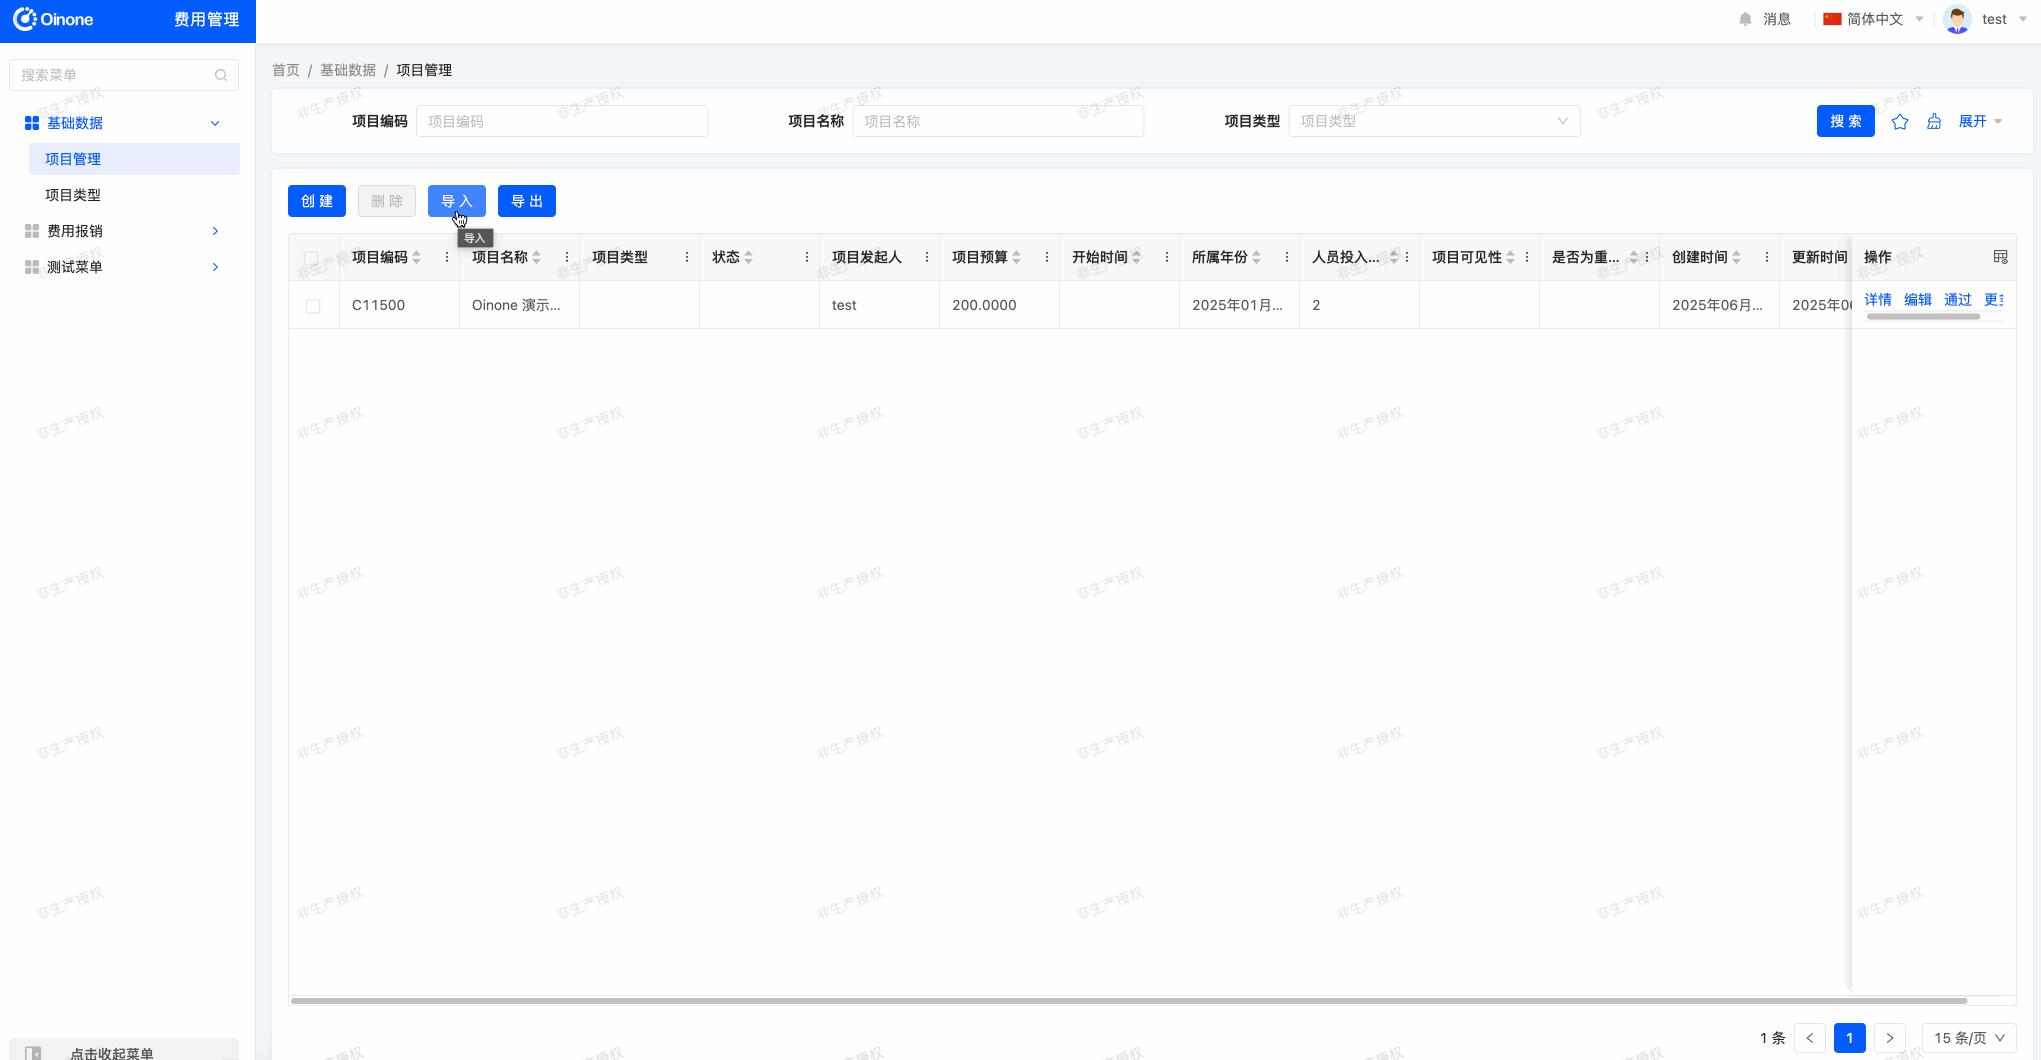
- Attempt to fill in some project information data:
- Import the Excel file through the page and check whether project information and project types are saved correctly:
To customize the file module, the corresponding dependency needs to be introduced according to JAVA characteristics:
<dependency>
  <groupId>pro.shushi.pamirs.core</groupId>
  <artifactId>pamirs-file2-api</artifactId>
</dependency>In Oinone, in addition to introducing the corresponding dependency, the corresponding module dependency also needs to be declared in the current module definition:
……
@Module(
    name = ExpensesModule.MODULE_NAME,
    displayName = "费用管理",
    version = "1.0.0",
    priority = 1,
    dependencies = {
        ……
        FileModule.MODULE_MODULE,
        ……
    }
)
……
public class ExpensesModule implements PamirsModule {
……
}The initialization of the Excel import template is automatically collected and created by implementing the ExcelTemplateInit interface and registering it as a Spring Bean. Oinone provides the ExcelHelper utility class to easily create a simple "fixed header" type import template.
Example: Create an Excel import template for TestModel:
@Component
public class TestModelImportTemplate implements ExcelTemplateInit {

    public static final String TEMPLATE_NAME = "testModelImportTemplate";

    @Override
    public List<ExcelWorkbookDefinition> generator() {
        return Collections.singletonList(ExcelHelper.fixedHeader(TestModel.MODEL_MODEL, TEMPLATE_NAME)
                .setDisplayName("测试模型导入")
                .setType(ExcelTemplateTypeEnum.IMPORT)
                .createBlock("测试模型", TestModel.MODEL_MODEL)
                .addColumn("code", "编码")
                .addColumn("name", "名称")
                .addColumn("user.login", "用户账号")
                .build());
    }
}- Declare the template name constant
TEMPLATE_NAME, which will be used in the import extension point expression. - ExcelHelper.fixedHeader: Create a
fixed headerformat Excel template. - setDisplayName: Set the display name of the downloaded template, which is also used for displaying the template selection in the page.
- setType: Set the template type for selecting among three types:
import only,export only, andimport-export. - createBlock: Create a
sheetandblock, with thesheetname as测试模型and theblockcorresponding to the import model. - addColumn: Add a column with the
codefield and the header title编码.
With the Excel import template, we need to customize the import logic to meet actual business needs. The default import logic is "create or update", but operations on "user" data are not just about saving to the database. Usually, creating or updating "users" requires using corresponding "services" to ensure normal operation, which requires us to customize the "import logic".
Example: Customize import logic for TestModelImportExtPoint:
@Component
@Ext(ExcelImportTask.class)
public class TestModelImportExtPoint implements ExcelImportDataExtPoint<TestModel> {

    @ExtPoint.Implement(expression = "importContext.definitionContext.name==\"" + TestModelImportTemplate.TEMPLATE_NAME + "\"")
    @Override
    public Boolean importData(ExcelImportContext importContext, TestModel data) {
        String userLogin = Optional.ofNullable(data.getUser()).map(PamirsUser::getLogin).orElse(null);
        PamirsUser user = null;
        if (StringUtils.isNotBlank(userLogin)) {
            // If user login is not empty, execute user creation or update logic
            // and assign a value to user
        } else {
            // If user login is empty, perform some processing logic
            // and assign a value to user
        }
        if (user != null) {
            // Set the user object, and the associated relationship field will be automatically saved when saving
            data.setUser(user);
        } else {
            data.unsetUser();
        }
        // Create and update main model data
        data.createOrUpdate();
        return true;
    }
}- The extension point needs to use an expression to limit that this extension point is only used for the specified import template. Here, we determine it by the previously defined template name
TEMPLATE_NAME. - The generic type of the import extension point can be directly set to the specified model object but cannot be declared as a list or other types. Each time the import extension point is executed, the collected data of one object is passed in for processing.
Tip:
The user.login field in the template will pass the "user account" data filled in Excel to the login field of the TestModel#user object, which is a very useful notation for many-to-one (M2O) fields.
Exercise
- Create an import template for "Project Information" (projectInfoImportTemplate).
- The template should include four fields: Project Code, Project Name, Project Type, and Status.
- Create an import extension point (ProjectInfoImportExtPoint) to process the project type before saving project information: if the input project type name is duplicated, get the first project type; if the input project type name does not exist, create the corresponding project type.
II. Create an Export Template for "Project Information"
Objectives: By the end of this section:
- Through the export button pop-up on the
Basic Data - Project Managementpage, select the "Project Information Export" template to export all current project information data, and finally jump to theFiles - Export Taskspage to download the exported file.
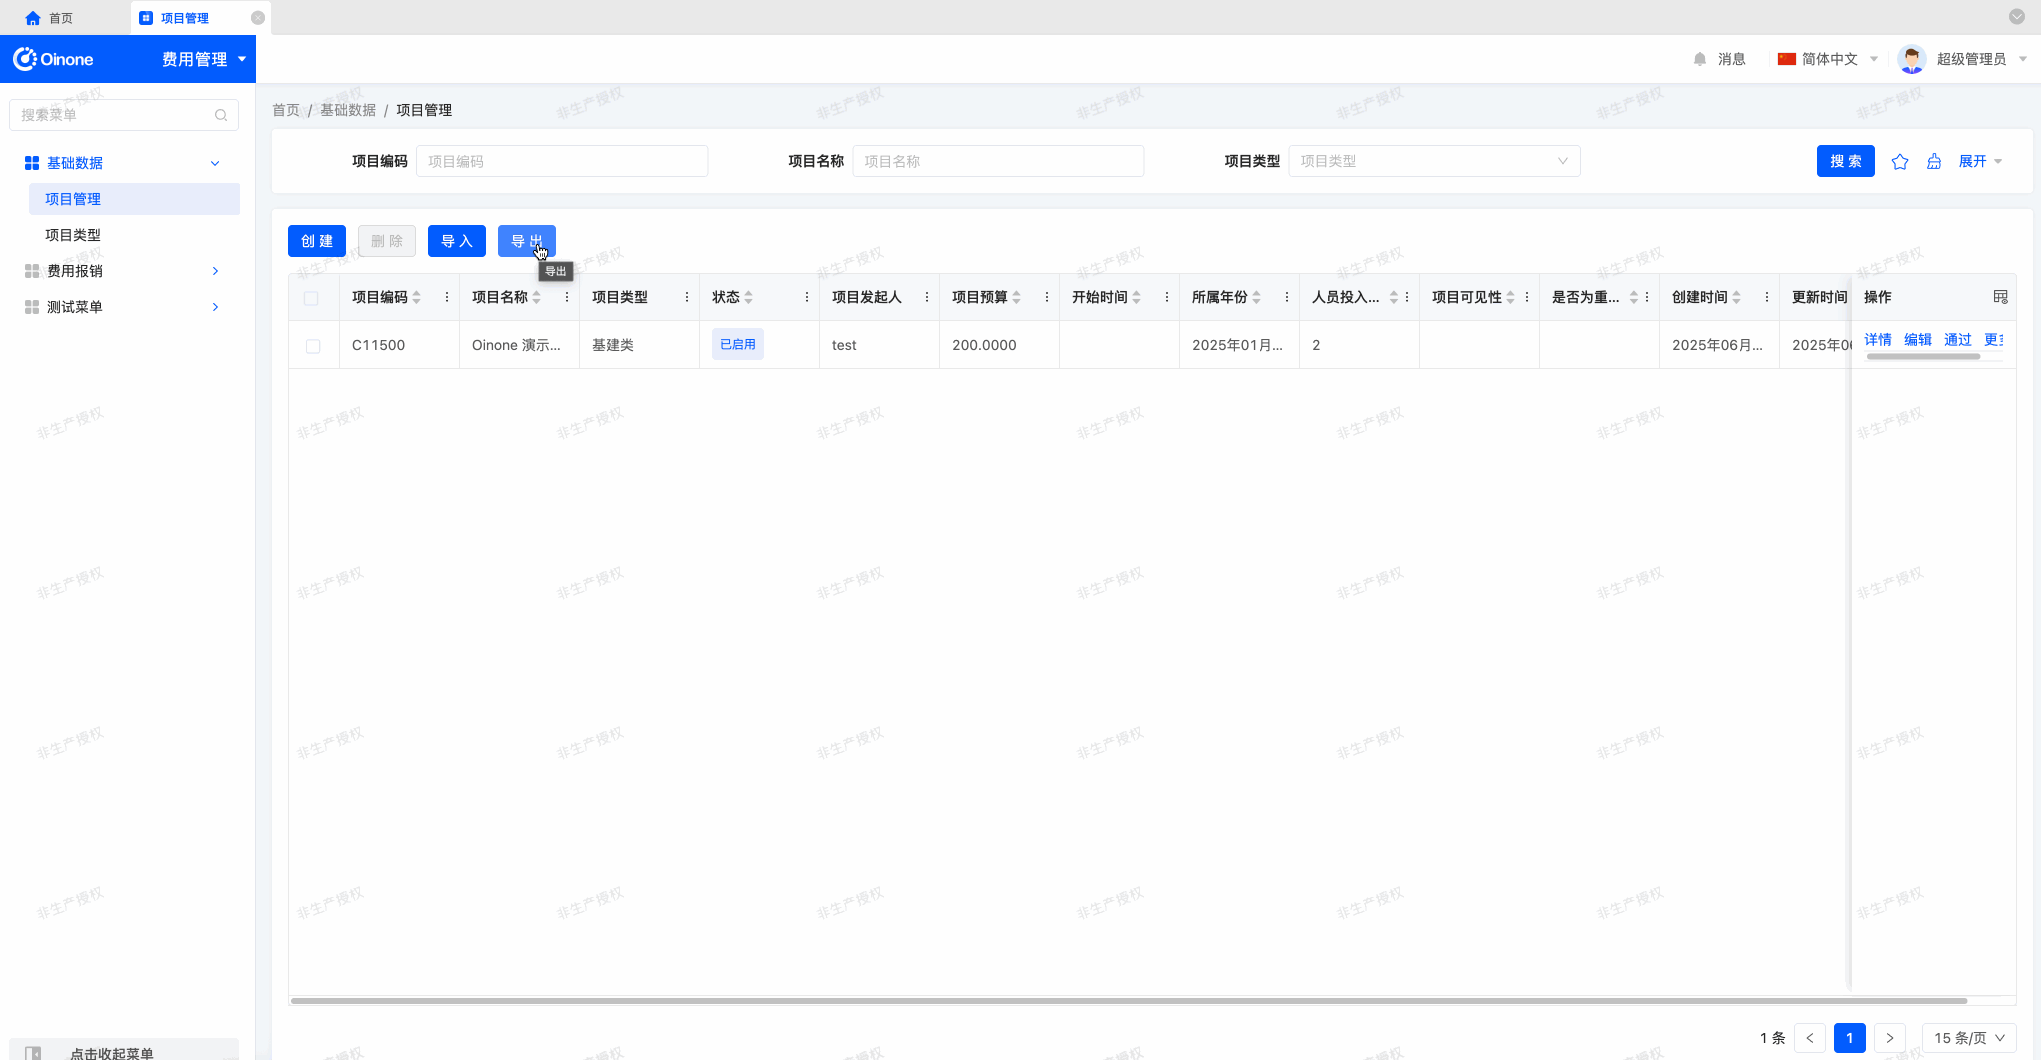
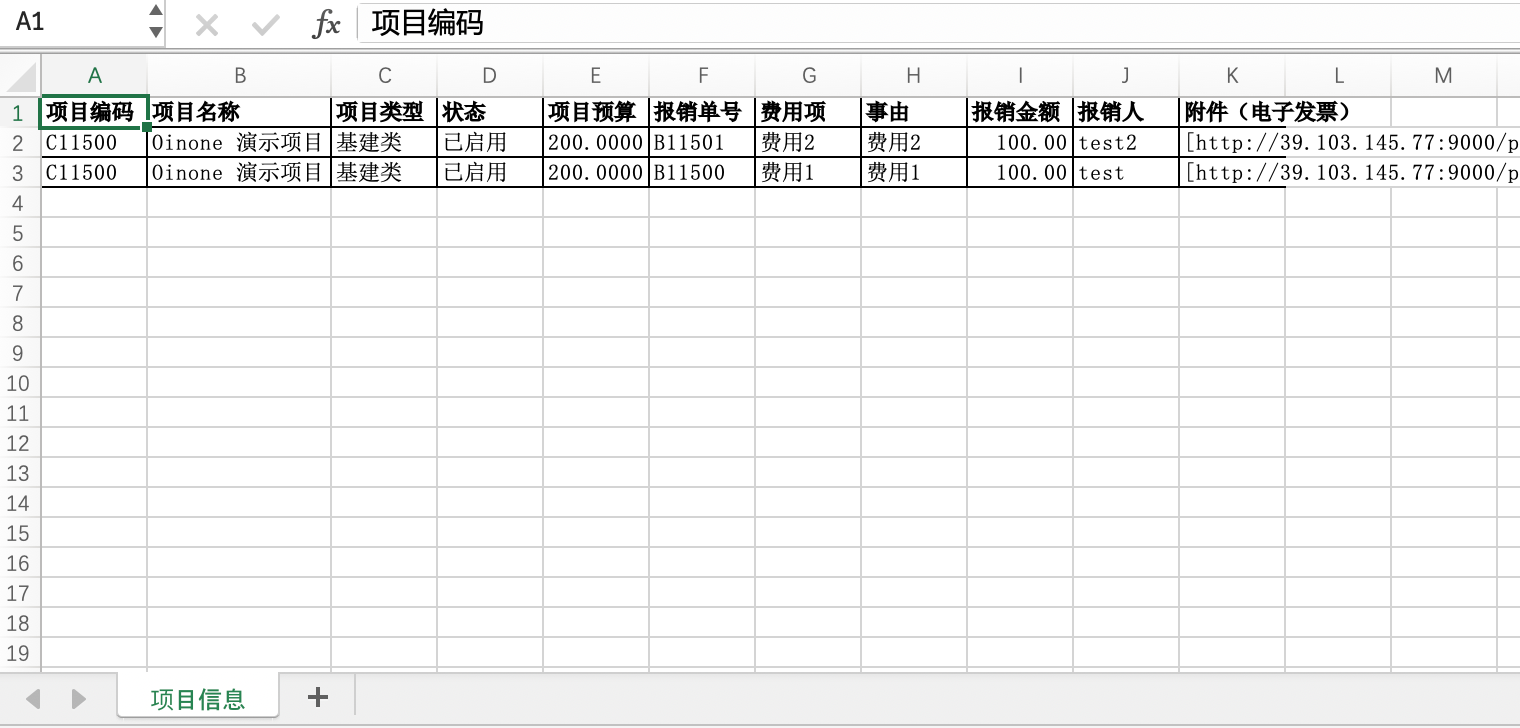
- After opening the Excel file, the following content should be visible:
The Excel export template is also automatically collected and created by implementing the ExcelTemplateInit interface and registering it as a Spring Bean. The definition method is exactly the same as the import template; we only need to change the corresponding template type in setType to "export only" to use it as an export template.
In the import template, we can define the field values of many-to-one (M2O) type fields in the form of ".". How should we define one-to-many (O2M) or many-to-many (M2M) fields?
Example: Create an Excel export template for TestModel:
@Component
public class TestModelExportTemplate implements ExcelTemplateInit {

    public static final String TEMPLATE_NAME = "testModelExportTemplate";

    @Override
    public List<ExcelWorkbookDefinition> generator() {
        return Collections.singletonList(ExcelHelper.fixedHeader(TestModel.MODEL_MODEL, TEMPLATE_NAME)
                .setDisplayName("测试模型导出")
                .setType(ExcelTemplateTypeEnum.EXPORT)
                .createBlock("测试模型", TestModel.MODEL_MODEL)
                .addColumn("code", "编码")
                .addColumn("name", new ExcelCellDefinition().setValue("名称").setAutoSizeColumn(true))
                .addColumn("computeName", "计算字段")
                .addColumn("partners[*].name", "合作伙伴名称")
                .build());
    }
}- Use
[*]to represent list-type fields. ExcelCellDefinitionis an Excel cell definition model, which can be used to set attributes other than the "header title", such assetAutoSizeColumnto enable the "auto column width" function.- The value of the
computeNamefield is obtained through a calculation expression. The default export logic does not support such calculation logic, which requires processing the data in the "custom export logic".
Although the export template is normally defined, some fields require special calculation logic for proper processing. Similar to "custom import logic", custom export is also implemented through "extension points".
Example: Customize export logic for TestModelExportExtPoint:
@Component
@Ext(ExcelExportTask.class)
public class TestModelExportExtPoint extends ExcelExportSameQueryPageTemplate implements ExcelExportFetchDataExtPoint {

    @SuppressWarnings("unchecked")
    @ExtPoint.Implement(expression = "context.name==\"" + TestModelExportTemplate.TEMPLATE_NAME + "\"")
    @Override
    public List<Object> fetchExportData(ExcelExportTask exportTask, ExcelDefinitionContext context) {
        List<Object> dataList = super.fetchExportData(exportTask, context);
        // Retrieve data from the first block and cast it to the corresponding model type
        List<TestModel> list = (List<TestModel>) dataList.get(0);
        for (TestModel item : list) {
            // Calculation logic
        }
        return dataList;
    }
}Exercise
- Create an export template for "Project Information" (projectInfoExportTemplate).
- The template should include the following fields: Project Code, Project Name, Project Type, Status, Project Budget, Reimbursement Form Number, Expense Item, Reason, Reimbursement Amount, Reporter, and Attachment (Electronic Invoice).
- Create an export extension point (ProjectInfoExportExtPoint) to calculate the project budget value using the formula (Project Budget = Budget per Person * Personnel Input Scale) after obtaining the data.
Tip:
Previously, in the "Project Information" model, the project budget was defined as a stored field and saved in the database. Before performing this exercise, you can change this field to a "non-stored field" to facilitate viewing the calculation effect of the custom extension point.