Before starting to handle integration transactions, you need to clearly define the resources that can be integrated. After the resource definition is completed, you can proceed with the orchestration of integrated data, as shown in the figure:

Integration refers to the connection between platform applications and external systems, while internal applications within the platform interact directly through internal service calls. As an important part of integration, connectors cover three types of resources: applications, databases, and file sets.
- Application: Refers to the application resources that can be integrated.
- Database: Refers to the database resources that can be integrated.
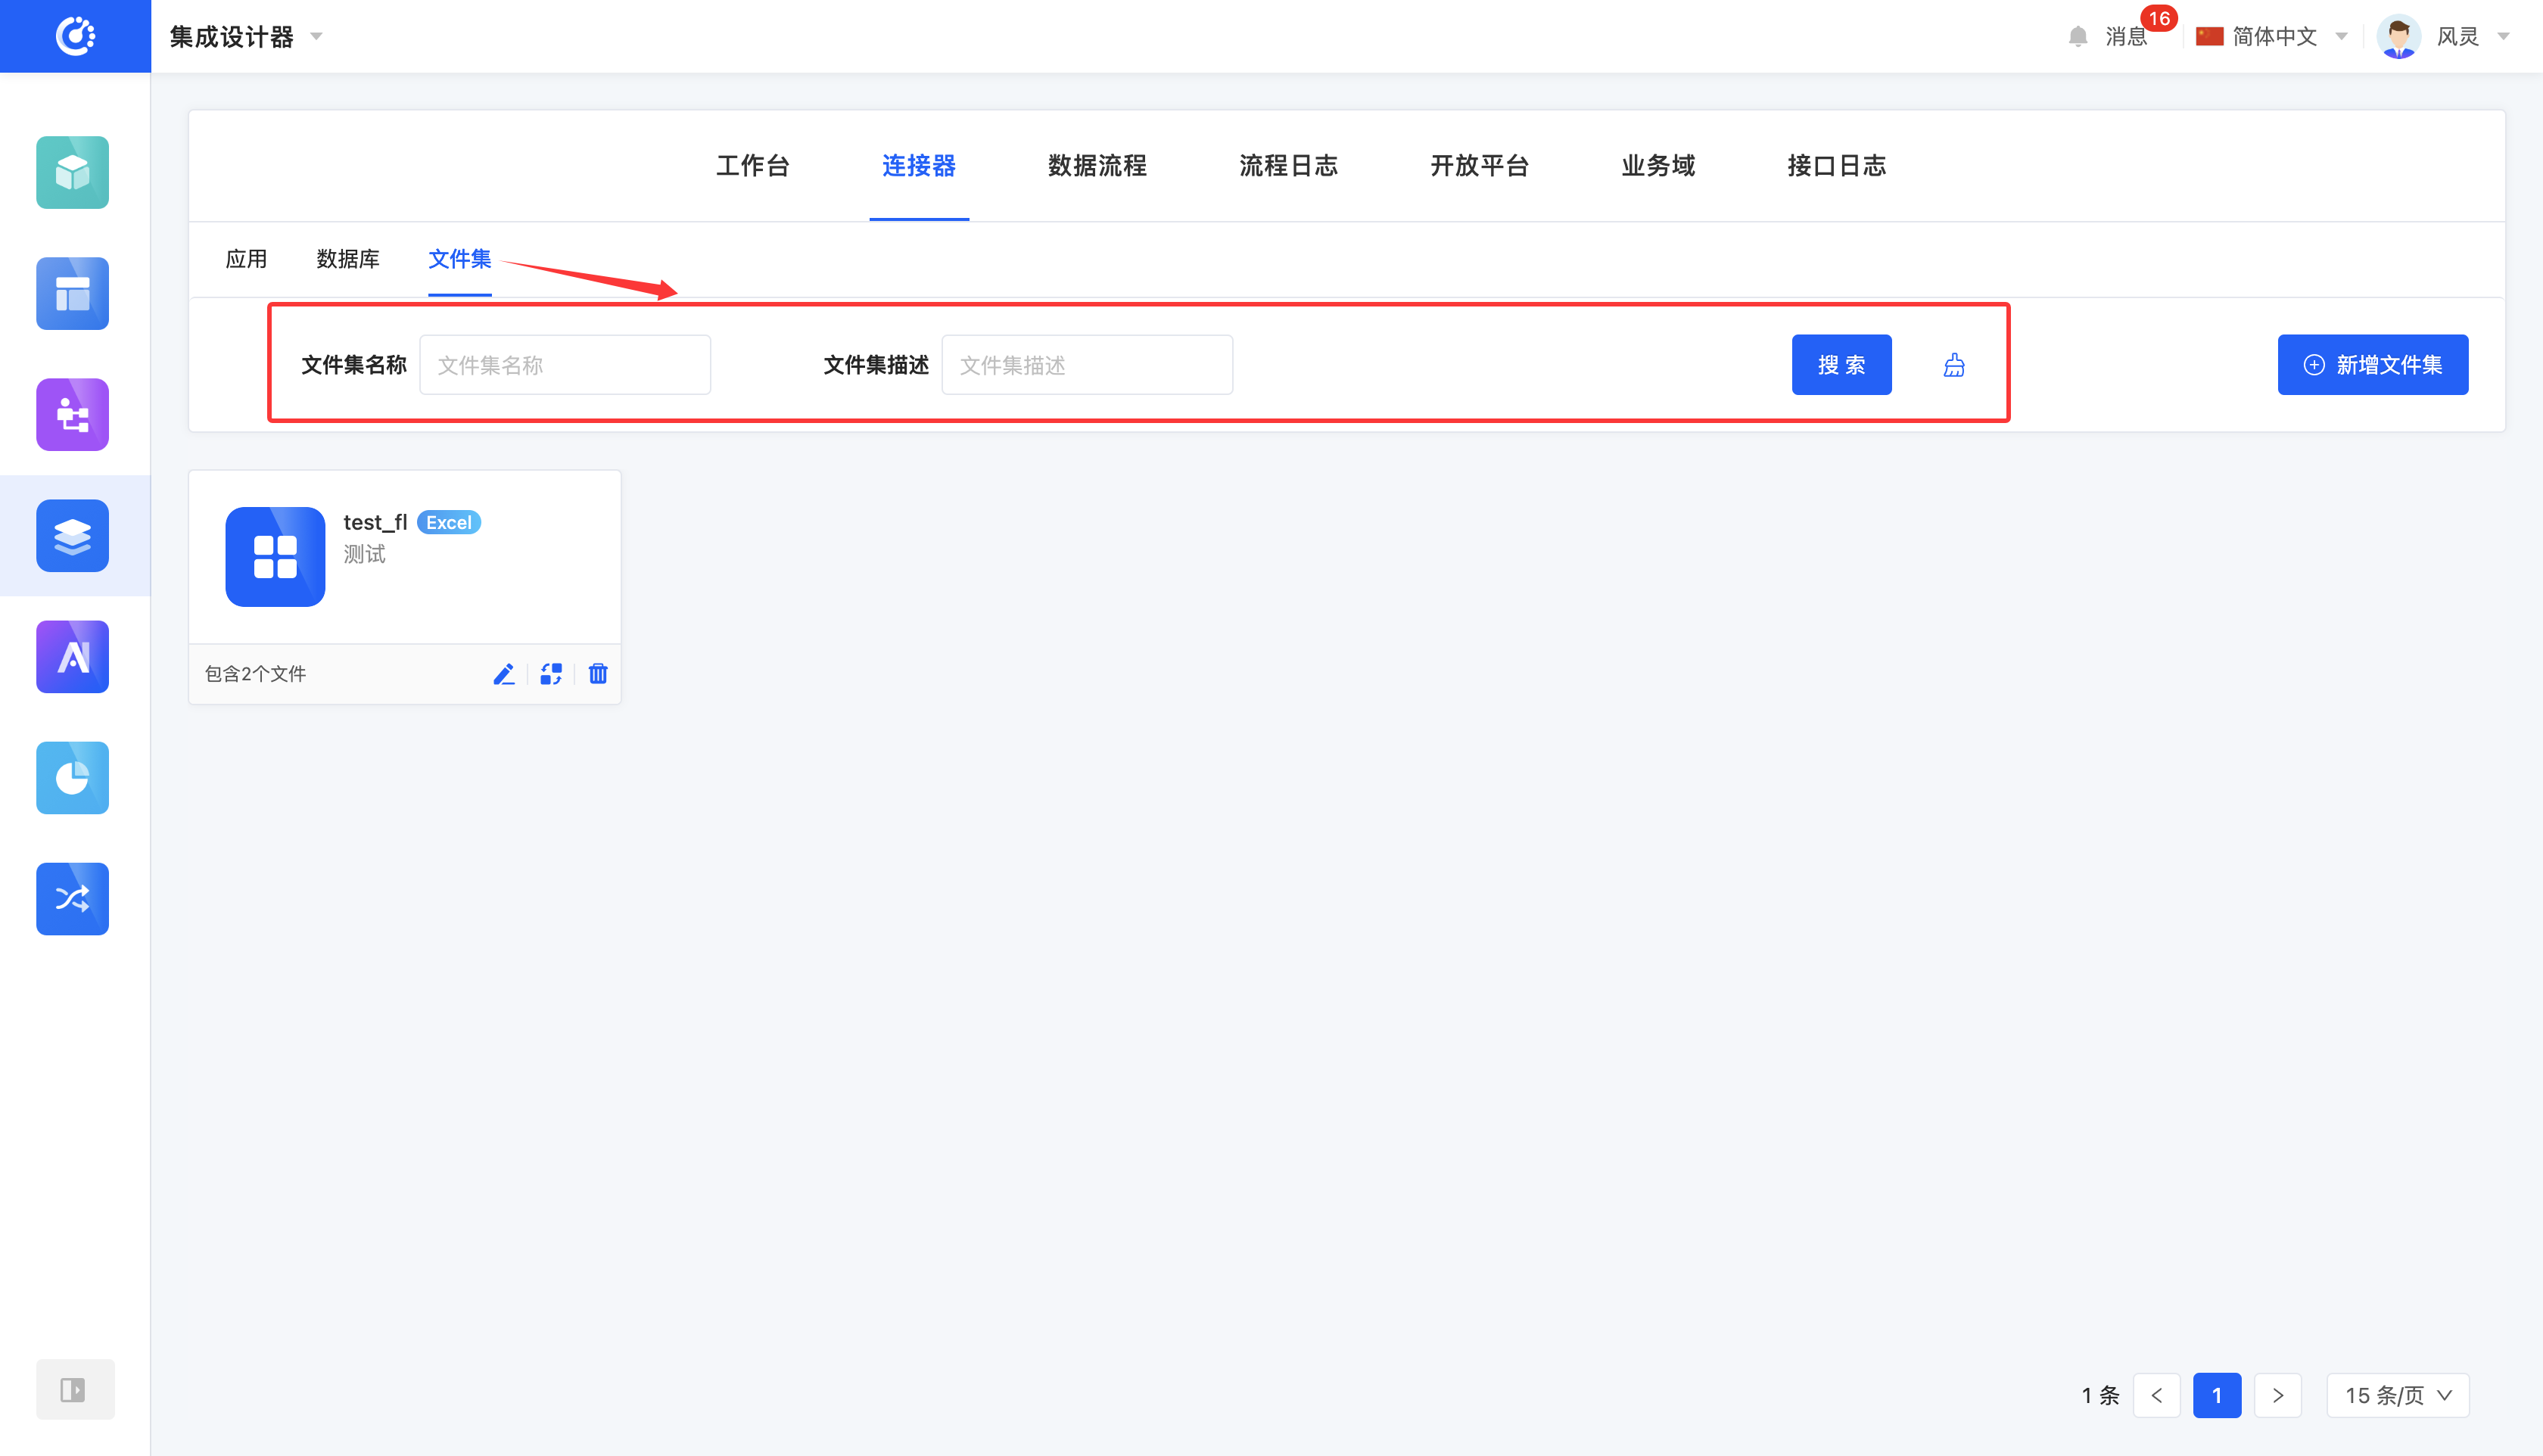
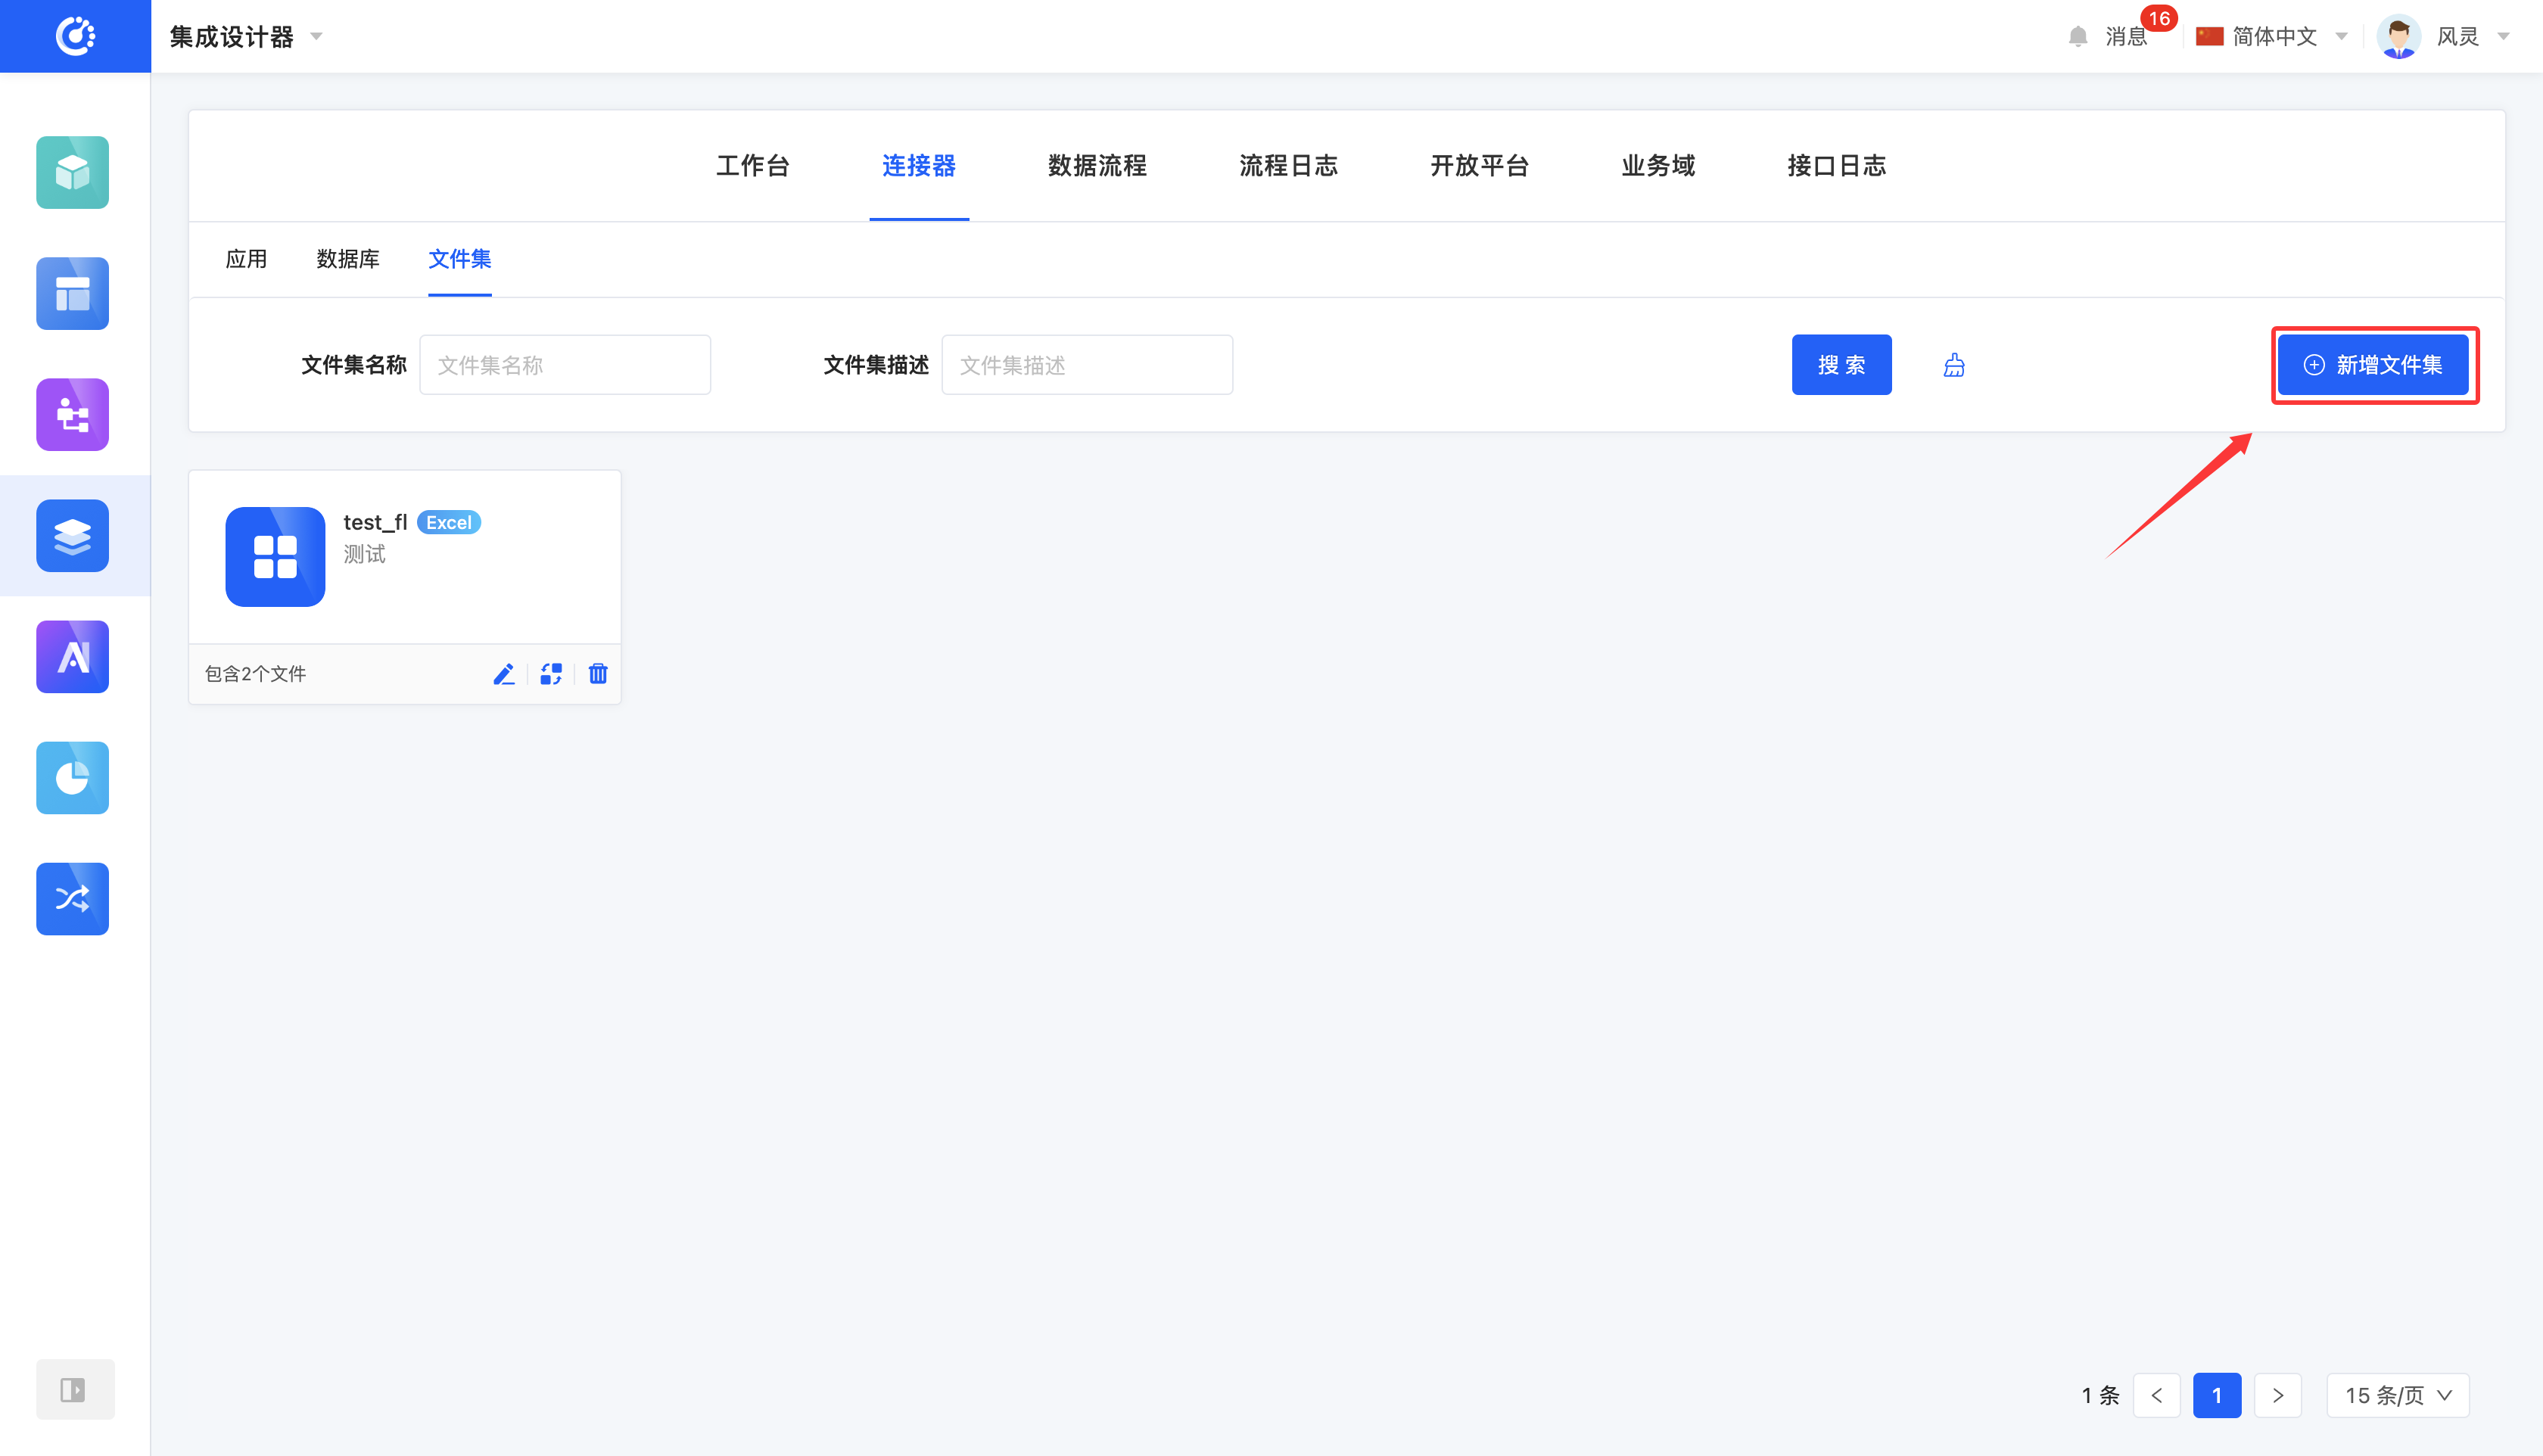
- File Set: Refers to the file resources that can be referenced.
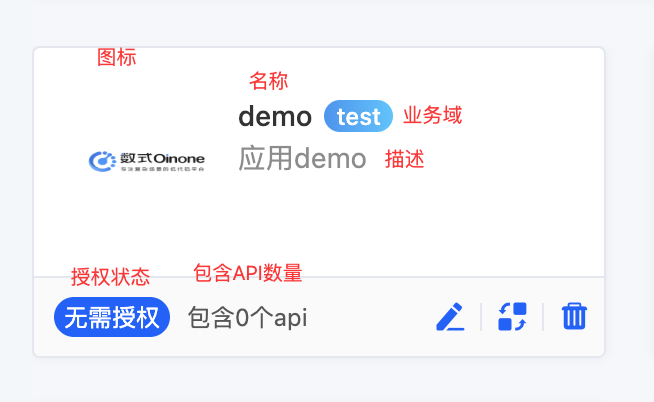
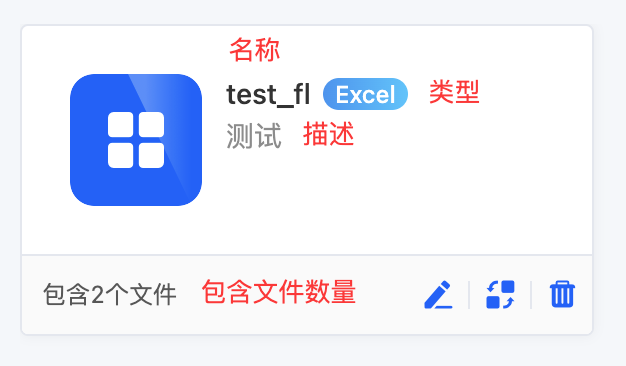
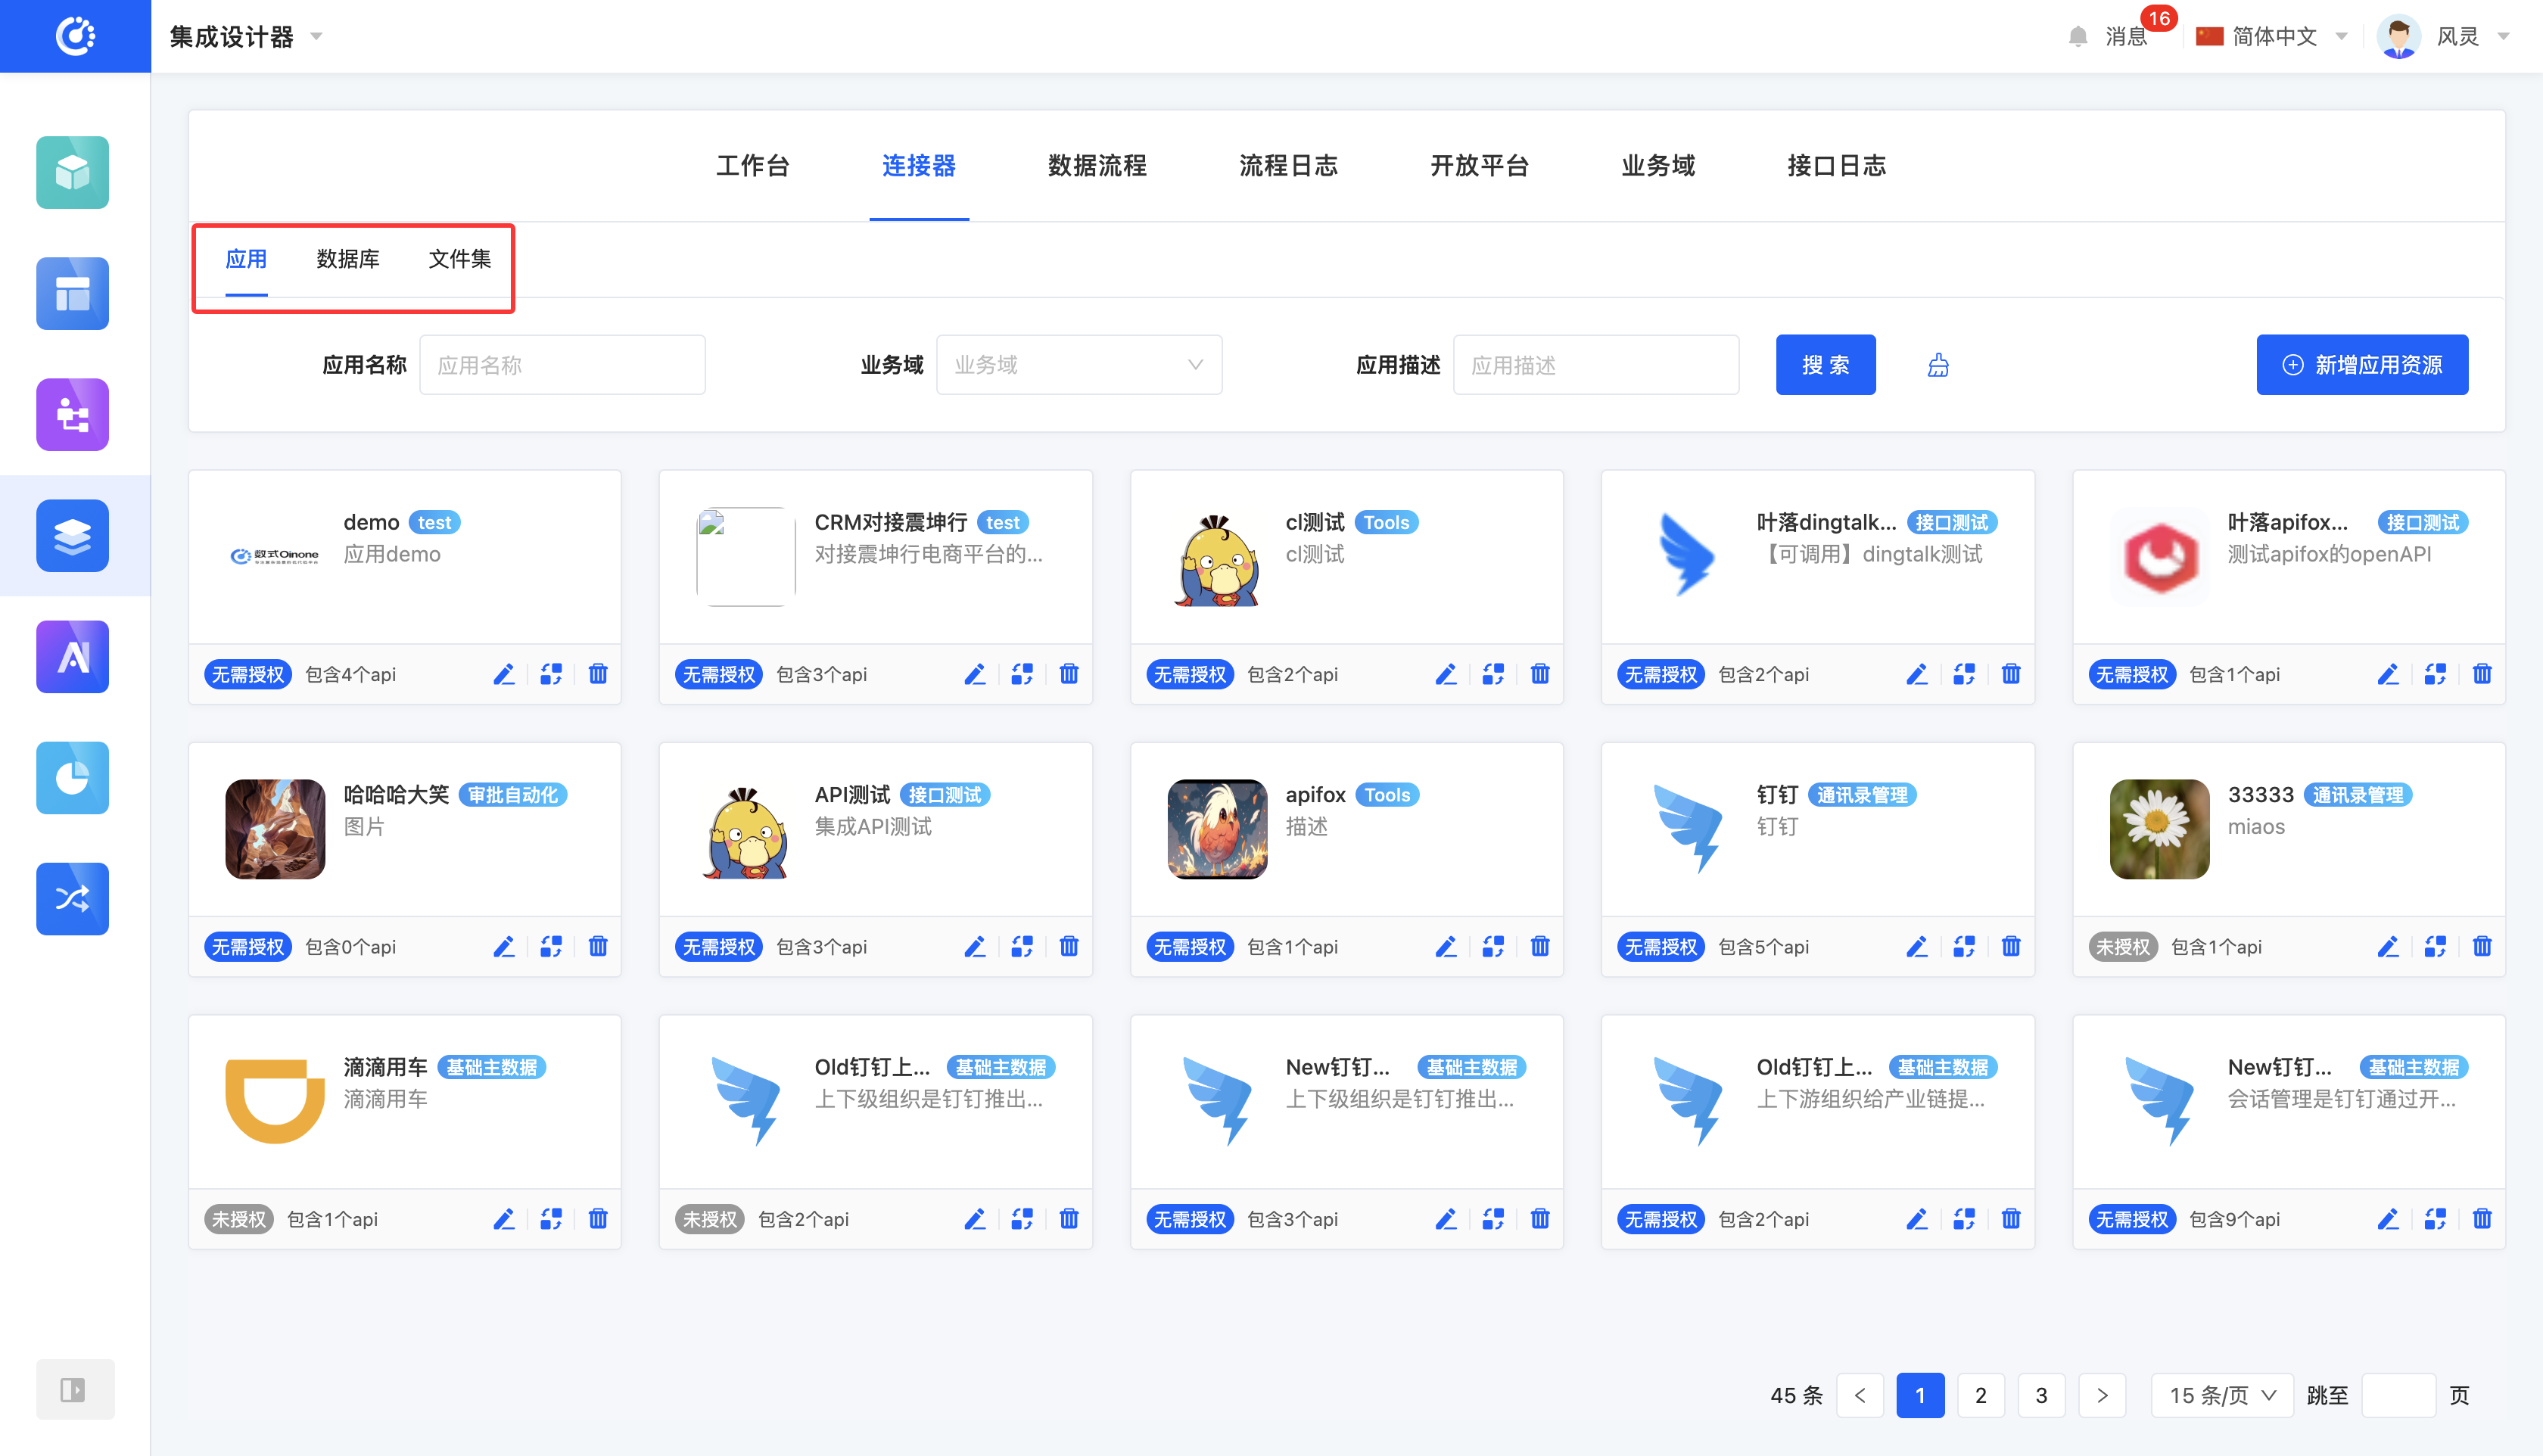
In the connector, the component list is presented in the form of cards. You can preview the basic information of applications, databases, or file sets on the cards:
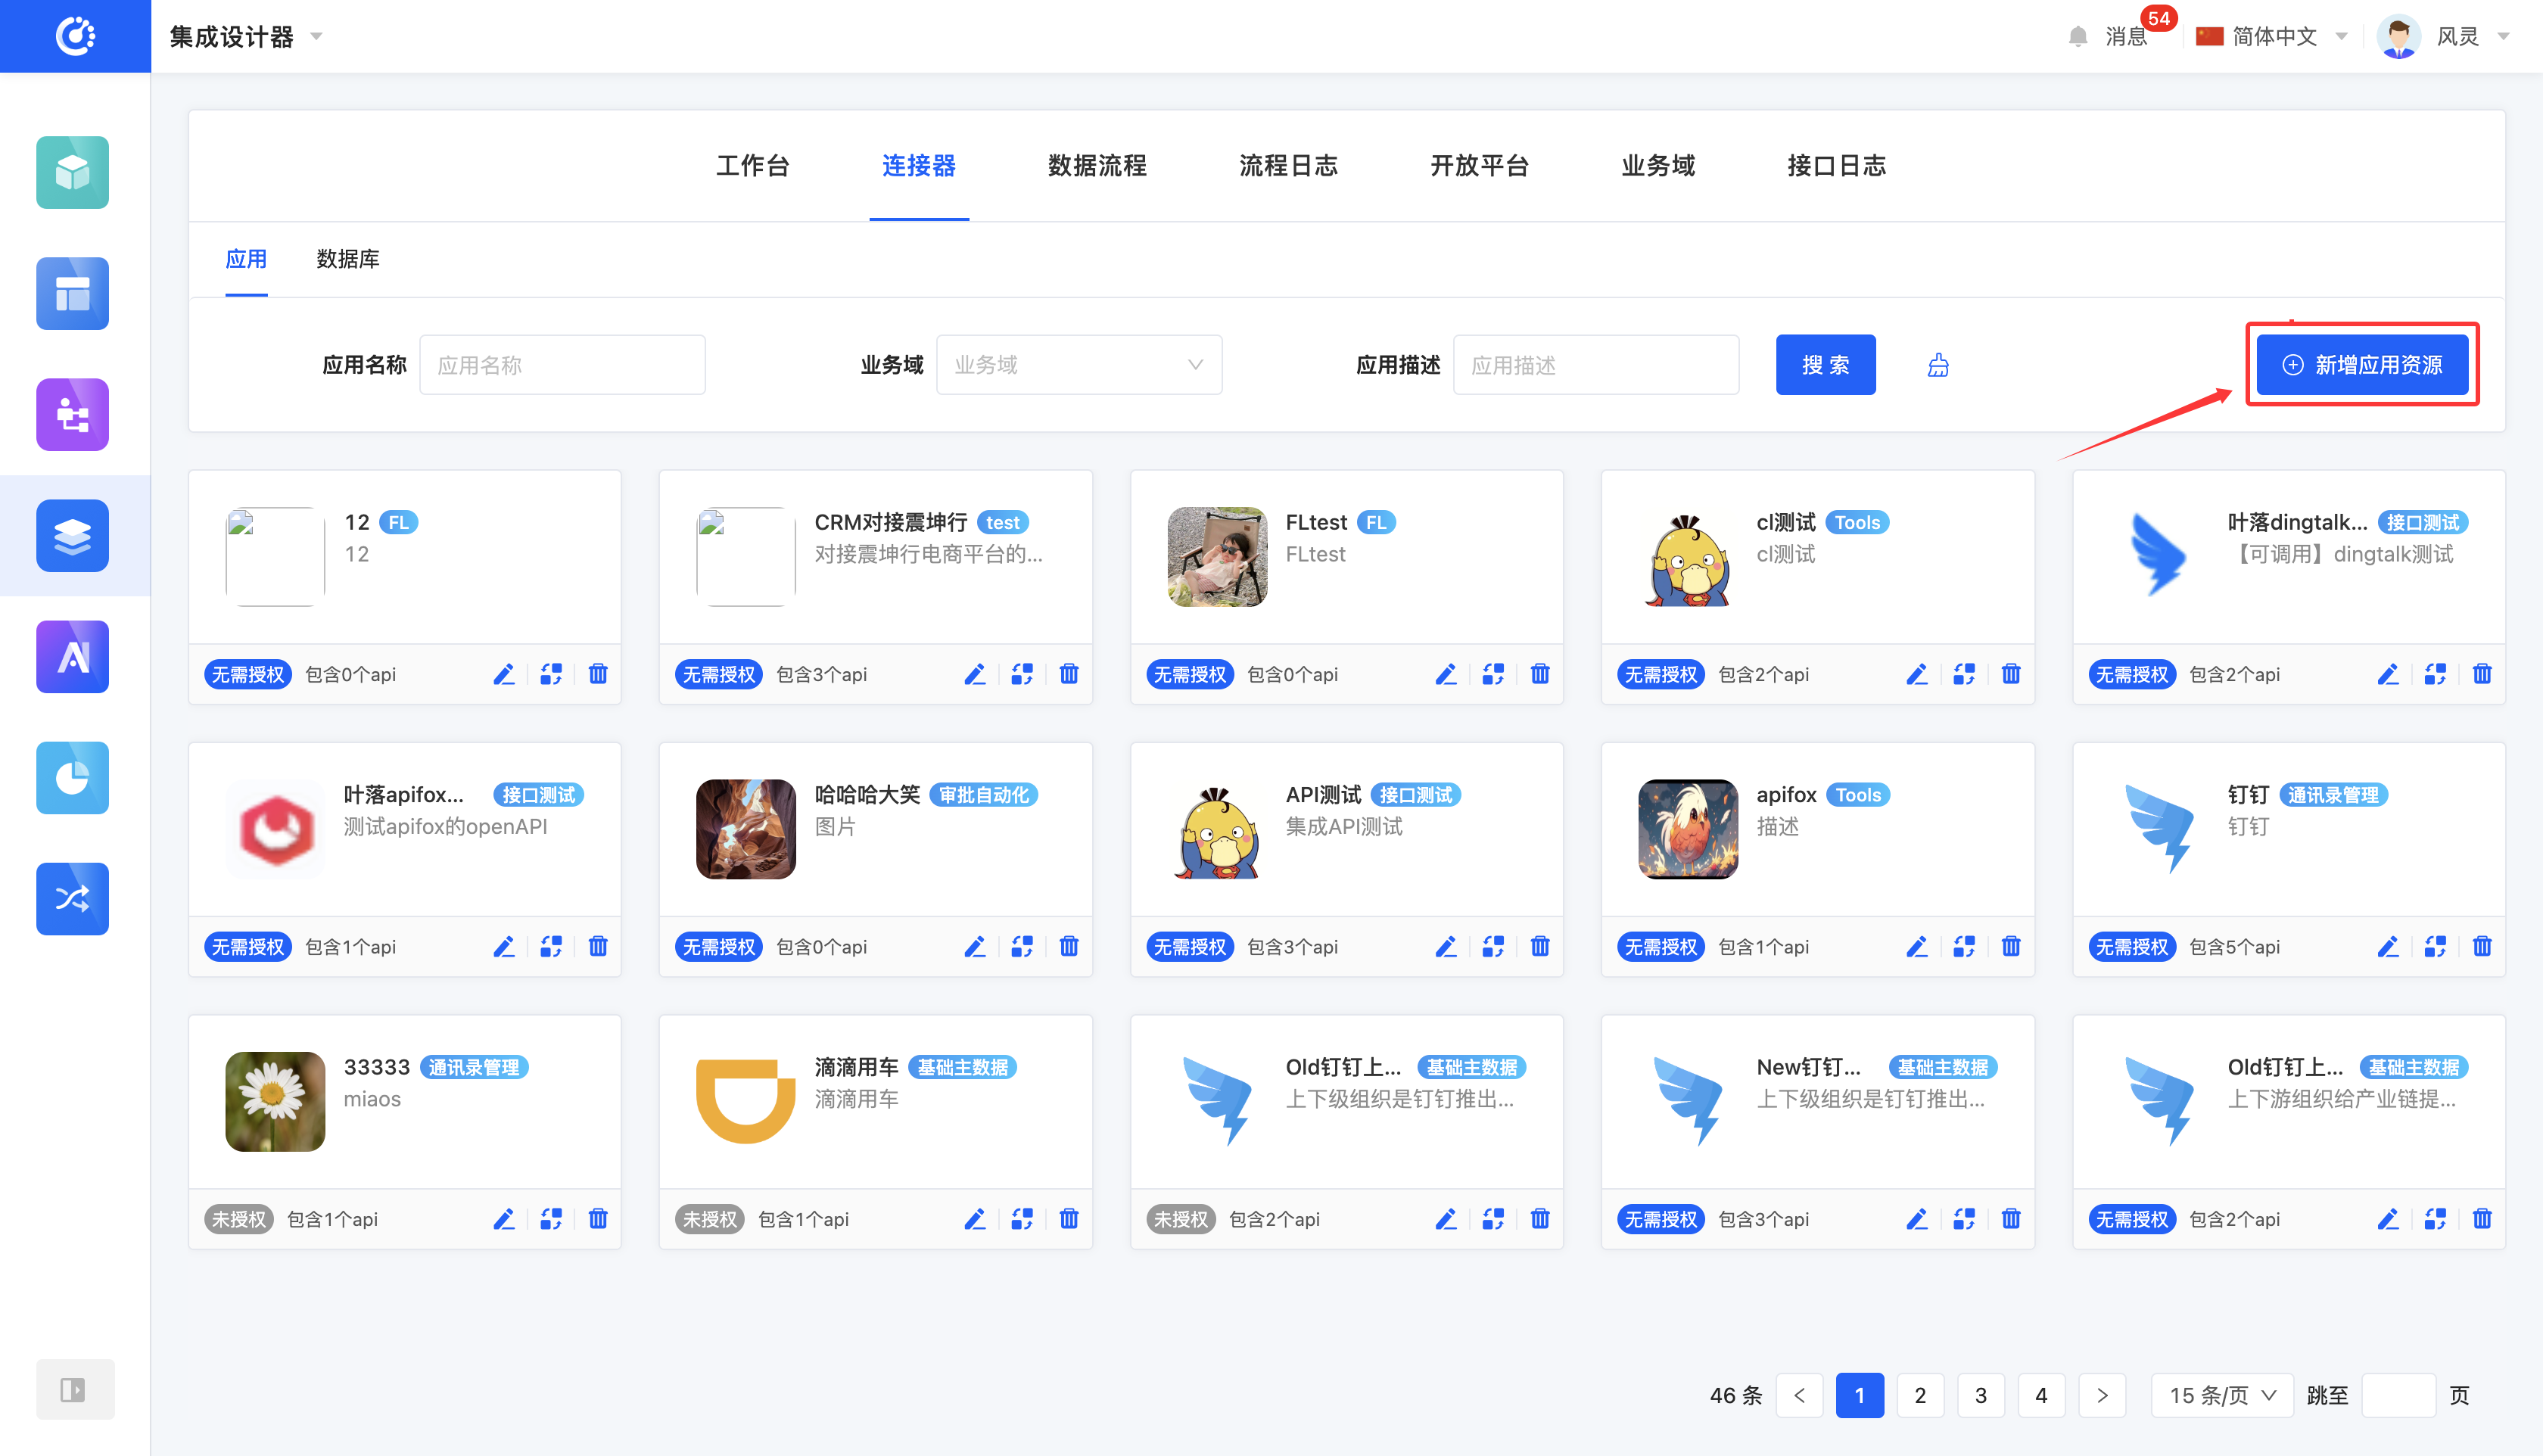
- Application: Icon, name, business domain, description, authorization status, and the number of included APIs.
Note
When a certain authentication method is selected during application creation, the authorization status here will correspond to the status.
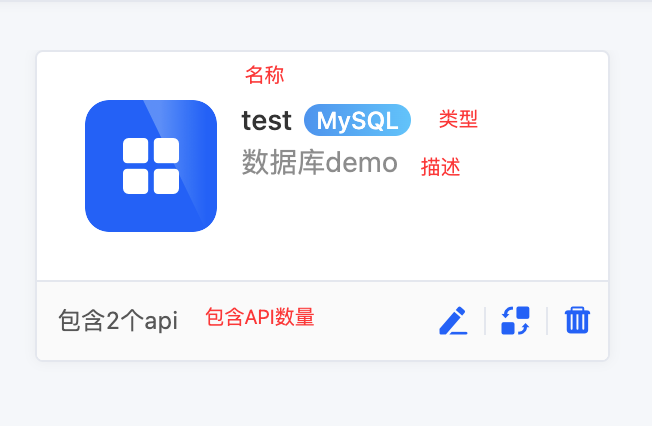
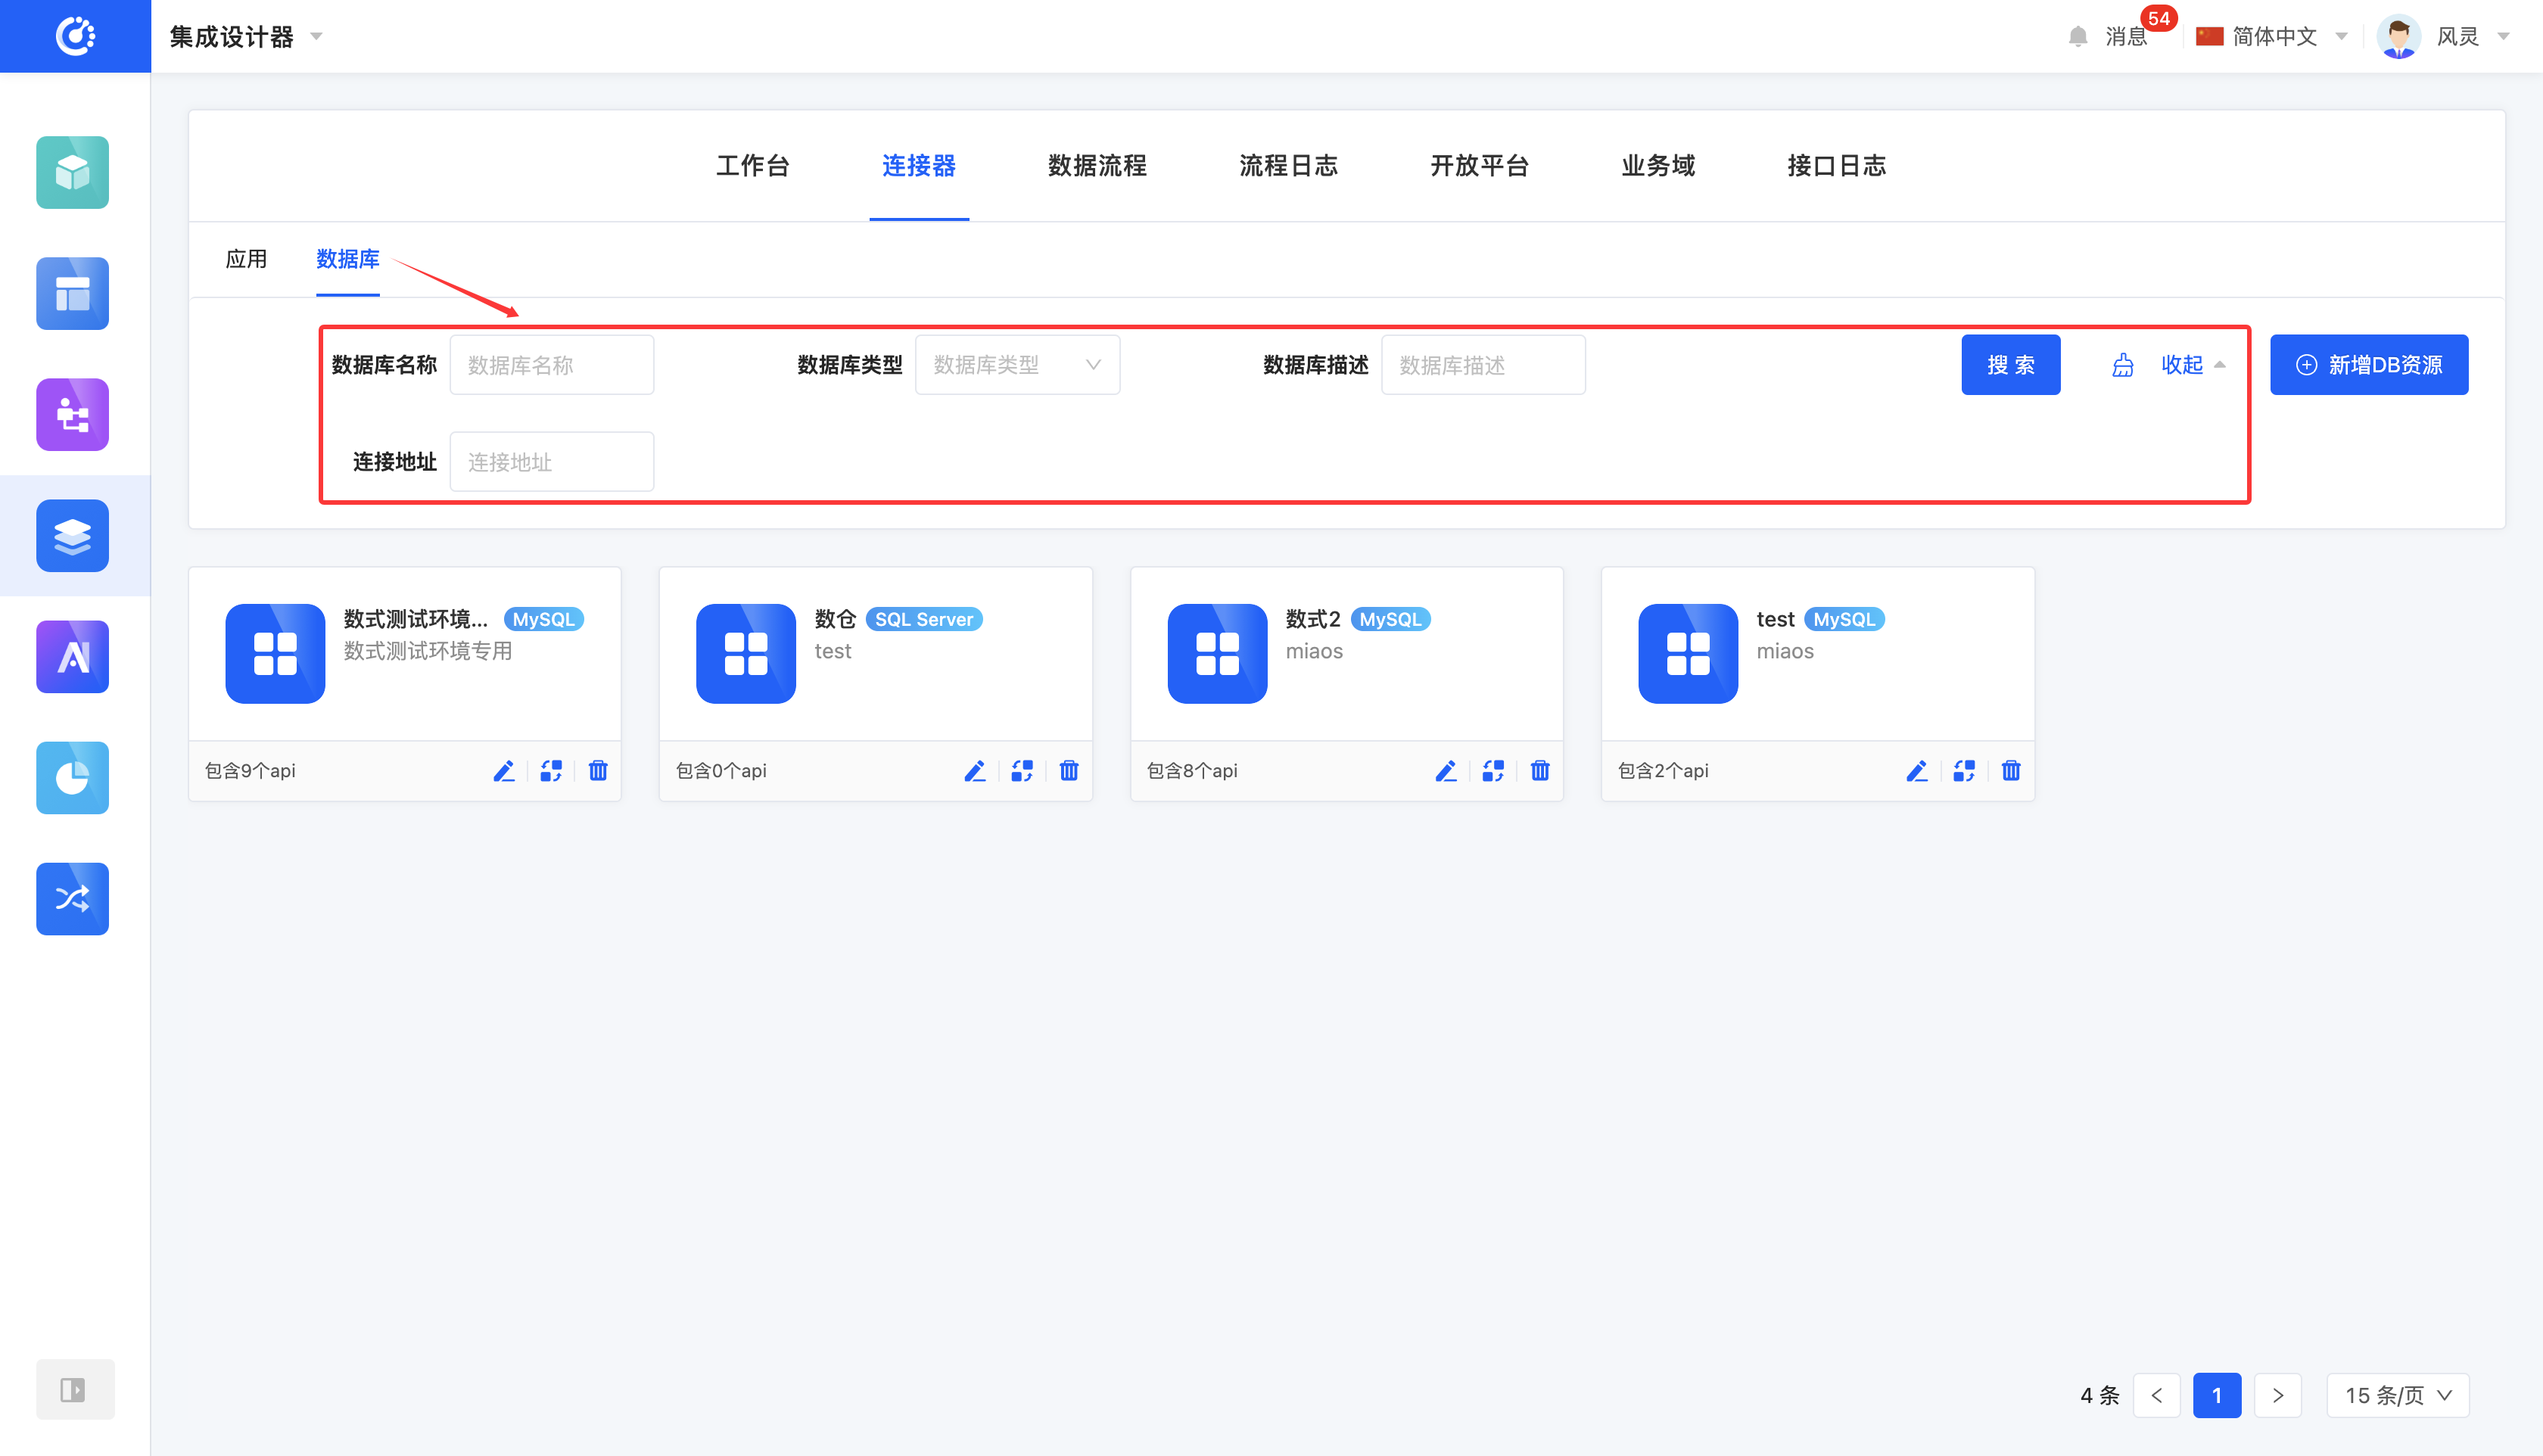
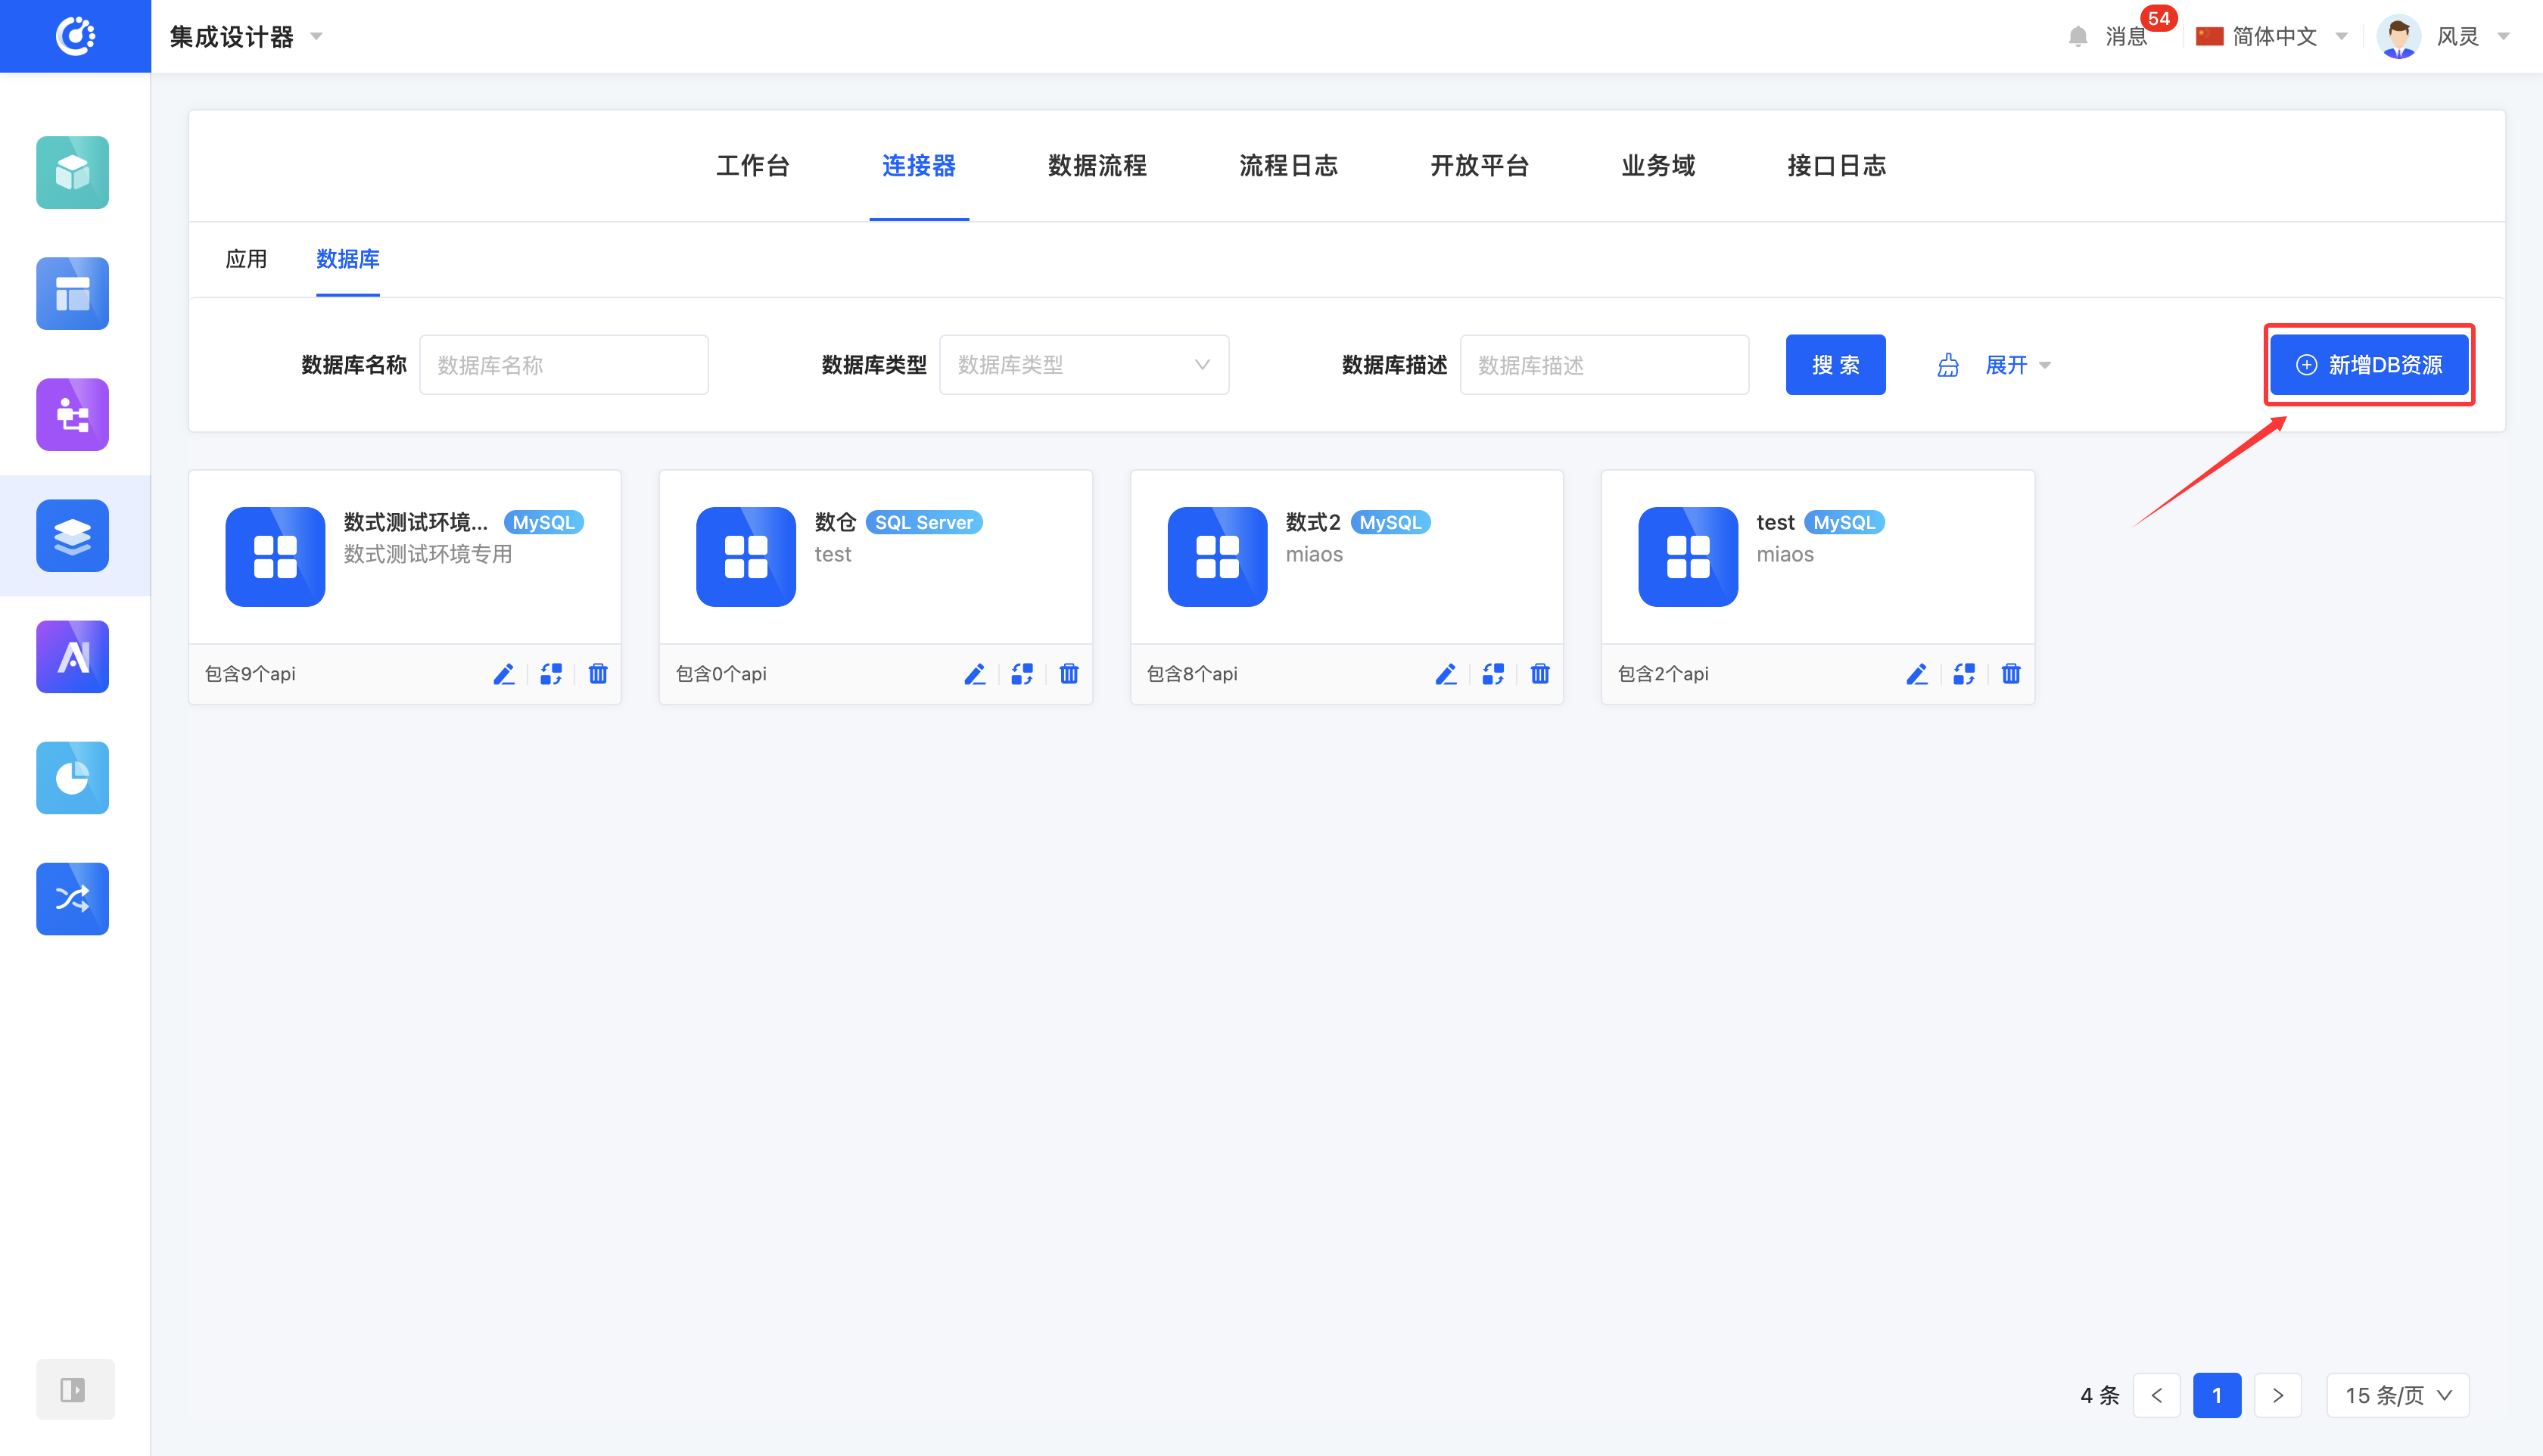
- Database: Name, type, description, and the number of included APIs.
- File Set: Name, type, description, and the number of included files.
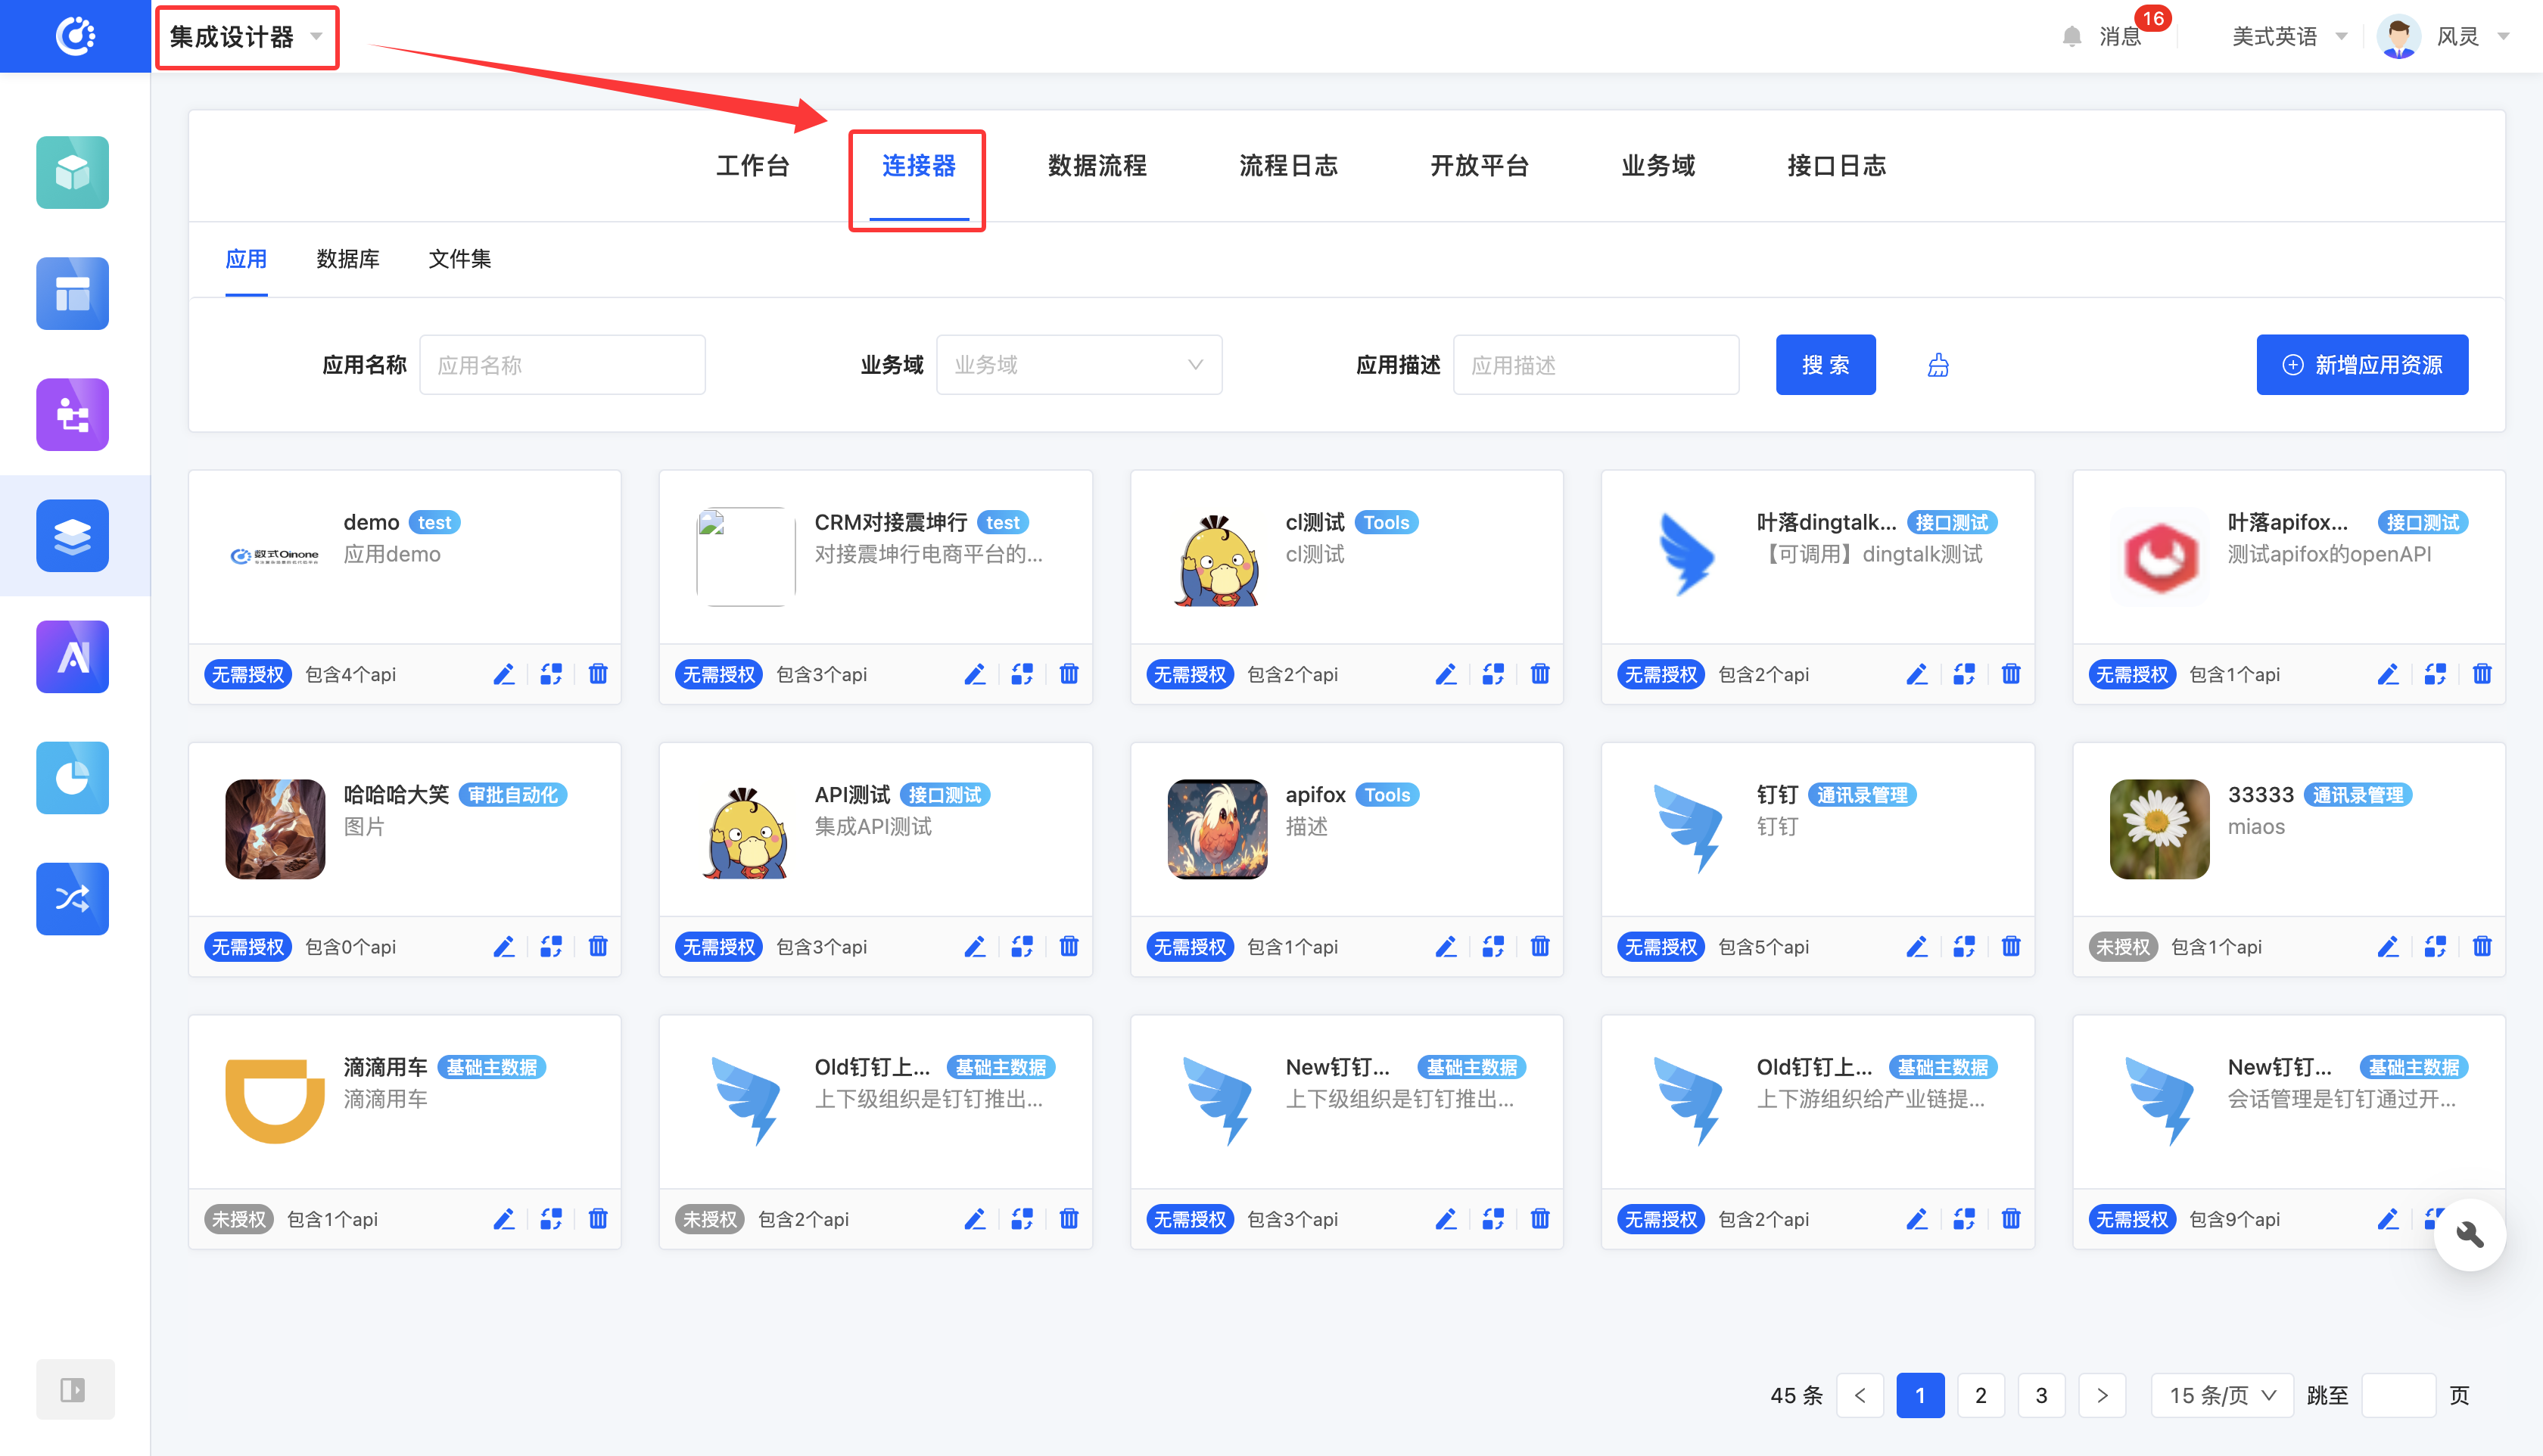
I. Switch Resource Types
1. Function Introduction
The connector contains three major resource types: applications, databases, and file sets. You can independently manage and operate these three types of resources.
2. Operation Method
Click the corresponding resource type in the Tab bar to switch.
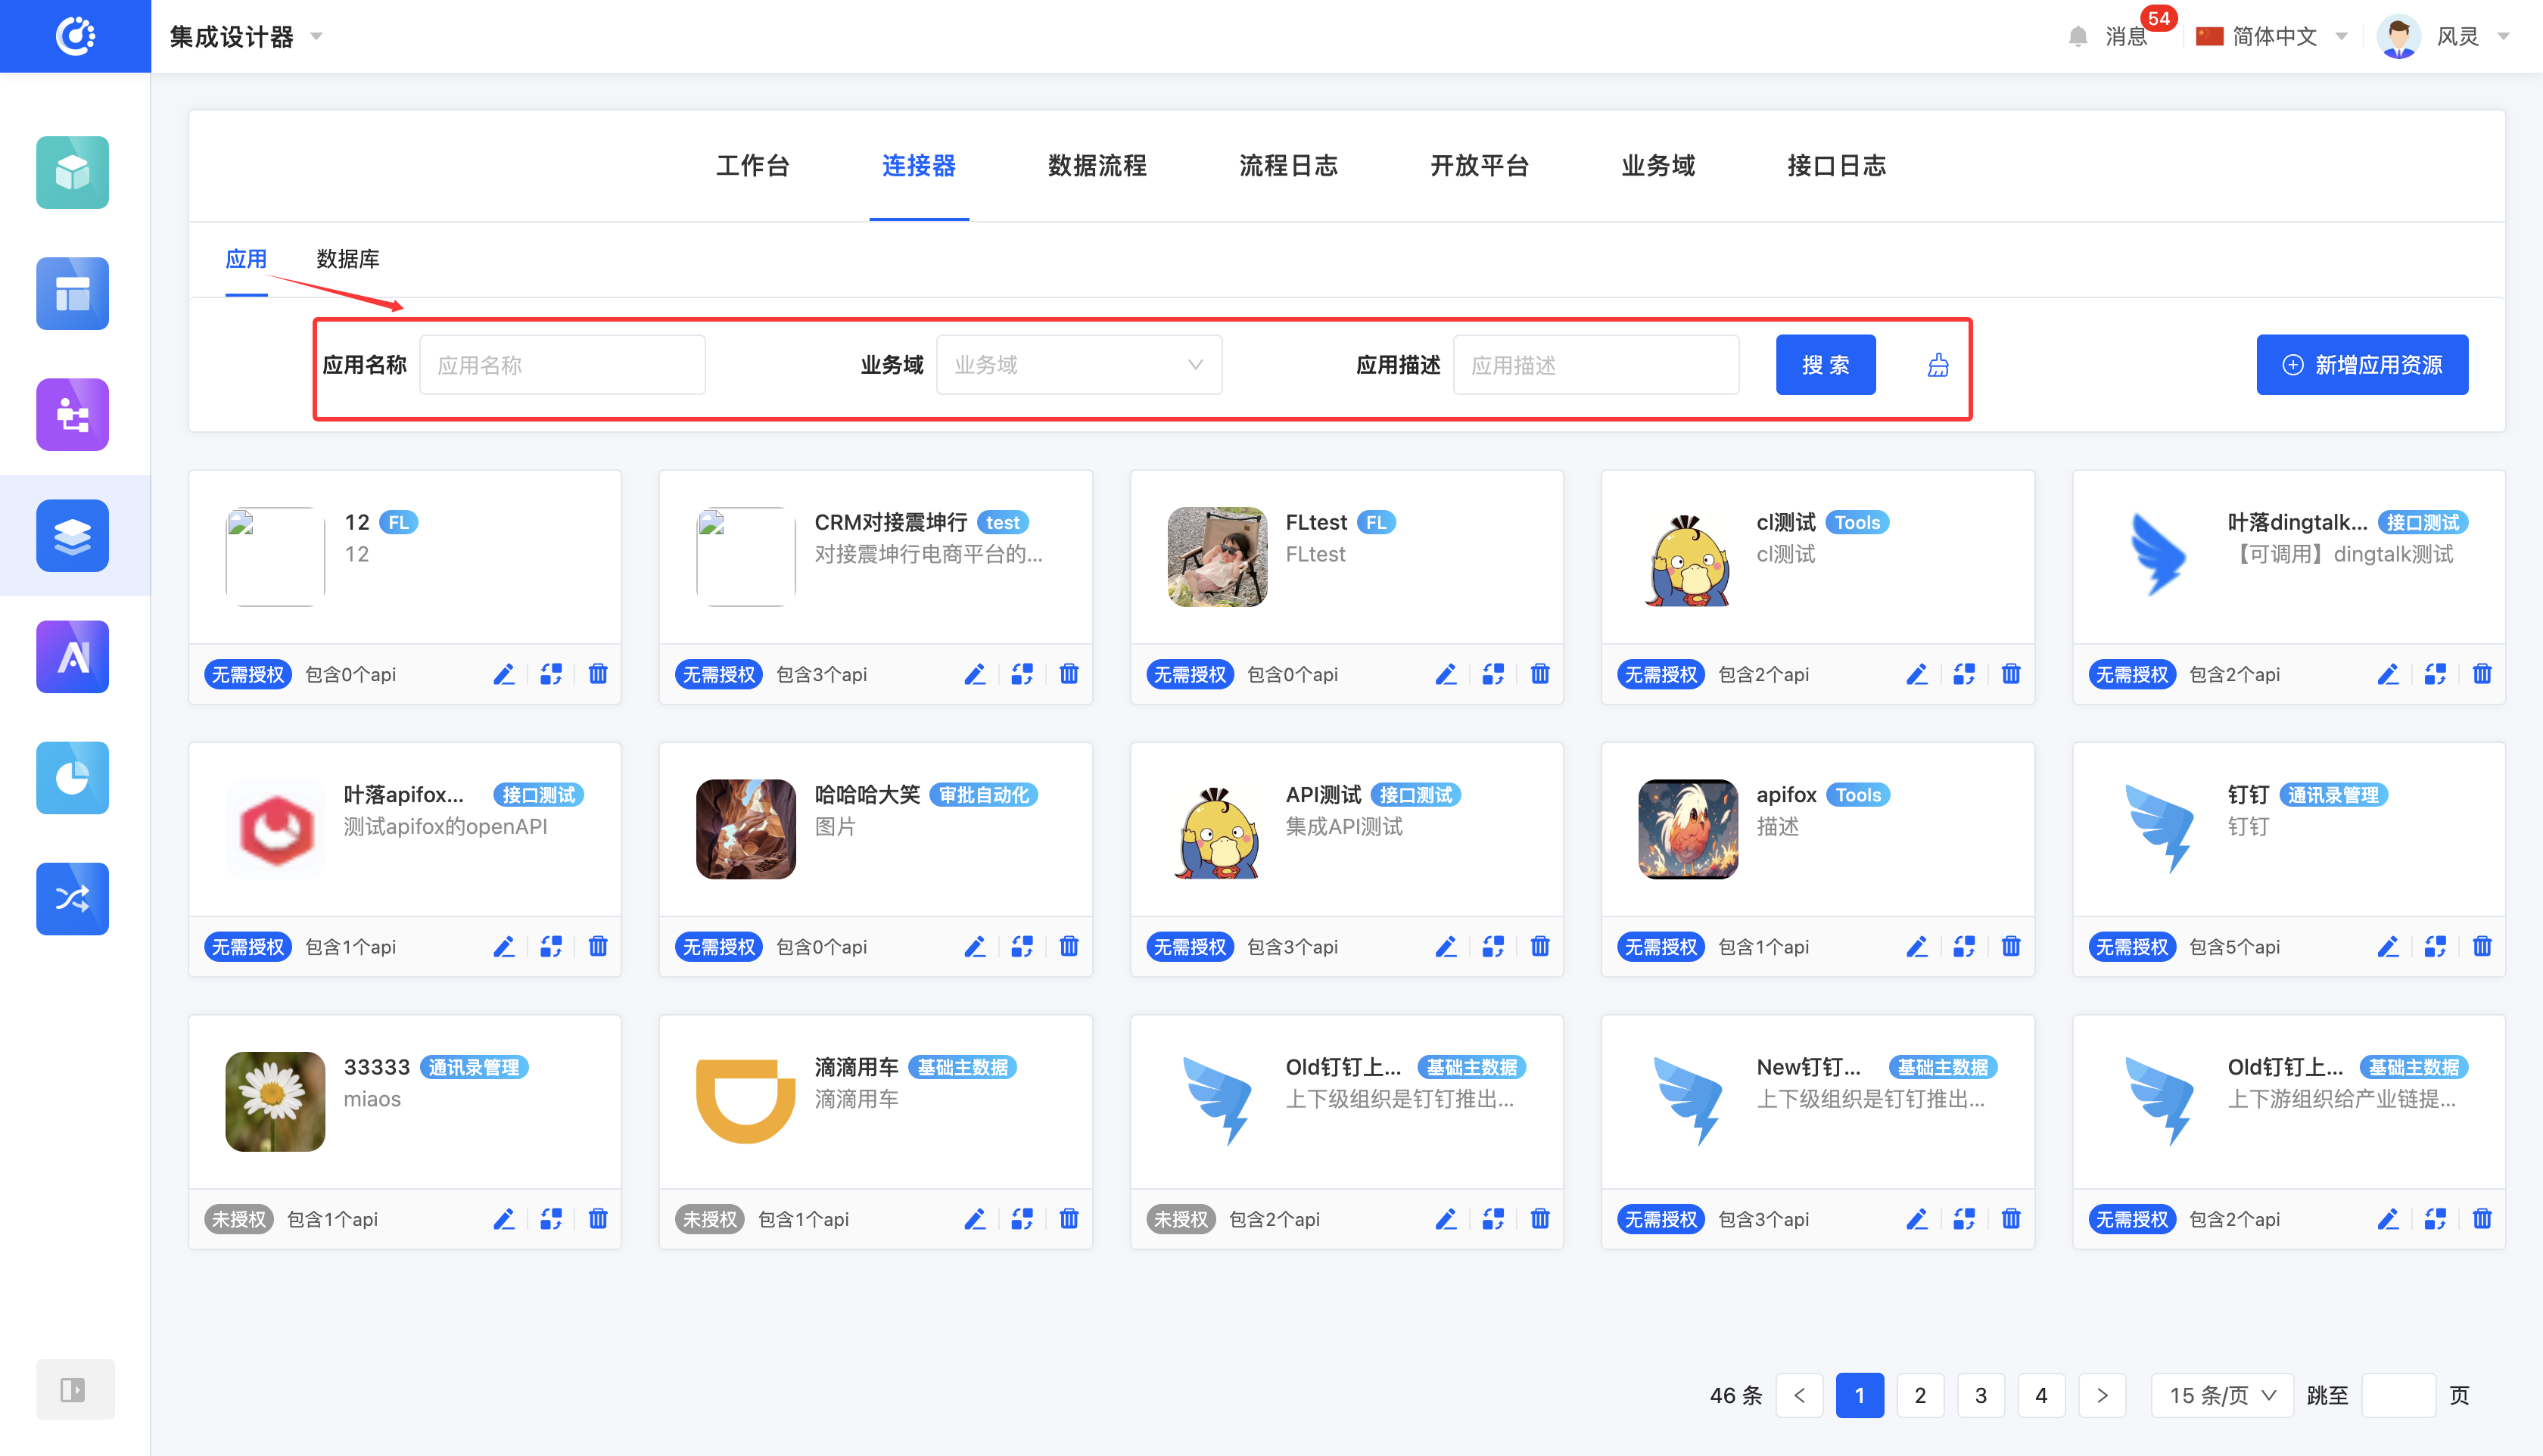
II. Filtering
1. Function Introduction
According to actual business needs, you can customize the filtering conditions for applications, databases, and file sets. Under the current filtering conditions, the corresponding lists of applications, databases, and file sets will be displayed, which is convenient for viewing and editing different applications, databases, and file sets.
2. Operation Method
- Filtering: Enter the conditions in the filtering area and click the "Search" button to filter applications, databases, and file sets.
- One-Click Clear: Click the "Clear" icon to clear all the conditions in the current filtering area at once.
III. New Addition
1. Function Introduction
It supports customizing application, database, and file set resources.
- Application: You can set the application's name, description, icon, business domain, server address, authentication method, and encryption method.
- Database: You can set the database's type, name, description, connection address, port, extended parameters, source database name, account, and password.
- File Set: You can set the file set's name, type, and description.
Note
Database resources can include operation resources such as queries, inserts, updates, and deletes, but DDL execution is not allowed.
Tip
After filling in the database information, you can test its connection. Even if the current connection fails or the connection is not tested, the connection can still be successfully created.
2. Operation Method
- Application: Click the "New Application Resource" button, fill in the information according to your needs on the pop-up page, and then save to create it successfully.
- Database: Click the "New DB Resource" button, fill in the information according to your needs on the pop-up page, and then save to create it successfully.
- File Set: Click the "New File Set" button, fill in the information according to your needs on the pop-up page, and then save to create it successfully.
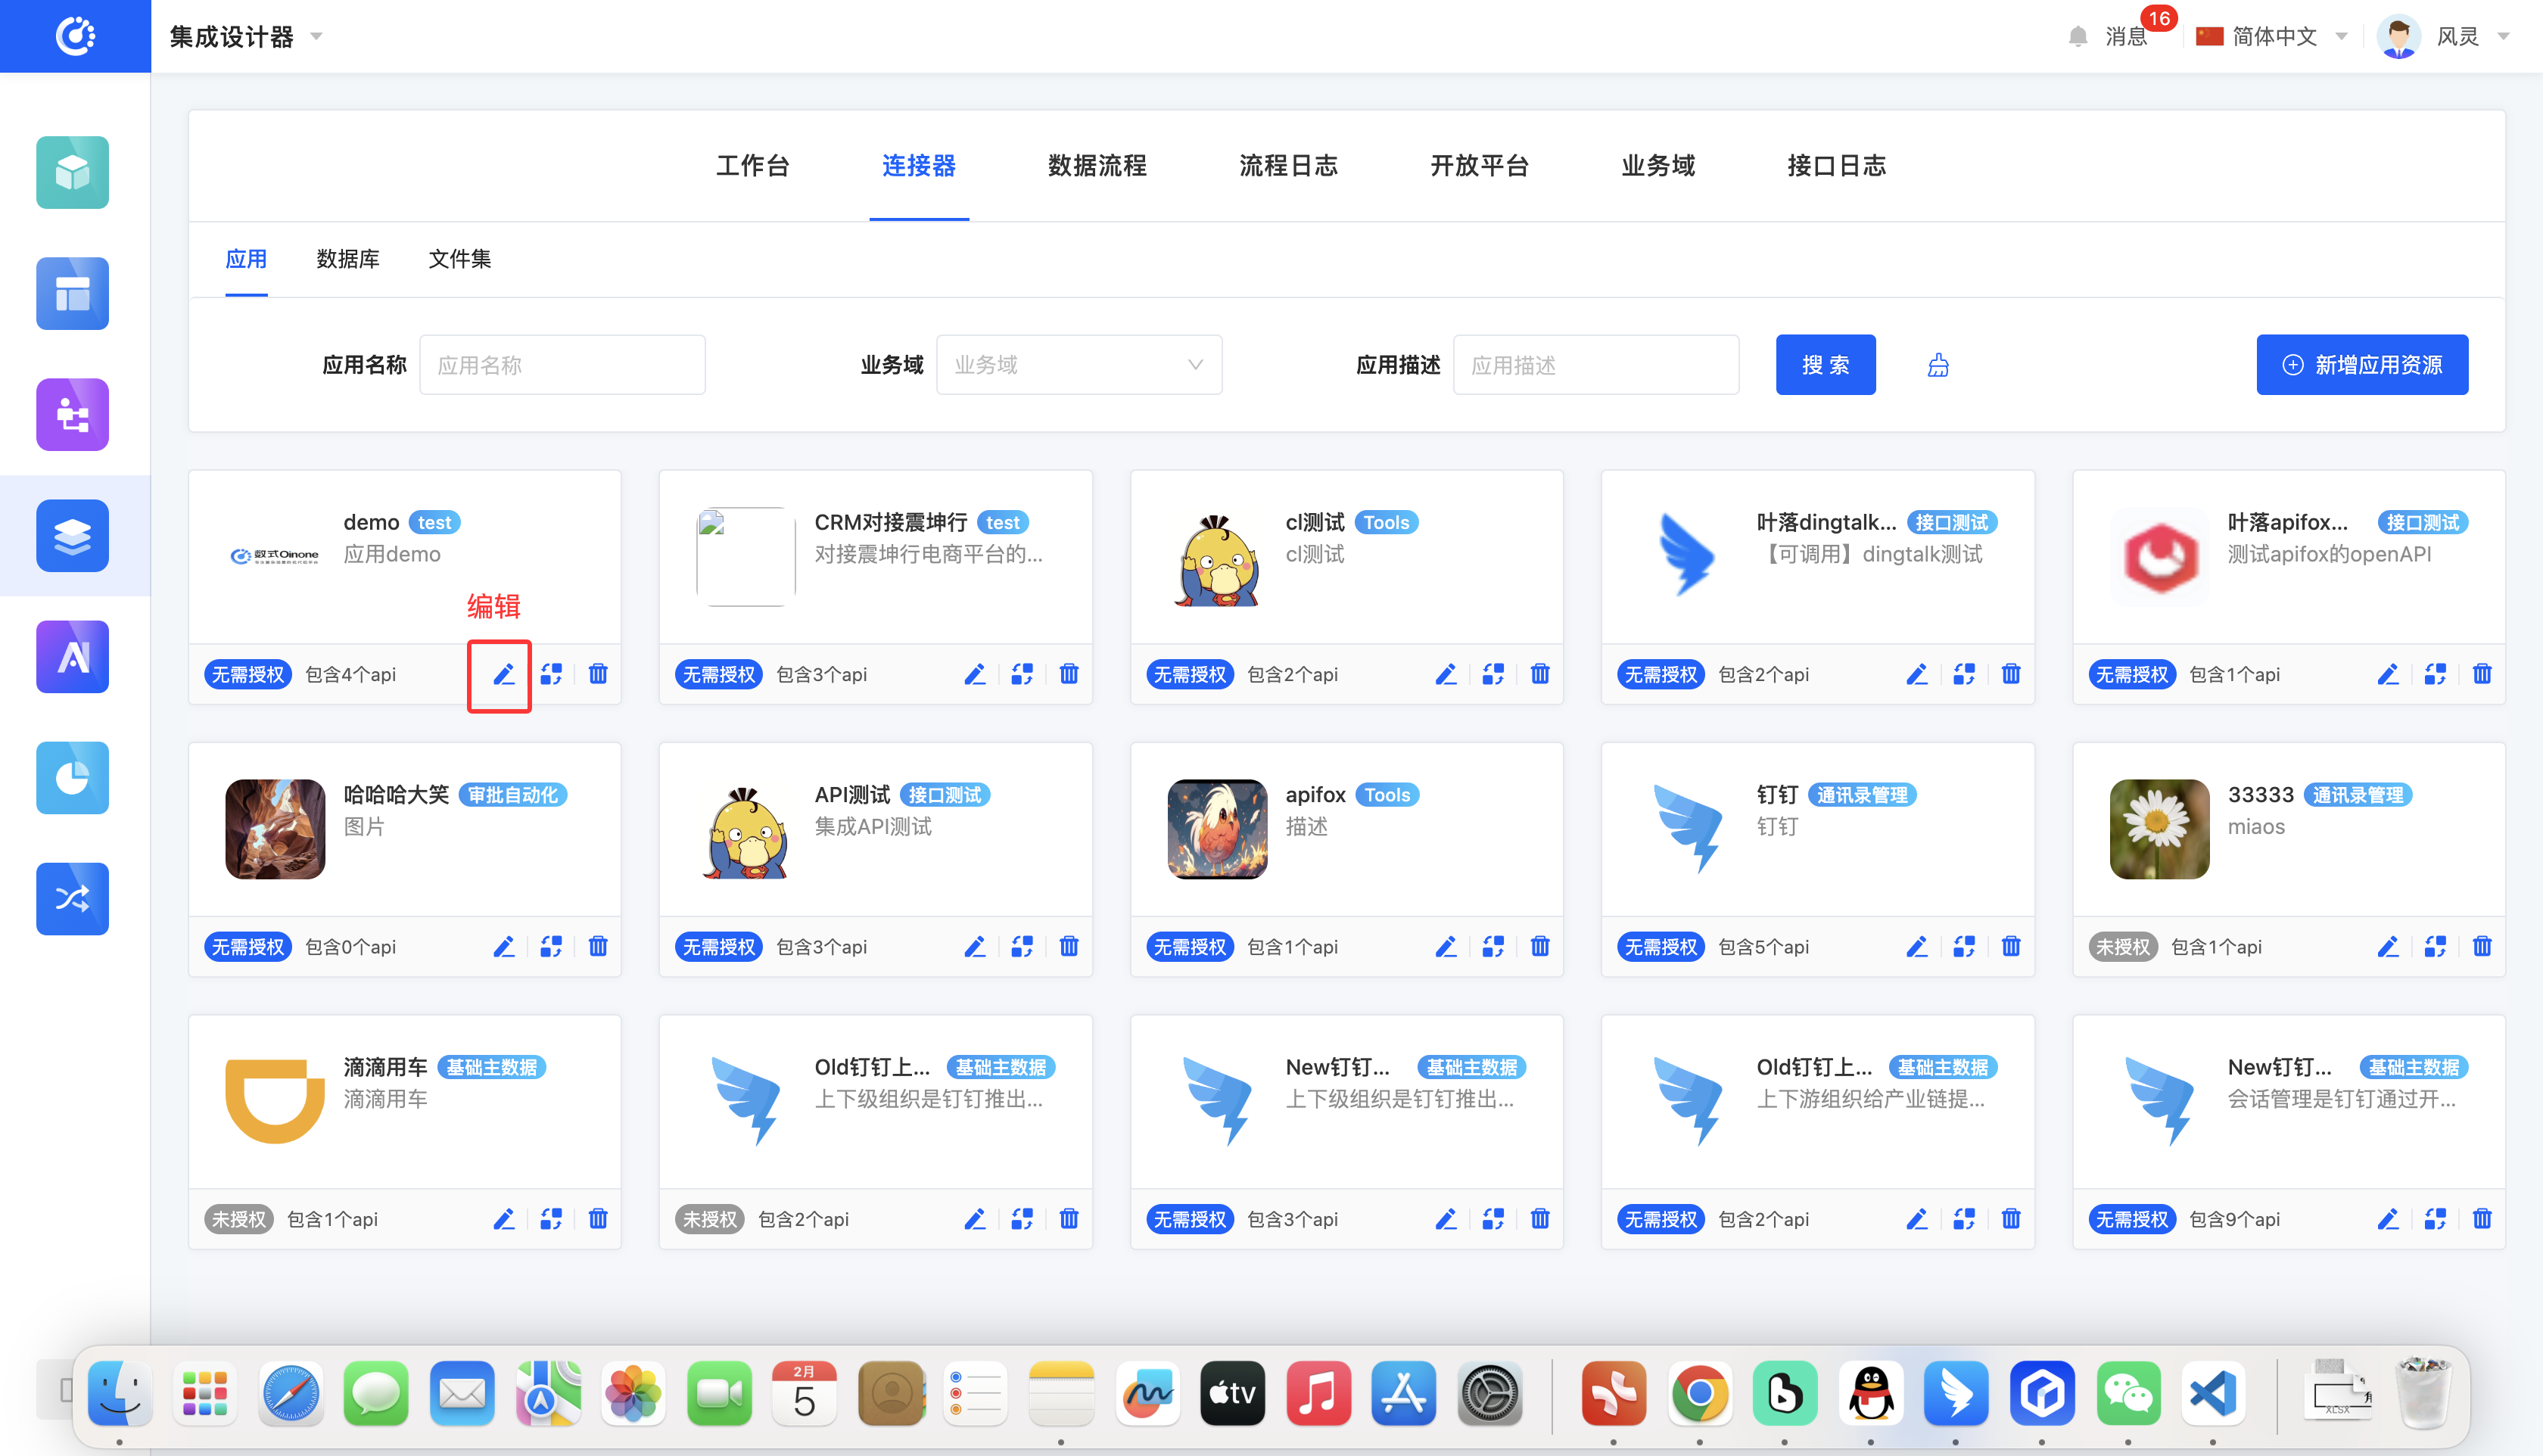
IV. Editing
1. Function Introduction
Successfully created applications, databases, and file sets can be edited.
2. Operation Method
Click the "Edit" button, and you can edit on the pop-up editing page (the same applies to databases and file sets as shown here for applications).
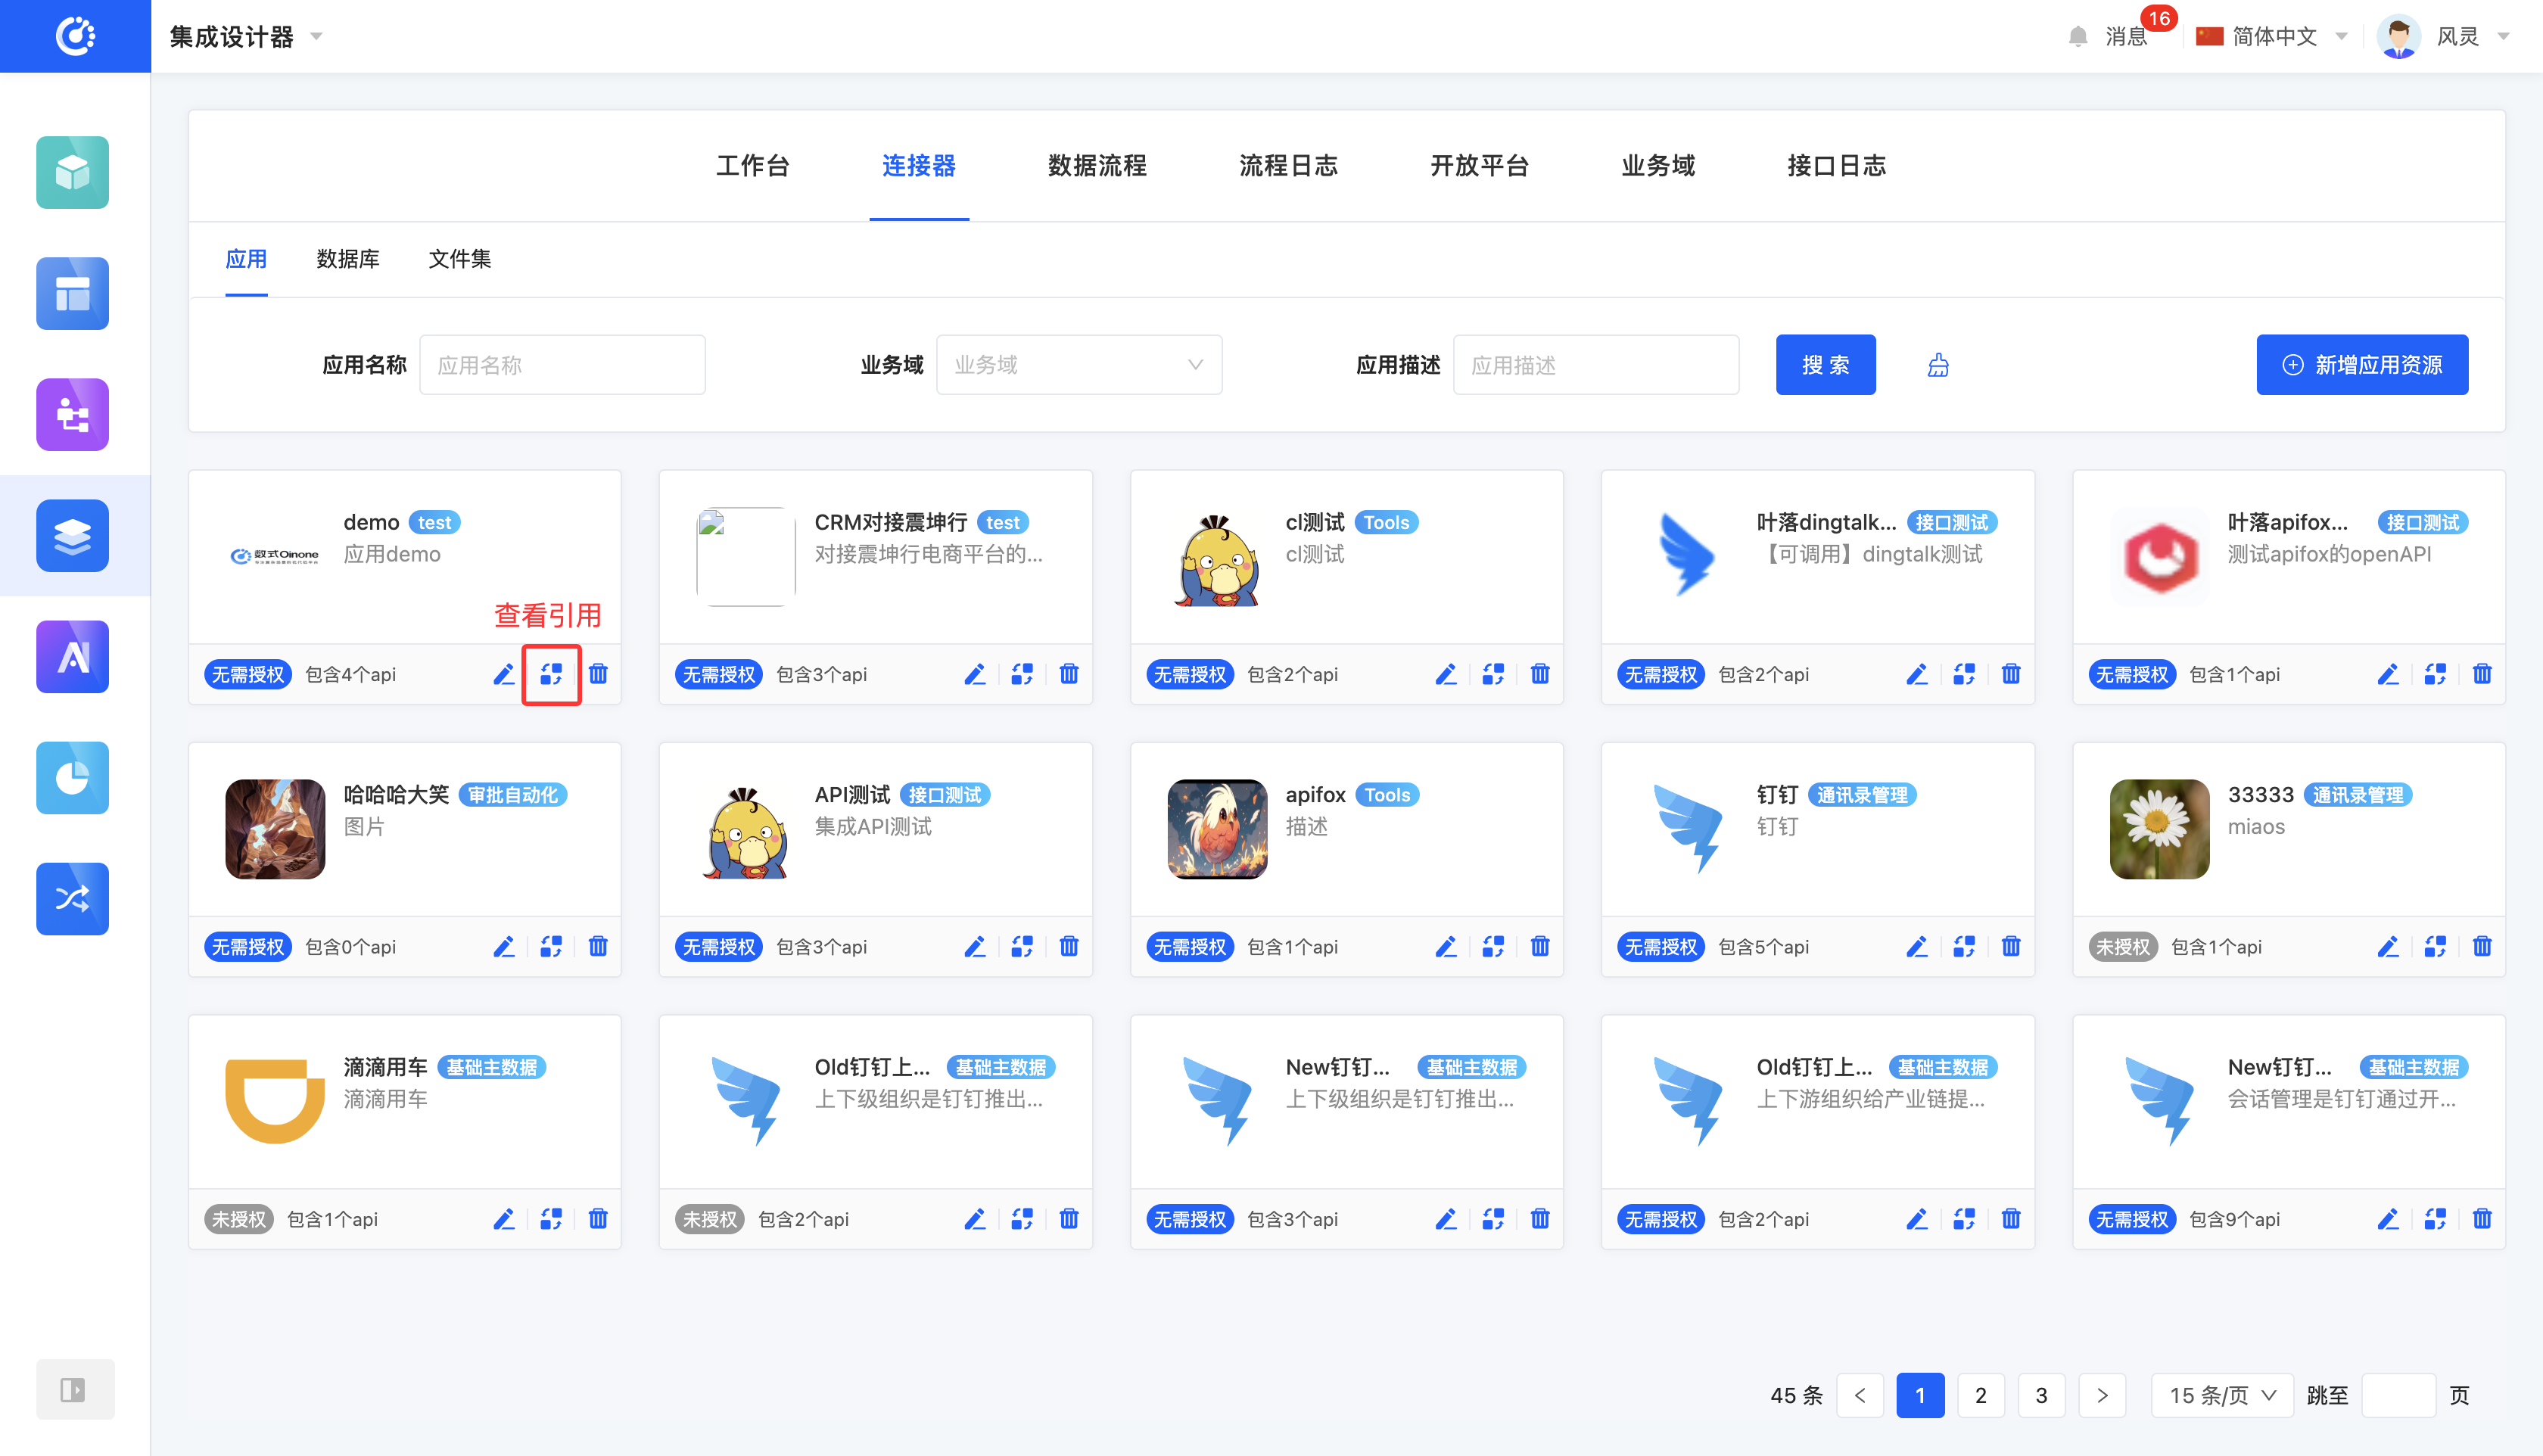
V. View References
1. Function Introduction
You can view various elements that have reference relationships with the application, database, or file set.
2. Operation Method
Click the "View References" icon to view the reference information. (The same applies to databases and file sets as shown here for applications).
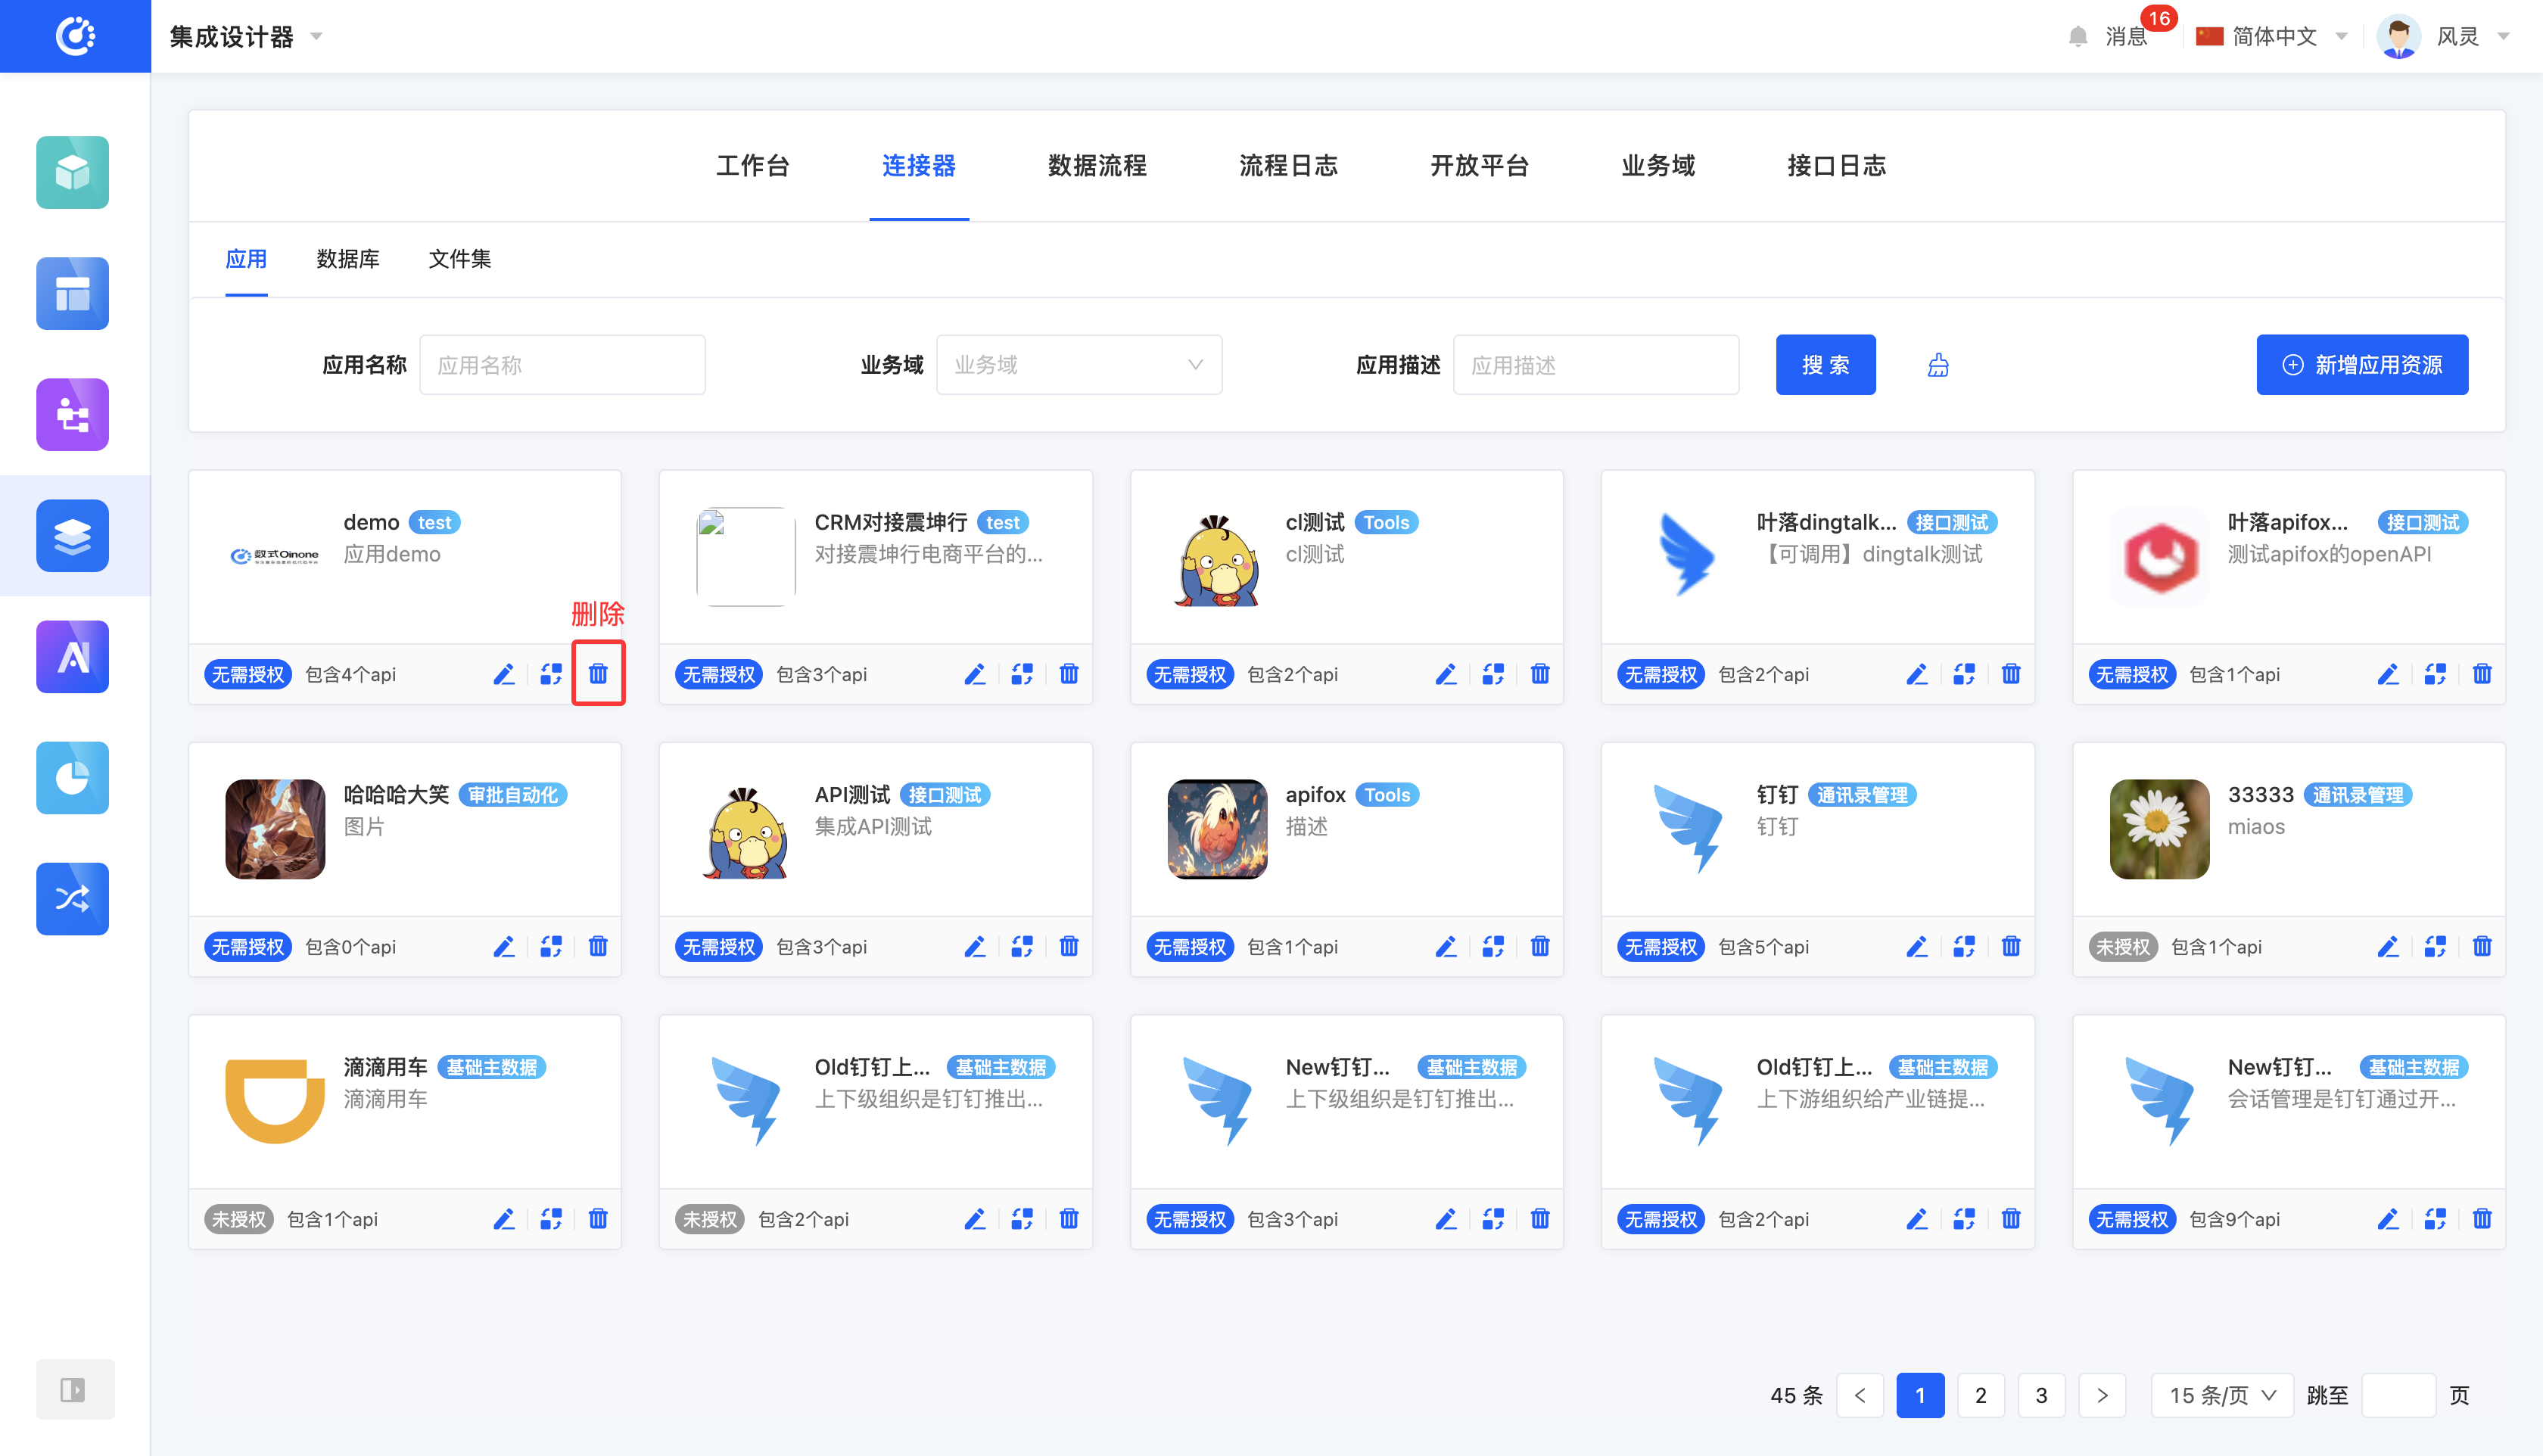
VI. Deletion
1. Function Introduction
When an application, database, or file set is no longer in use, you can choose to delete it.
Note
Before deletion, ensure that the application, database, or file set is not being referenced; otherwise, the deletion operation will fail.
Warning
Once an application, database, or file set is deleted, it cannot be recovered. Please operate with caution!
2. Operation Method
Click the "Delete" icon, confirm the deletion, and it will be deleted. (The same applies to databases and file sets as shown here for applications).
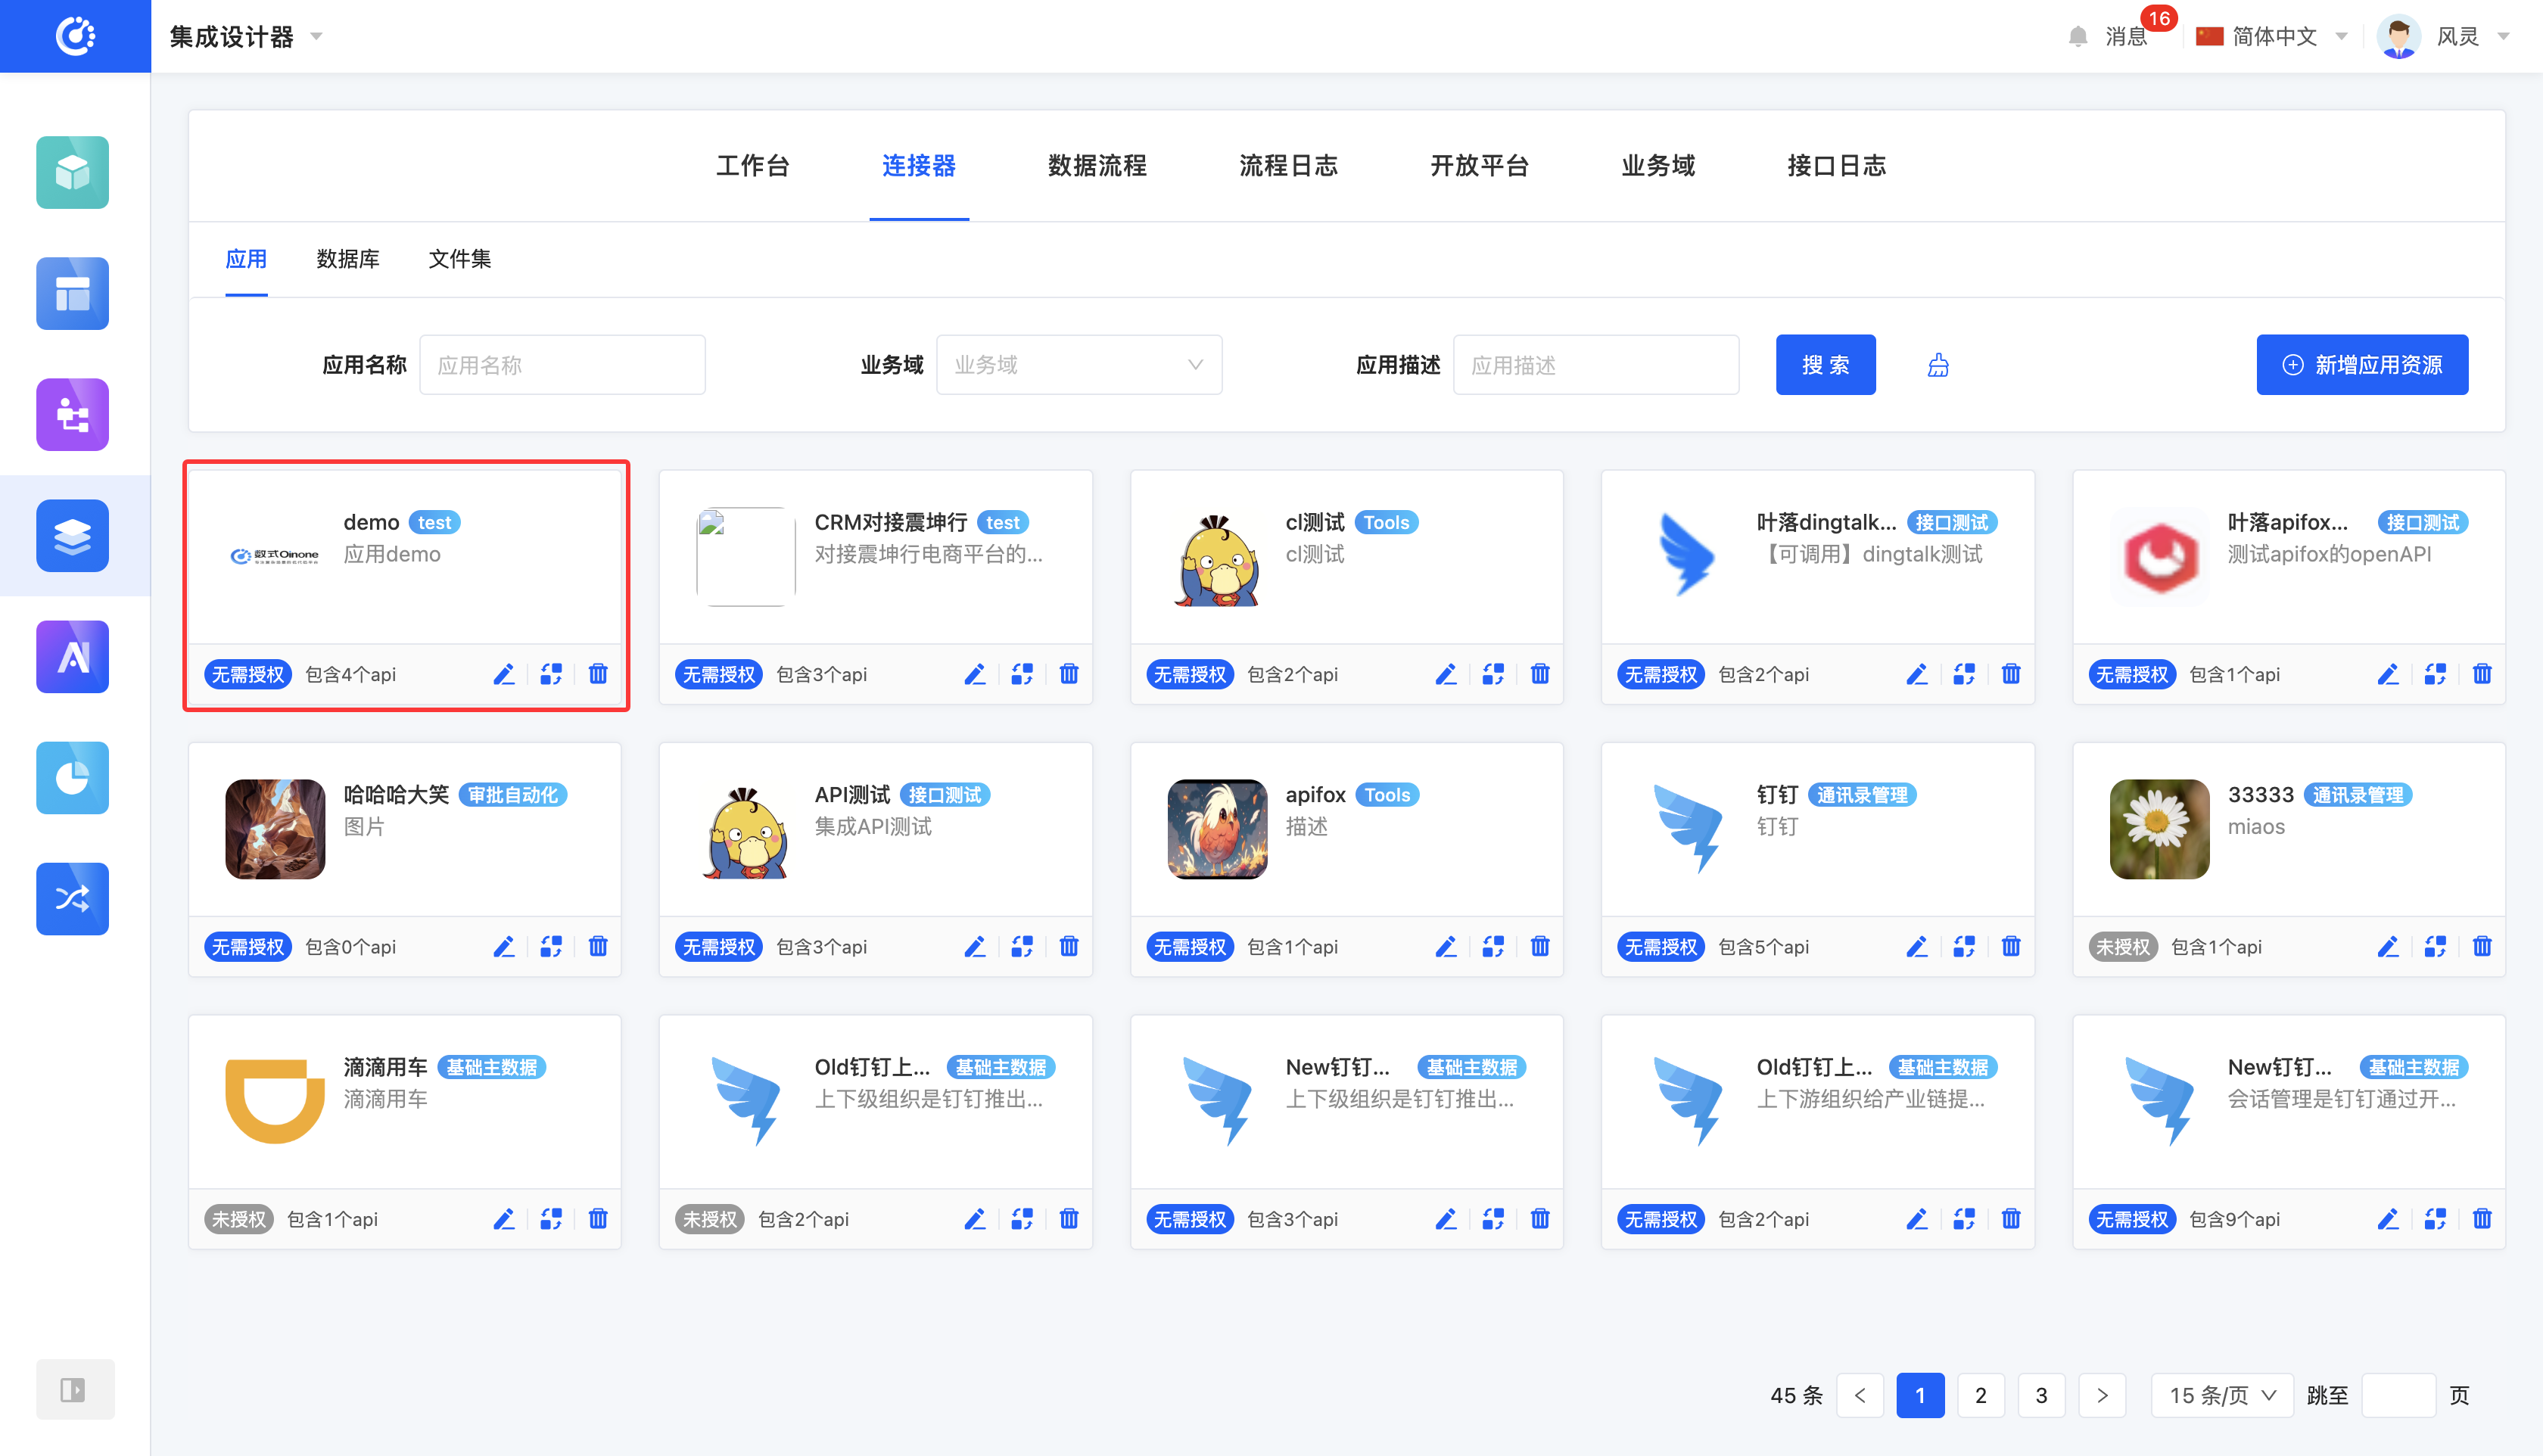
VII. Details
1. Function Introduction
An application or database can contain multiple APIs, and a file set can contain multiple files, but not all of them can be presented on the card. To understand applications, databases, and file sets more comprehensively, you can view their details, including browsing the basic information of applications, databases, and file sets, as well as the information of all the included APIs and files.
Note
If a certain authentication method is selected during application creation, you can add its authorization information in the details.
2. Operation Method
Click the card to enter its details page (the same applies to databases and file sets as shown here for applications).
VIII. Manage APIs
After entering the details page, you can manage the included APIs and files, including operations such as addition, deletion, and editing.
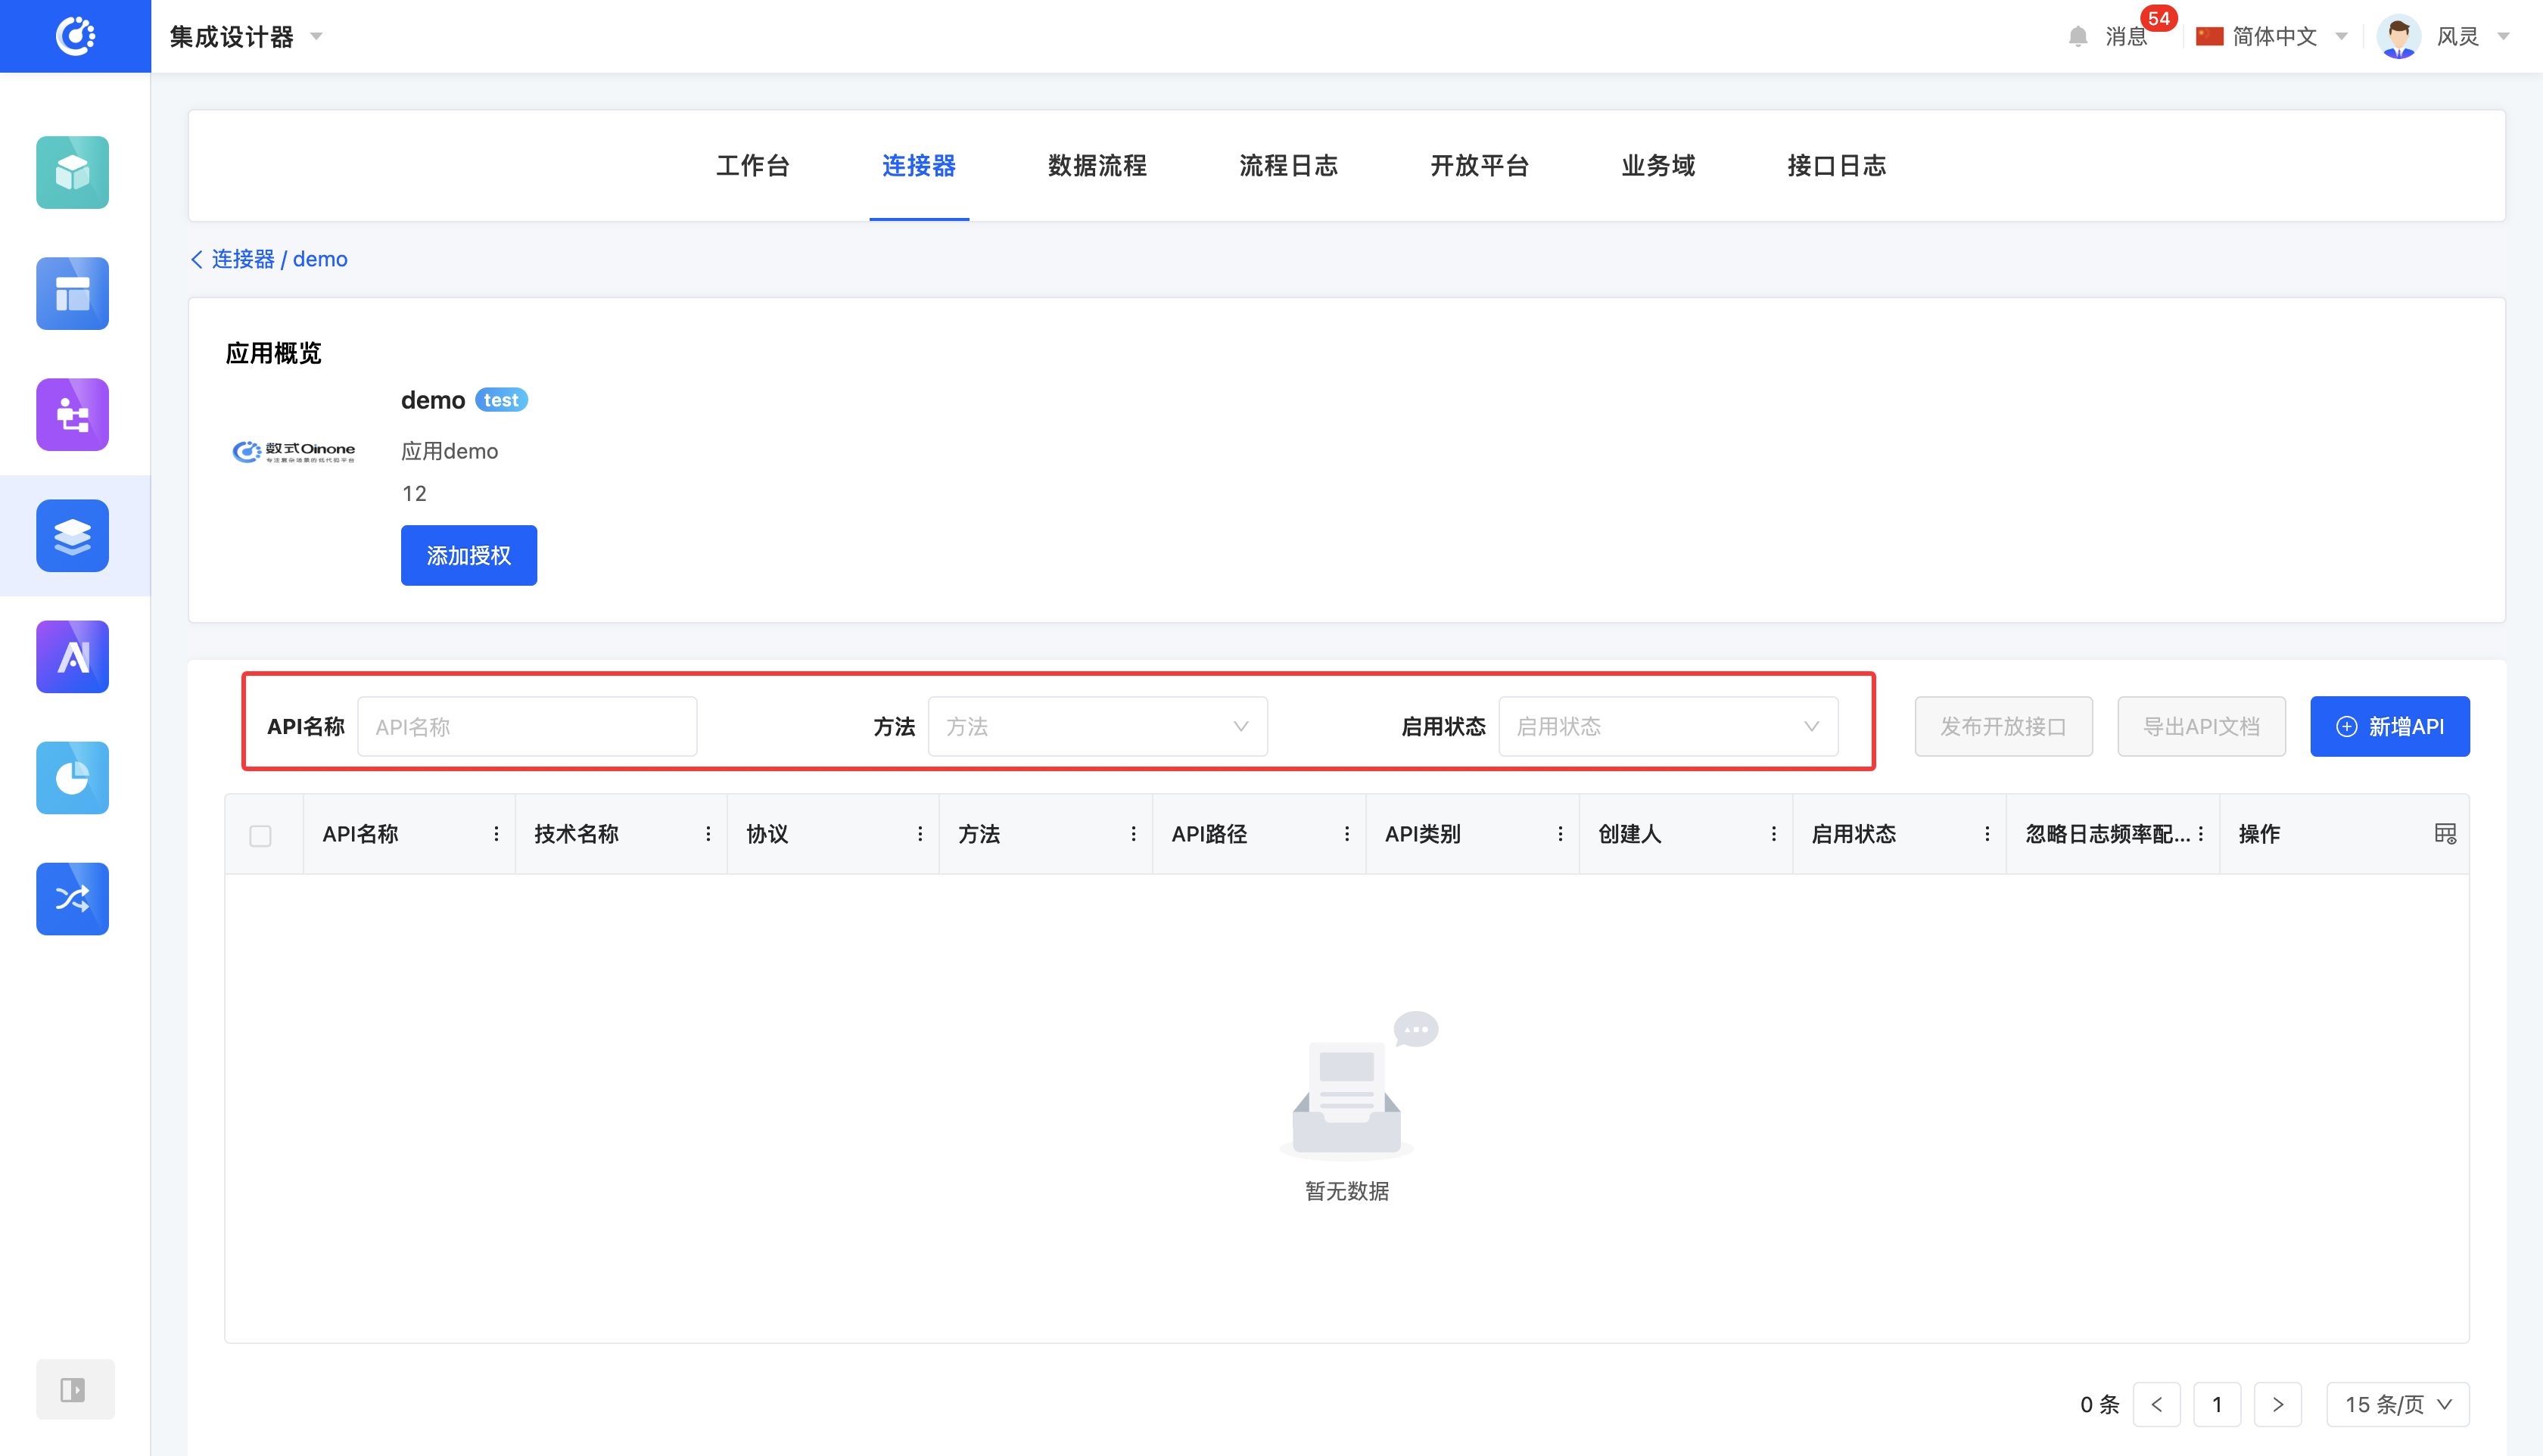
(I) Query
1. Function Introduction
According to actual business needs, you can customize the filtering conditions for APIs or files. Under the set filtering conditions, the corresponding lists of APIs or files will be displayed.
2. Operation Method
Select or enter conditions in the filtering area to filter APIs or files (the same applies to databases and file sets as shown here for applications).
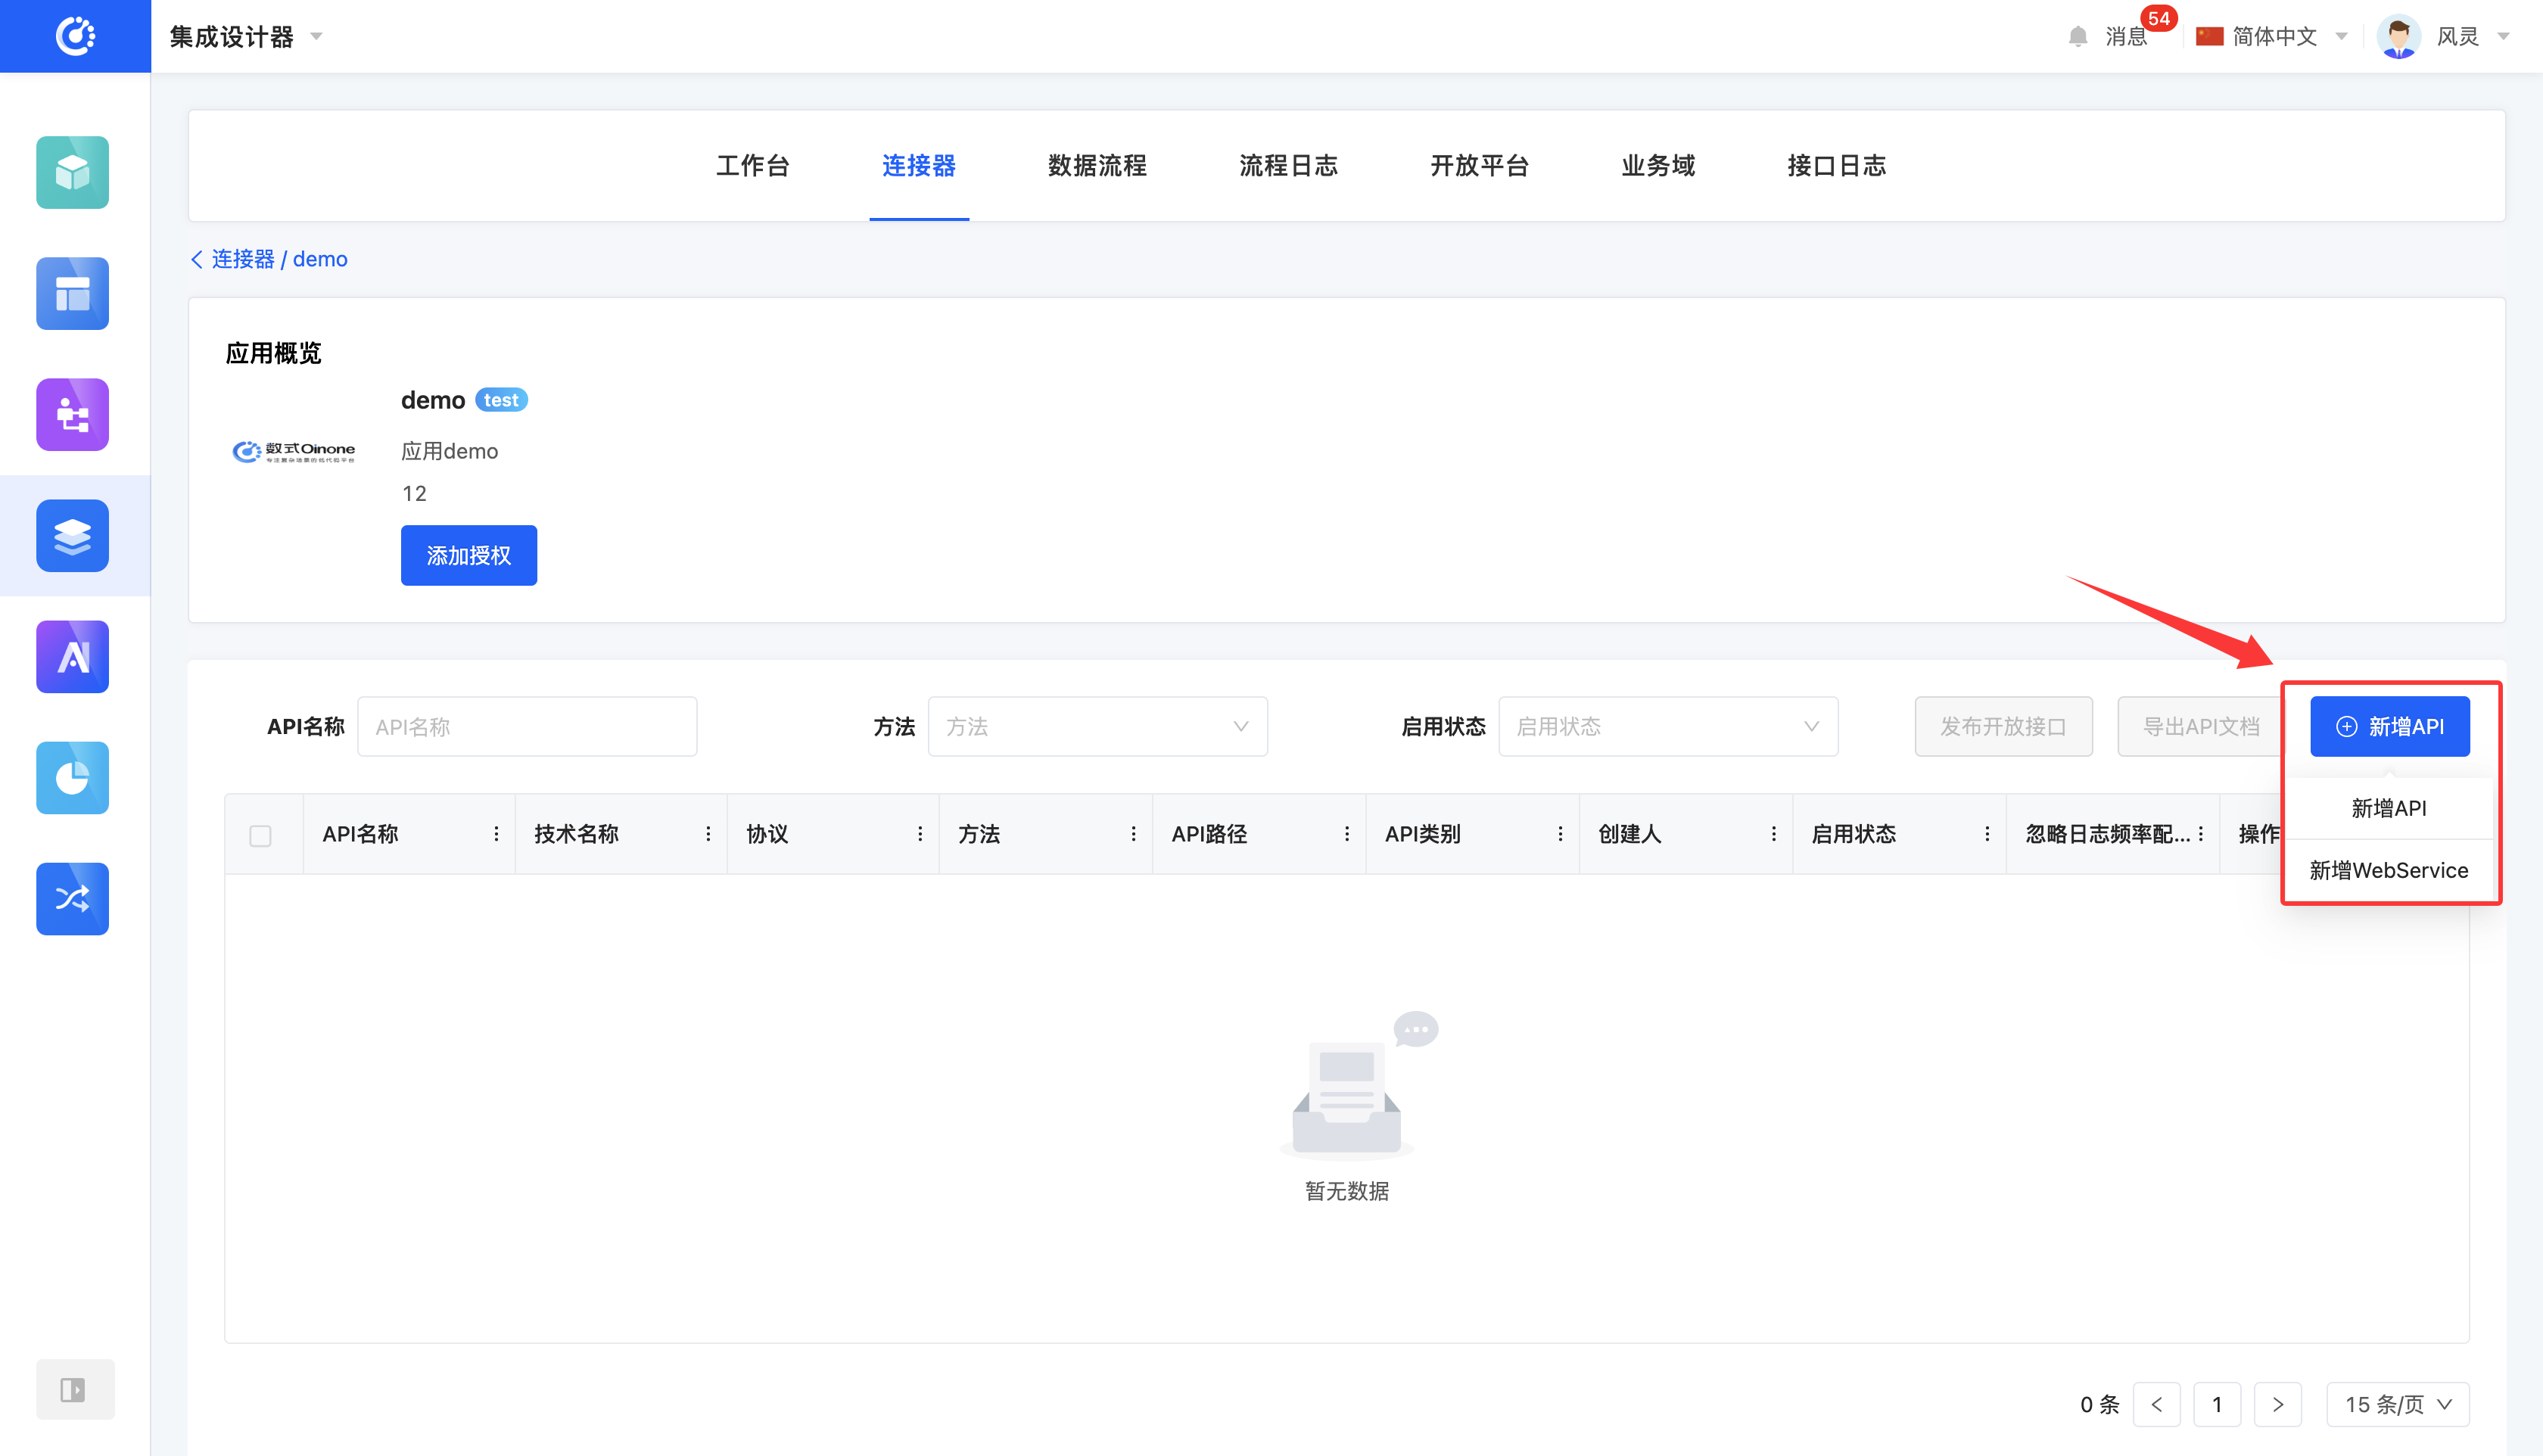
(II) New Addition
1. Function Introduction
Applications can add new APIs or WebServices according to business needs, databases can add new APIs, and file sets can add new files.
- New API: You can set the basic information of the API, request parameters, and response results.
- API URL support:
- Protocol type: HTTP/HTTPS
- Verb: GET, POST, PUT, DELETE
- Parameter type support: Long, Double, String, Boolean, Integer, Date, Void, Object.
- Content types supported: application/json, x-www-form-urlencoded, multipart/form-data, application/json + fhir
- API URL support:
- New WebService: You can set the basic information of the WebService, request parameters, and response results (not supported for databases).
- API URL support:
- Protocol type: HTTP/HTTPS
- Verb: POST
- Parameter type support: Long, Double, String, Boolean, Integer, Date, Void, Object.
- API URL support:
Note
If the "Ignore Log Frequency Configuration" switch is not enabled, the system will only record part of the log content. Under normal operation, you can turn off this configuration to save resources. If a problem occurs during operation, you can turn on this configuration, and the system will completely record the detailed request and response information of the interface logs, which is convenient for troubleshooting and viewing.
Note
The paths of APIs are not allowed to be repeated.
- New File: You can upload local files, set their names and descriptions. You can preview the existing data in the files, and modify the data types according to the parsed data.

Note
Supported file formats for upload are xlsx, xls, csv, and the file size should be less than 50M.
2. Operation Method
- For applications, click the "New API" button, select "New API" or "New WebService", fill in the information on the pop-up page, and then save to add it successfully.
- For databases, click the "New API" button, fill in the information on the pop-up page, and then save to add it successfully.
- For file sets, click the "New File" button, fill in the information on the pop-up page, and then save to add it successfully.
After successful creation, the APIs and files will be automatically enabled. The enabled APIs and files can be referenced.
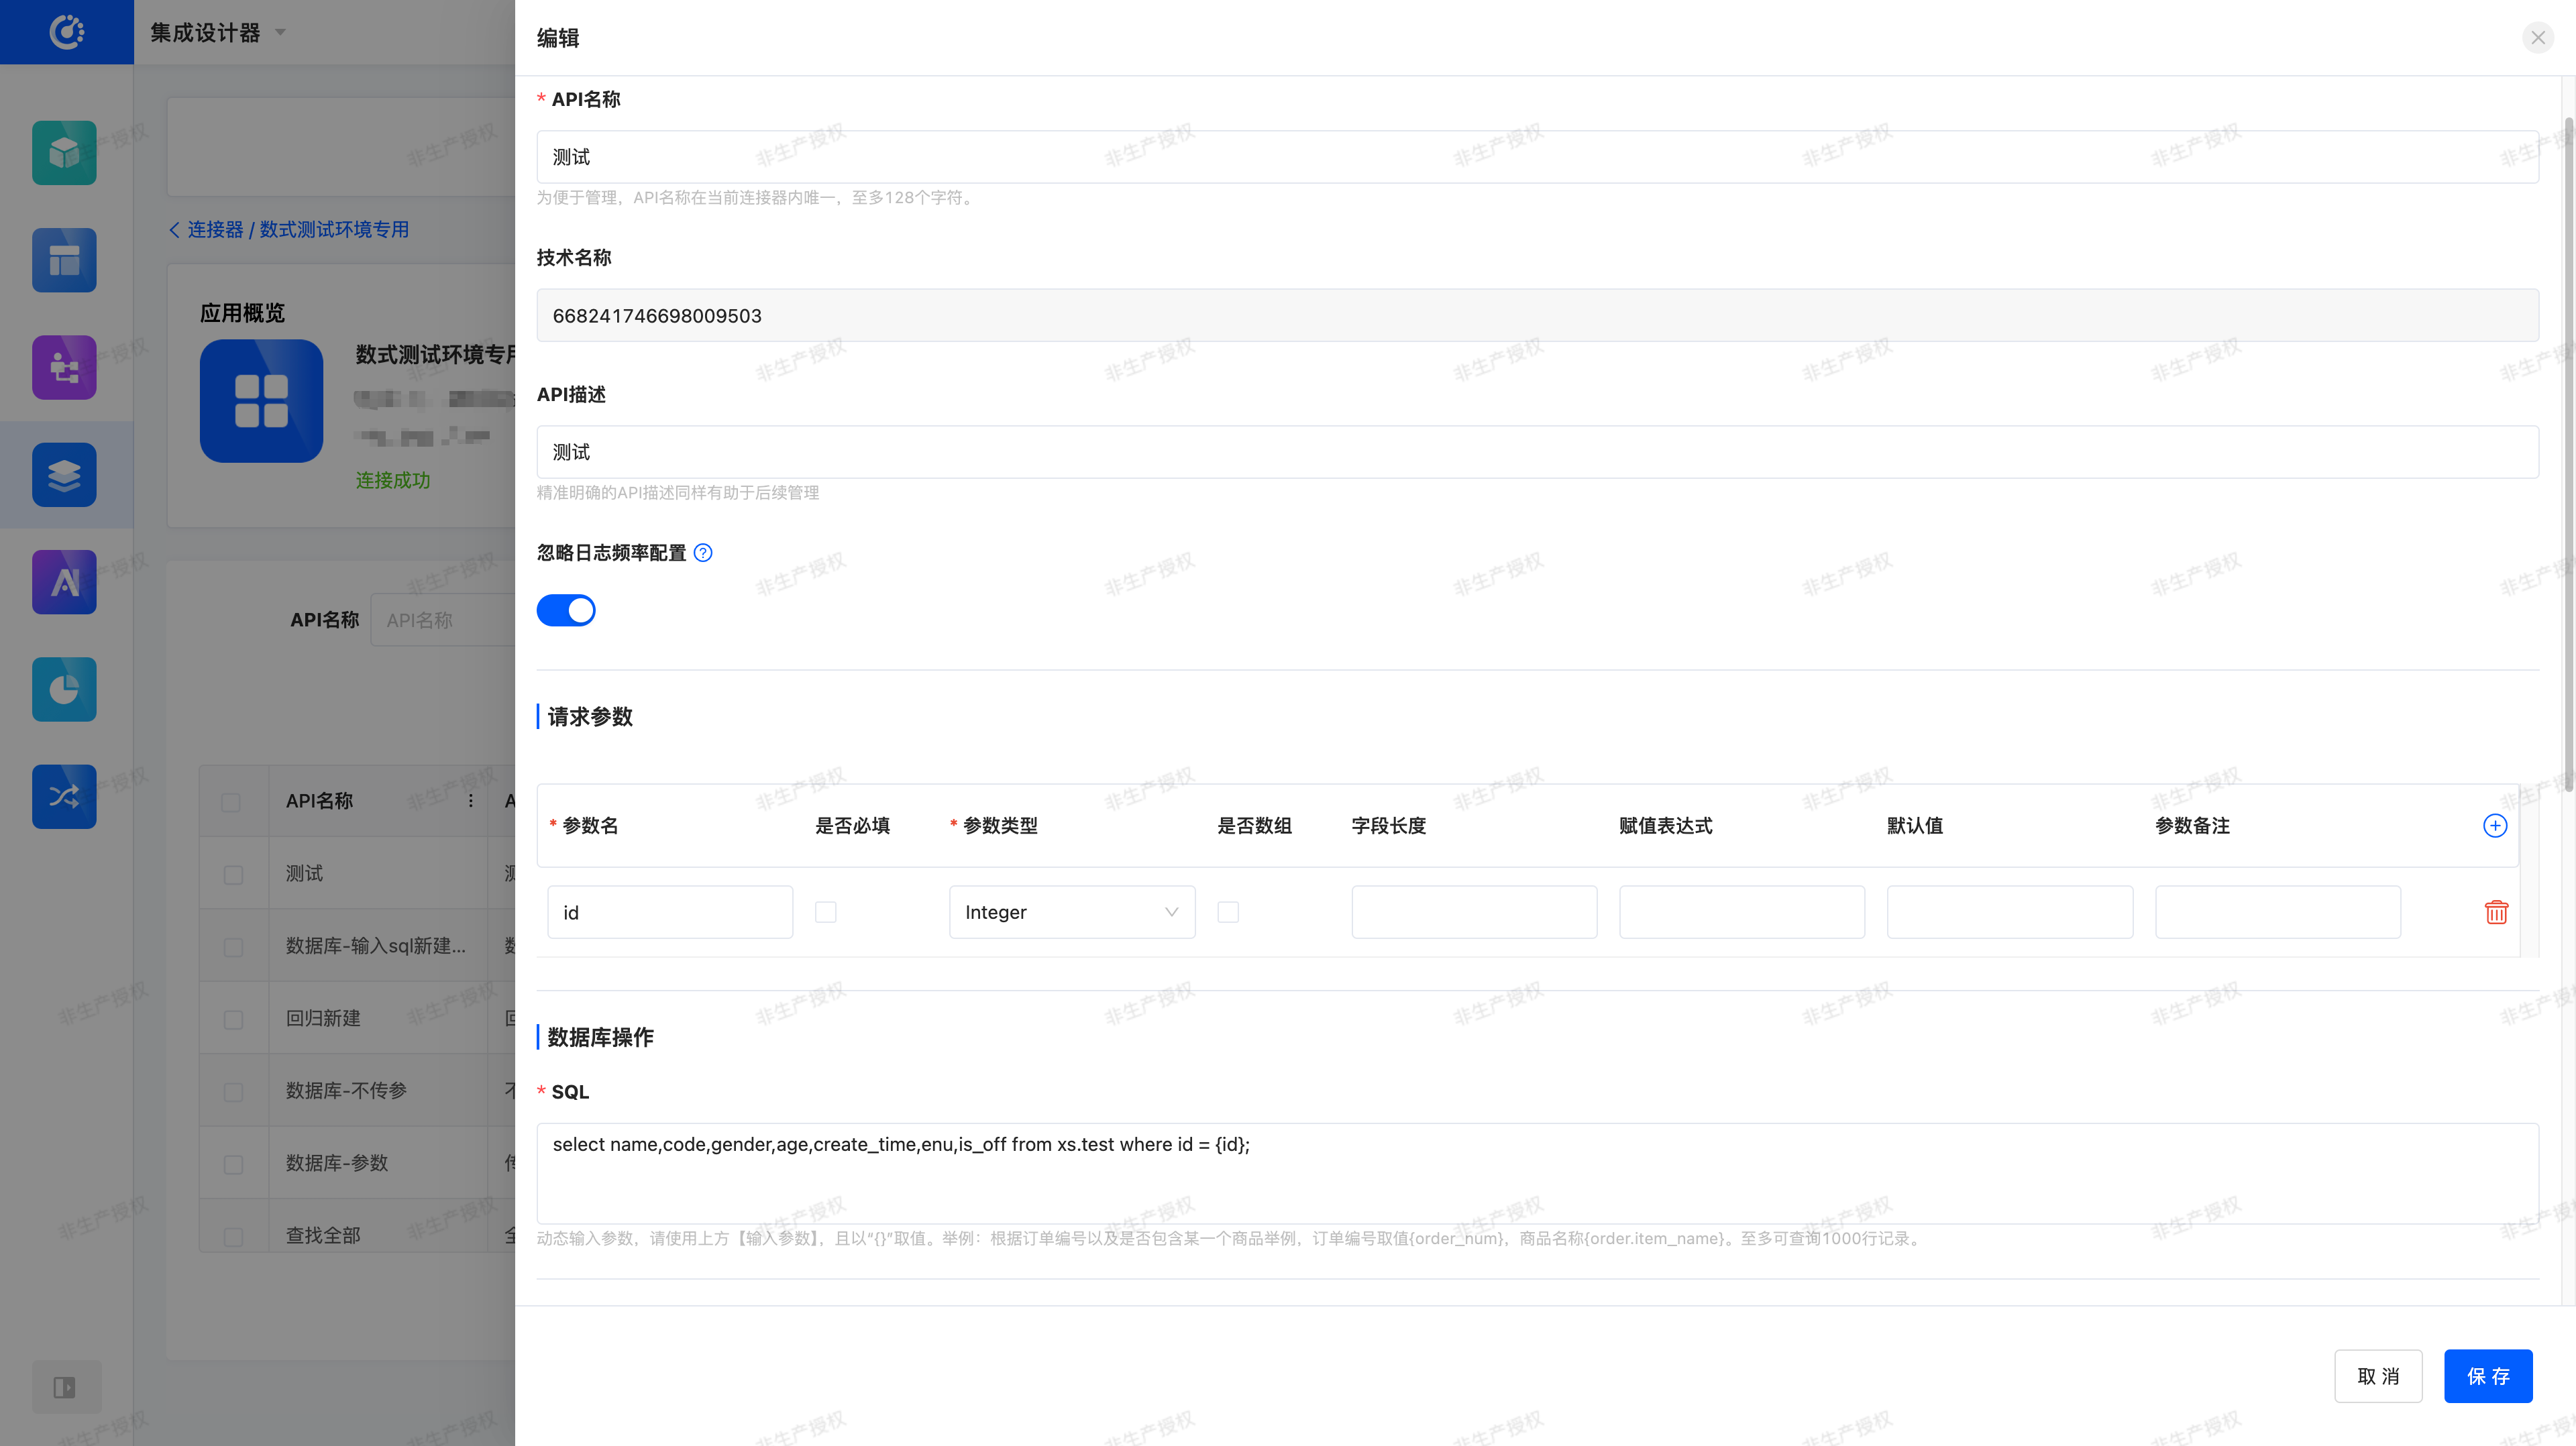
(III) Editing
1. Function Introduction
Successfully created APIs or files can be edited.
2. Operation Method
Click the "Edit" button, and you can edit on the pop-up editing page.
Note
Editing operations are only allowed when APIs and files are in the disabled state. Once APIs and files are enabled, the edit button will be hidden to prevent improper modifications to the APIs and files in use.

In the SQL input area of the database API, a toggle button for 「Format」 and 「Compress」 is provided to help users view and edit SQL statements more clearly.
- Format: After entering or pasting SQL in the input box, click 「Format」. The system will format the current SQL. Without changing the meaning of the SQL, it will re - format the SQL text to make it easier to read and maintain.
- Compress: After entering or pasting SQL in the input box, click 「Compress」. The system will compress the current SQL. Without changing the meaning of the SQL, it will remove redundant spaces, line breaks, and indentations, and merge it into one line or very few lines.

(IV) Integrated Interface Testing
1. Feature Introduction
Previously, after users configured an interface in the connector, they still needed to use external tools such as data flows, Postman, or curl for verification. This approach led to fragmented operations and low efficiency. Now, we have directly integrated the interface testing function into the platform, enabling a one-stop development and debugging experience.
2. Operation Methods
API:
Usage Example
The following takes the DingTalk Open Platform - Create User Interface as an example to demonstrate the workflow of interface testing.
Obtain Interface Information
On the DingTalk Open Platform, we can find the relevant information about this interface:
- Request Method: POST
- Request URL:
https://oapi.dingtalk.com/topapi/v2/user/create
Query Parameters
{
  "access_token": "d13ad96bbfd73d61a737ed2673e6bfa9"
}Body Parameters
{
  "userid": "002",
  "name": "小钉",
  "mobile": "18546673752",
  "title": "教职人员",
  "job_number": "100828",
  "work_place": "未来park",
  "senior_mode": "false",
  "dept_id_list": "1"
}Operations on Our Platform:
- Enter the Connector module and create a new API interface named 【Create User】.
Tips
Creating an API is not a mandatory step. If there is an available API already in the platform, you can directly perform testing on it.

- After creation, click Test in the operation bar.

- Fill in the request method, URL, and parameter information obtained in the previous step into the corresponding fields.
- Click the Test button to immediately verify whether the interface works properly.

WebService:
Usage Example
The following takes the WebService Weather Query Interface as an example to demonstrate the workflow of interface testing.
Obtain Interface Information
- Method:
getSupportCity - Function: Query information about supported domestic and international cities.
- Input Parameters:
byProvinceName: Specified province. PassALLor leave it empty to return all cities.
- Return Result:
- A one-dimensional string array
String[], with content in the format ofCity Name (City Code).
- A one-dimensional string array
Common Calling Methods
# SOAP 1.1 Request Example
POST /WebServices/WeatherWebService.asmx HTTP/1.1
Host: www.webxml.com.cn
Content-Type: text/xml; charset=utf-8
SOAPAction: "http://WebXml.com.cn/getSupportCity"

<?xml version="1.0" encoding="utf-8"?>
<soap:Envelope xmlns:xsi="http://www.w3.org/2001/XMLSchema-instance"
               xmlns:xsd="http://www.w3.org/2001/XMLSchema"
               xmlns:soap="http://schemas.xmlsoap.org/soap/envelope/">
  <soap:Body>
    <getSupportCity xmlns="http://WebXml.com.cn/">
      <byProvinceName>北京</byProvinceName>
    </getSupportCity>
  </soap:Body>
</soap:Envelope># HTTP GET Request Example
GET /WebServices/WeatherWebService.asmx/getSupportCity?byProvinceName=北京 HTTP/1.1
Host: www.webxml.com.cn# Return Result (Example):
<ArrayOfString xmlns="http://WebXml.com.cn/">
<string>北京(101010100)</string>
<string>昌平(101010700)</string>
</ArrayOfString>Operations on Our Platform:
- Enter the Connector module and create a new API interface named 【Query Weather】.
Tips
Creating a WebService is not a mandatory step. If there is an available API already in the platform, you can directly perform testing on it.
If the method name can be correctly parsed at the request parameter position, there is no need to add the additional parameter op=methodName.

- After creation, click Test in the operation bar.

- Fill in the request method, URL, and parameter information obtained in the previous step into the corresponding fields.
- Click the Test button to immediately verify whether the interface works properly.

Database:
Usage Example: Database Query Interface
The following takes the Database Query Interface as an example to demonstrate how to perform interface testing on the Oinone platform.
Obtain Interface Information
- Operation Type: SQL Query
- Function: Query student information based on the specified
id. - Input Parameters:
id: Student ID (required).
- SQL Statement:
select name,
       code,
       gender,
       age,
       create_time,
       enu,
       is_off
  from xs.test
where id = {id};- Return Result:
- Tabular data containing fields such as
name, code, gender, age, create_time, enu, is_off.
- Tabular data containing fields such as
Operations on Our Platform:
- Enter the Connector module and create a new database API interface named 【Query Student Information】.
Tips
Creating an API is not a mandatory step. If there is an available database API already in the platform, you can directly perform testing on it.
- After creation, click Test in the operation bar.

- Fill in the SQL statement and parameters (e.g.,
id=1) obtained in the previous step into the corresponding fields. - Click the Test button to immediately verify whether the query result is returned normally.

In this way, users can quickly complete interface configuration and debugging within Oinone without switching to external tools, improving integration efficiency and user experience.
In addition, both API and database interfaces can be directly tested in 【Integrated Application → Integrated Interface】, enabling seamless connection between interface debugging and application integration.

(Ⅴ) Details
1. Function Introduction
It supports displaying the detailed information of APIs and files.
2. Operation Method
Click the "Details" button to view the detailed information of the selected API or file.

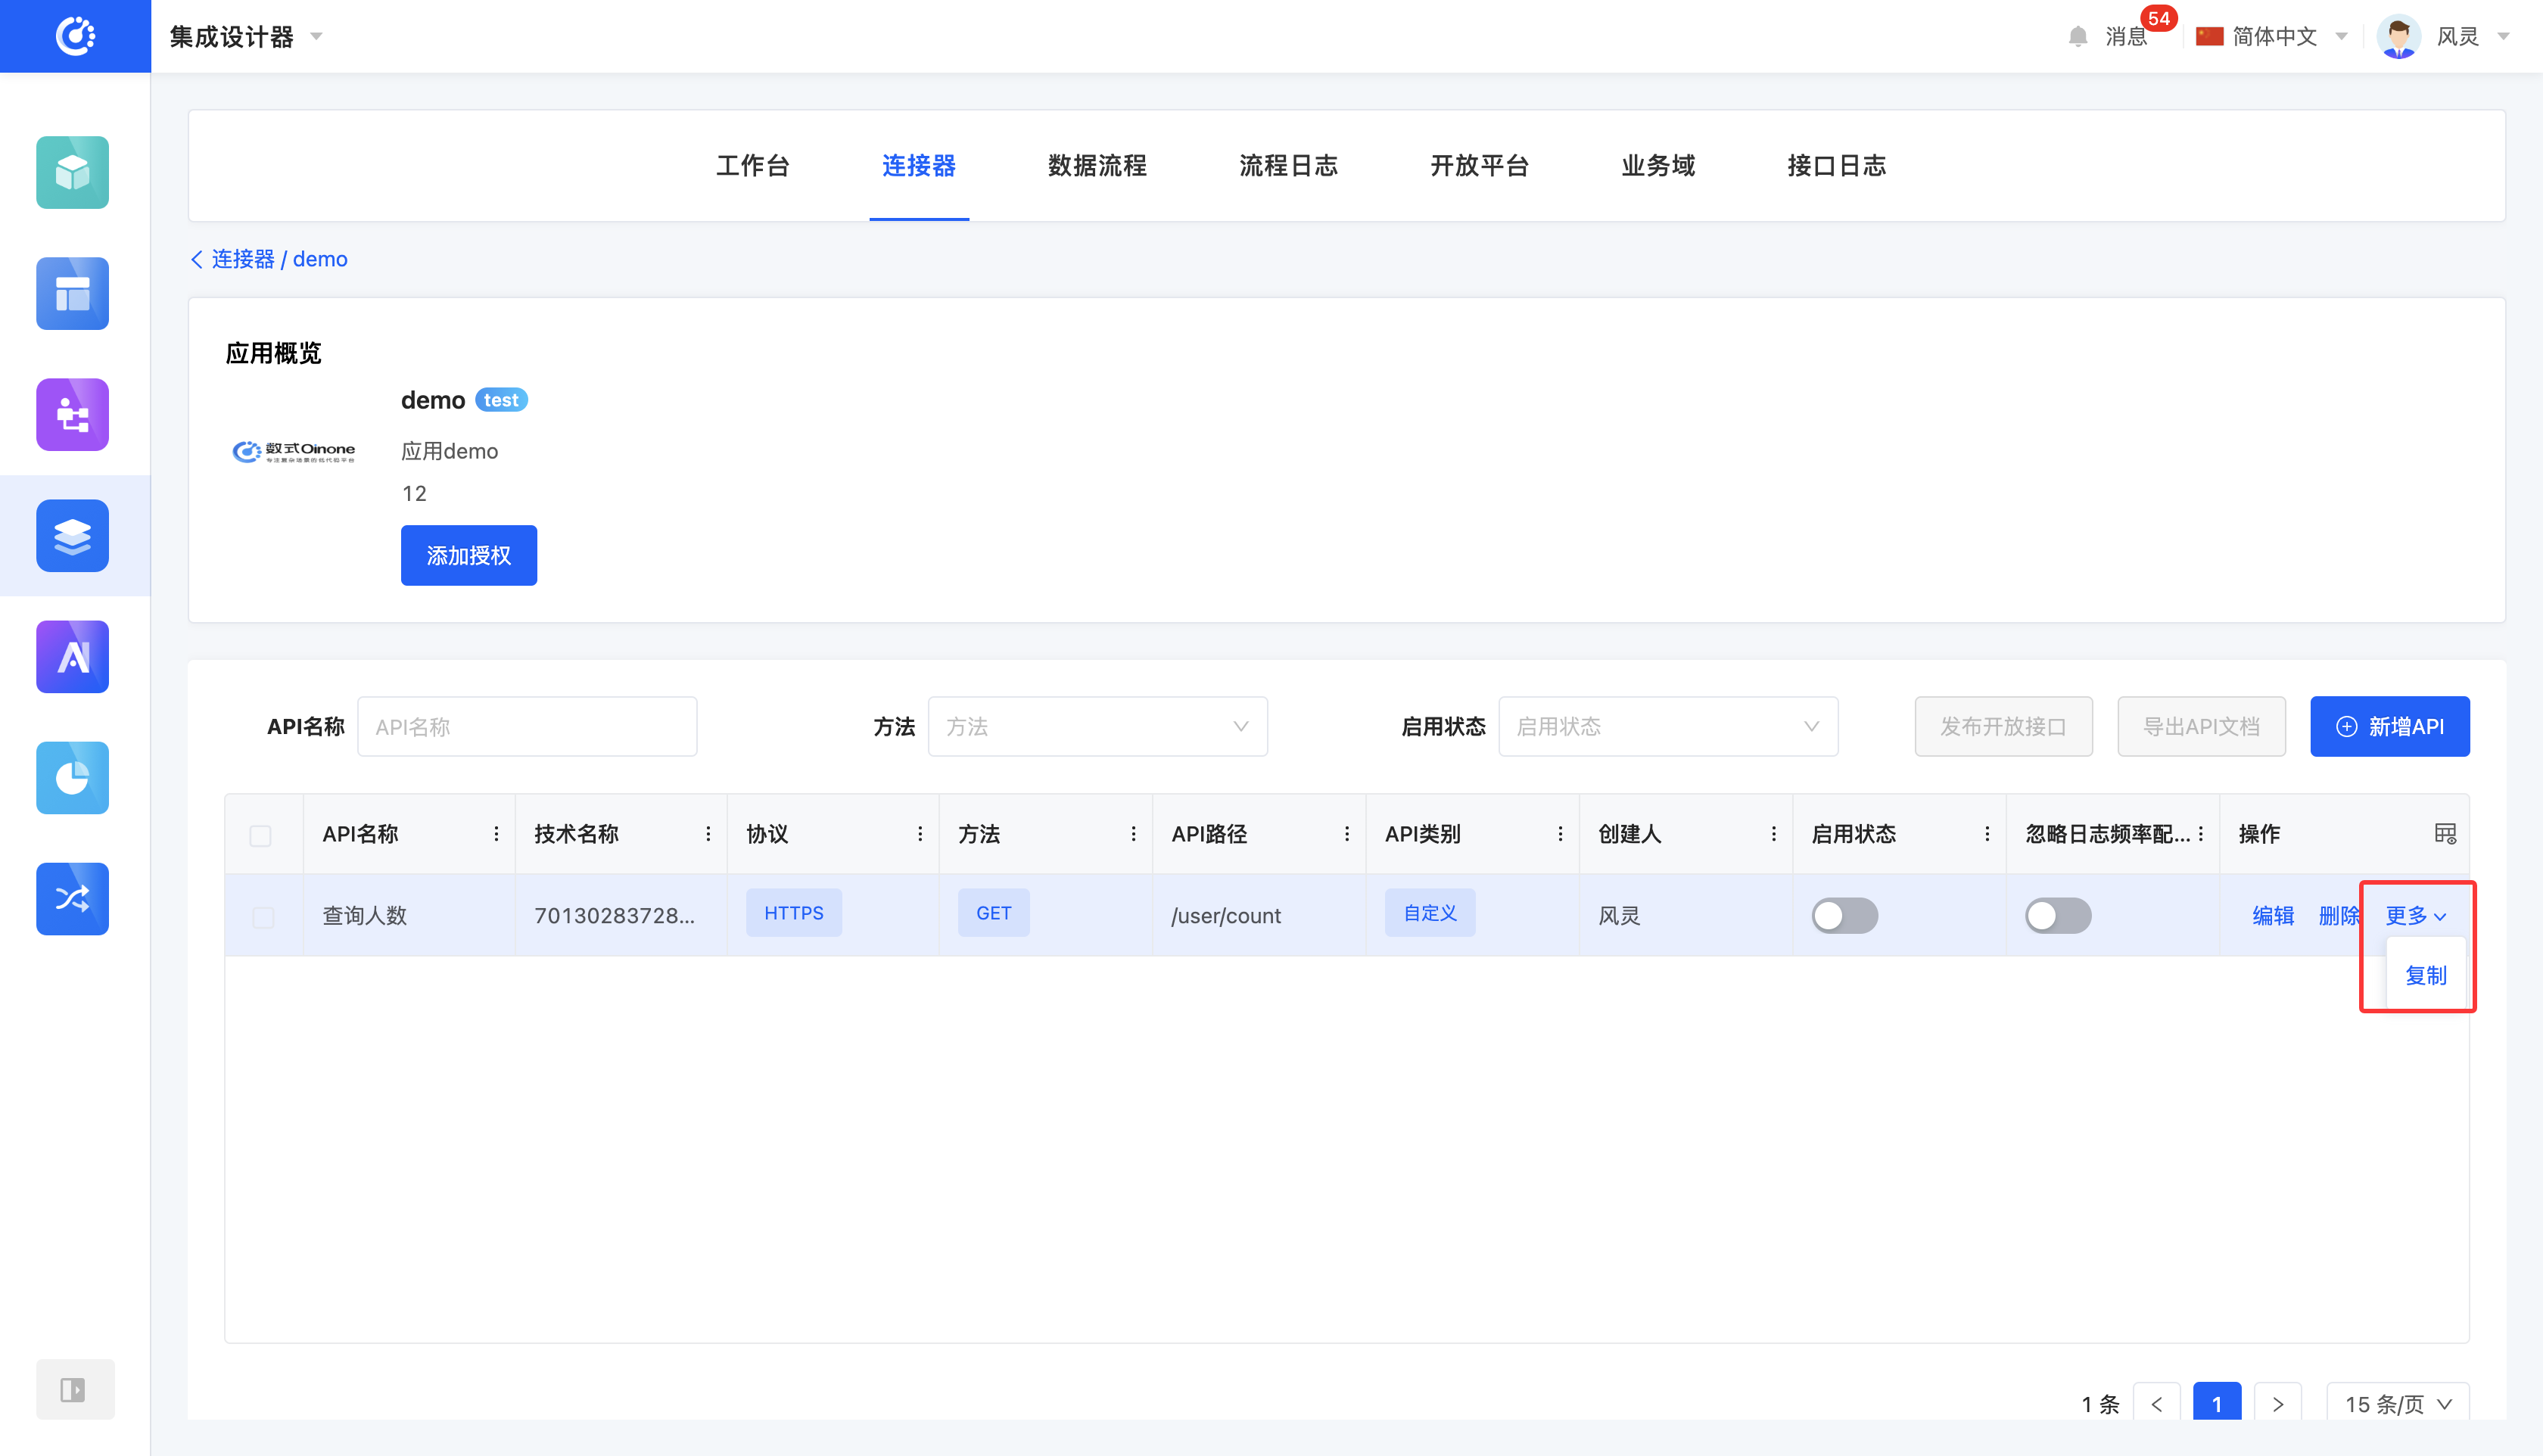
(Ⅵ) Copy
1. Function Introduction
When the API information has a high degree of similarity, you can use the copy function to generate a new page named "Original API Name - Copy". Edit the content and save it to successfully copy (not supported for databases and file sets).
Note
The paths of APIs are not allowed to be repeated.
2. Operation Method
Click the "Copy" button, fill in the information on the pop-up page, and then save to copy successfully.
Note
When an API is not enabled, the "Edit" button will be displayed in the operation bar, and the "Copy" option will be hidden under the "More" menu.
(Ⅶ) Deletion
1. Function Introduction
When an API or file is no longer in use, you can choose to delete it.
Note
APIs and files that are being referenced cannot be deleted.
Warning
Once an API is deleted, it cannot be recovered. Please operate with caution!
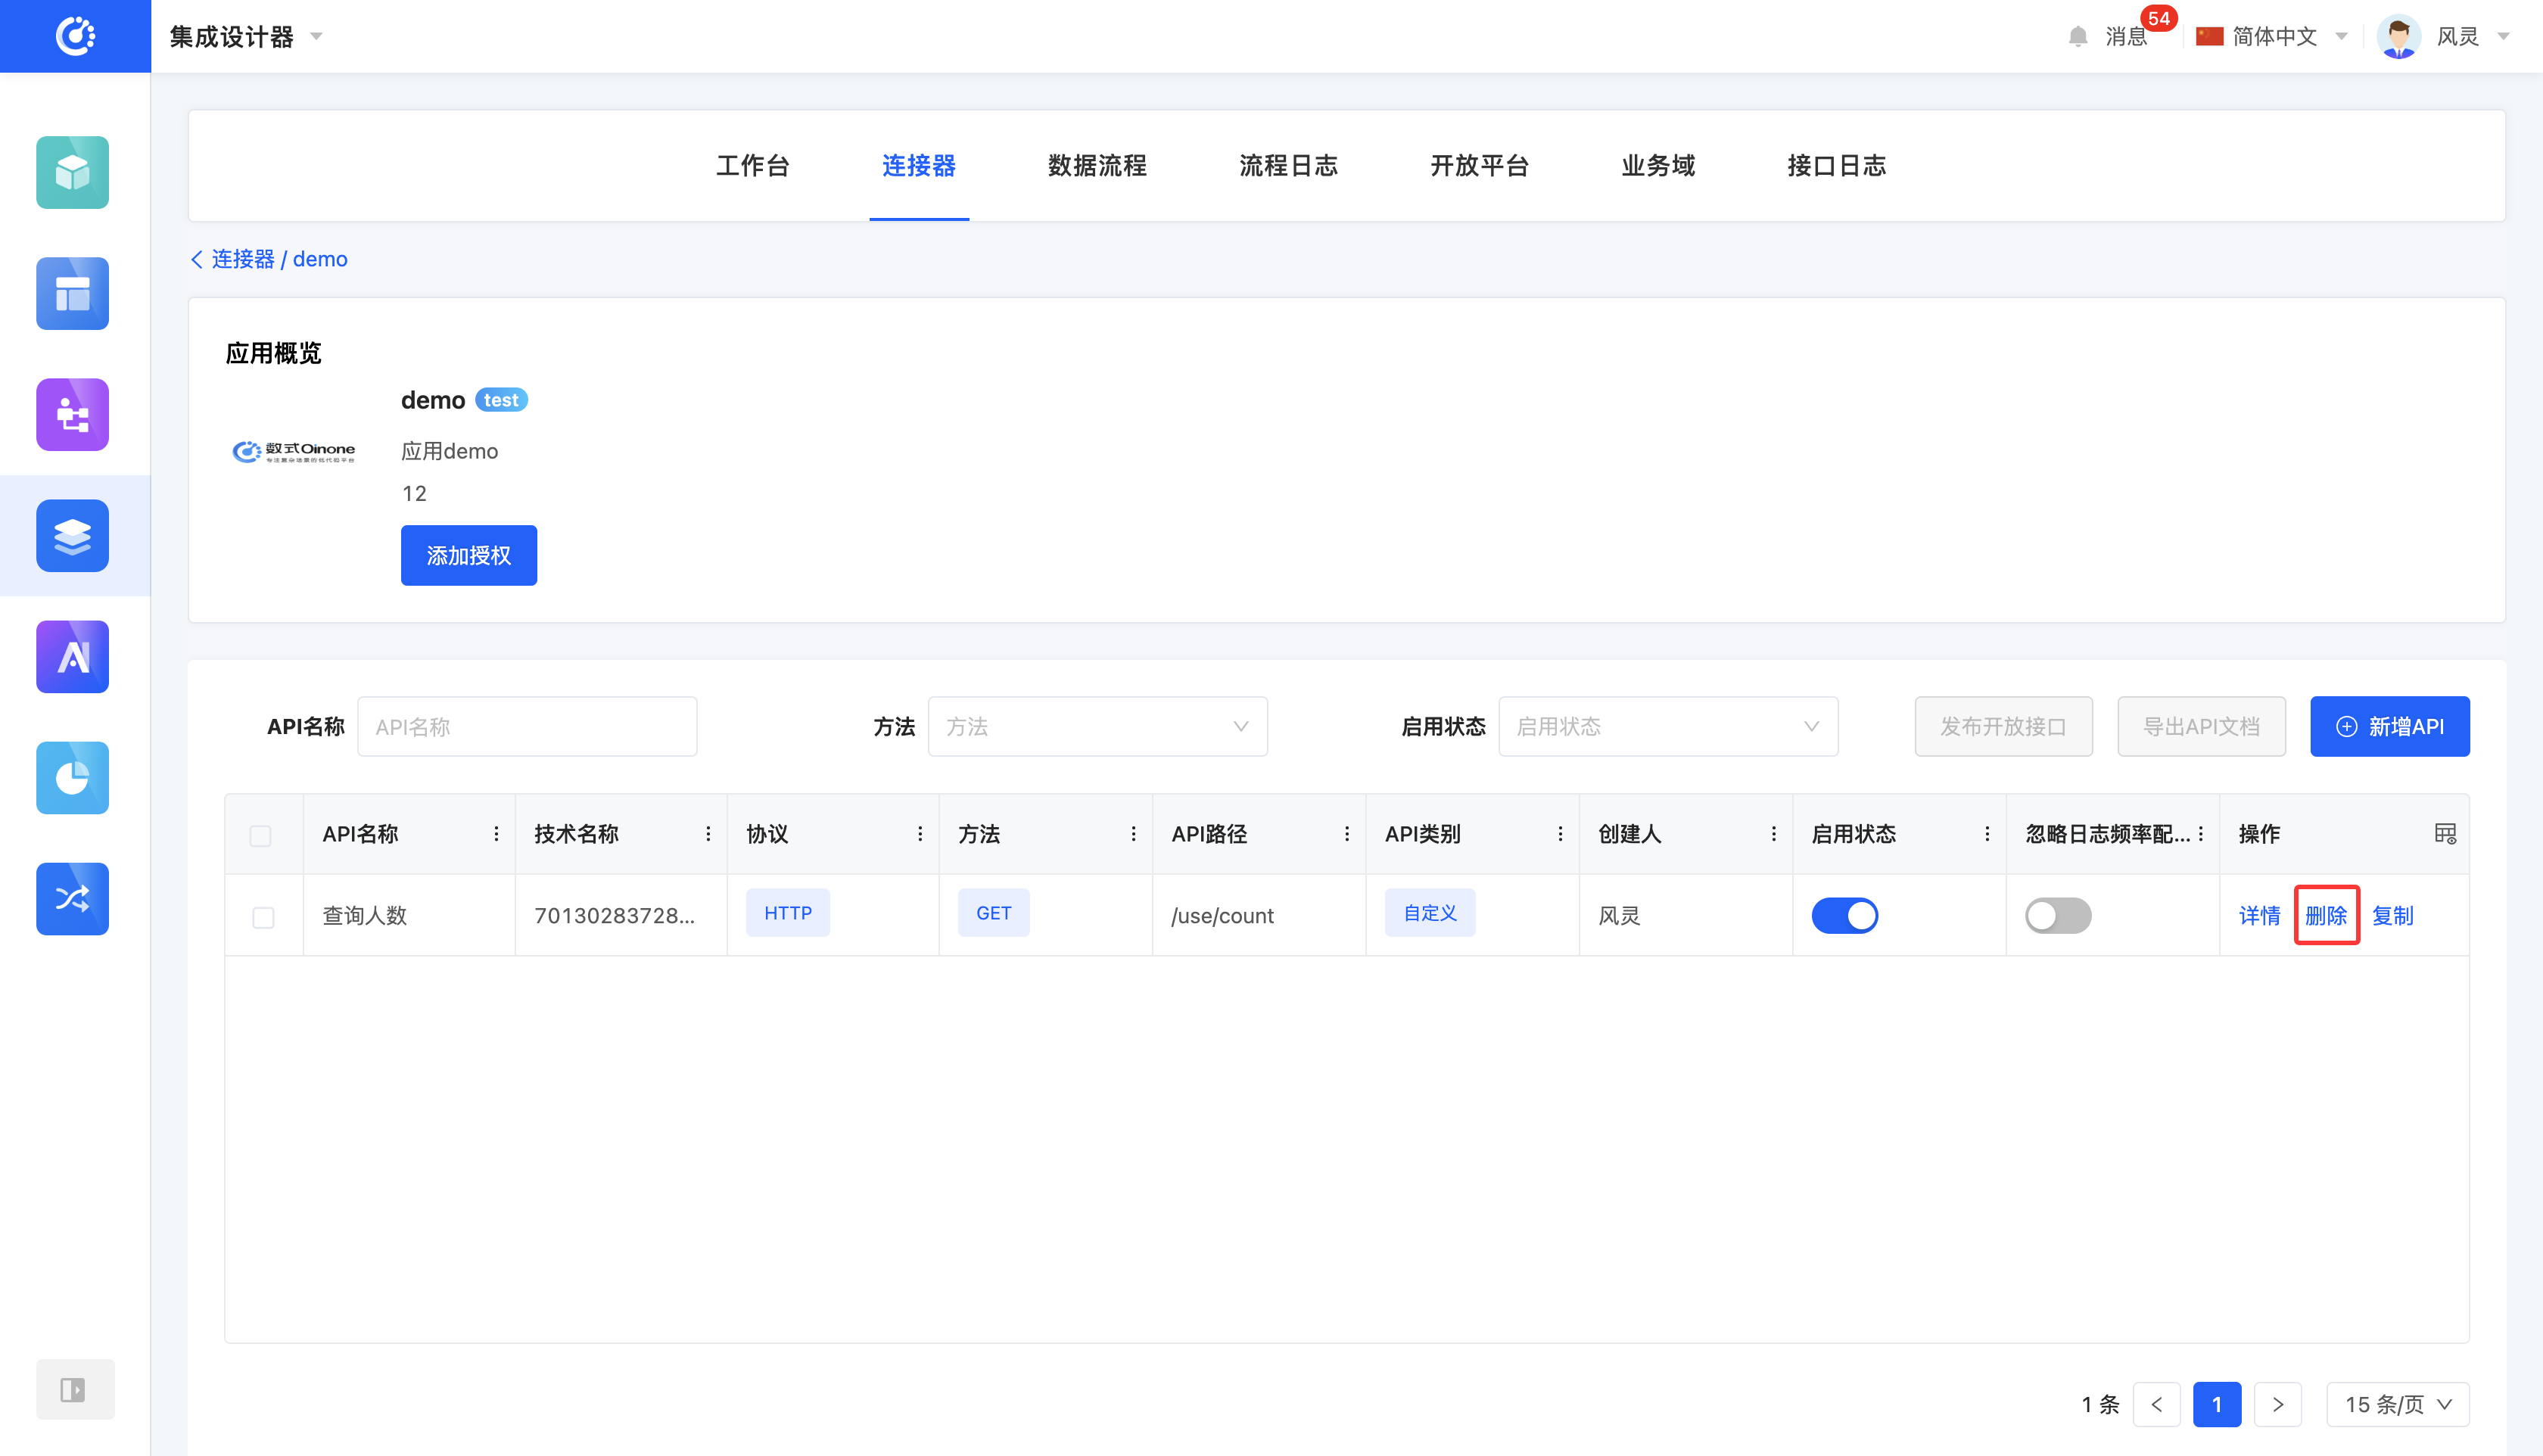
2. Operation Method
Click the "Delete" icon, confirm the deletion, and it will be deleted.
(Ⅷ) Publish Open APIs
1. Function Introduction
It supports publishing APIs in applications and databases as open APIs. After being set as open APIs, they can be used by external systems.
Note
APIs set as open APIs can be viewed in the "Open Platform".
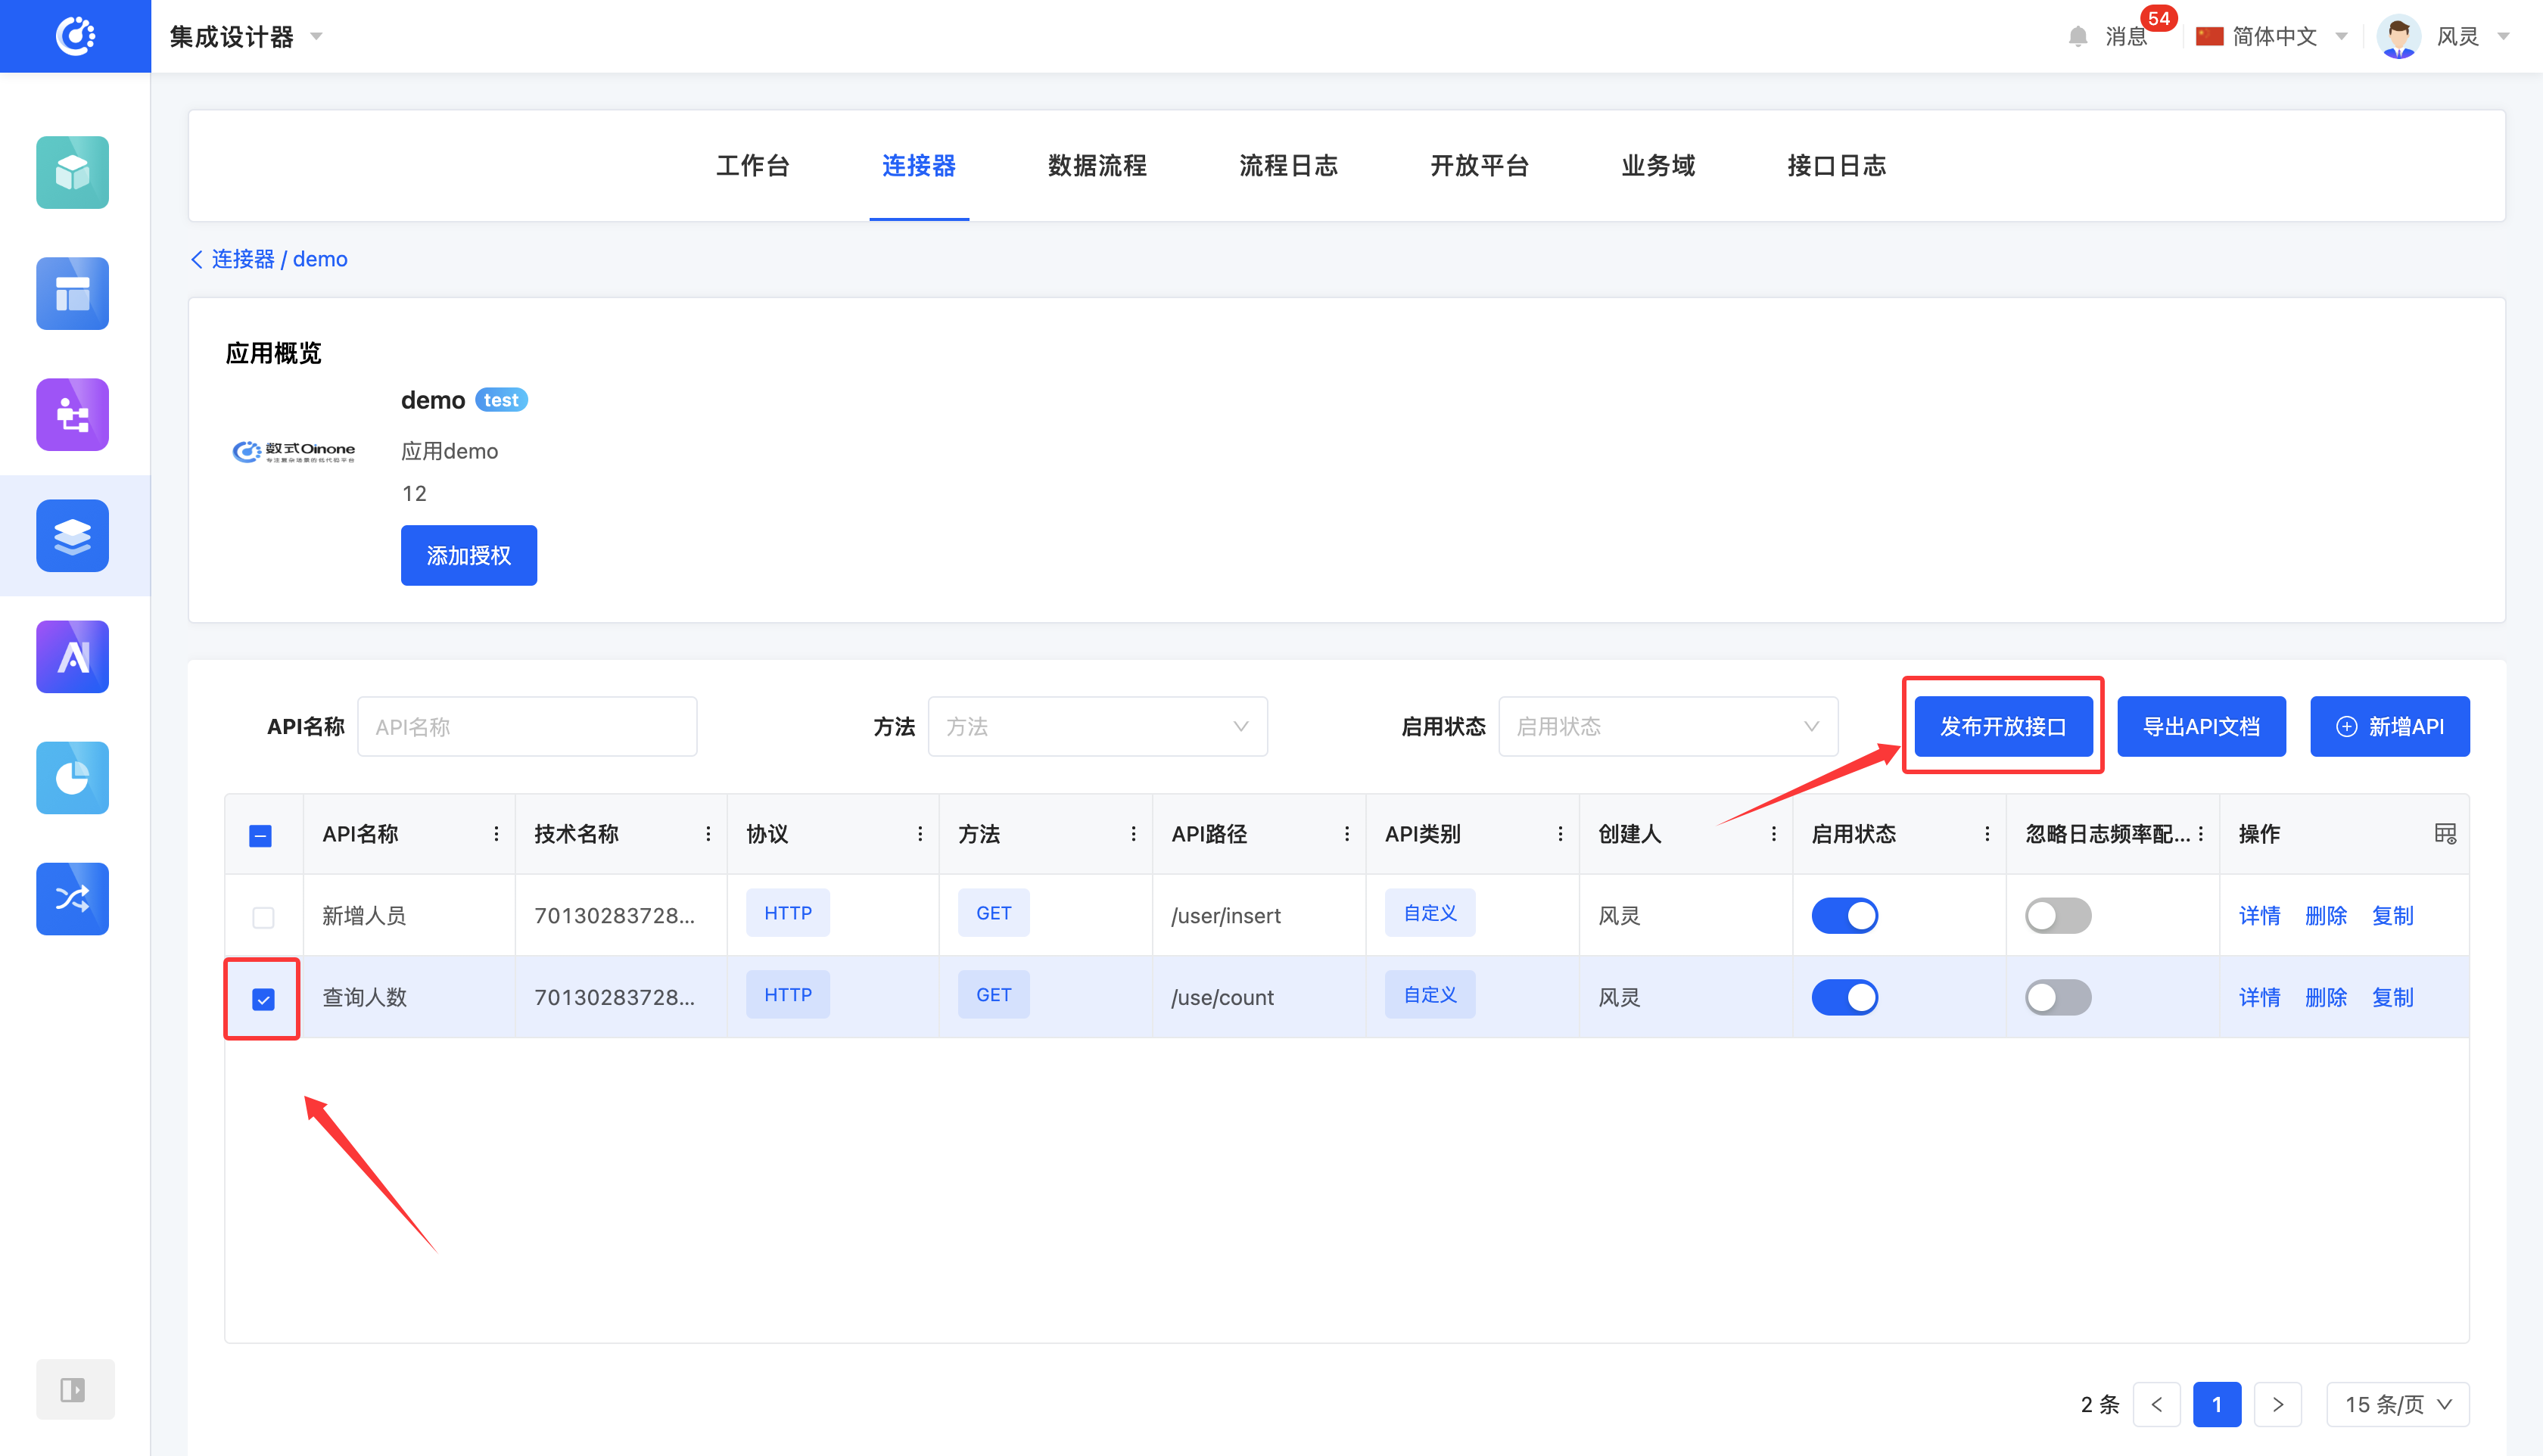
2. Operation Method
Select an API and click the "Publish Open API" button to publish it successfully.
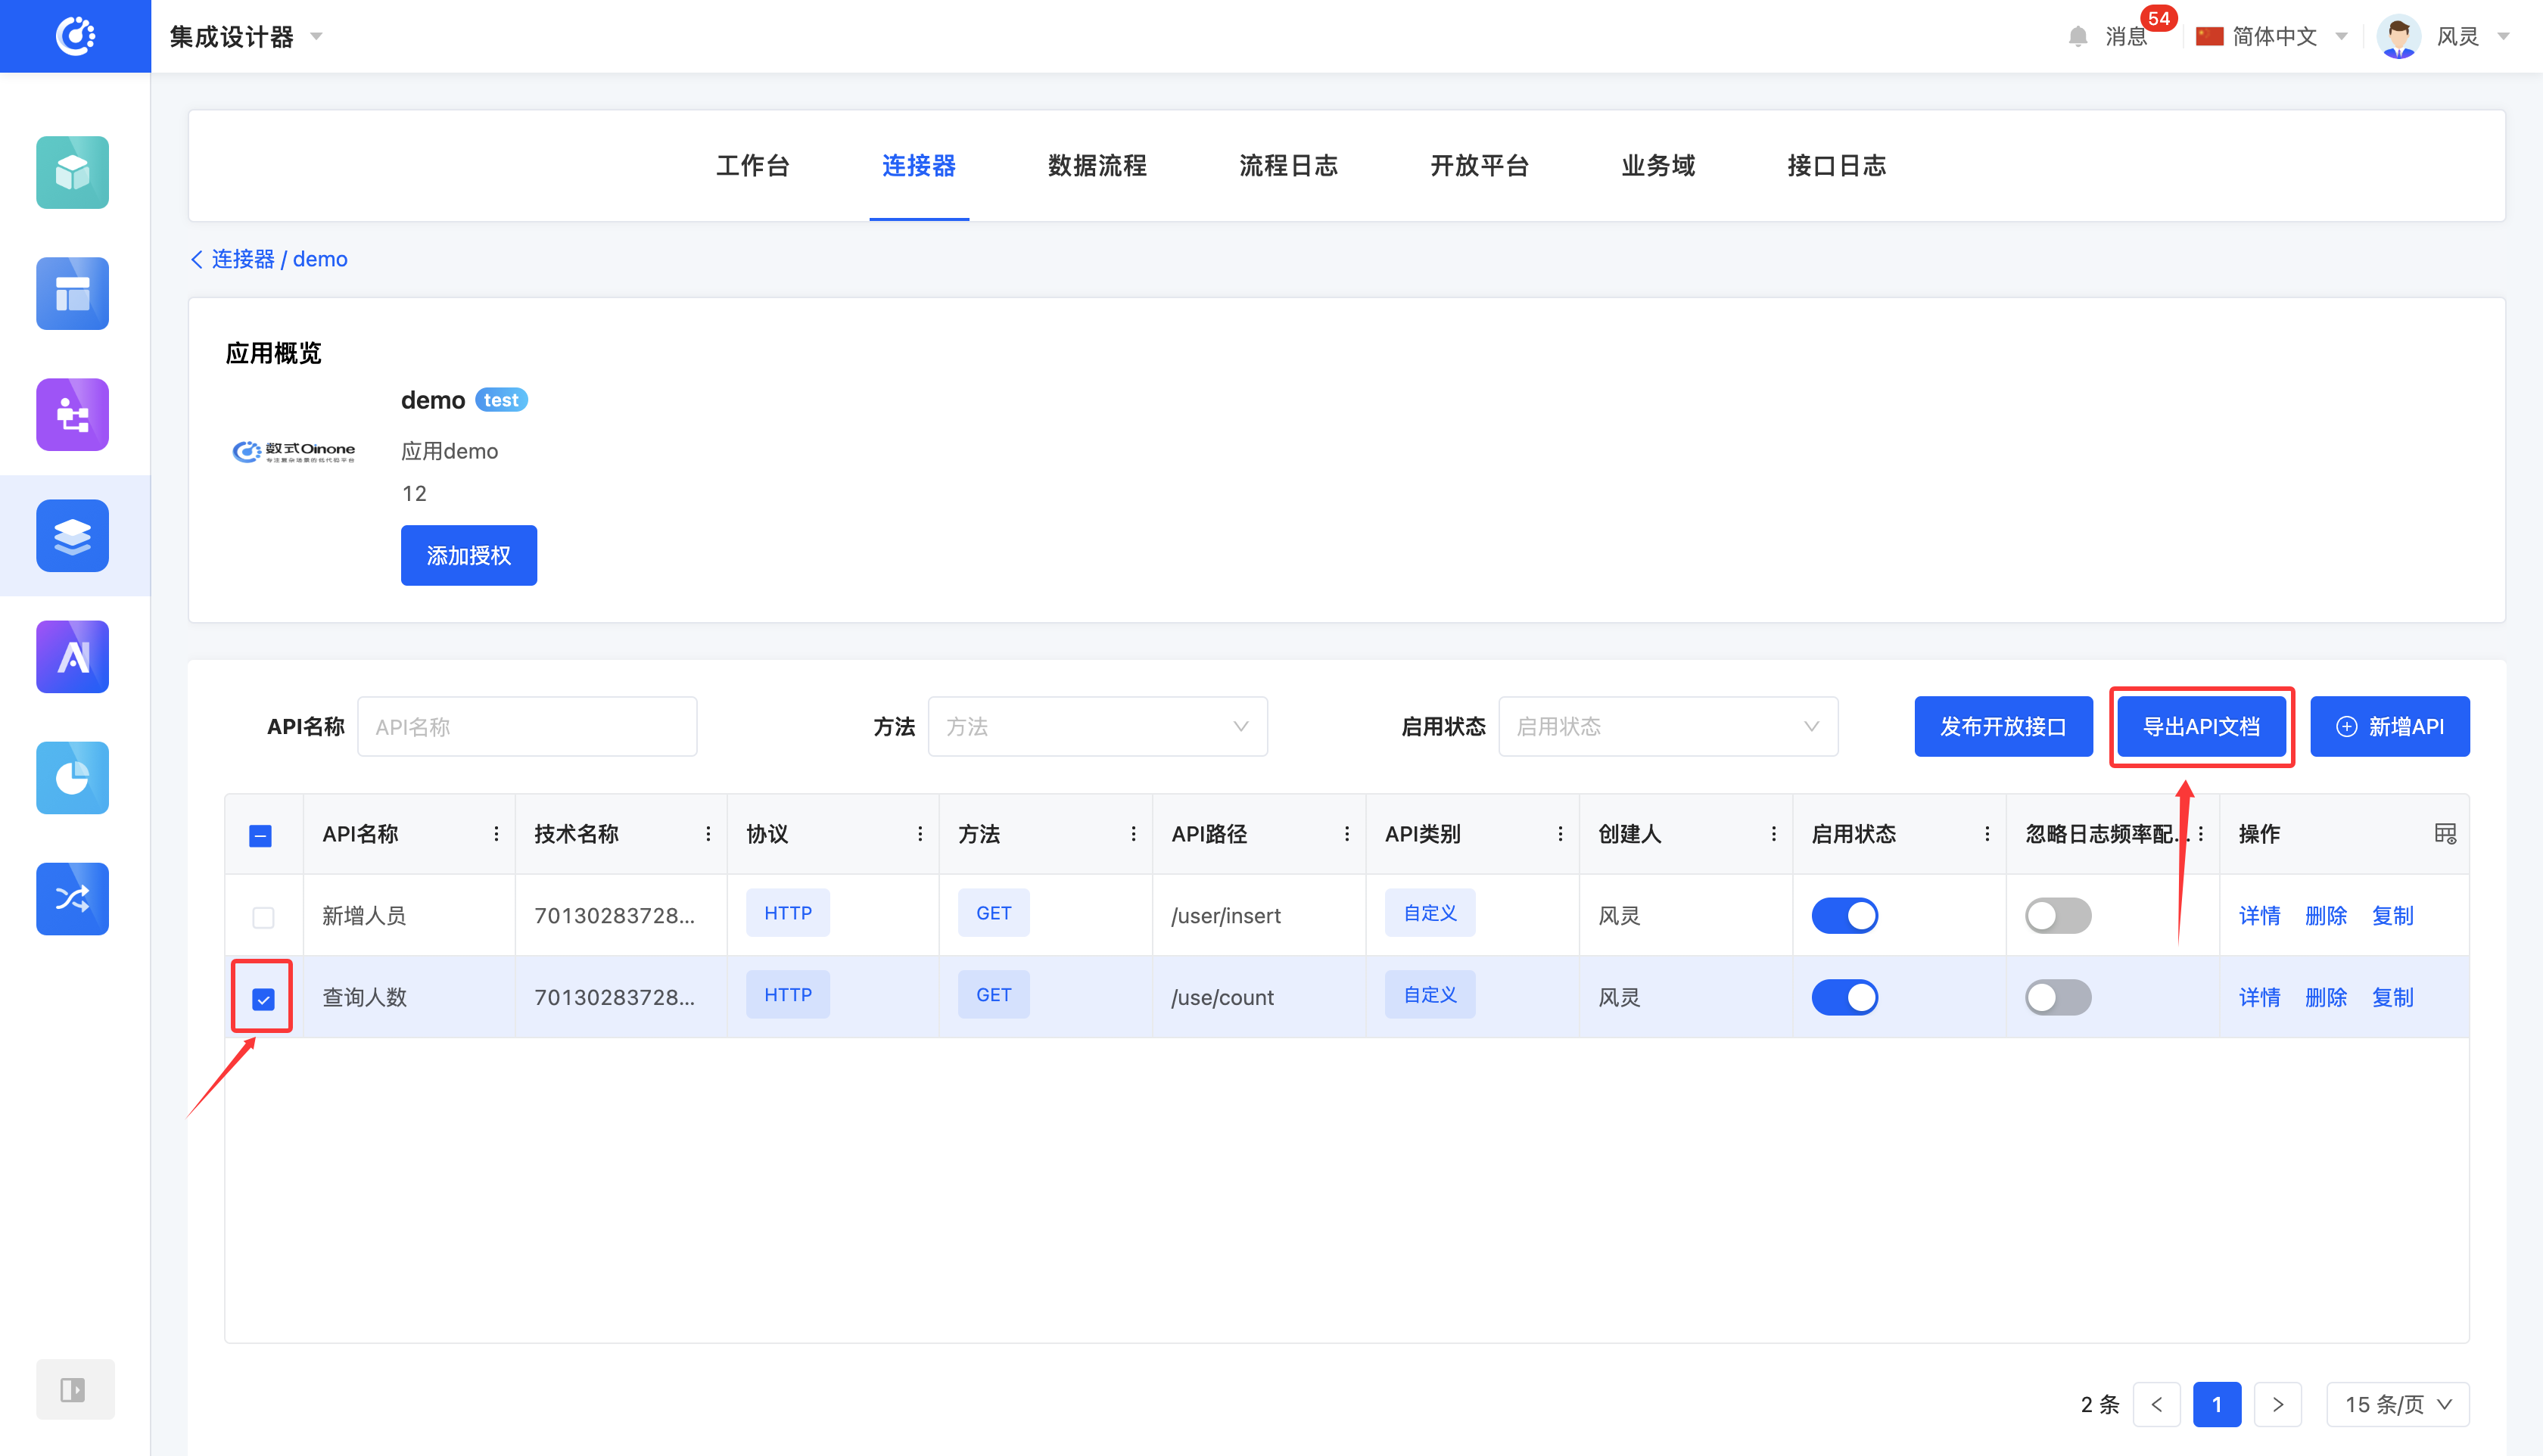
(Ⅸ) Export API Documentation
1. Function Introduction
It supports the export of API information in applications and databases into document format. The document adopts a uniform structure, and different types display different information according to their own characteristics, which is used to describe the configured interface capabilities under an application, including interface purpose, call mode, parameter description and return data structure
2. Operation Method
Select an API and click the "Export API Documentation" button to export it successfully.
Tip
The successfully exported documentation can be downloaded in "Files" - "Export Tasks".