On the microflow design page, comprehensive microflow design and configuration can be carried out.
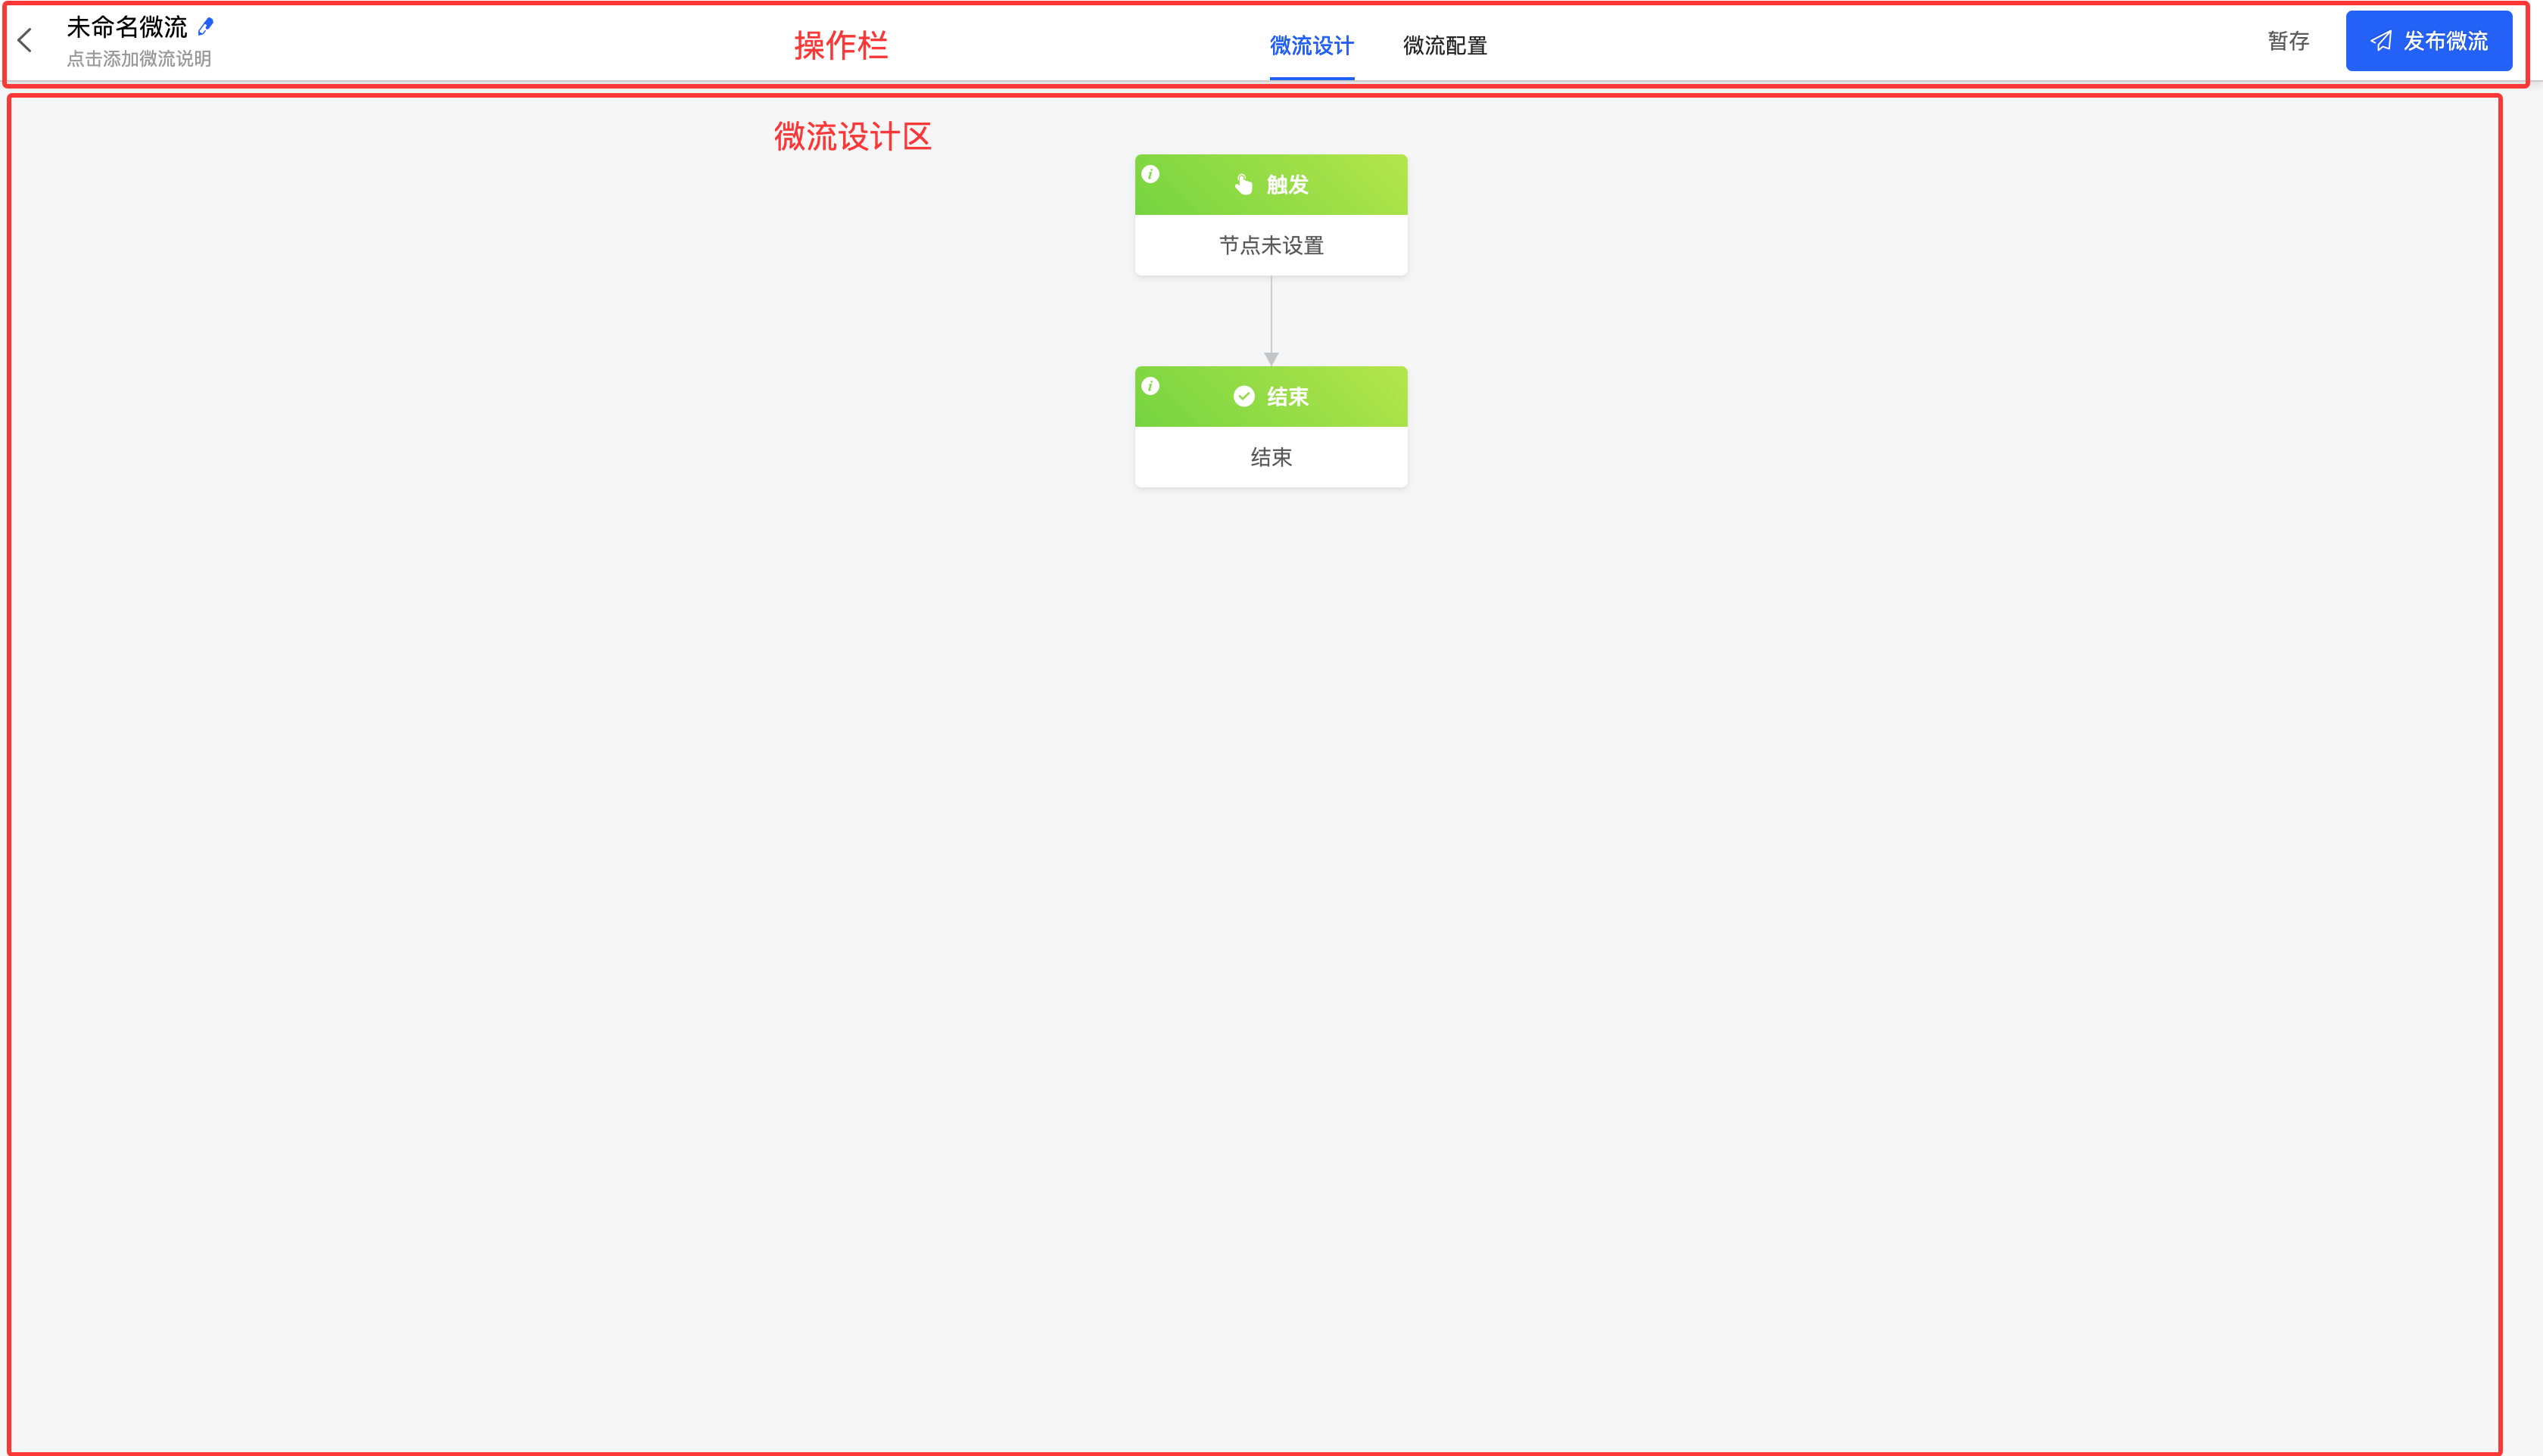
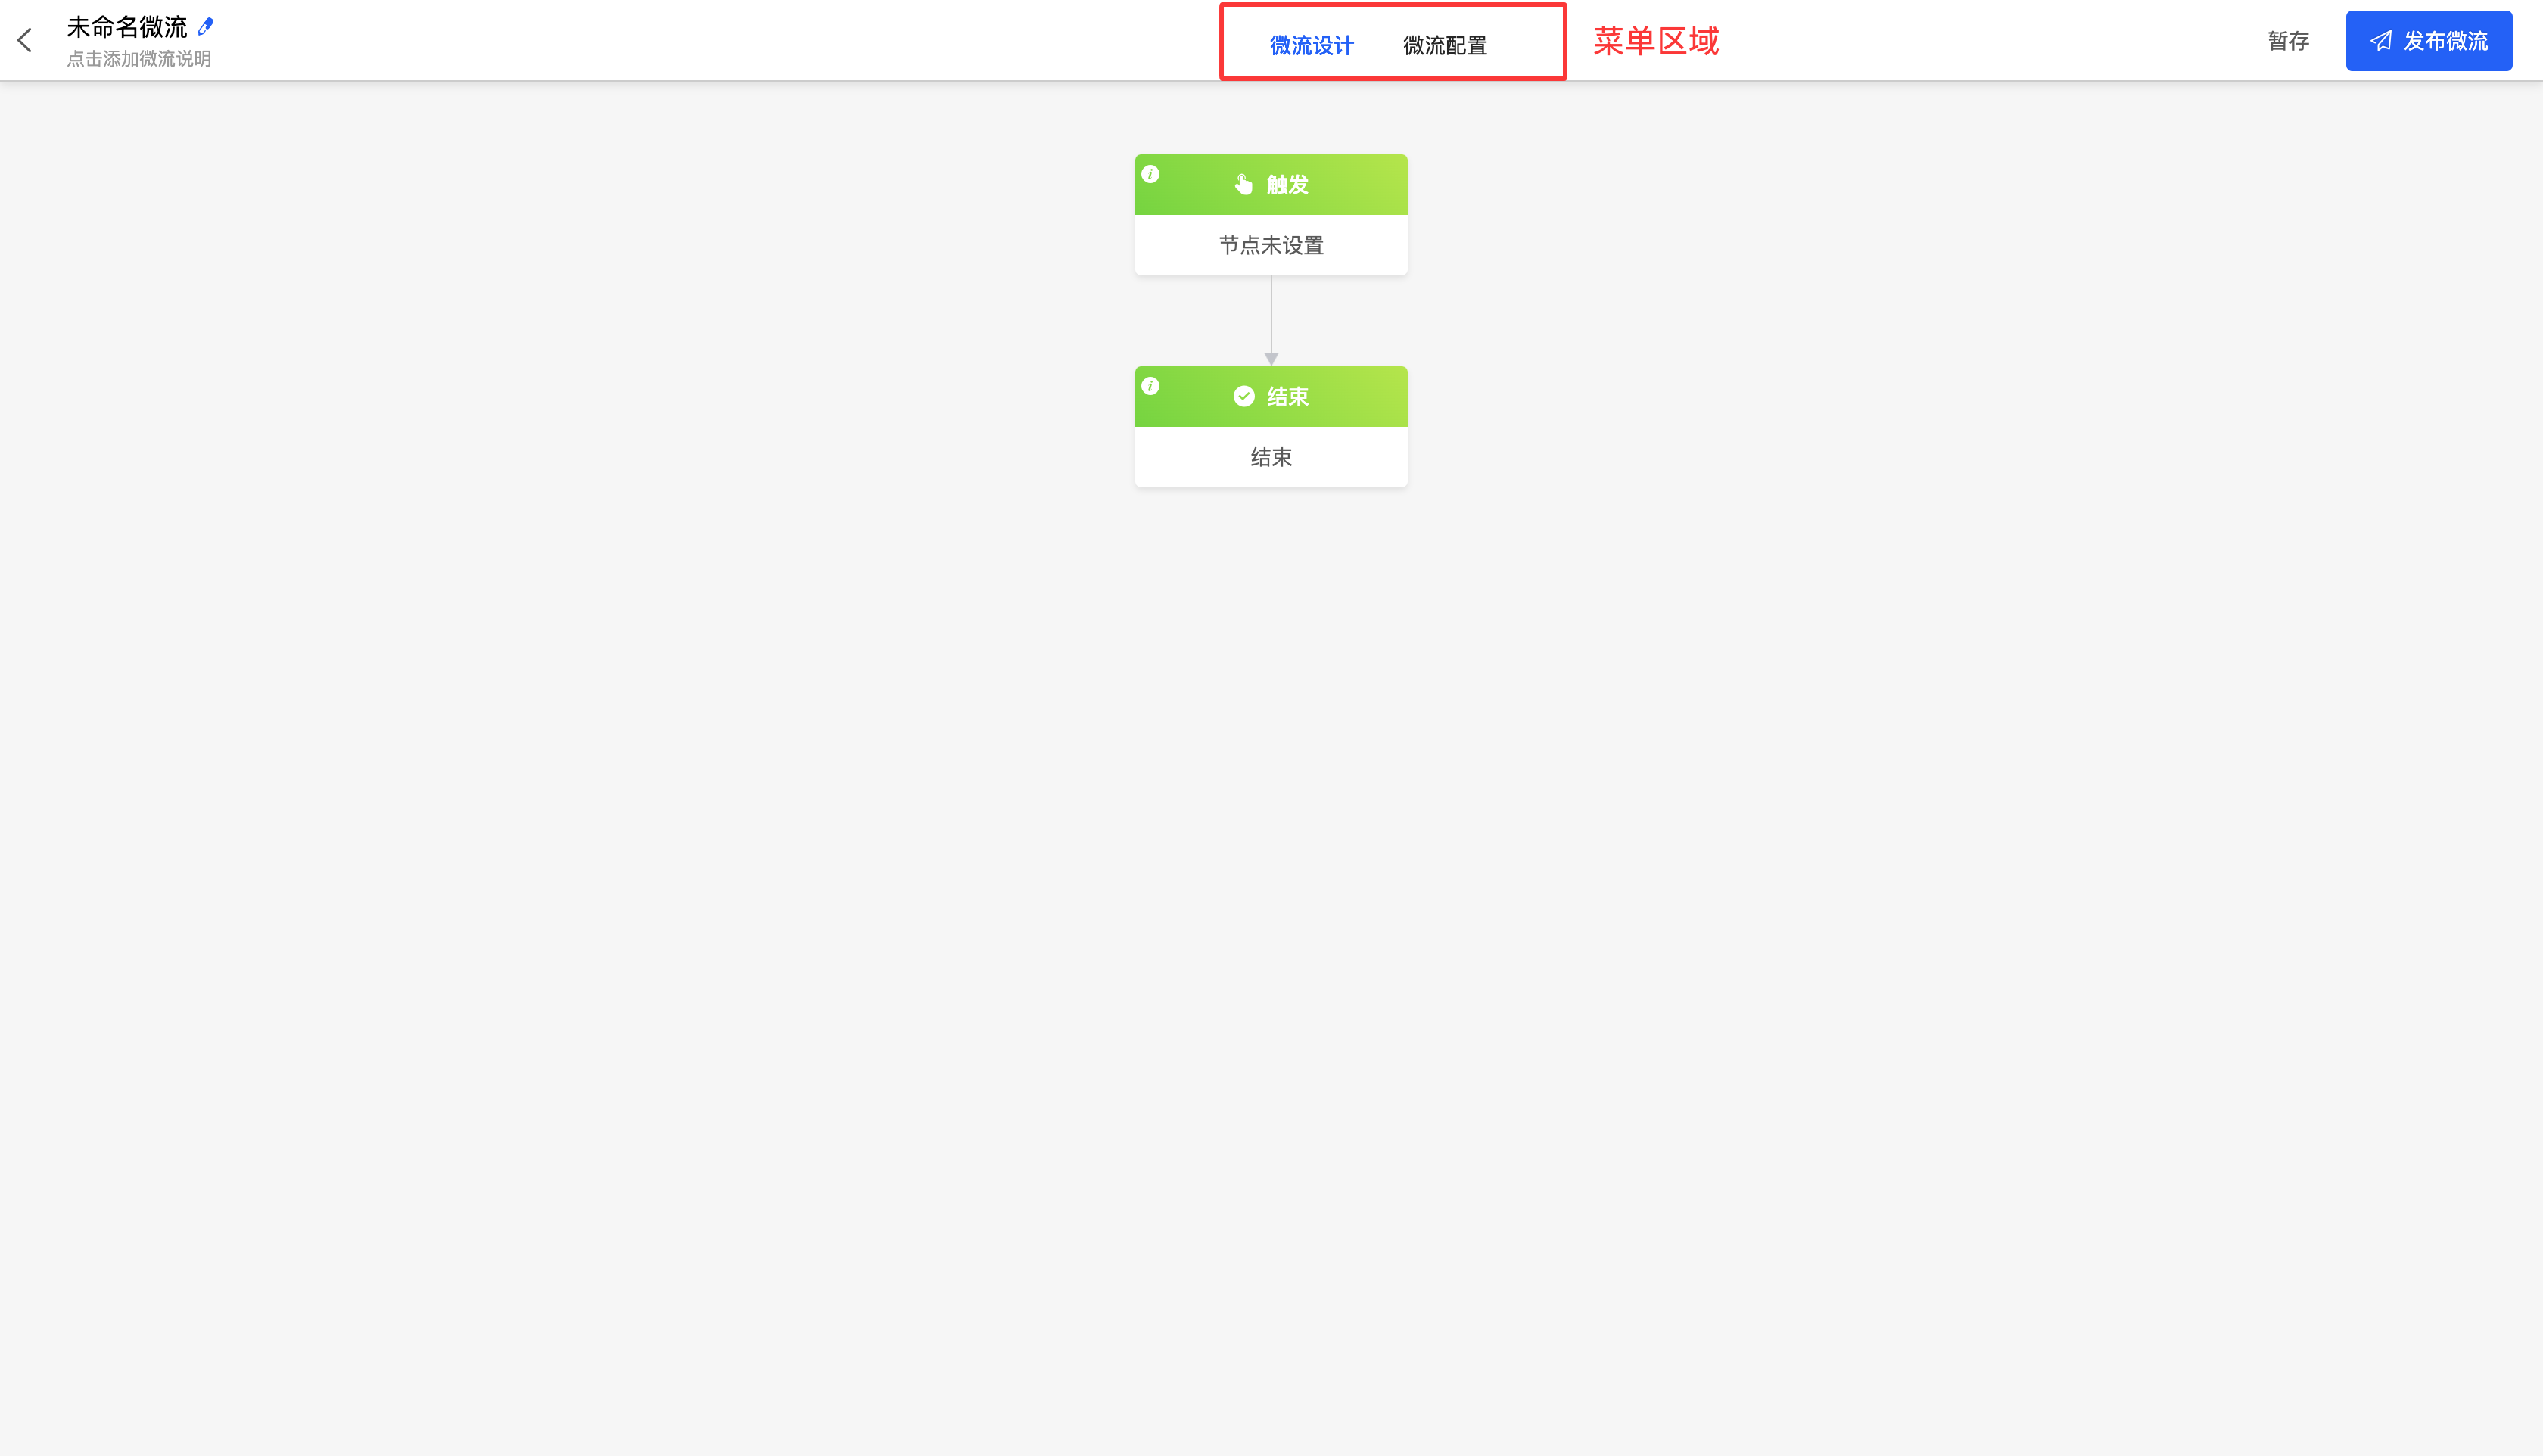
Microflow design is mainly divided into three functional areas, namely: the operation bar, the microflow design area, and the property panel.
- Operation bar: It provides a series of commonly used operation buttons and menu options, allowing operations such as modifying the microflow name, saving, and publishing.
- Microflow design area: This is the main area for microflow design. Nodes and actions can be directly added to the microflow to improve it.
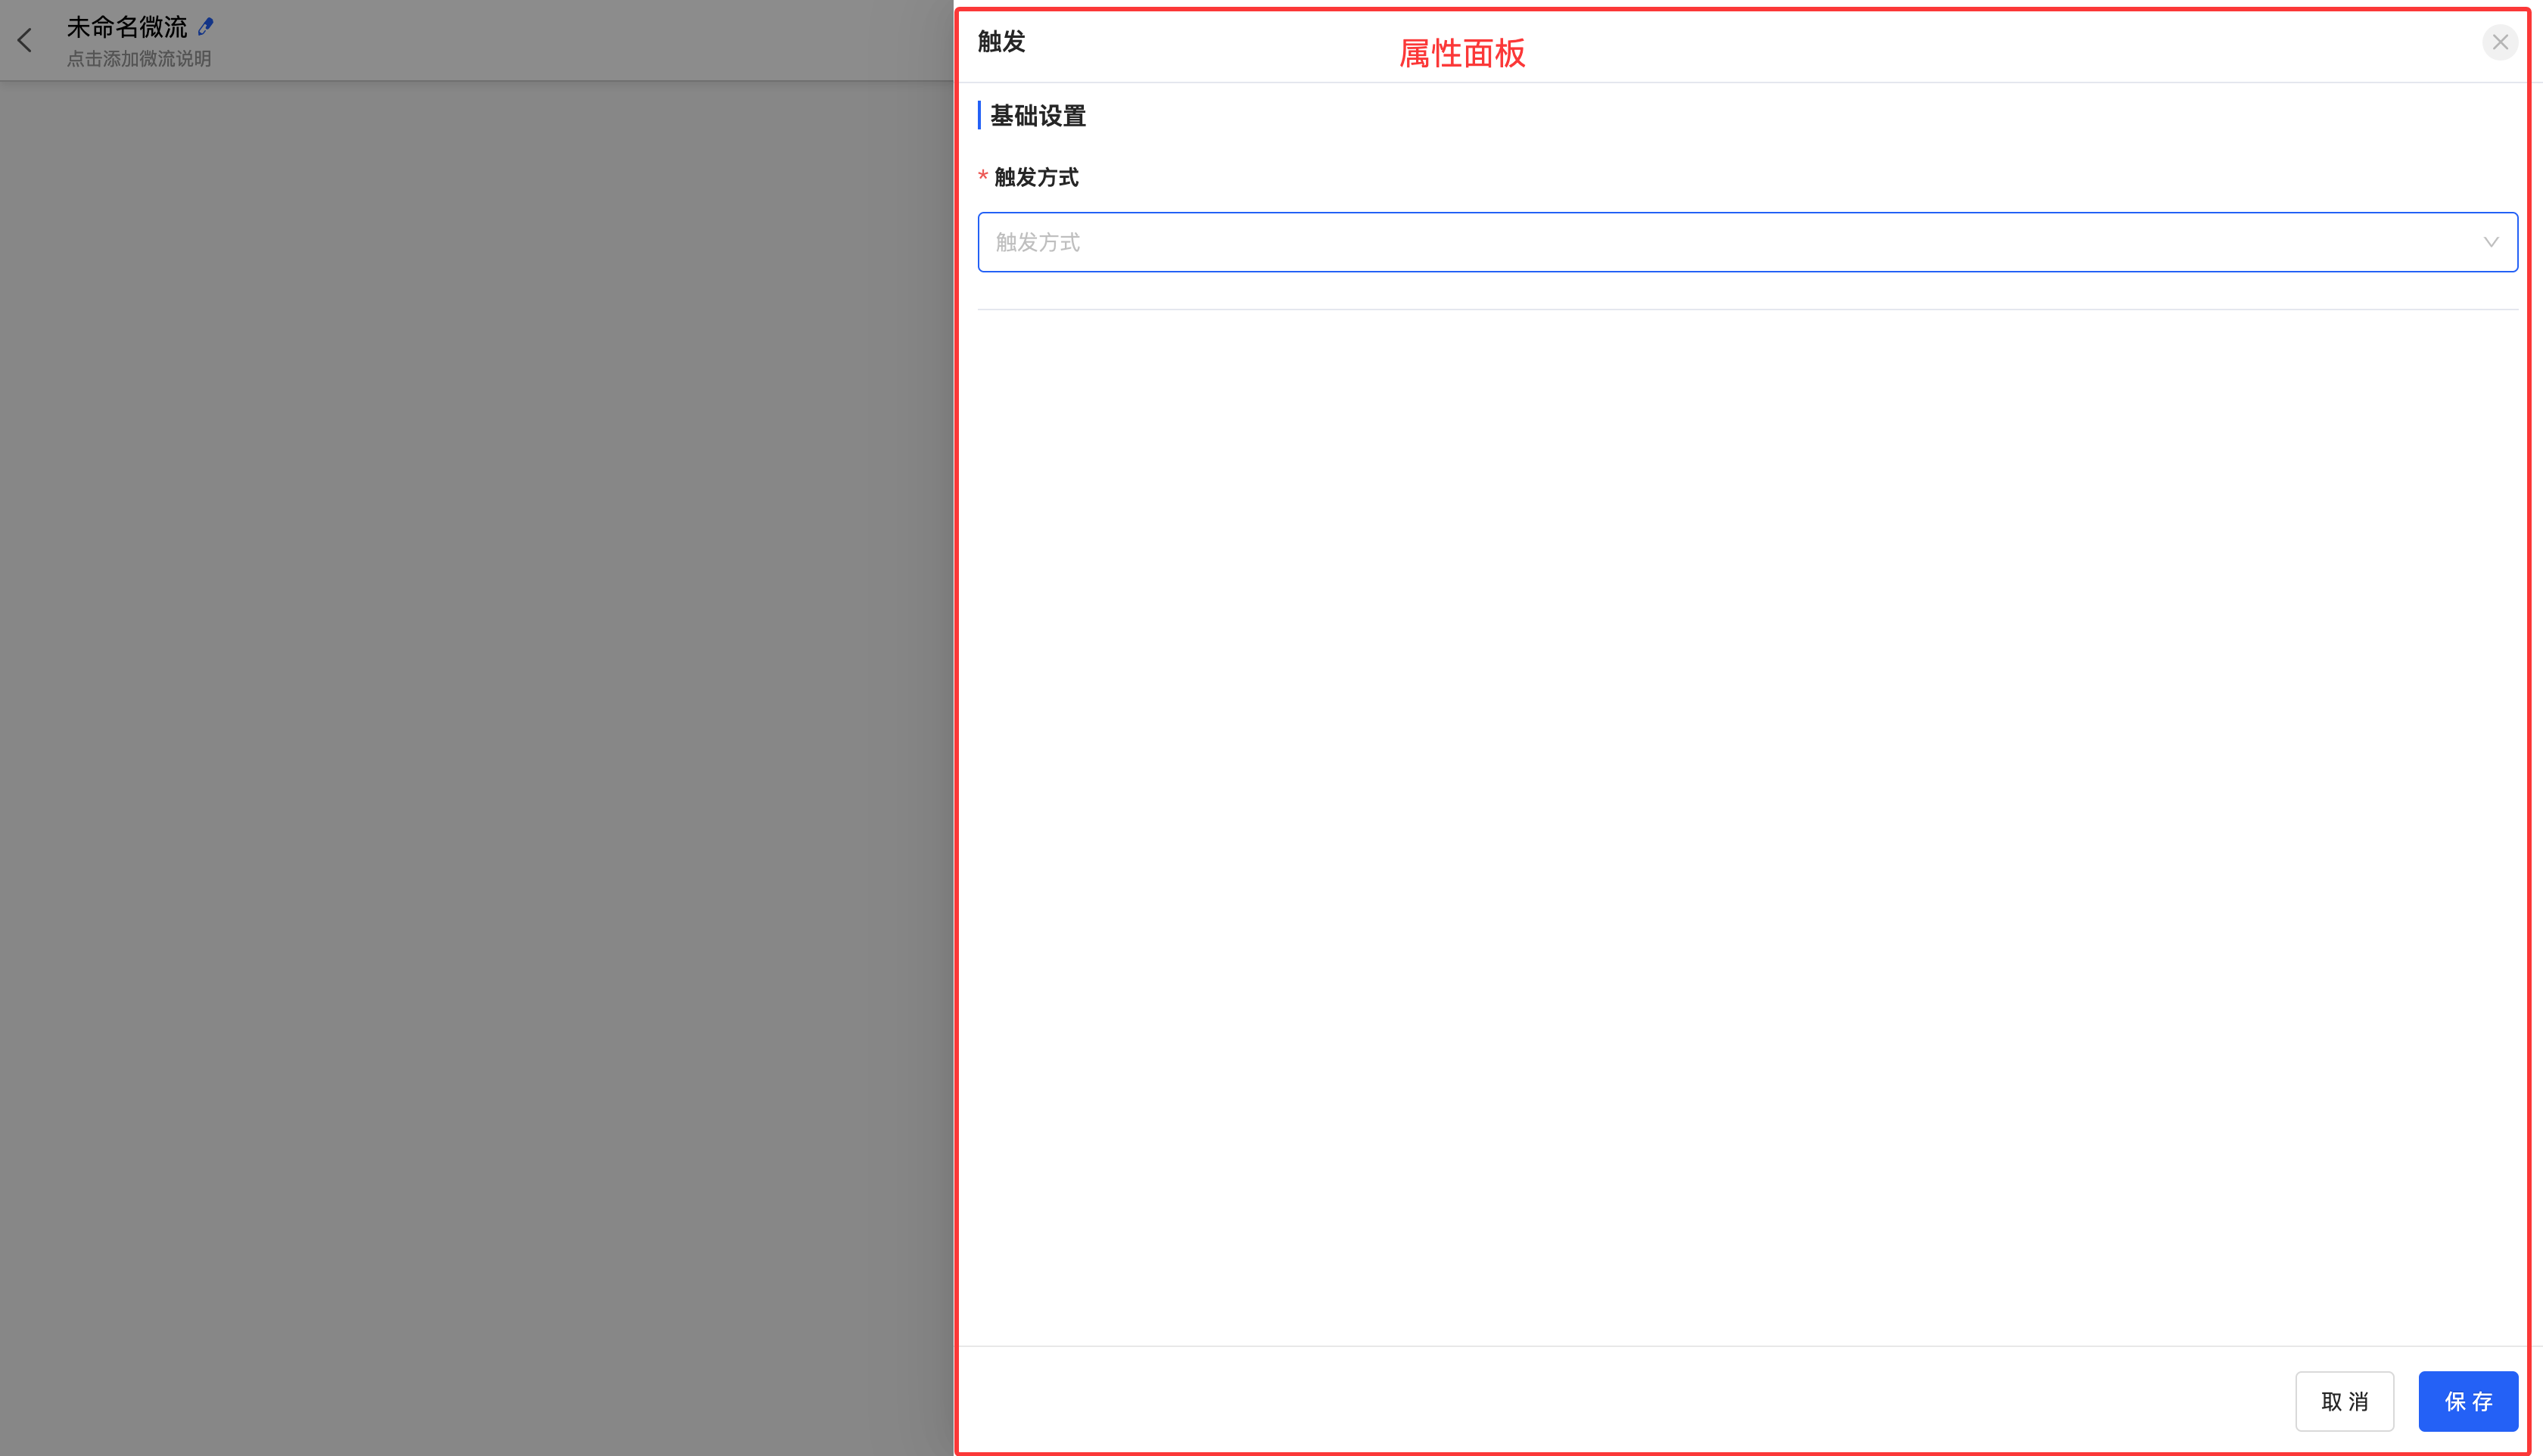
- Property panel: It is displayed when a node action is clicked. The relevant properties of the node can be adjusted on this panel.
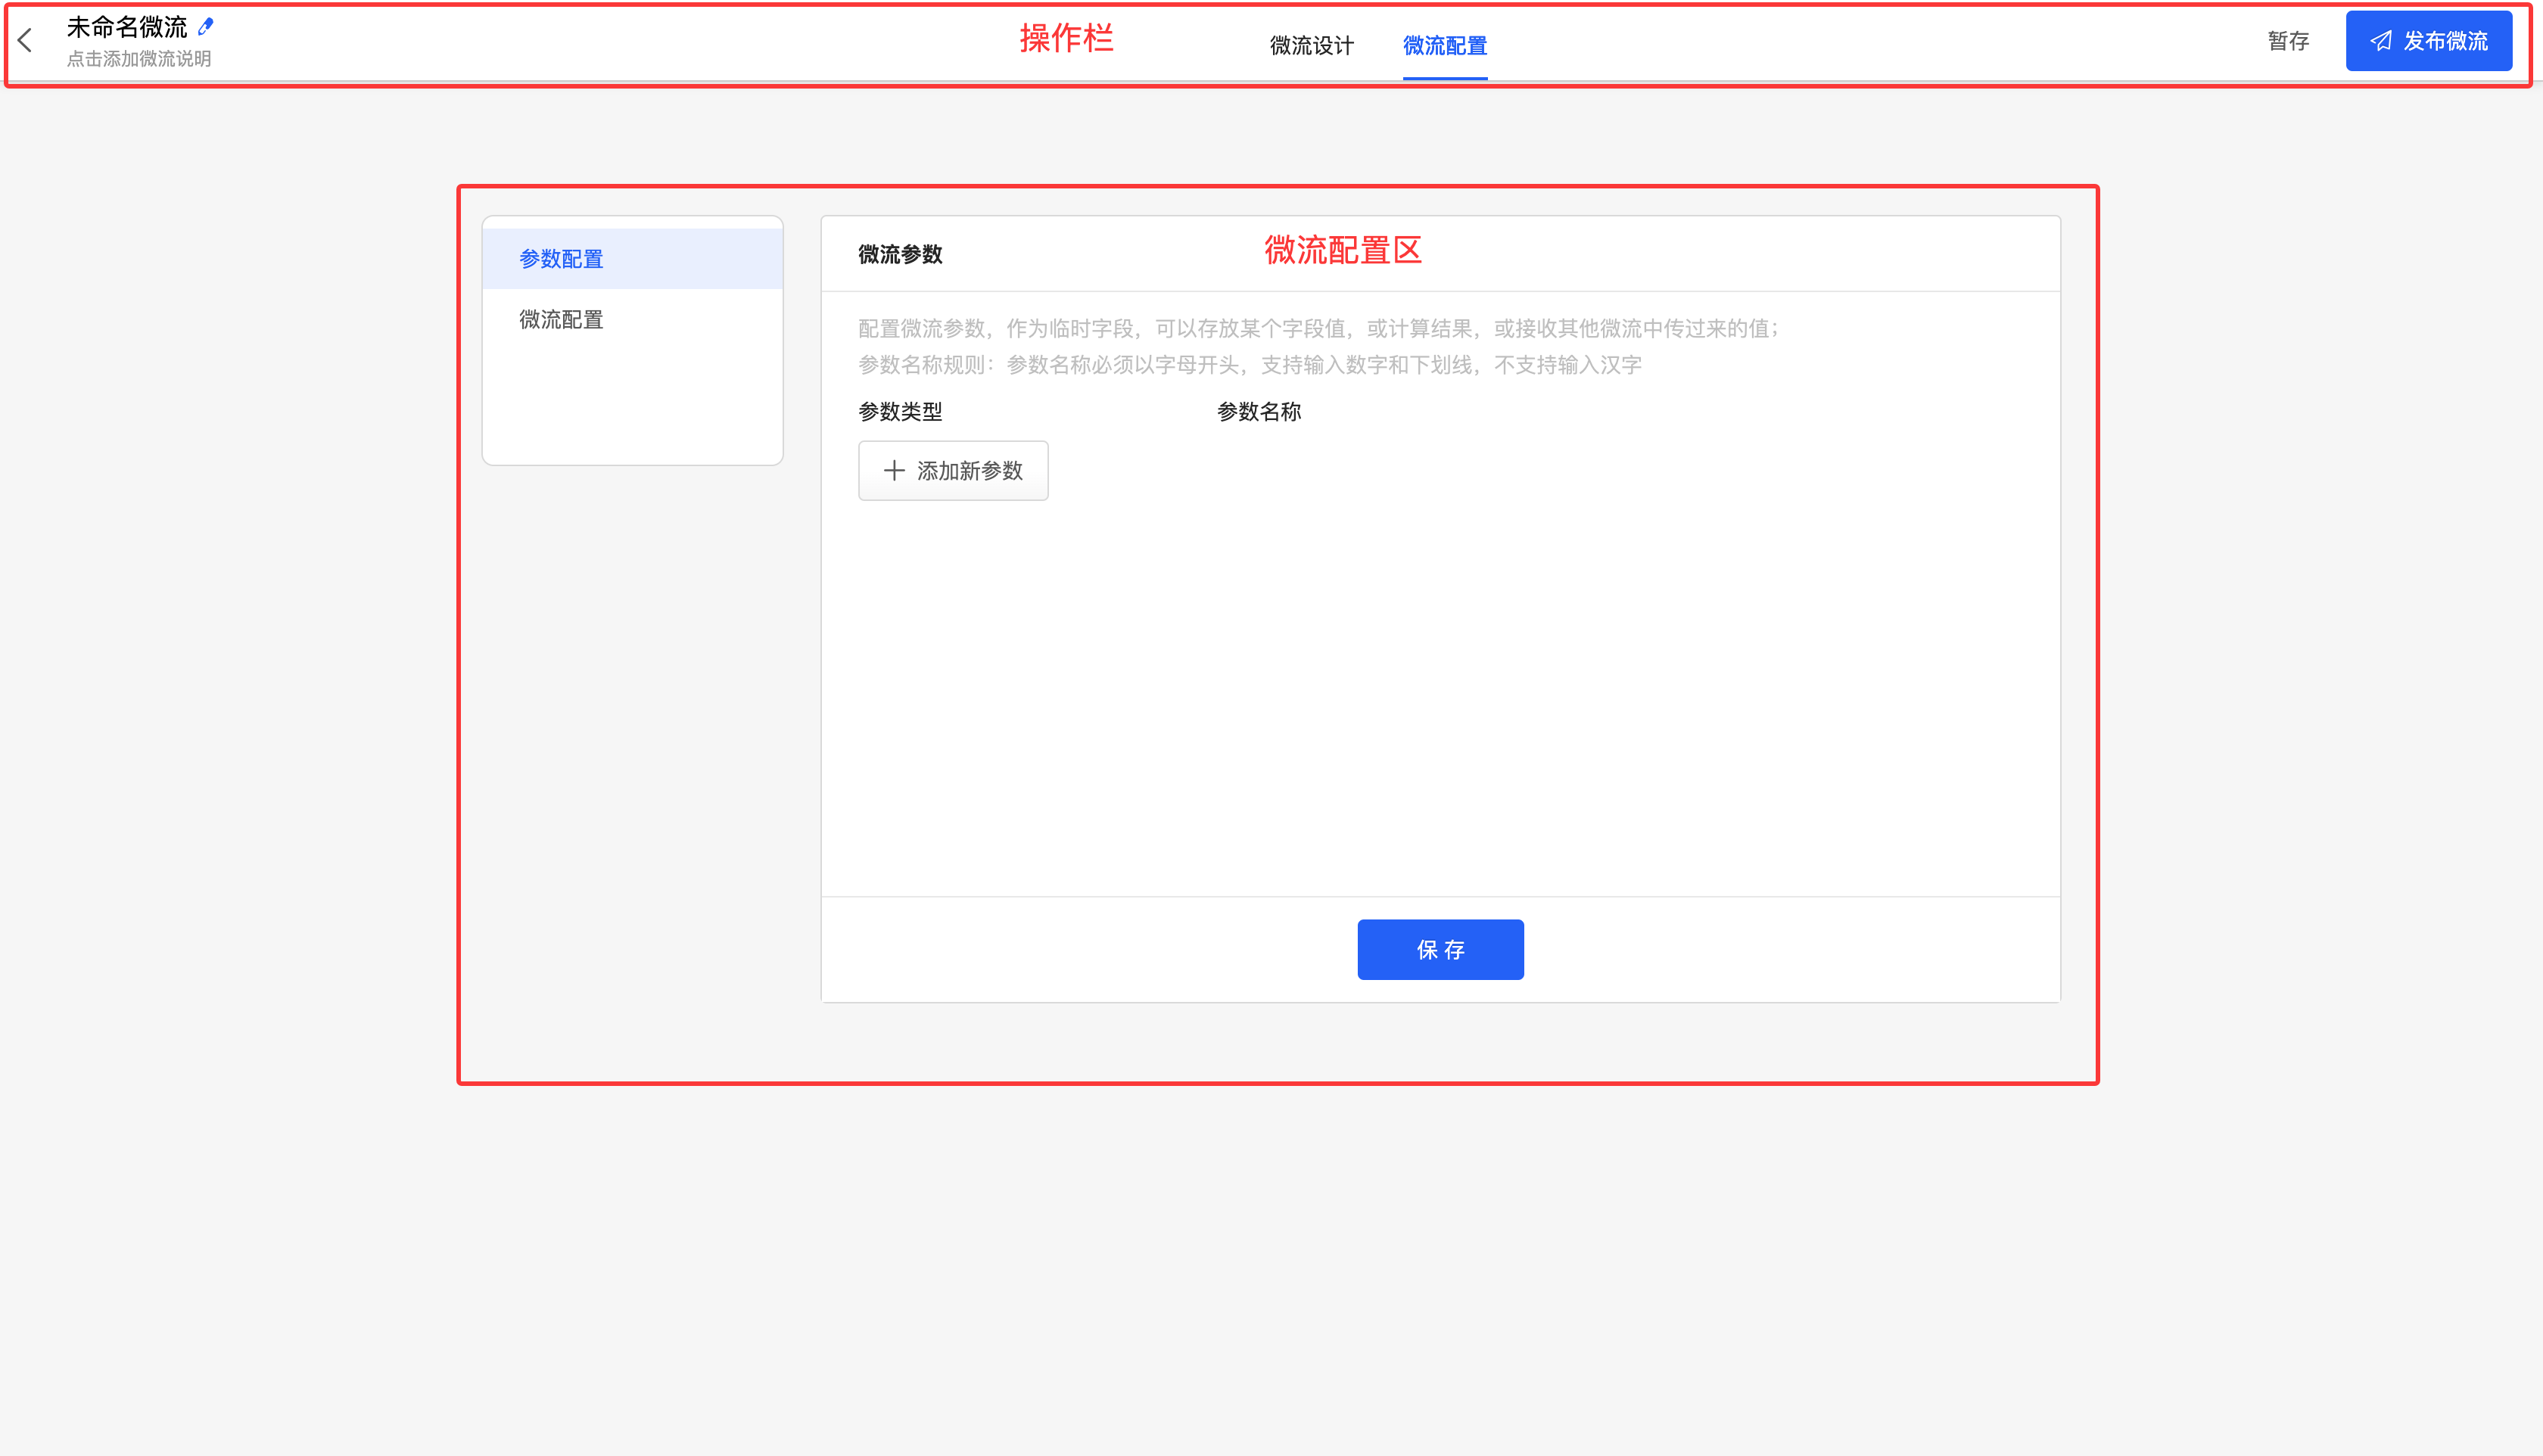
Microflow configuration is mainly divided into two functional areas, the operation bar and the microflow configuration area.
- Operation bar: It is consistent with the operation bar in microflow design.
- Microflow configuration area: Microflow parameters can be configured here as temporary fields, or the application to which the microflow belongs can be changed.
I. Microflow Design
(I) Operation Bar
1. Edit Microflow Name and Description
1. Function Introduction
The name and description of the microflow can be edited on the left side of the operation bar. The modified name and description will be displayed in the microflow list.
Note
After editing the name or description, you need to save temporarily or publish; otherwise, the changes cannot be saved.
2. Operation Method
- Edit the name: Click the "Edit" icon, enter the name in the input box, and then click anywhere outside the input box to complete the editing.
- Edit the description: Click the description area below the name, enter the description in the pop-up window, and then click "OK" to complete the editing.

2. Switch Menu
1. Function Introduction
When designing a microflow, if you need temporary parameters or need to modify the application to which the microflow belongs, you can switch the menu in the operation bar to complete the operation.
2. Operation Method
Click the menu area in the operation bar to switch between microflow design and microflow configuration.
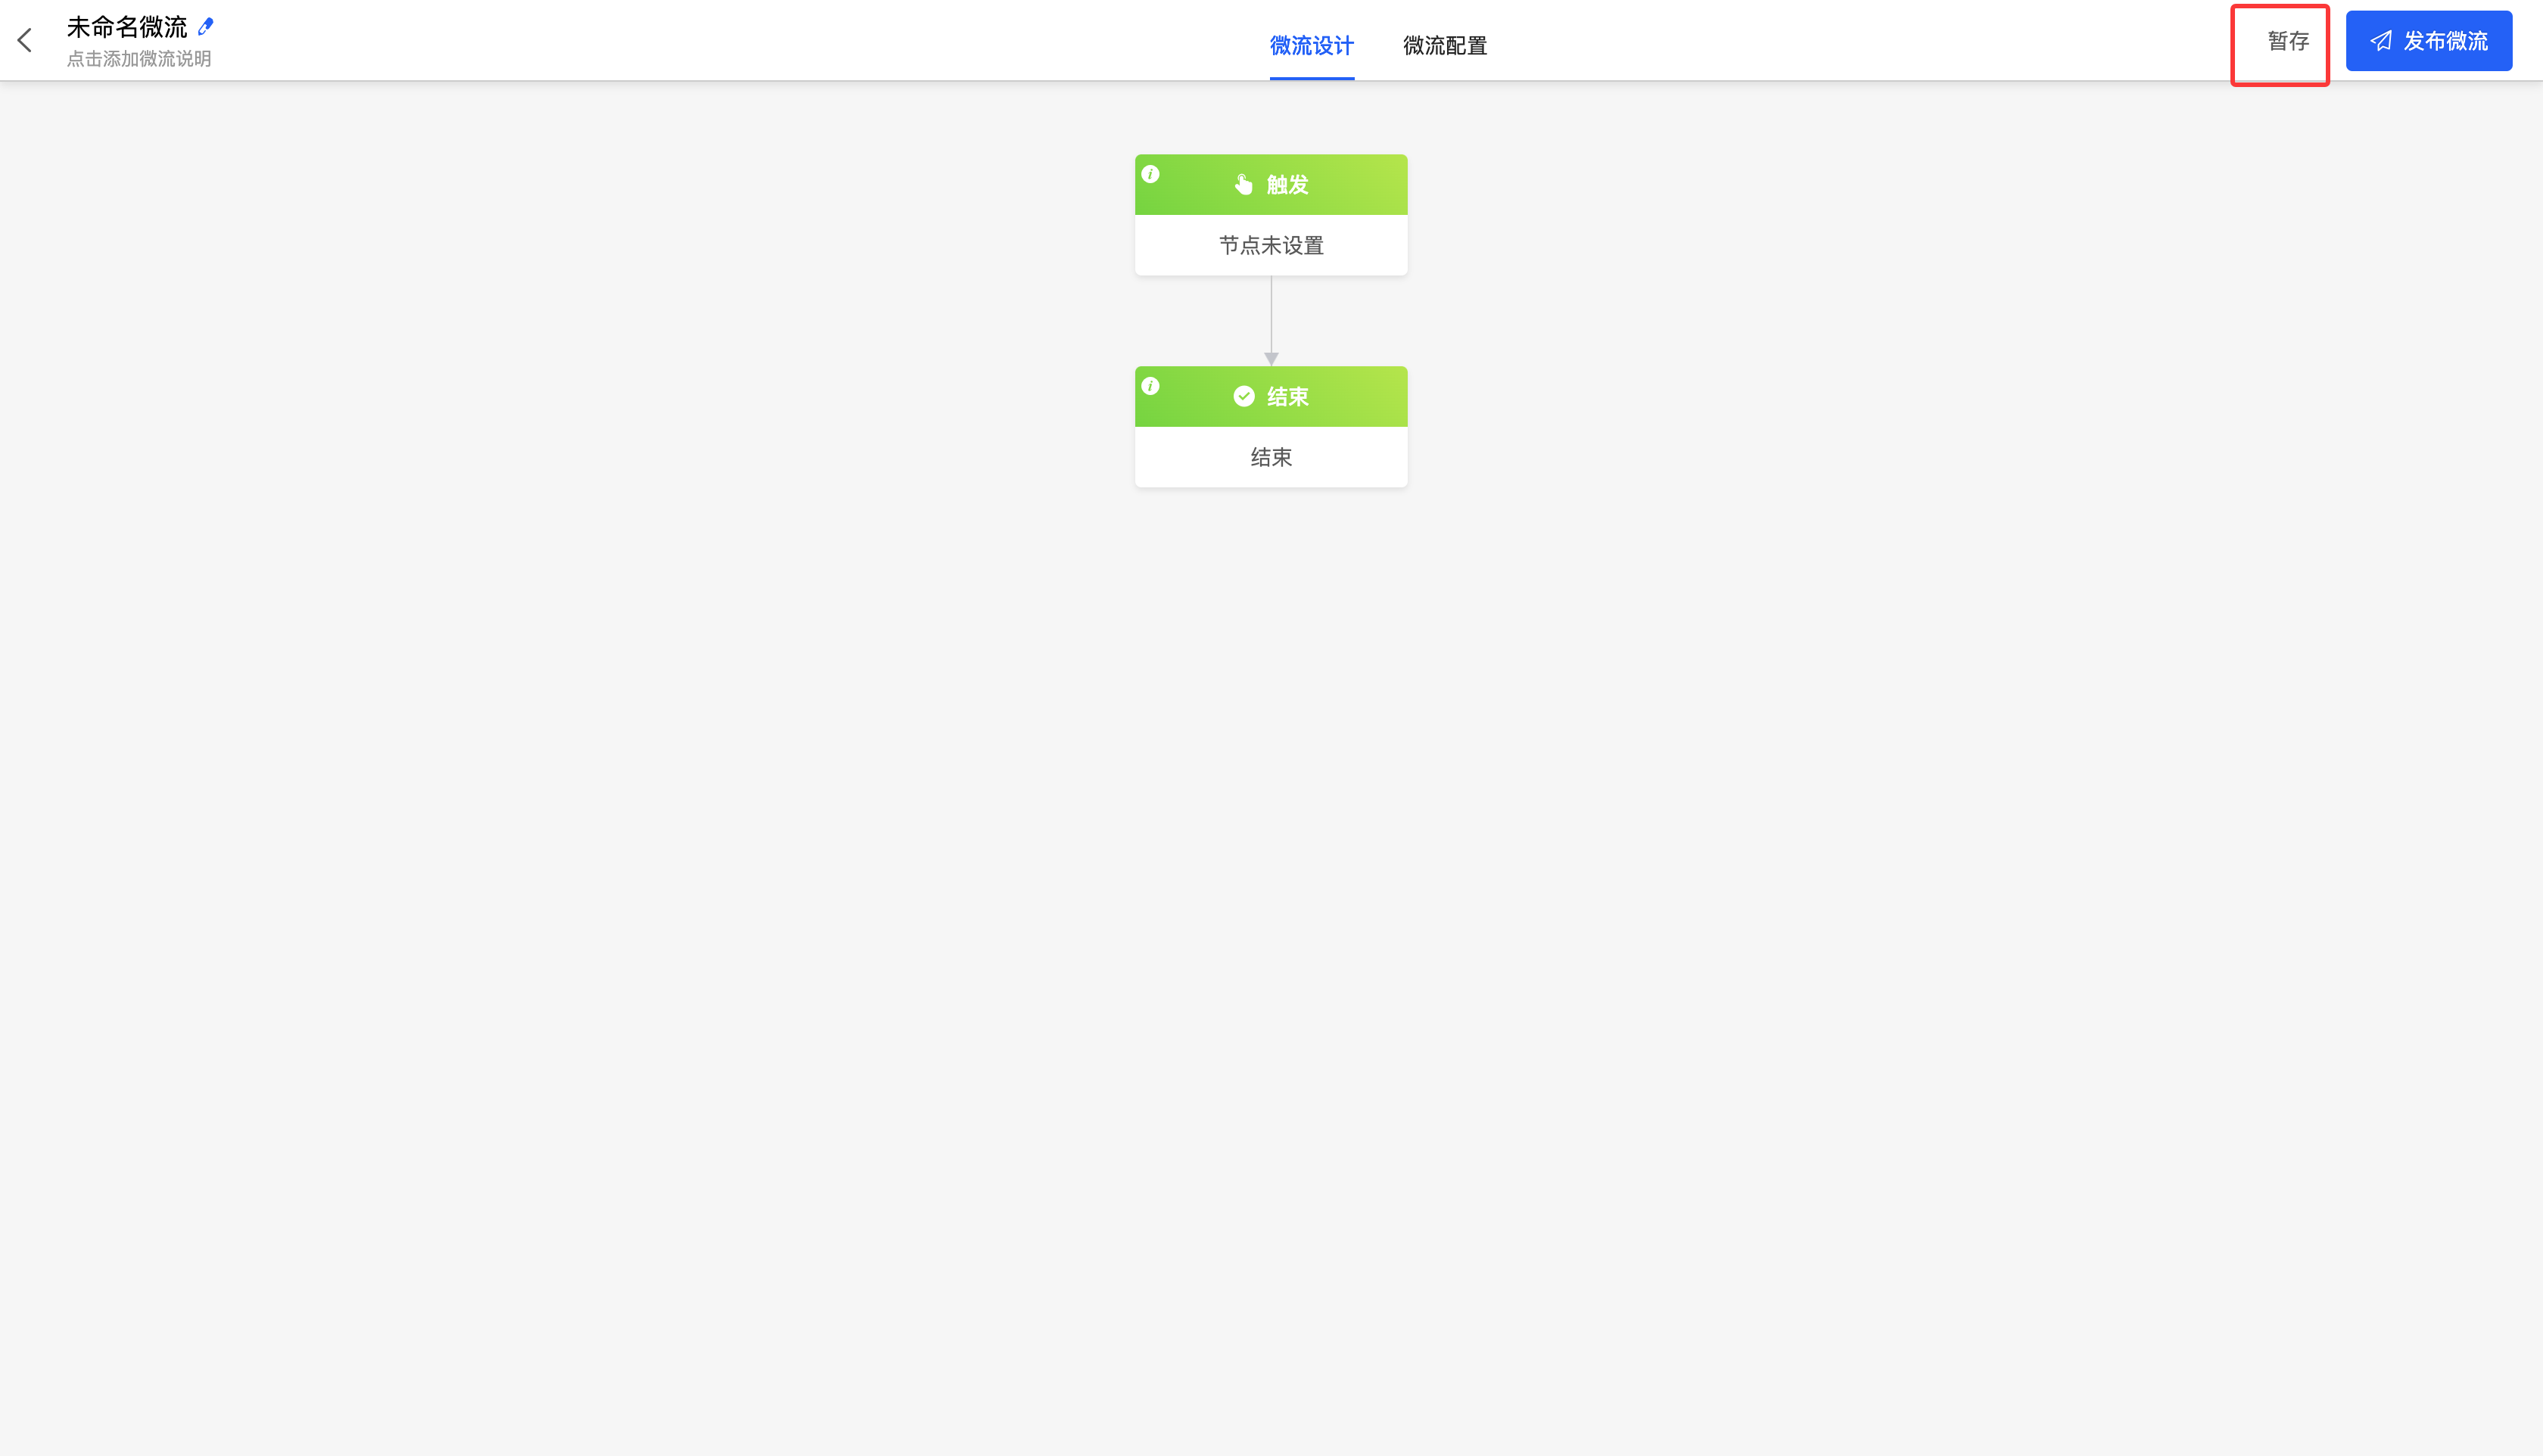
3. Temporary Save
1. Function Introduction
It supports archiving and saving the microflow design. Even if the microflow design is not yet complete, you can choose to temporarily save the current design progress. When you enter the microflow design page next time, the system will automatically load and display the previously temporarily saved design page, making it convenient to continue improving the microflow.
Tip
When the microflow design is completed but not yet published, you can choose to directly enable the microflow. The enable operation will automatically trigger the publication of the current version of the microflow, making the design take effect immediately and be put into use.
2. Operation Method
Click "Temporary Save" to archive and save the current design progress.
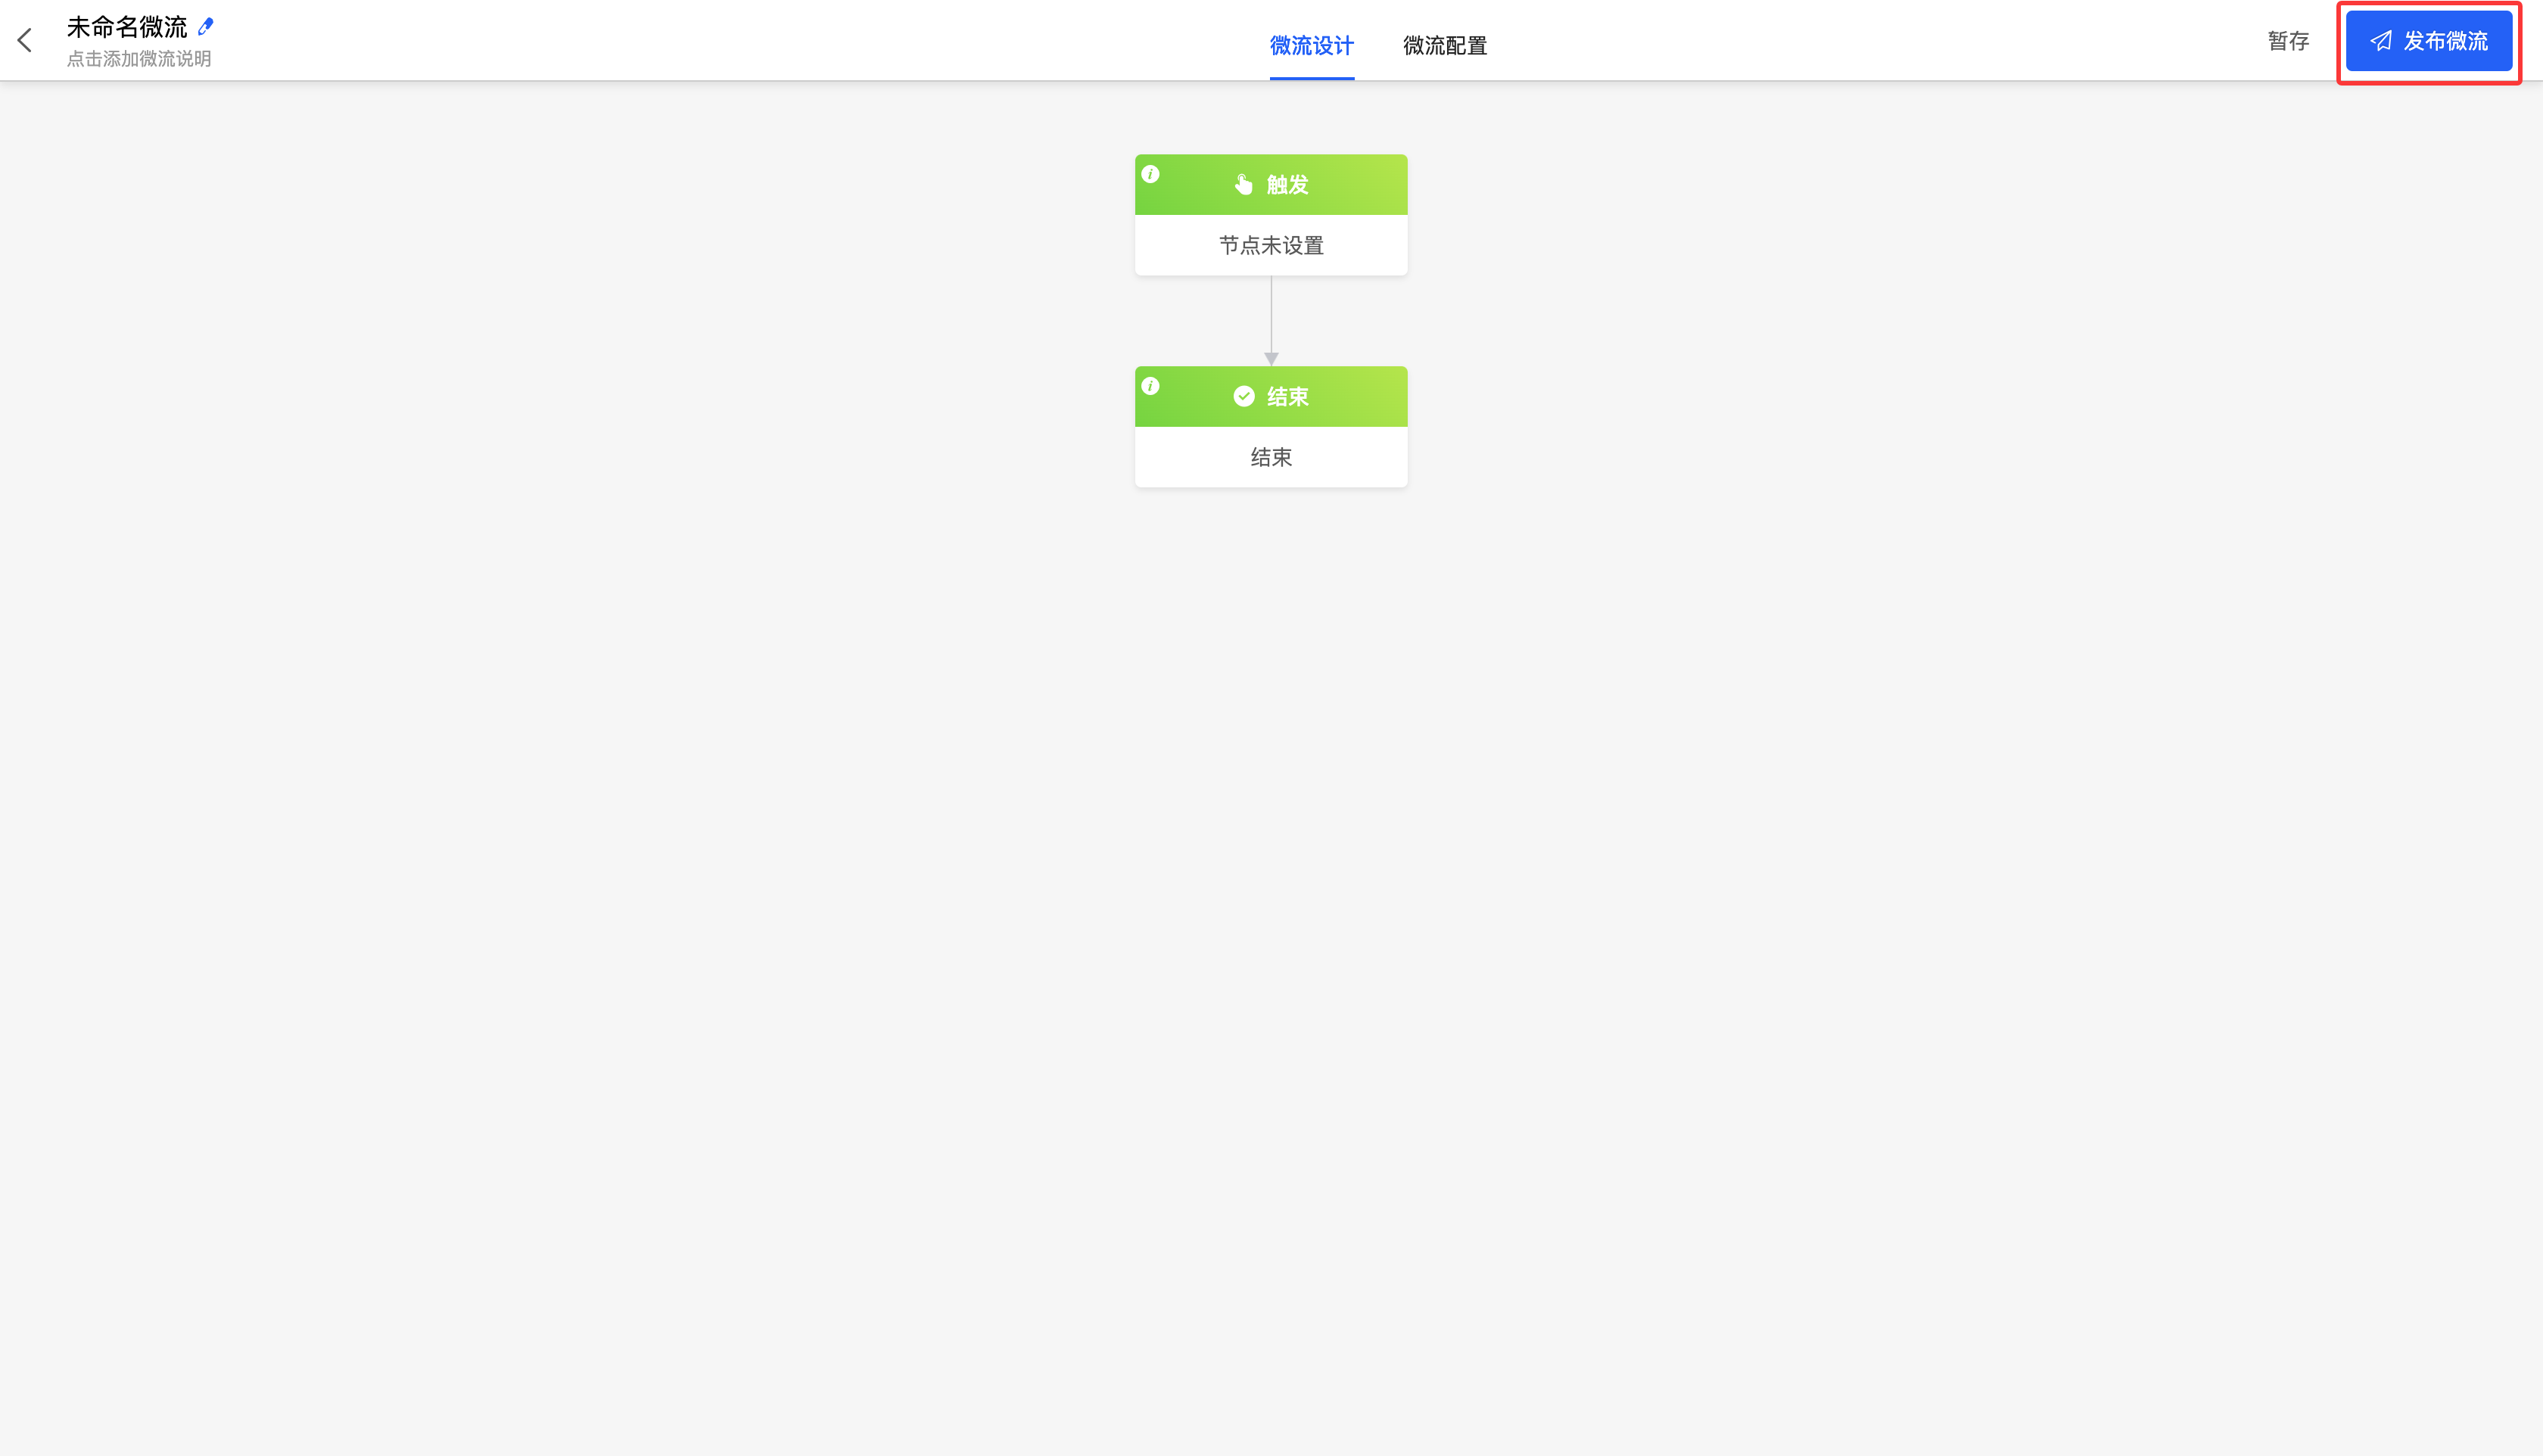
4. Publish/Update and Publish
1. Function Introduction
After the microflow design is completed, you can choose to publish it to make the microflow officially take effect and be put into use. For a microflow that has not been published before, the publish button will display "Publish Microflow". For a microflow that has already been published, the publish button will change to "Update and Publish".
Note
After modifying a published and enabled microflow, before updating and publishing, these modifications will not have any impact on the currently used microflow version. On the microflow management page, the update status will be displayed as "Not Updated". Only after all modifications are completed and the update and publish operation is performed, the new microflow version will officially take effect and replace the previous version.
Note
When publishing a microflow, you must ensure that there is at least one valid node between the trigger node and the end node, and all nodes have been configured. If these conditions are not met, the microflow cannot be published.
2. Operation Method
Click the "Publish/Update and Publish" button to publish the current process design.
(II) Microflow Design Area
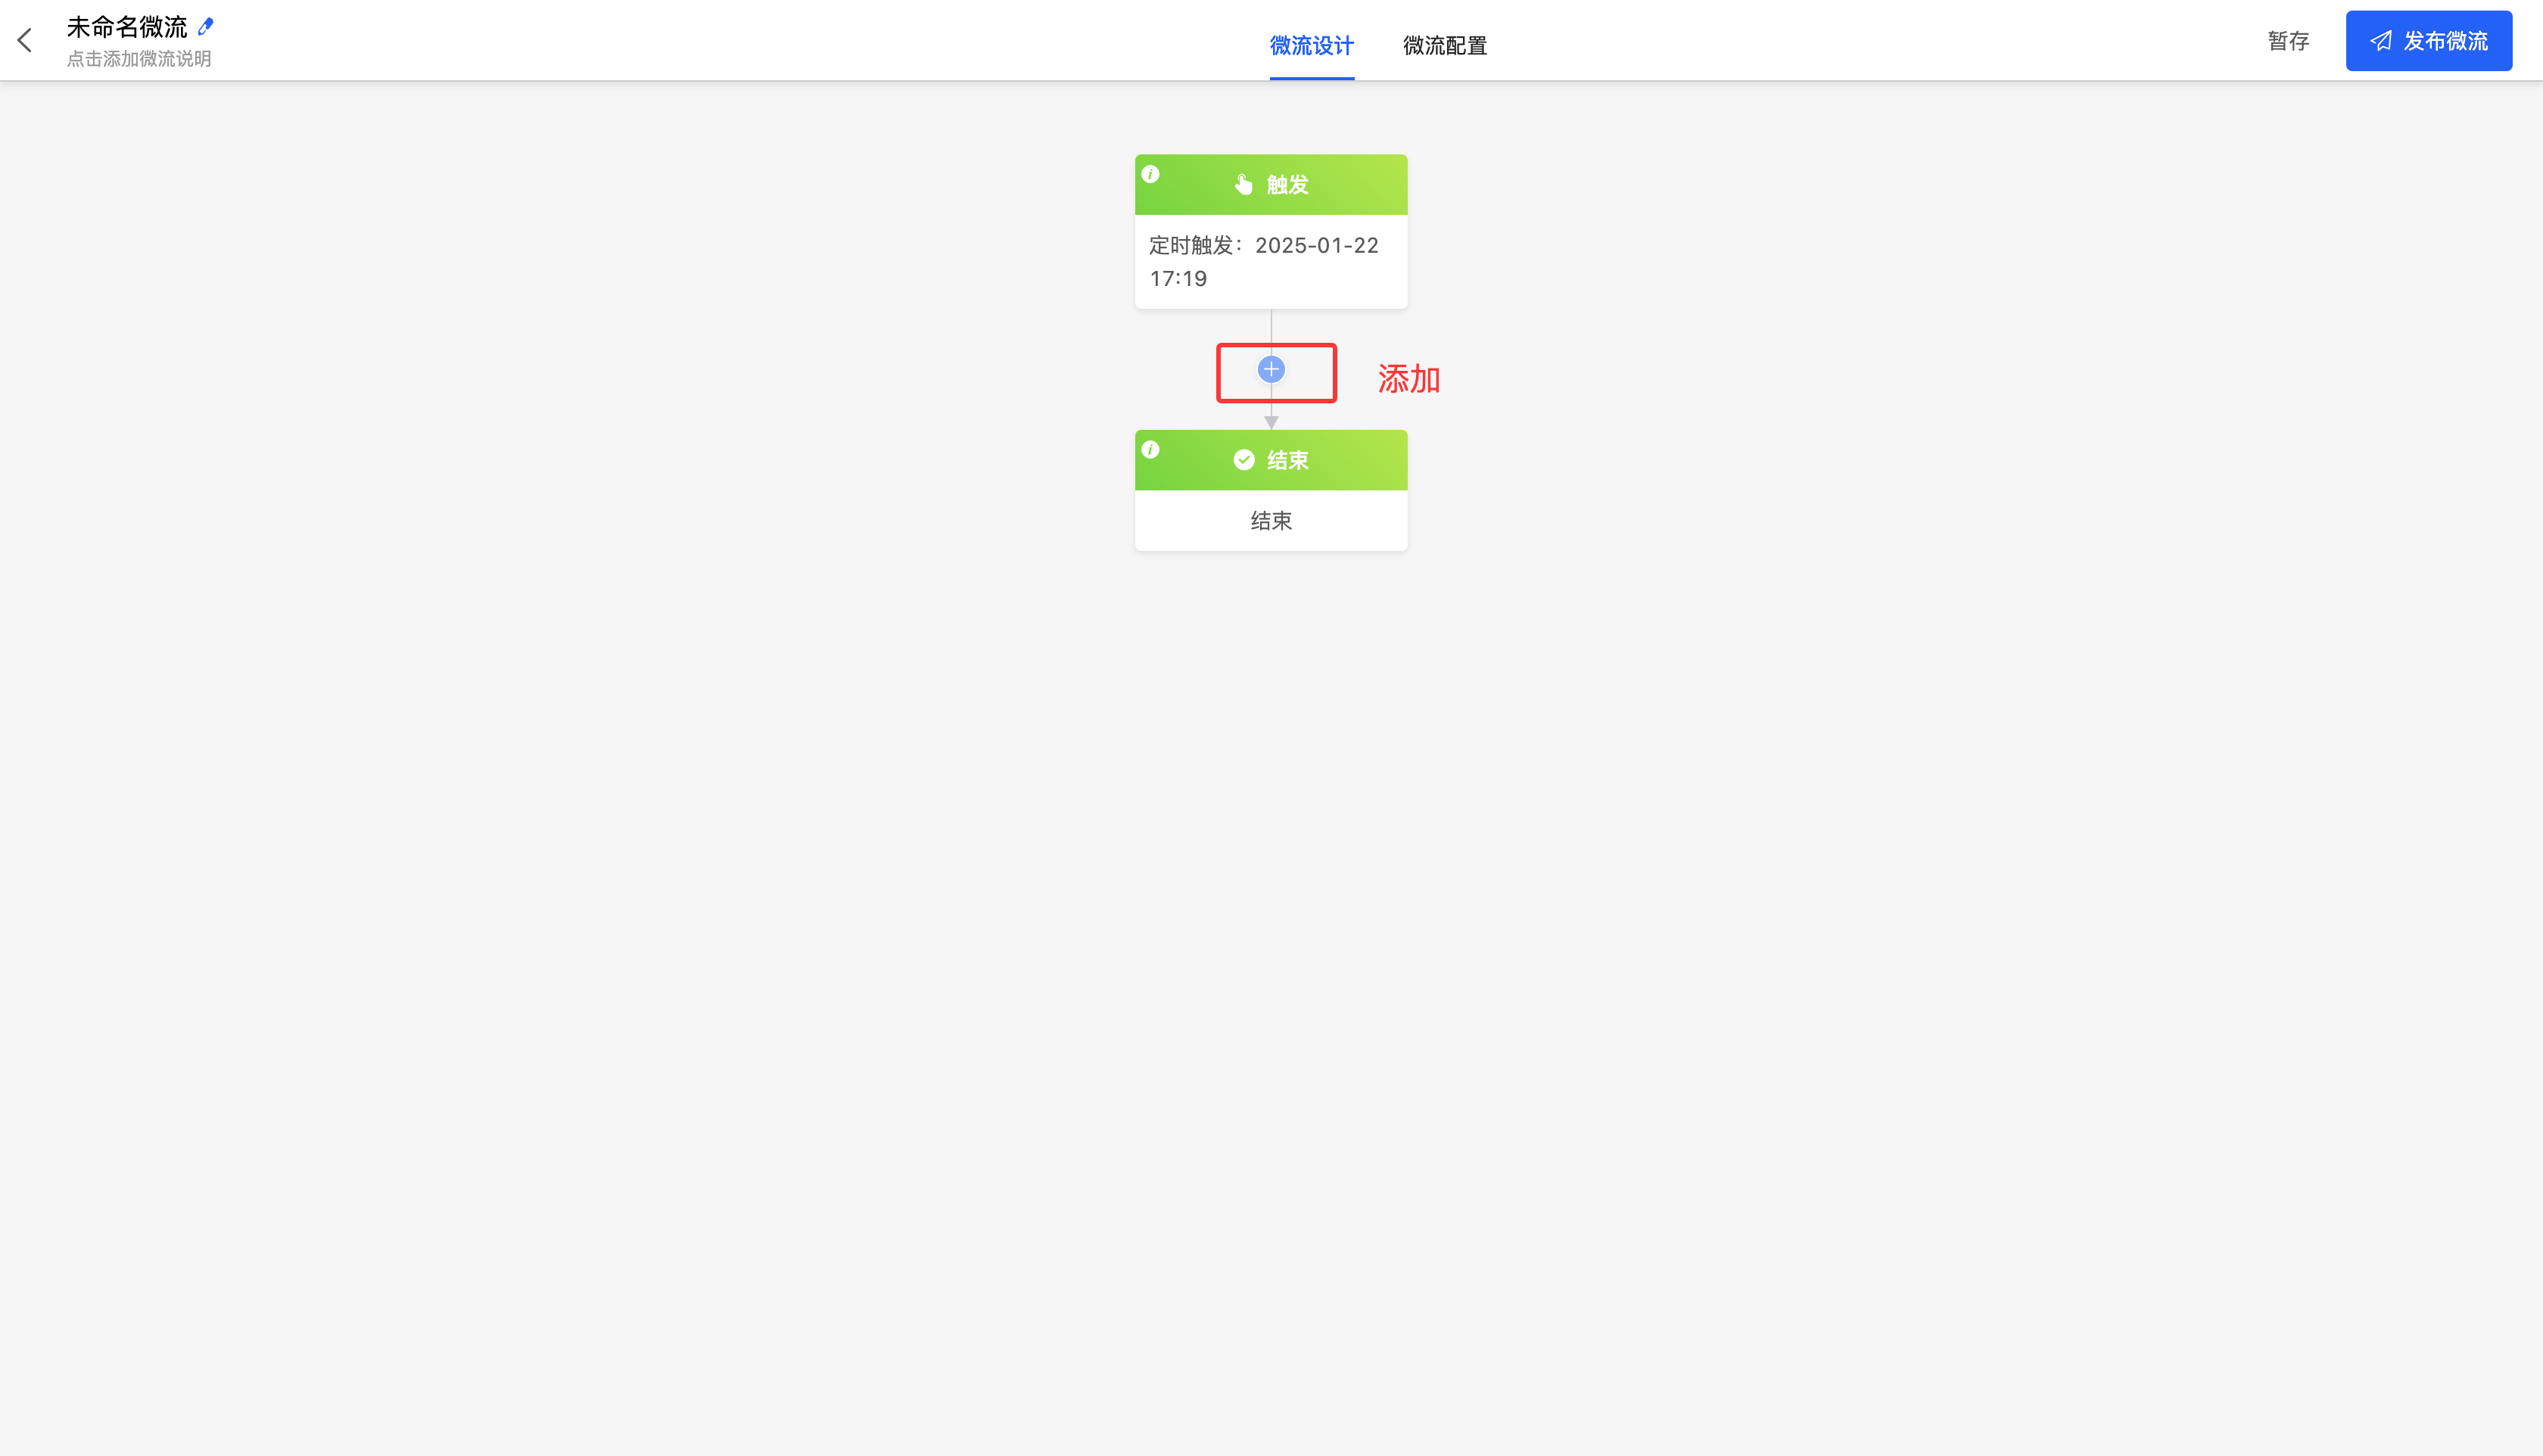
1. Function Introduction
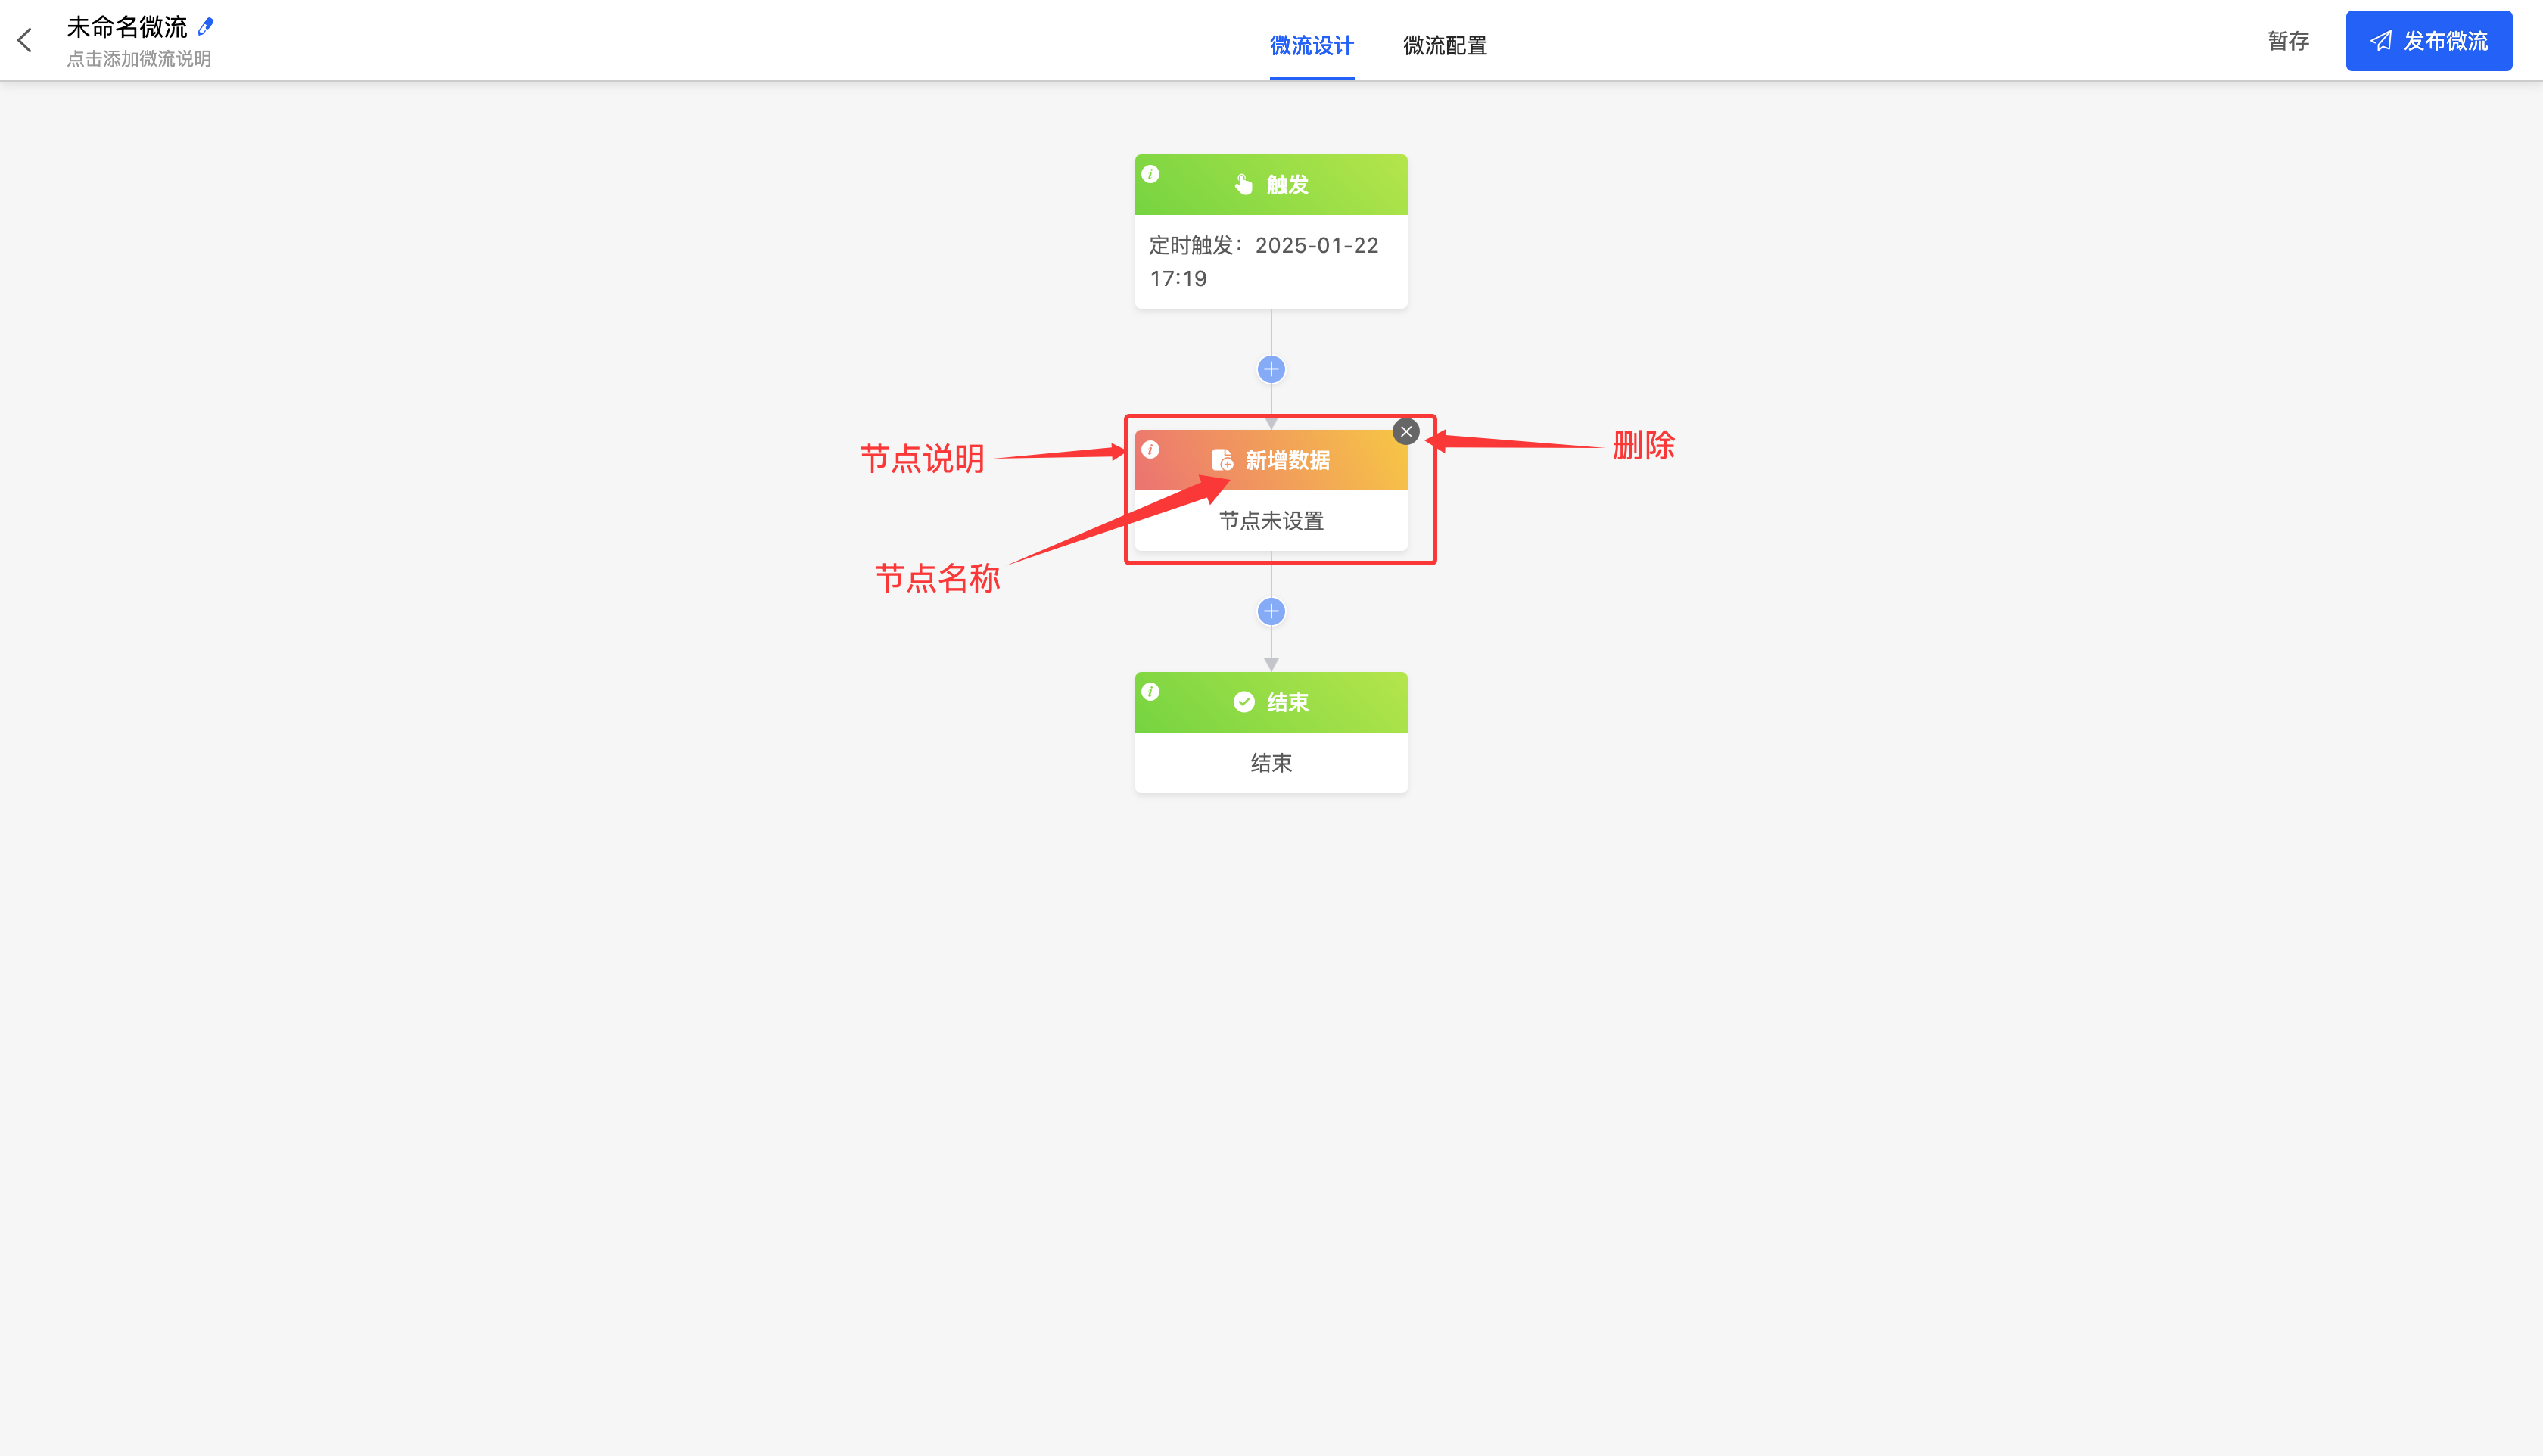
After adding nodes to the microflow, you can add nodes, modify their names, edit descriptions, and delete unnecessary nodes to better design the microflow.
The nodes in the microflow designer are generally the same as those in the process designer. Compared with the process designer, it lacks nodes that require manual intervention, such as approval, filling, approval branches, parallel nodes, and developer nodes. In addition, a "Loop" node is newly added in the microflow designer.
- Loop node: It can execute a part of nodes cyclically, including two loop methods: list loop and number of times loop.
- List loop: You can select the data in the corresponding model from which all data can be obtained before the loop node and loop based on the data list.
- Number of times loop: You can set the start value, end value, and step size of the loop. You can directly enter the values or select them from the data in the corresponding model from which all data can be obtained before the loop node.
Warning
Once a node is deleted, it cannot be restored. Please operate with caution!
Note
For information about nodes, please refer to the "Process Designer - Node Introduction" document.
2. Operation Method
- Click the "Add" icon to add a node between microflows.
- Click the "Node Name" to modify the name in the input box.
- Click the "Node Description" icon, enter the node description in the pop-up window, and then click "OK" to successfully edit the node description.
- Click the "Delete" icon, and then click "OK" in the pop-up window to delete the node.
(III) Property Panel
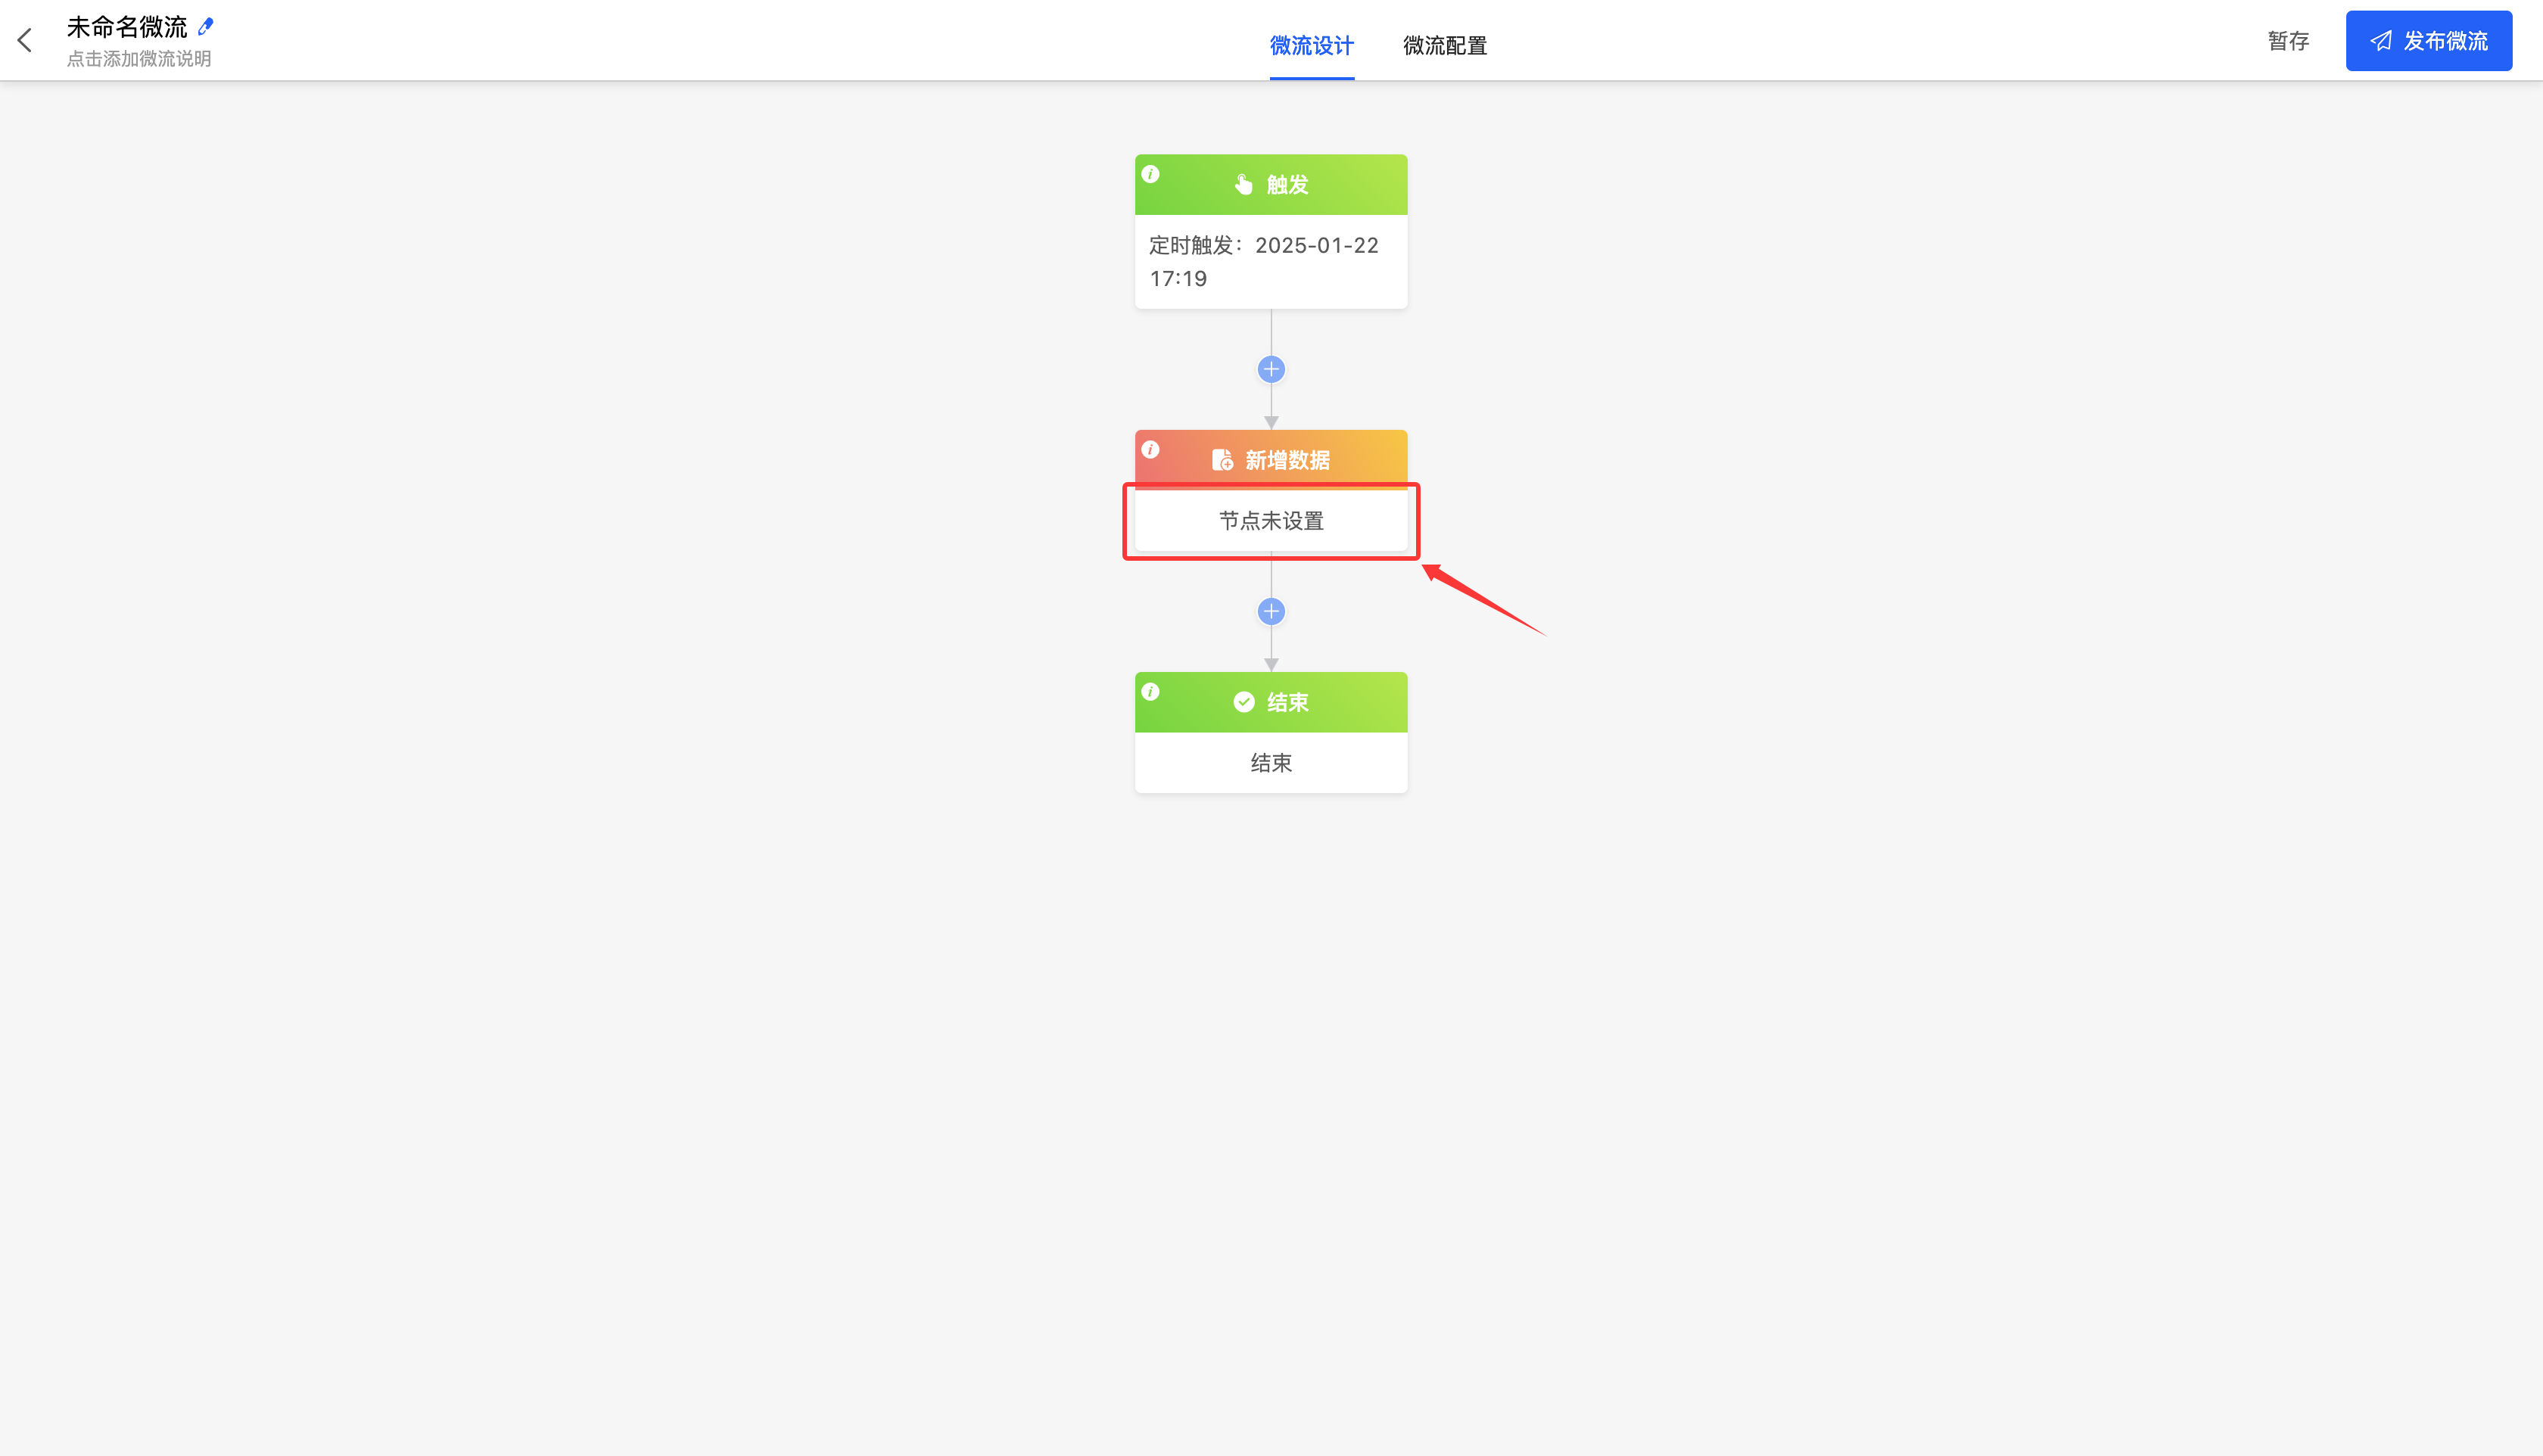
1. Function Introduction
In the property panel, you can configure various properties for node actions.
2. Operation Method
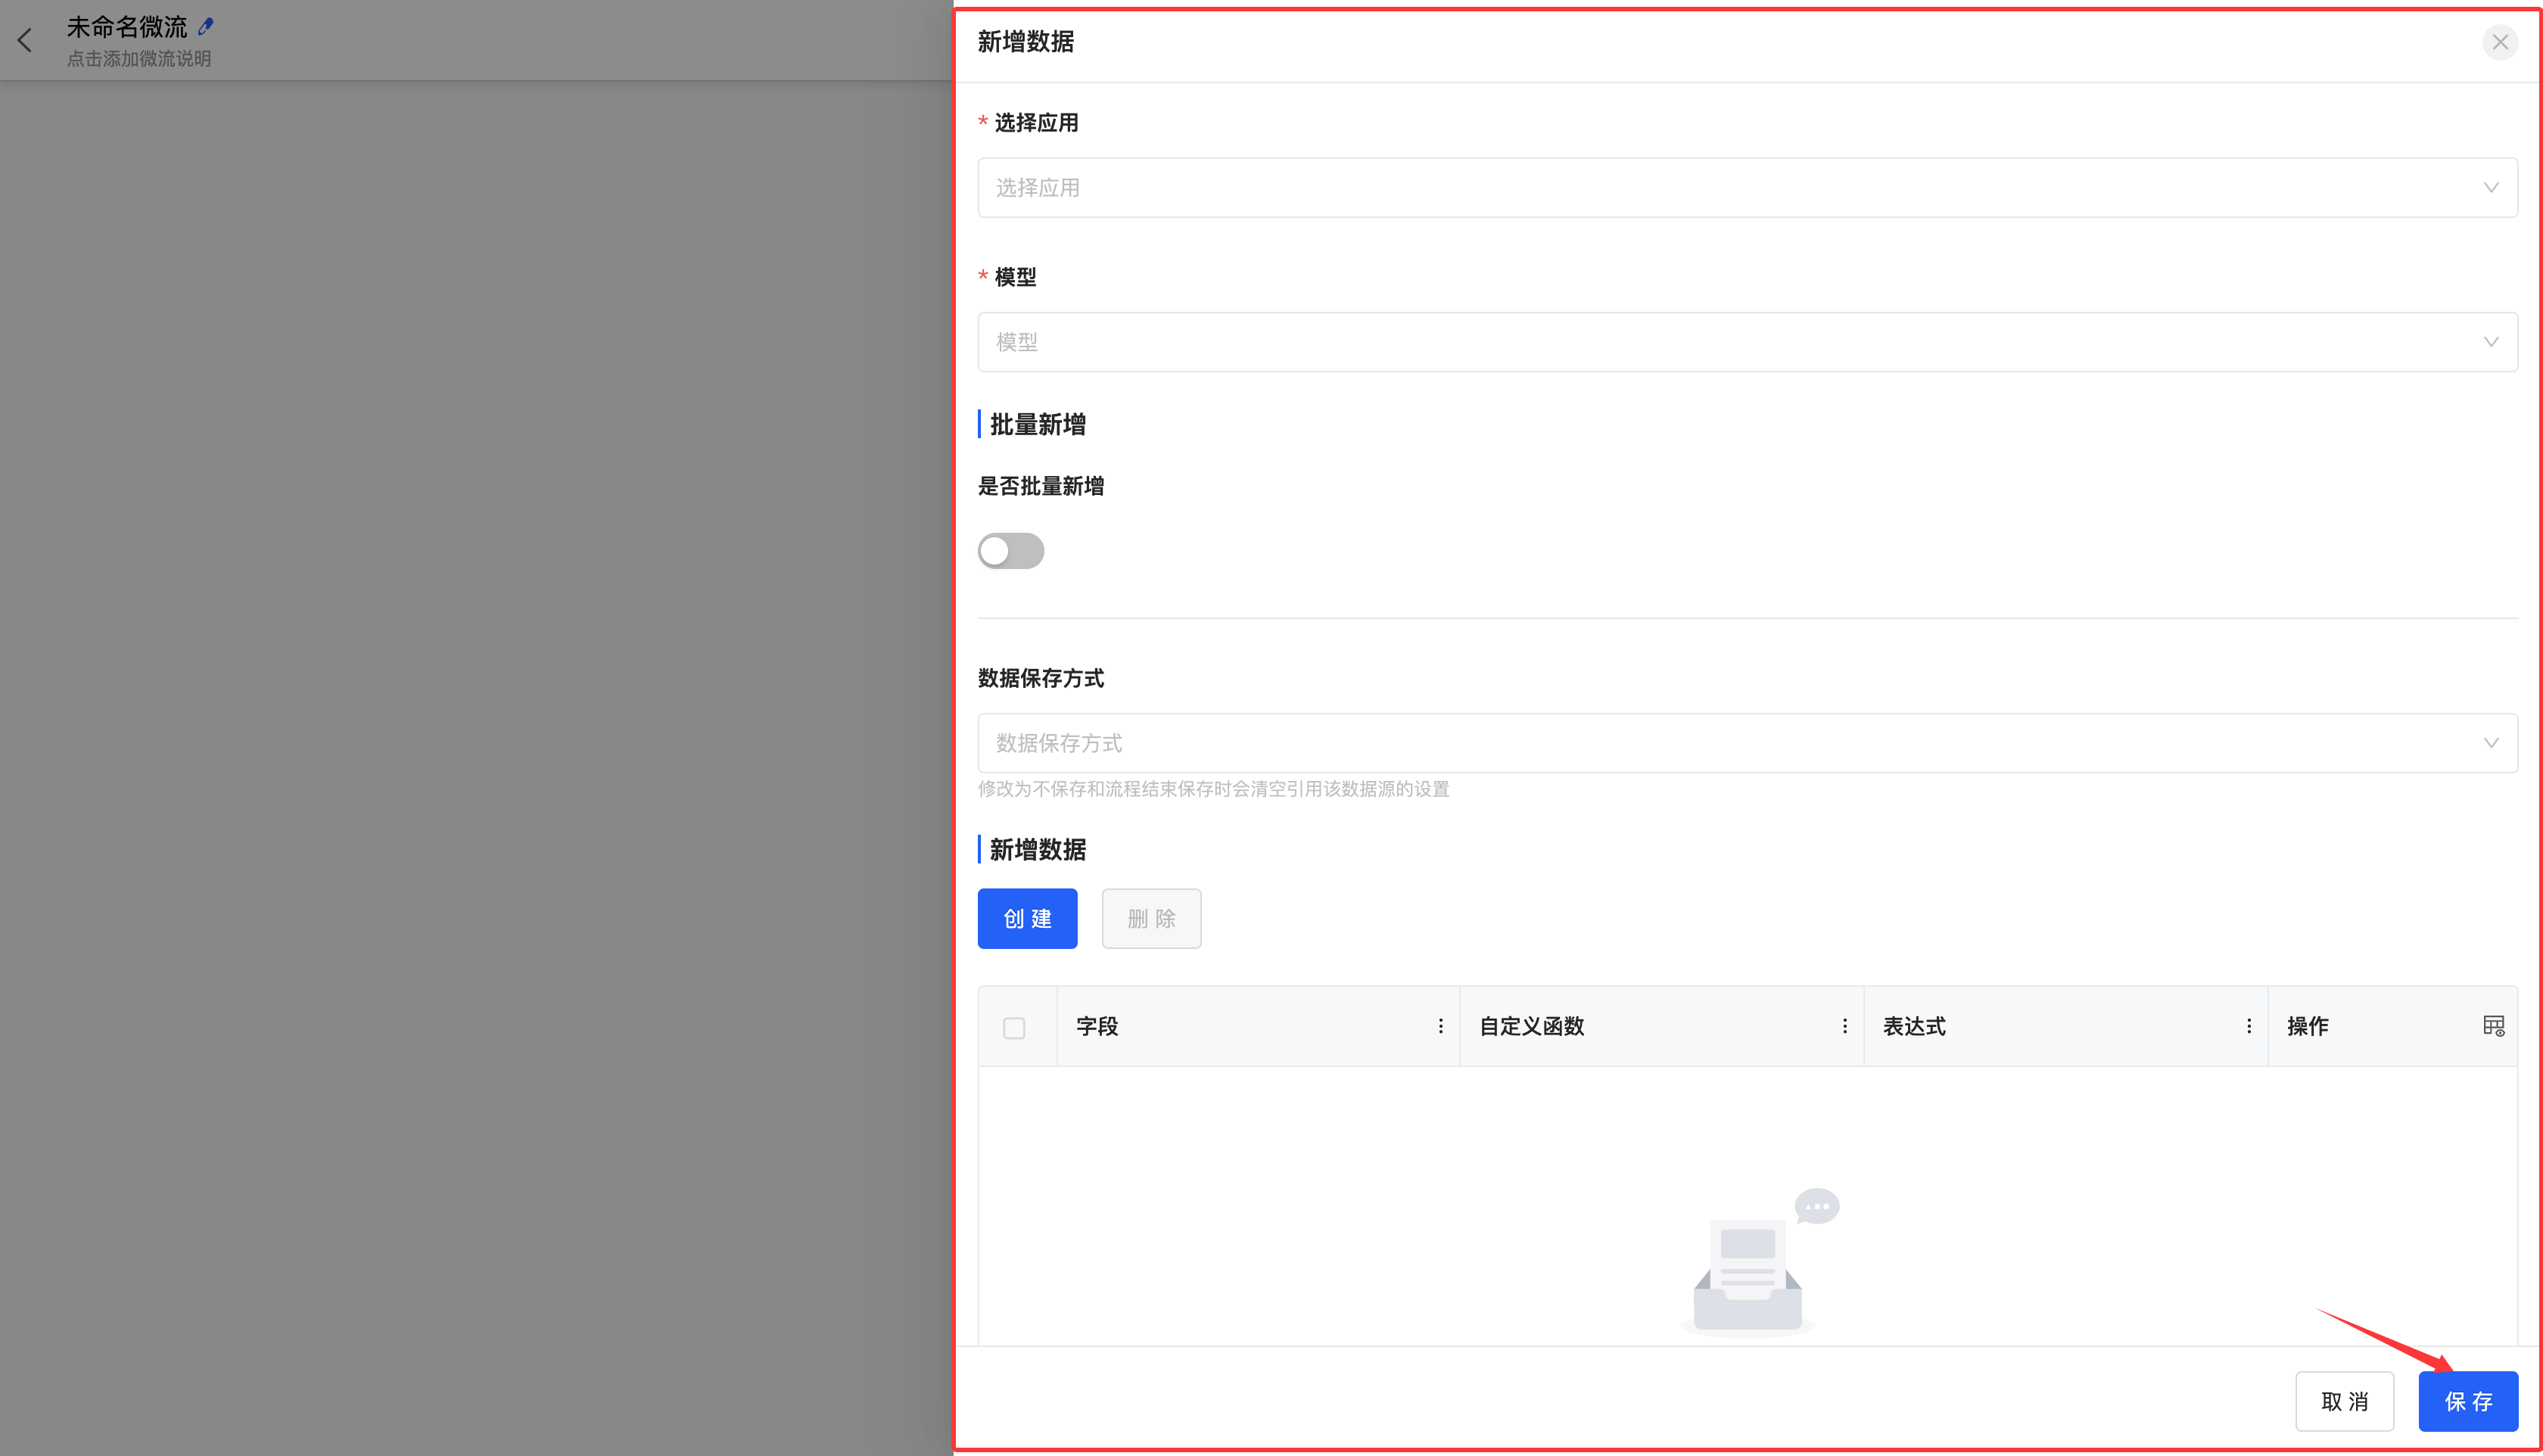
Click the main position of the node, configure the properties according to business requirements in the pop-up window on the right, and then click "Save".
Note
You need to fill in all the required information in the properties; otherwise, you cannot save.
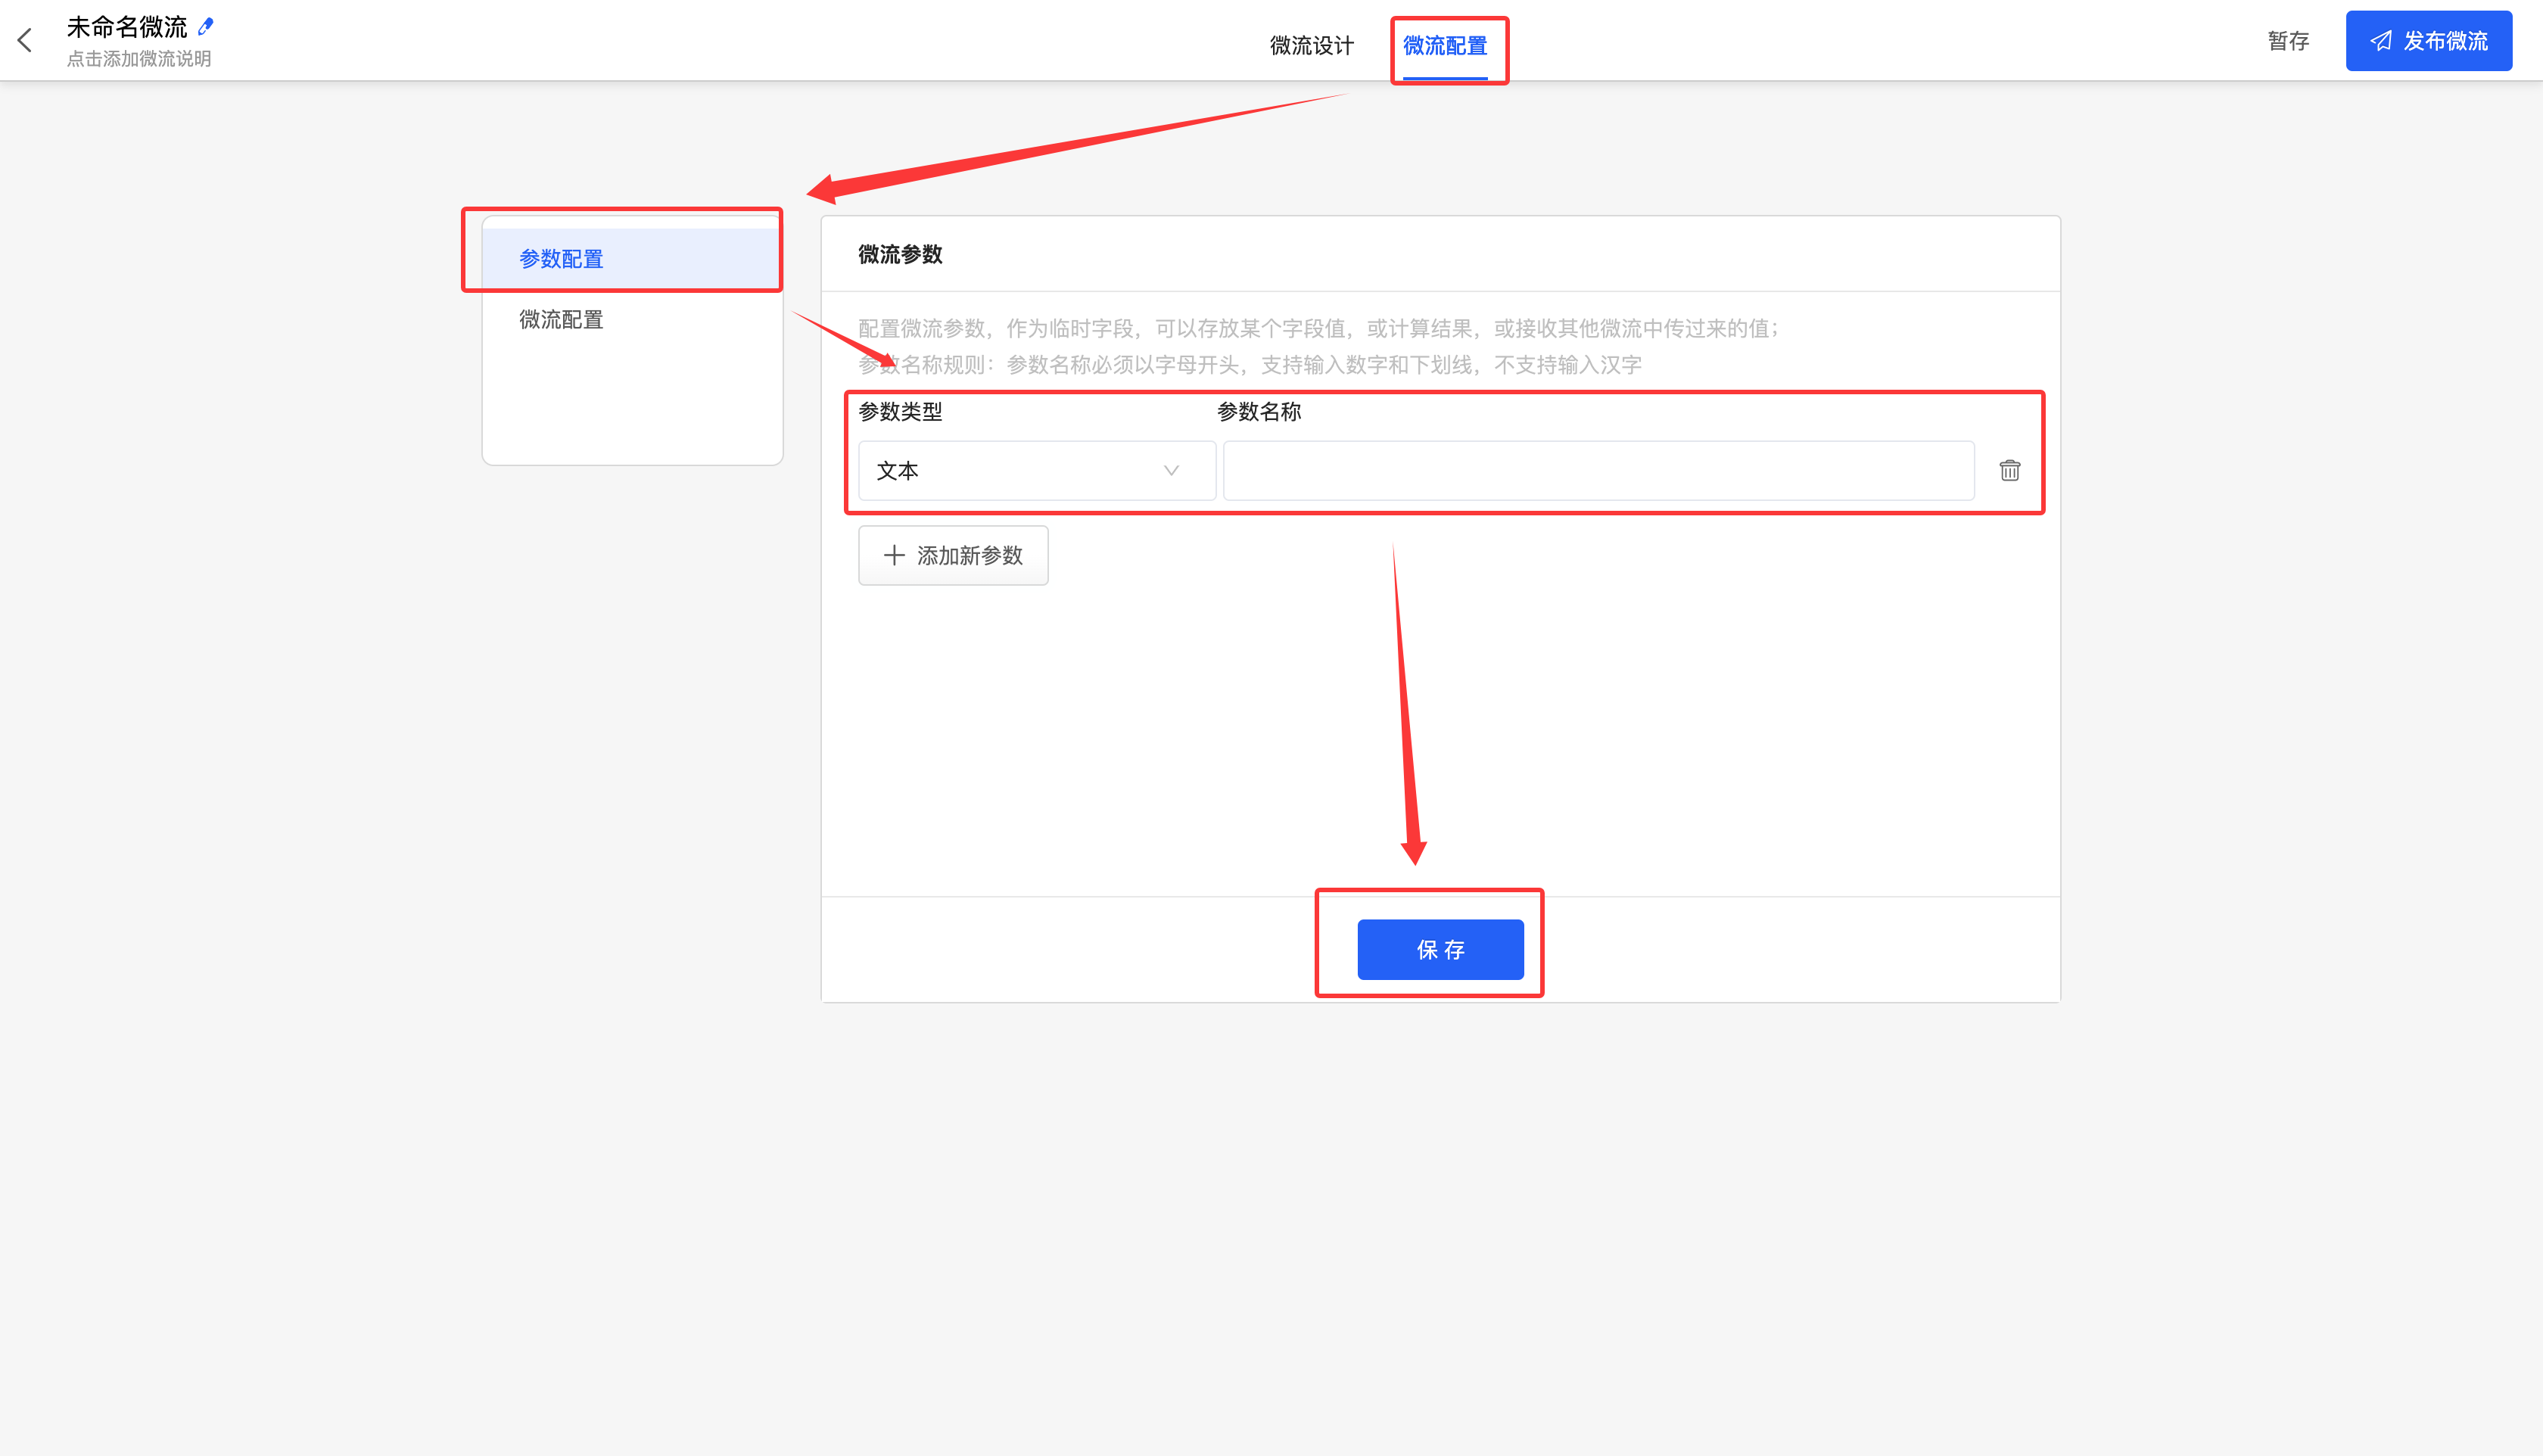
II. Microflow Configuration
(I) Parameter Configuration
1. Function Introduction
In microflow design, microflow parameters can be used as temporary fields to store a field value, calculation result, or receive values passed from other microflows. Temporary parameters support four data types: text, number, date, and boolean to meet the needs of different scenarios.
Note
Once a microflow parameter is referenced in a microflow, it cannot be modified or deleted.
Tip
In the microflow, you can use "Update Microflow Parameter" to use the configured parameters to store data.
2. Operation Method
Under parameter configuration, click "Add New Parameter", select the parameter type, enter the parameter name, and then click "Save" to successfully add the parameter.
Note
Parameter name rules: The parameter name must start with a letter, support the input of numbers and underscores, and do not support the input of Chinese characters.
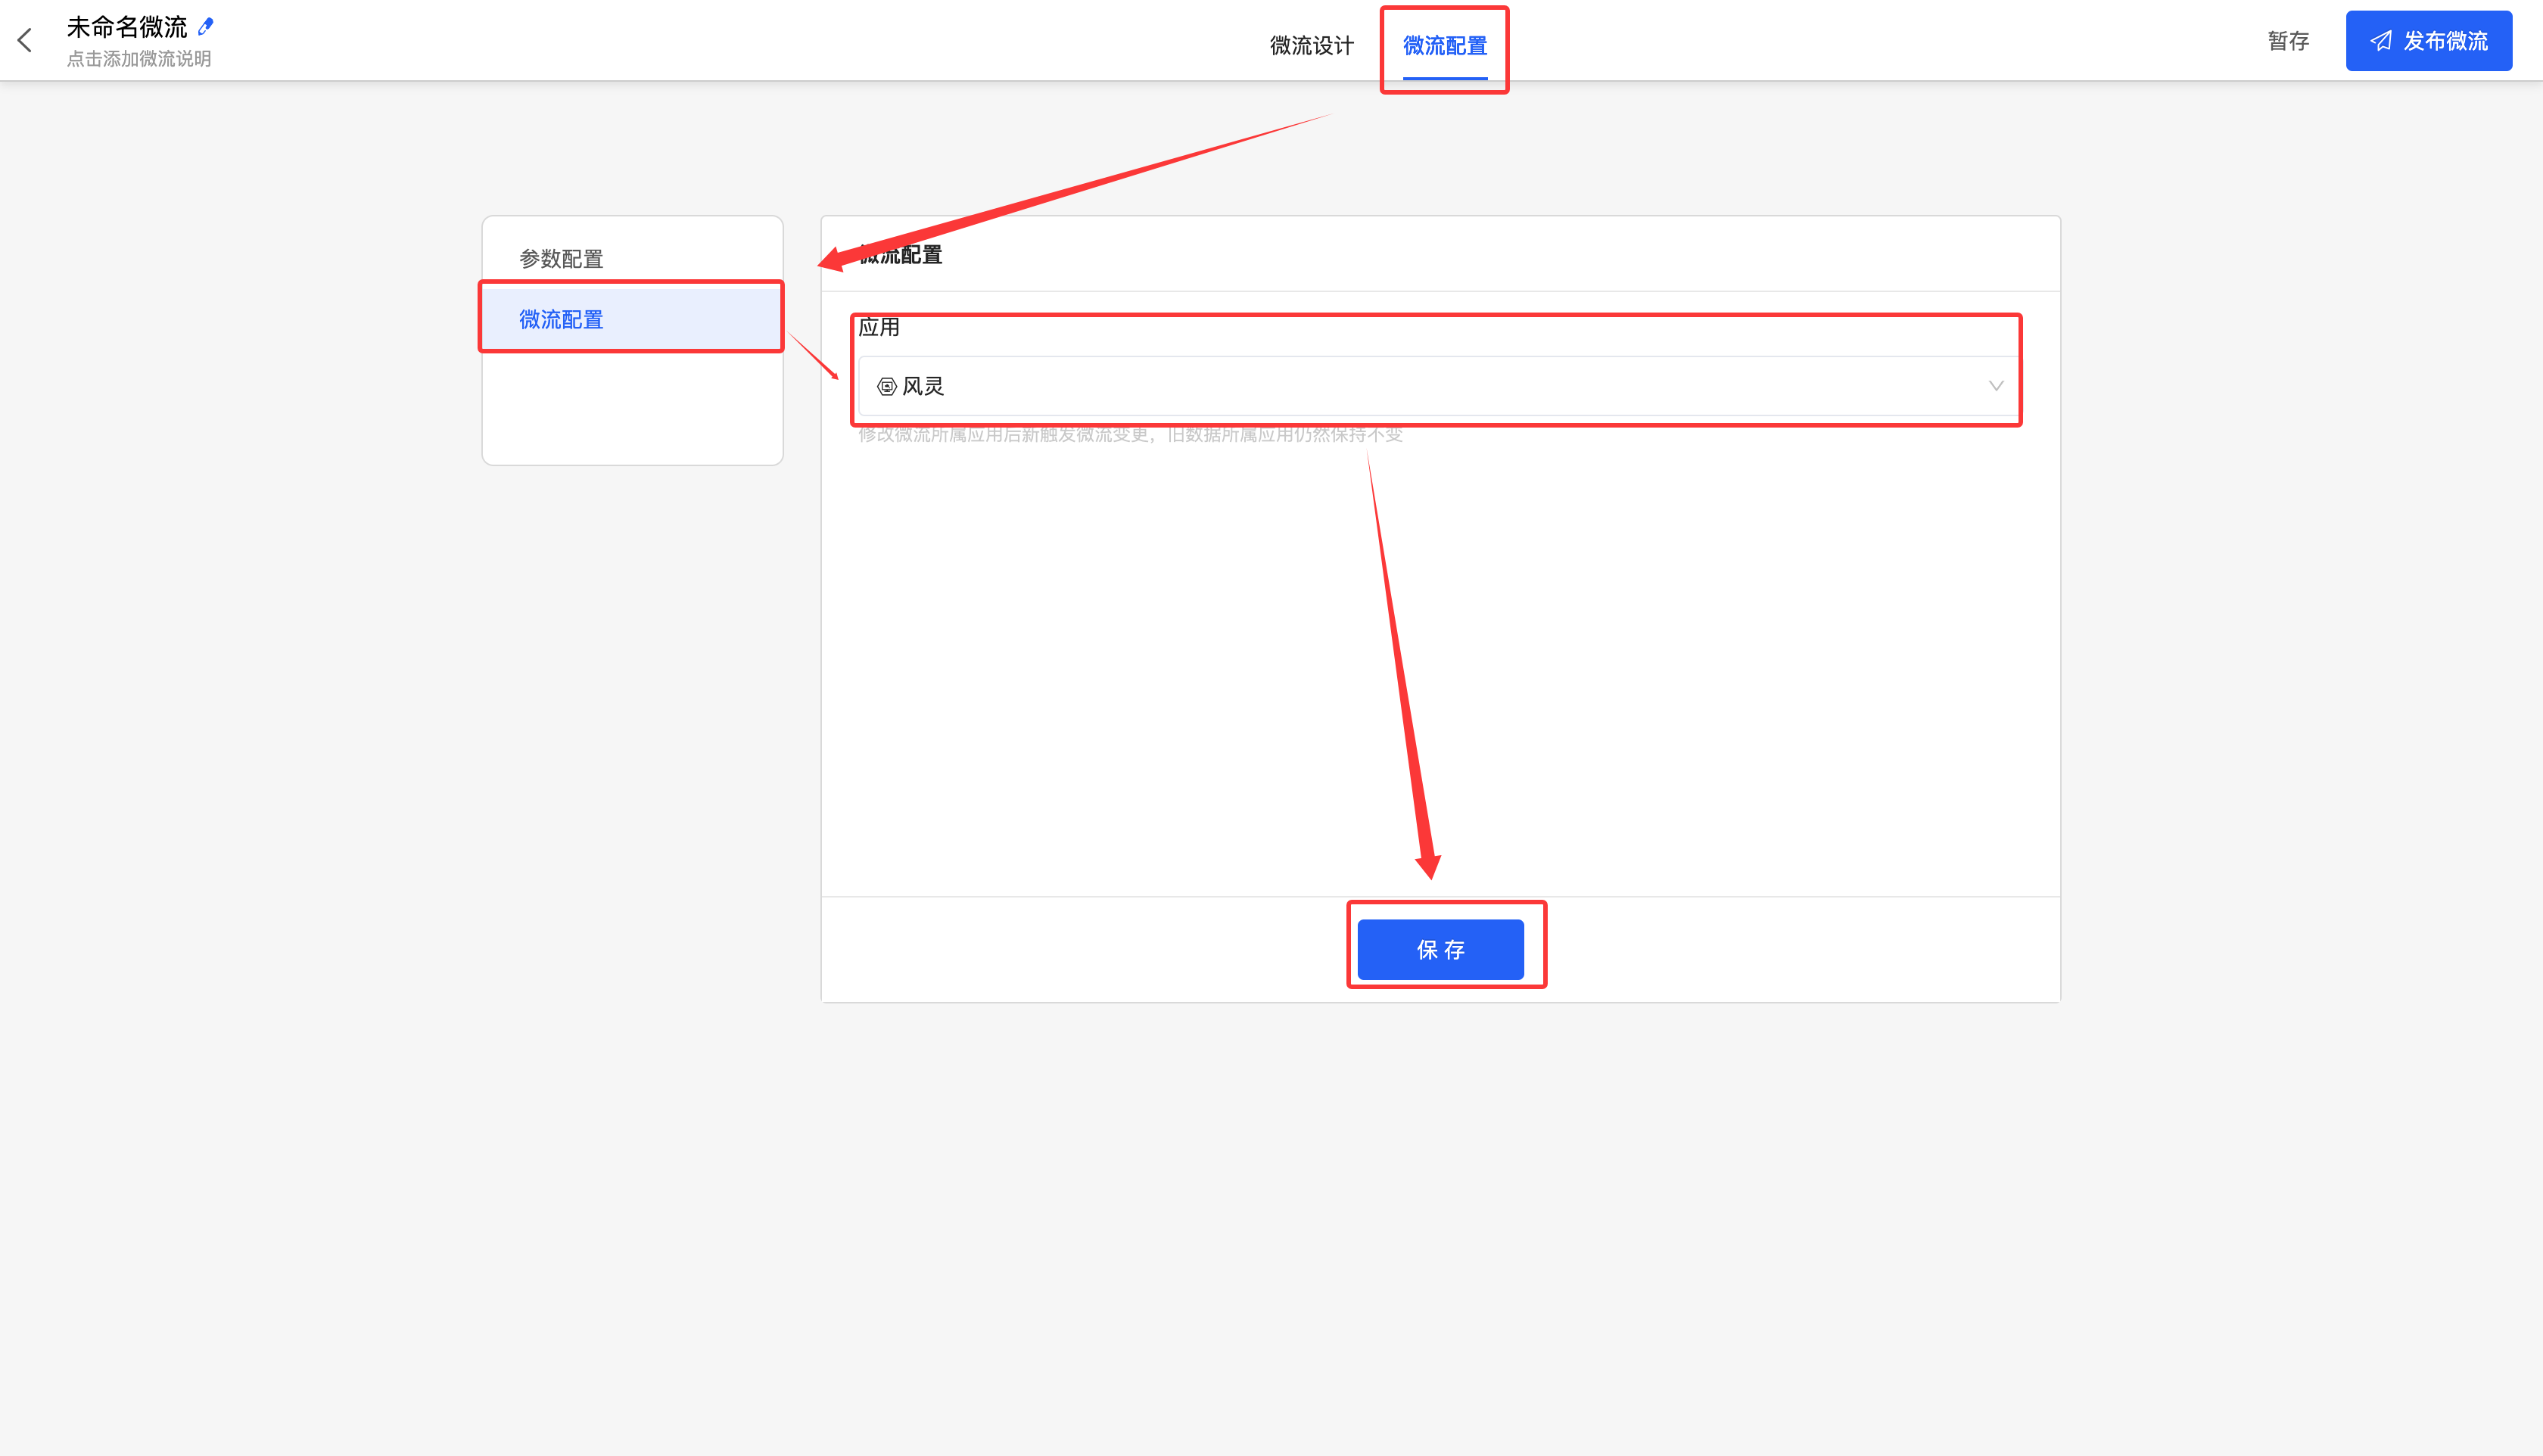
(II) Microflow Configuration
1. Function Introduction
When creating a microflow, you have selected the application to which it belongs. If you find that the application selection is incorrect or need to change the application to which it belongs, you can perform the editing operation here.
Note
When viewing microflow instances in "Workflow" - "Microflow Running Records":
- If an instance was generated before the application change, it will continue to be stored in the application before the change.
- Newly generated instances after the application change will be stored in the application after the change.
2. Operation Method
Under microflow configuration, select an application and click "Save" to successfully modify the application.