The microflow designer supports a series of convenient operations such as adding, editing, and deleting processes to meet various management needs.
Tip
After a microflow is successfully enabled, it will be automatically executed according to the set trigger conditions. To view the execution status of a microflow, you can go to the "Workflow" - "Microflow Execution Records" page, which will display the detailed running status of the microflow. If an exception occurs in the microflow, you can view the exception information on this page and improve and optimize the microflow based on the exception information.
I. Filtering
1. Function Introduction
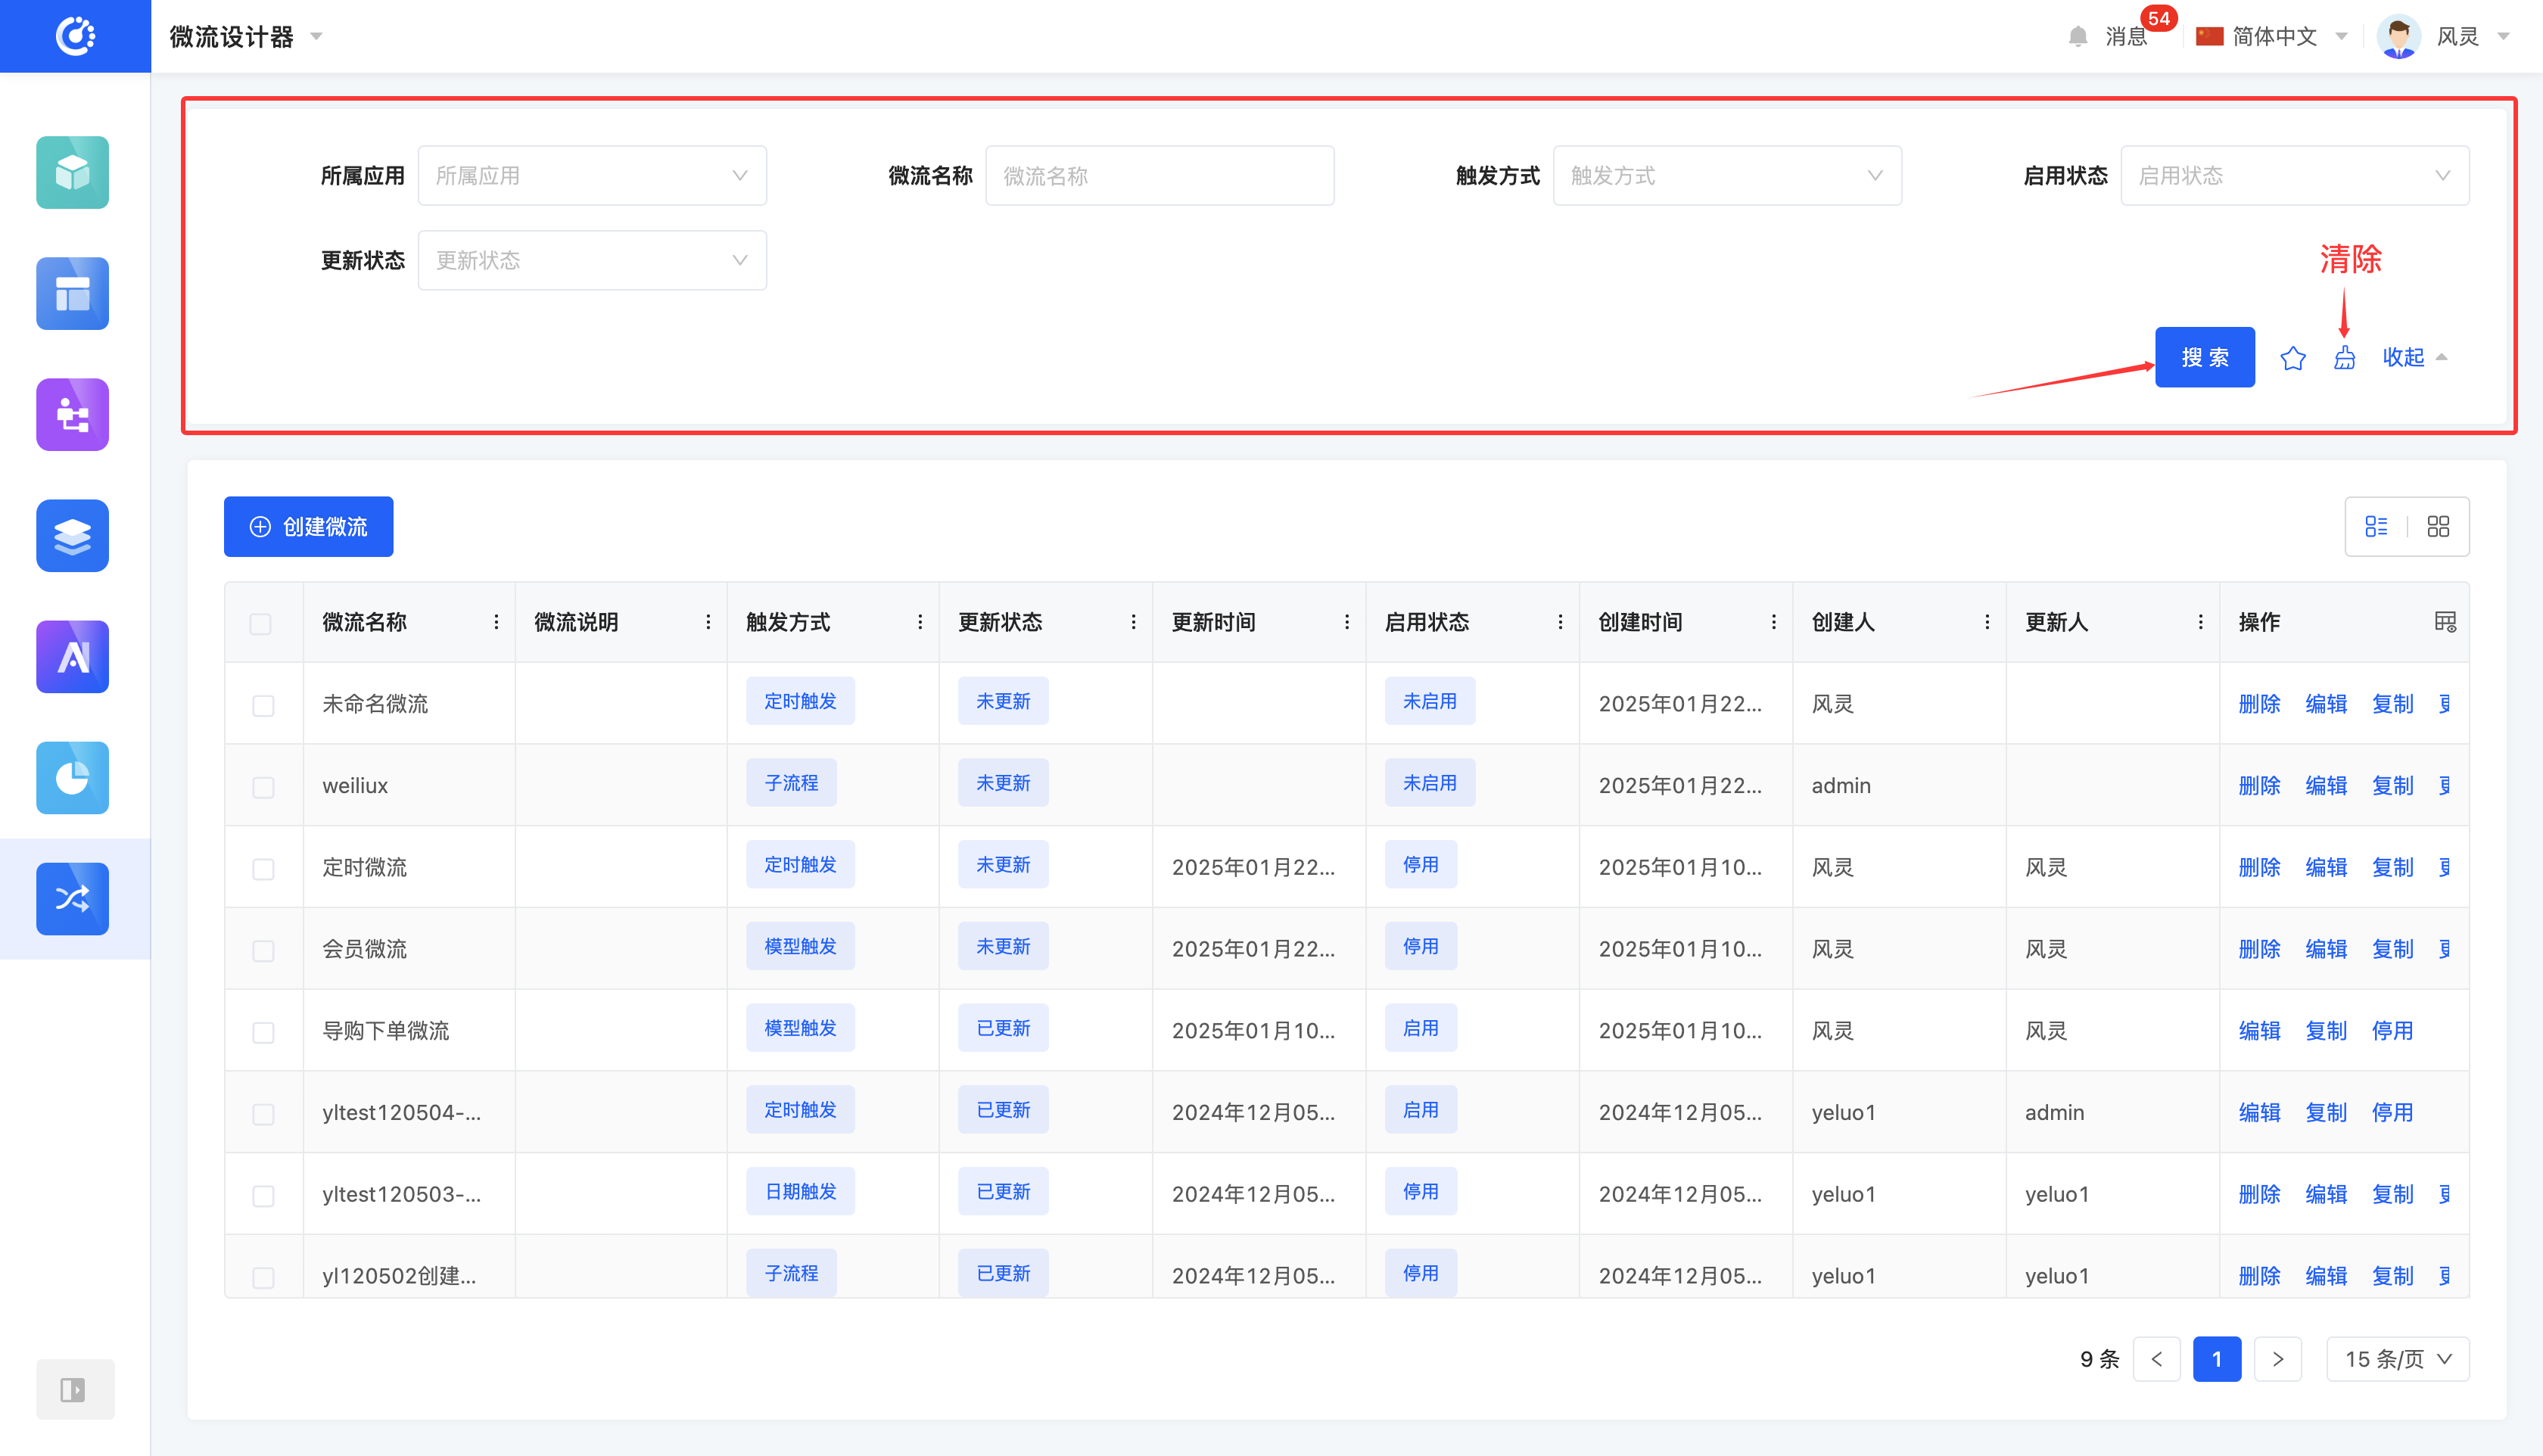
According to actual business requirements, you can customize microflow filtering conditions, including the associated application, microflow name, trigger method, enabled status, and update status. Under the current filtering conditions, the corresponding microflow list will be displayed, facilitating design operations on different microflows.
Tip
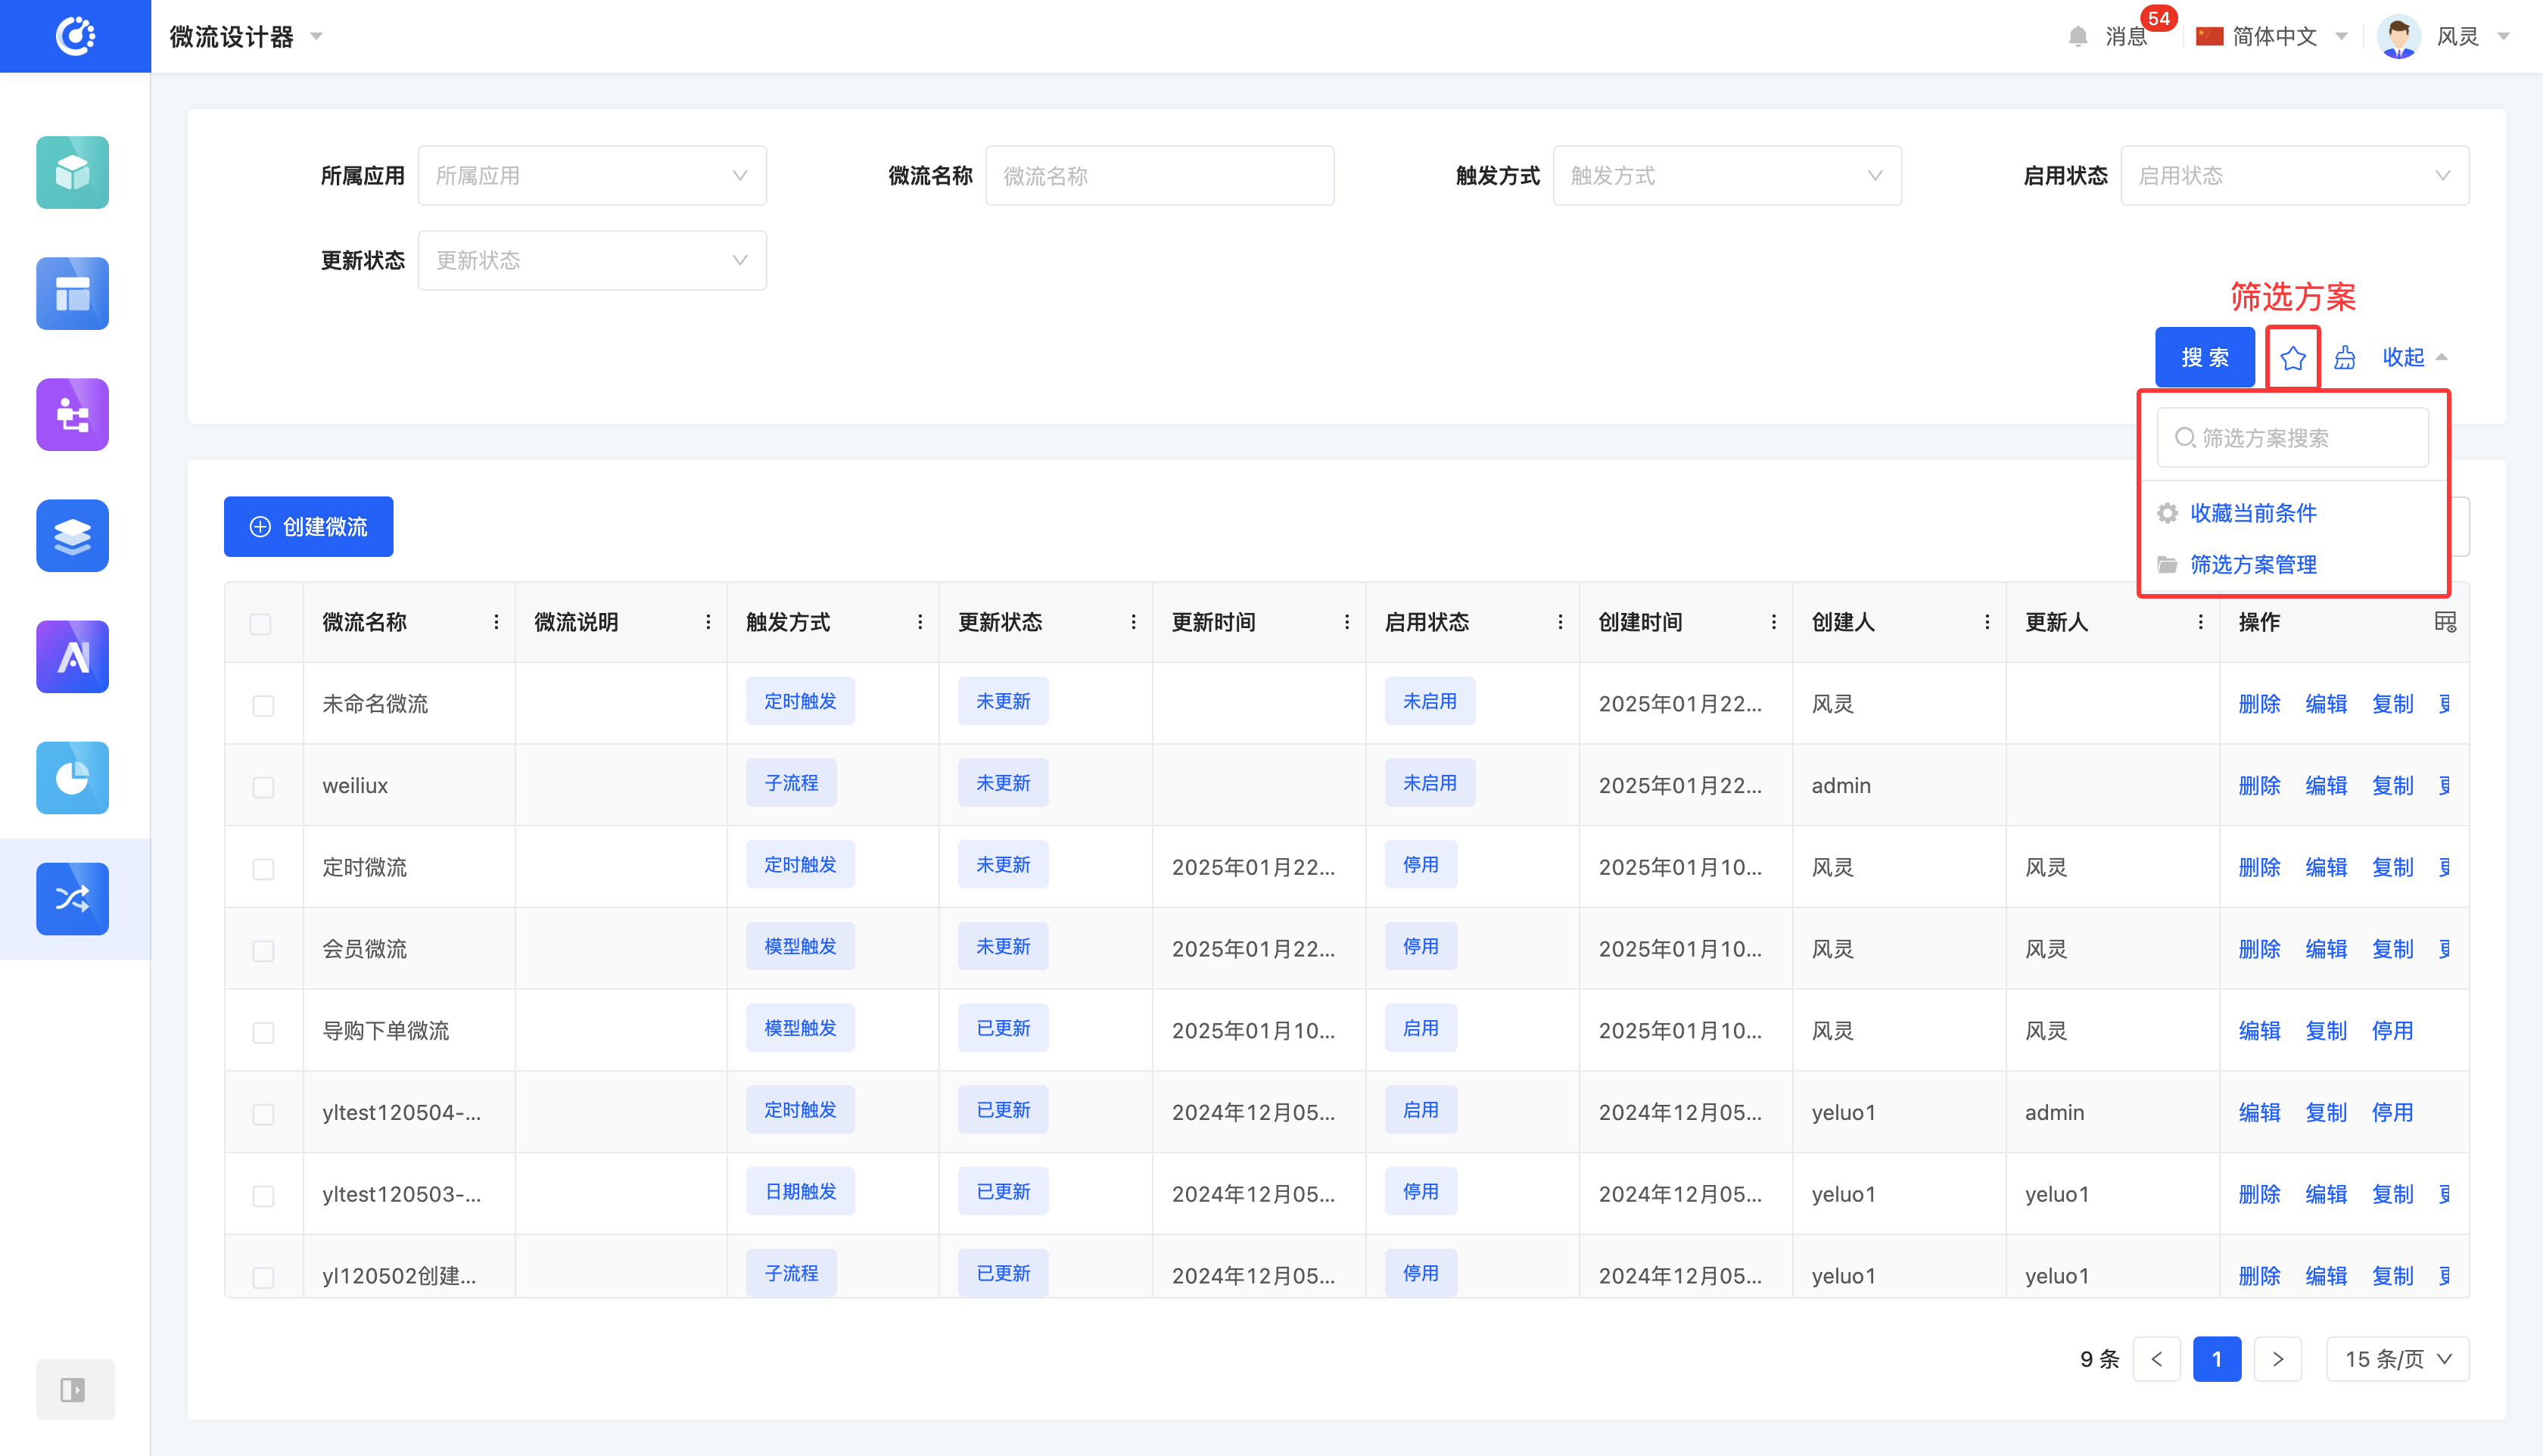
For commonly used filter option combinations, you can add them to the filter schemes. Then, you can directly select a scheme in the filter schemes to filter the processes with one click.
2. Operation Method
- Filter: After selecting or entering conditions in the filter area, click the "Search" button to filter the microflows.
- Clear All: Click the "Clear" icon to clear all conditions in the current filter area with one click.
- Manage Filter Schemes: Move the mouse over the "Filter Schemes" icon to manage the filter schemes.
- Add: After selecting or entering filter conditions in the filter area, click the "Save Current Conditions" button. Enter the scheme name in the pop-up window to add the current filter condition combination to the filter schemes.
- Search: Enter the scheme name in the input box.
- Modify: Click the "Manage Filter Schemes" button. In the pop-up window, select a scheme and click the scheme name to modify it.
- Delete: Select a scheme in the scheme list and click the "Delete" icon to delete the filter scheme.
II. Create a Microflow
1. Function Introduction
It supports creating microflows. Once created, the microflow will be automatically executed after being triggered.
2. Operation Method
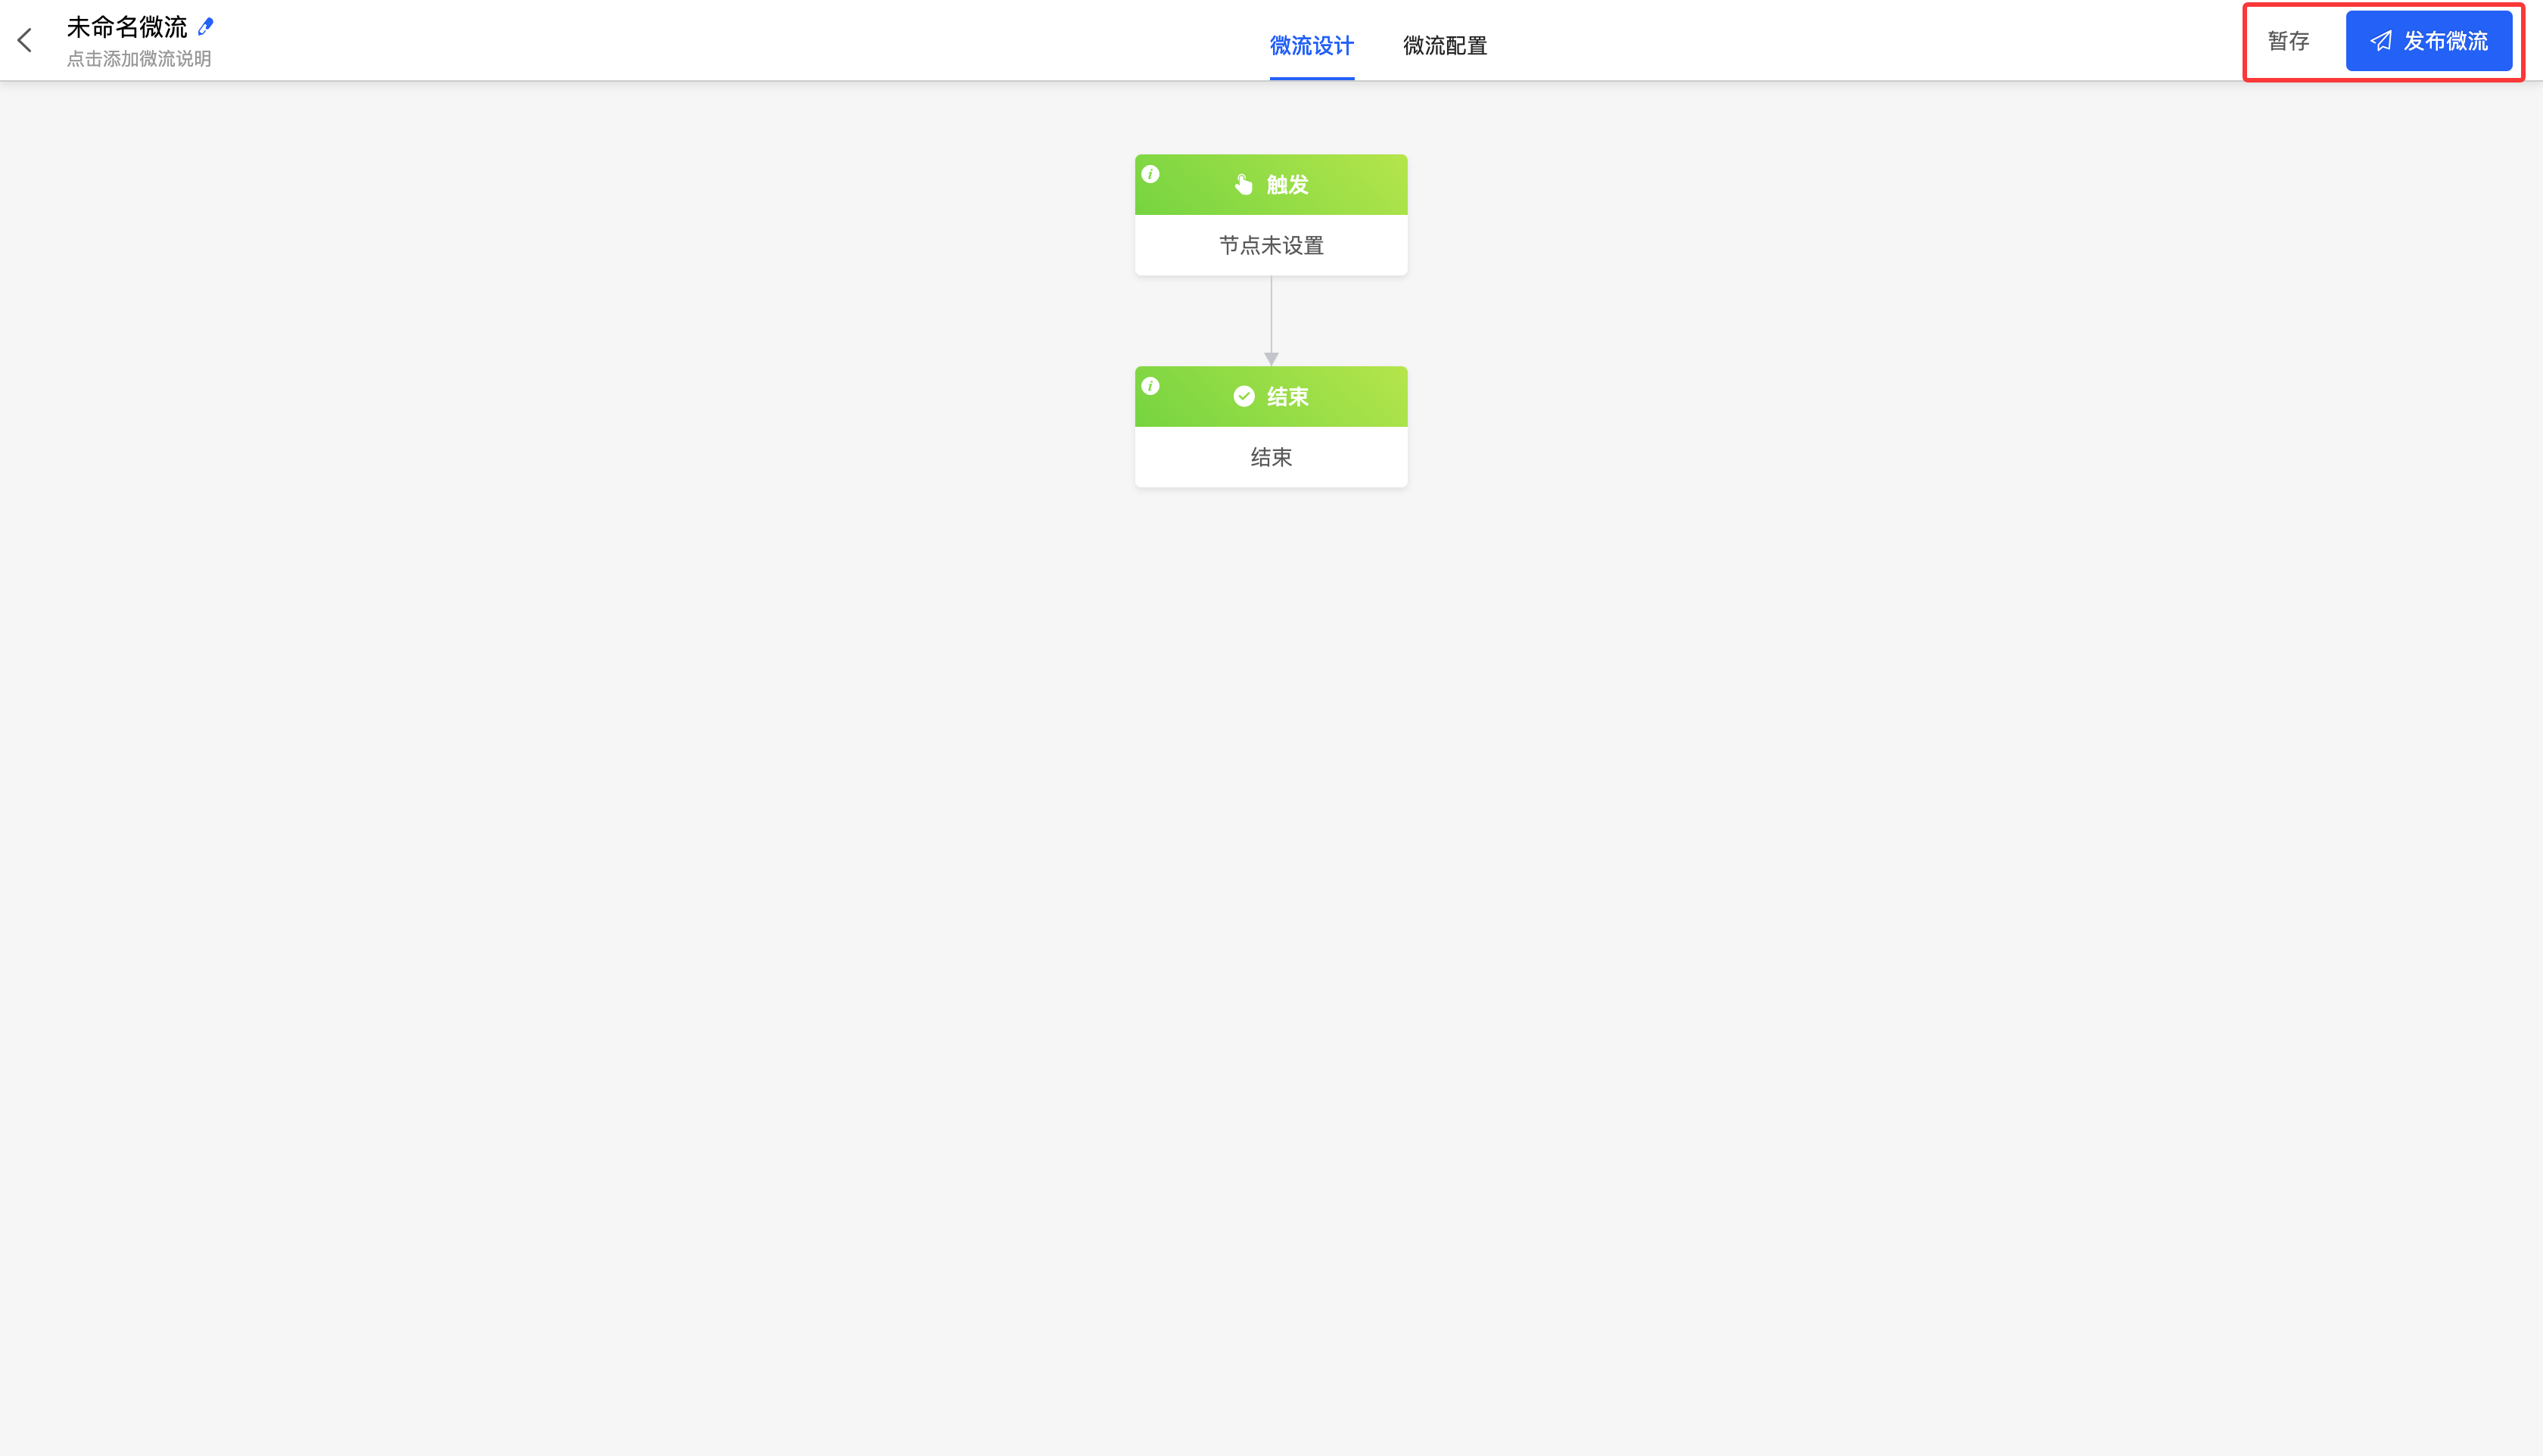
Click the "Create Microflow" button. After selecting the associated application, click the "Create" button. You will be redirected to the microflow design page. Click the "Save Draft" or "Publish" button to successfully create the microflow.
Note
If you do not click the "Save Draft" or "Publish" button, the created process will not be saved.

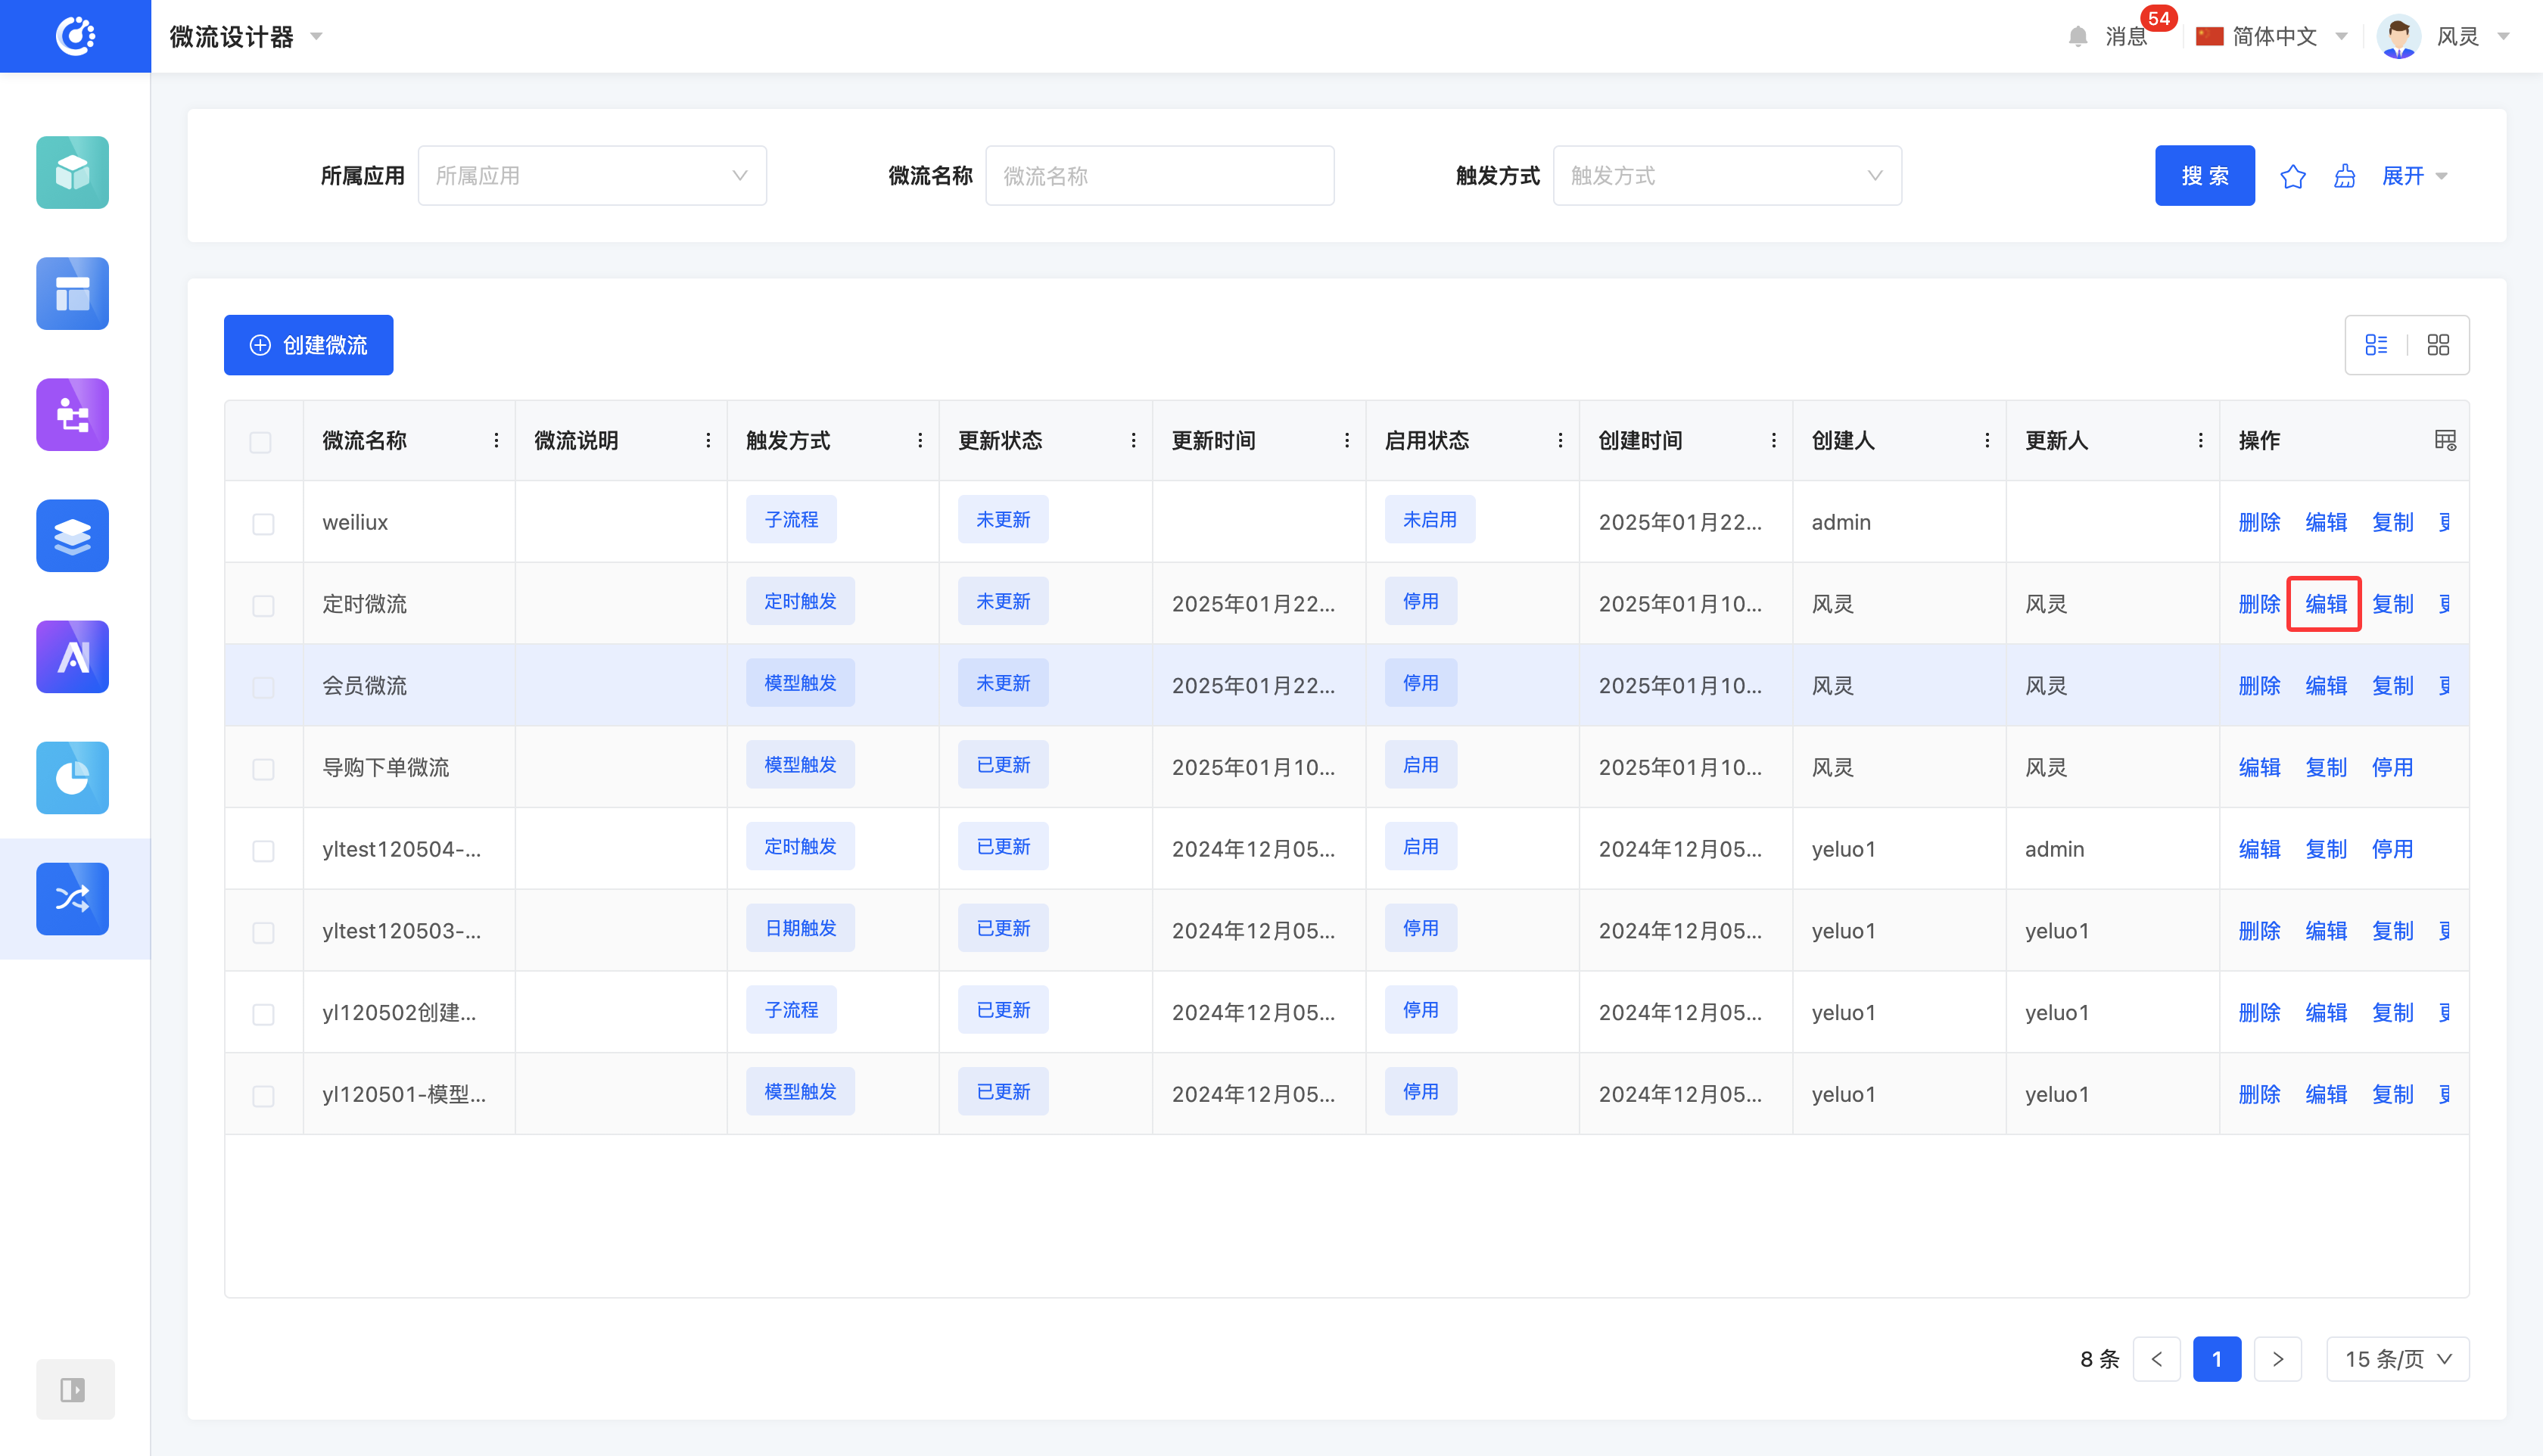
III. Design a Microflow
1. Function Introduction
When designing a microflow, you can use various node actions to layout the process to meet the process requirements in different actual business scenarios.
2. Operation Method
Click the "Edit" button to enter the microflow design interface. (For details, see the microflow design documentation.)
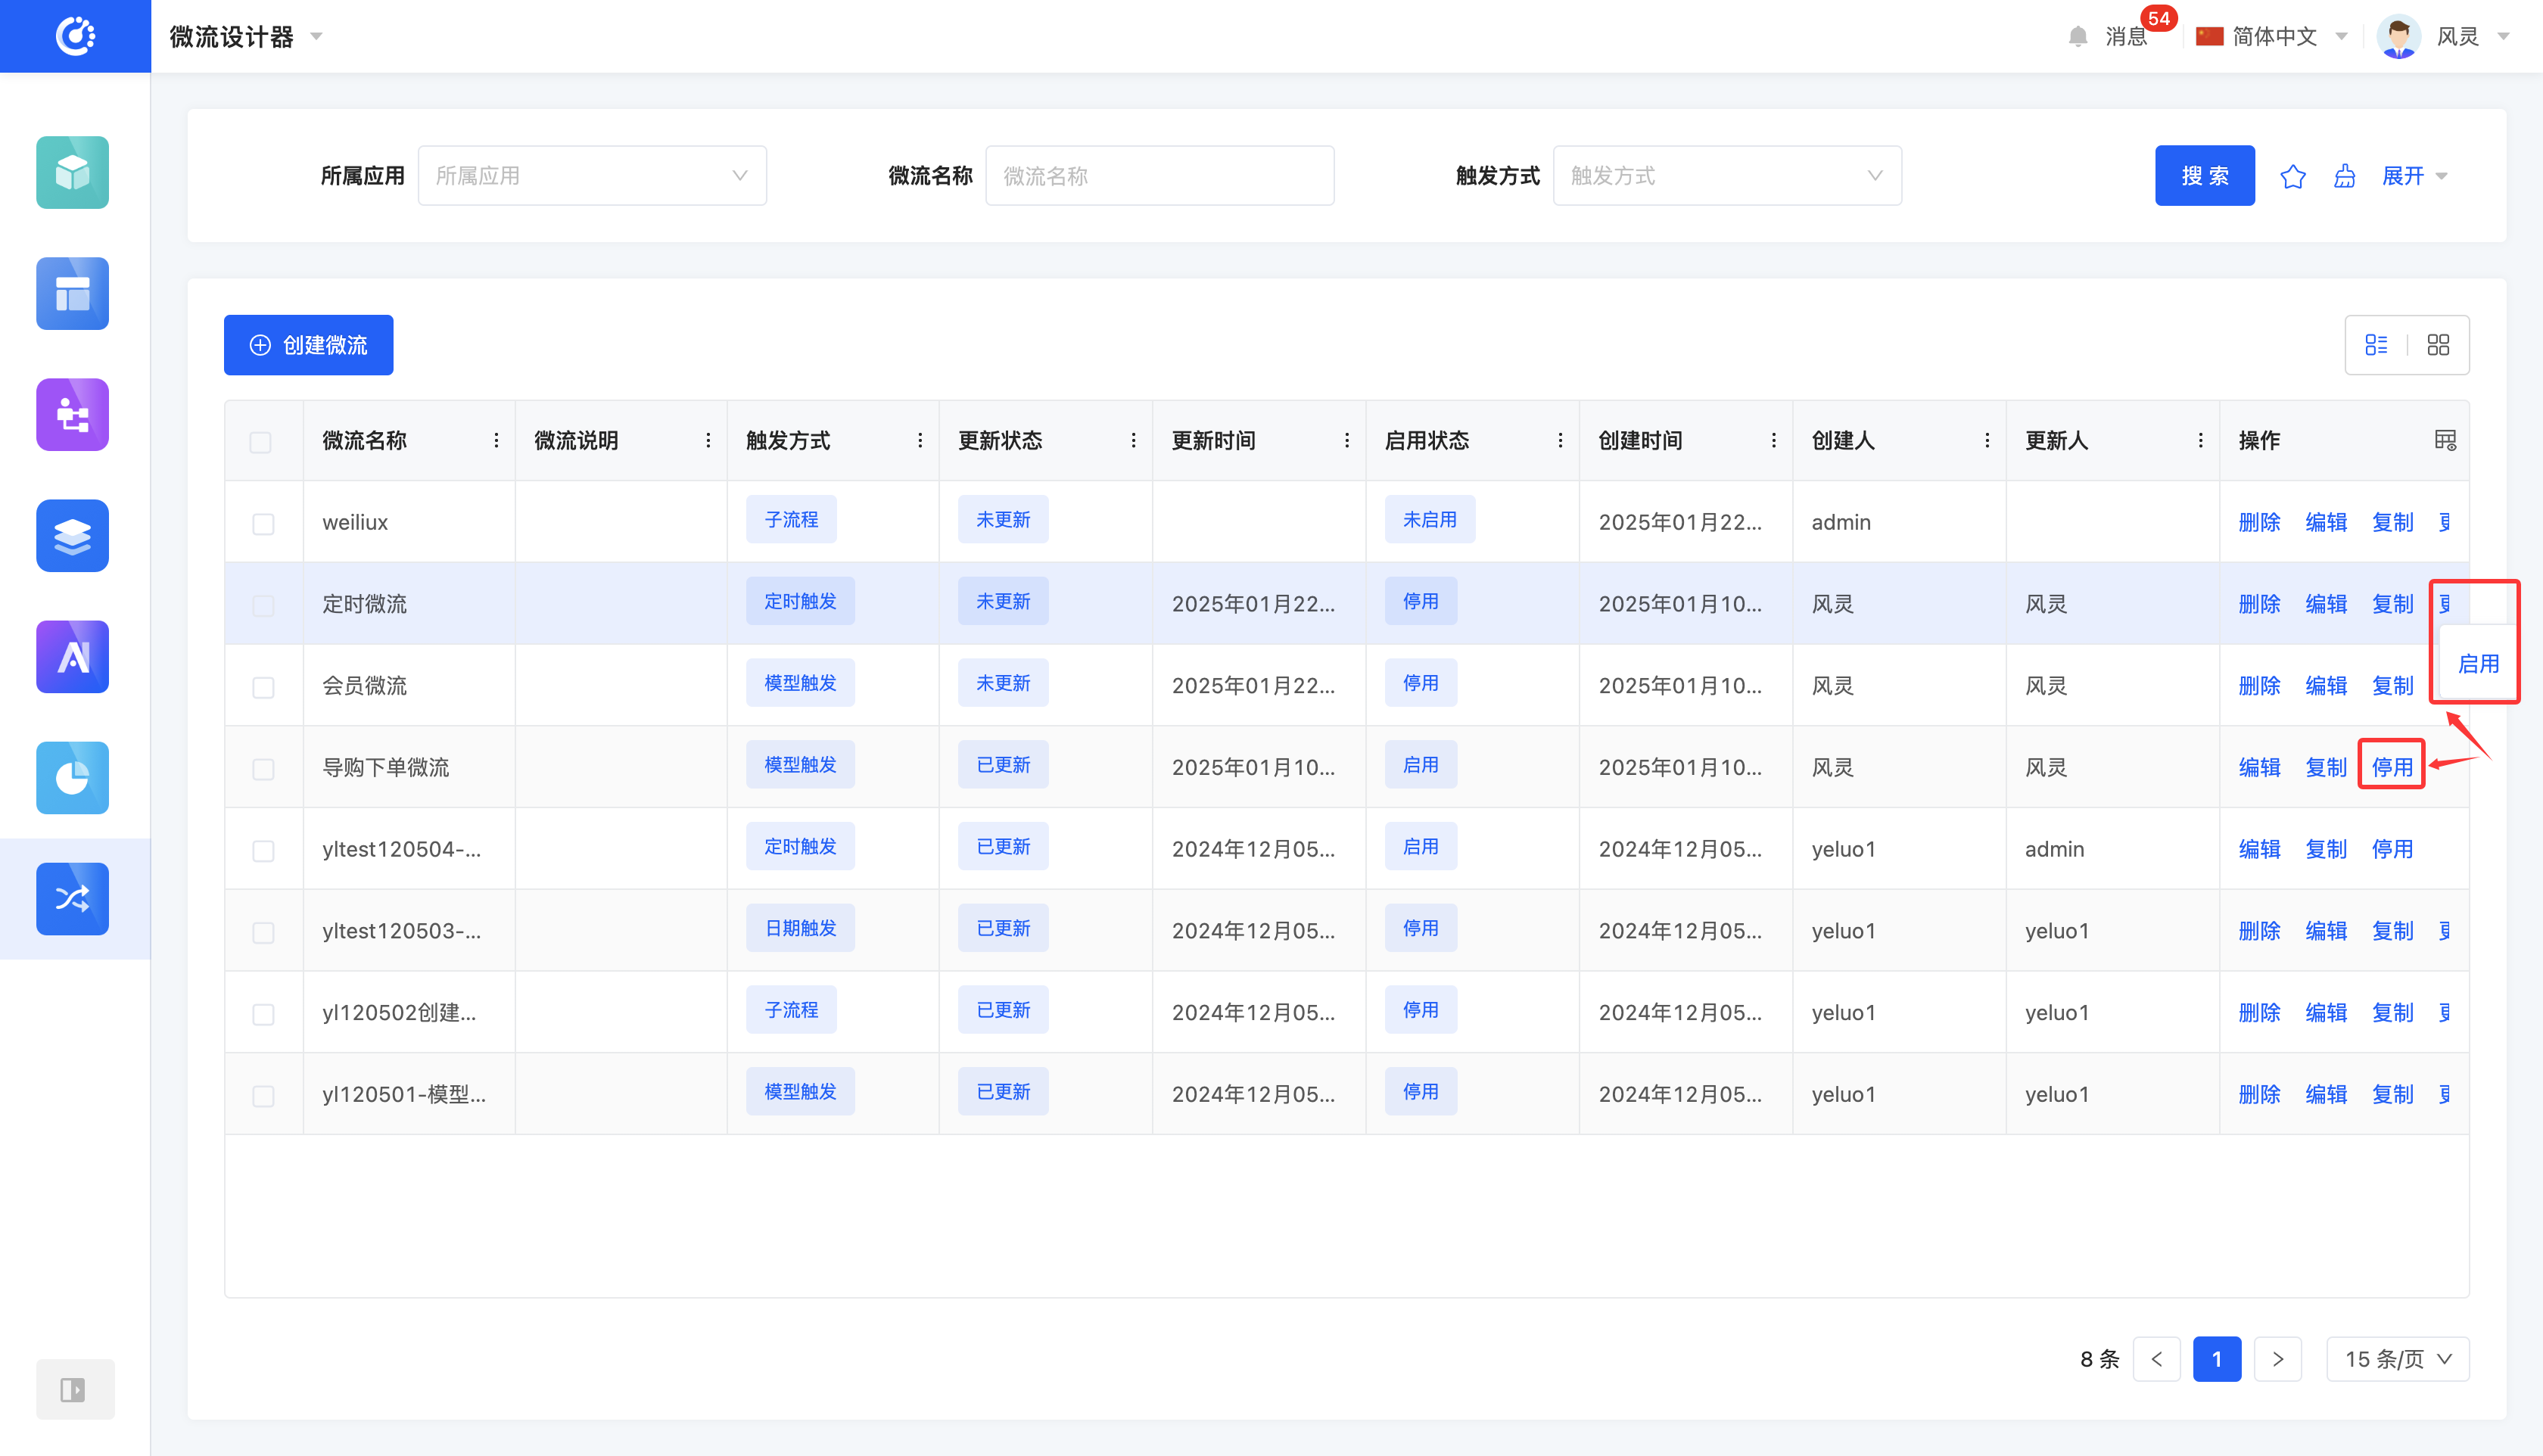
IV. Disable/Enable a Microflow
1. Function Introduction
When a microflow needs to be updated or is temporarily not in use, you can disable it. After disabling a microflow, it will no longer be executed. Microflows that are currently being executed will not be affected by the disable operation and will continue to run until completion.
When you need to execute a microflow, you can enable it. After enabling a microflow, it can be automatically executed according to the trigger method. In addition, you can also select an enabled microflow in the microflow action component in the page designer to manually trigger the microflow.
Note
- Newly published microflows are automatically enabled.
- A microflow cannot be enabled if there are nodes that are not fully configured.
2. Operation Method
Click the "Disable/Enable" button to change the status of the microflow.
Tip
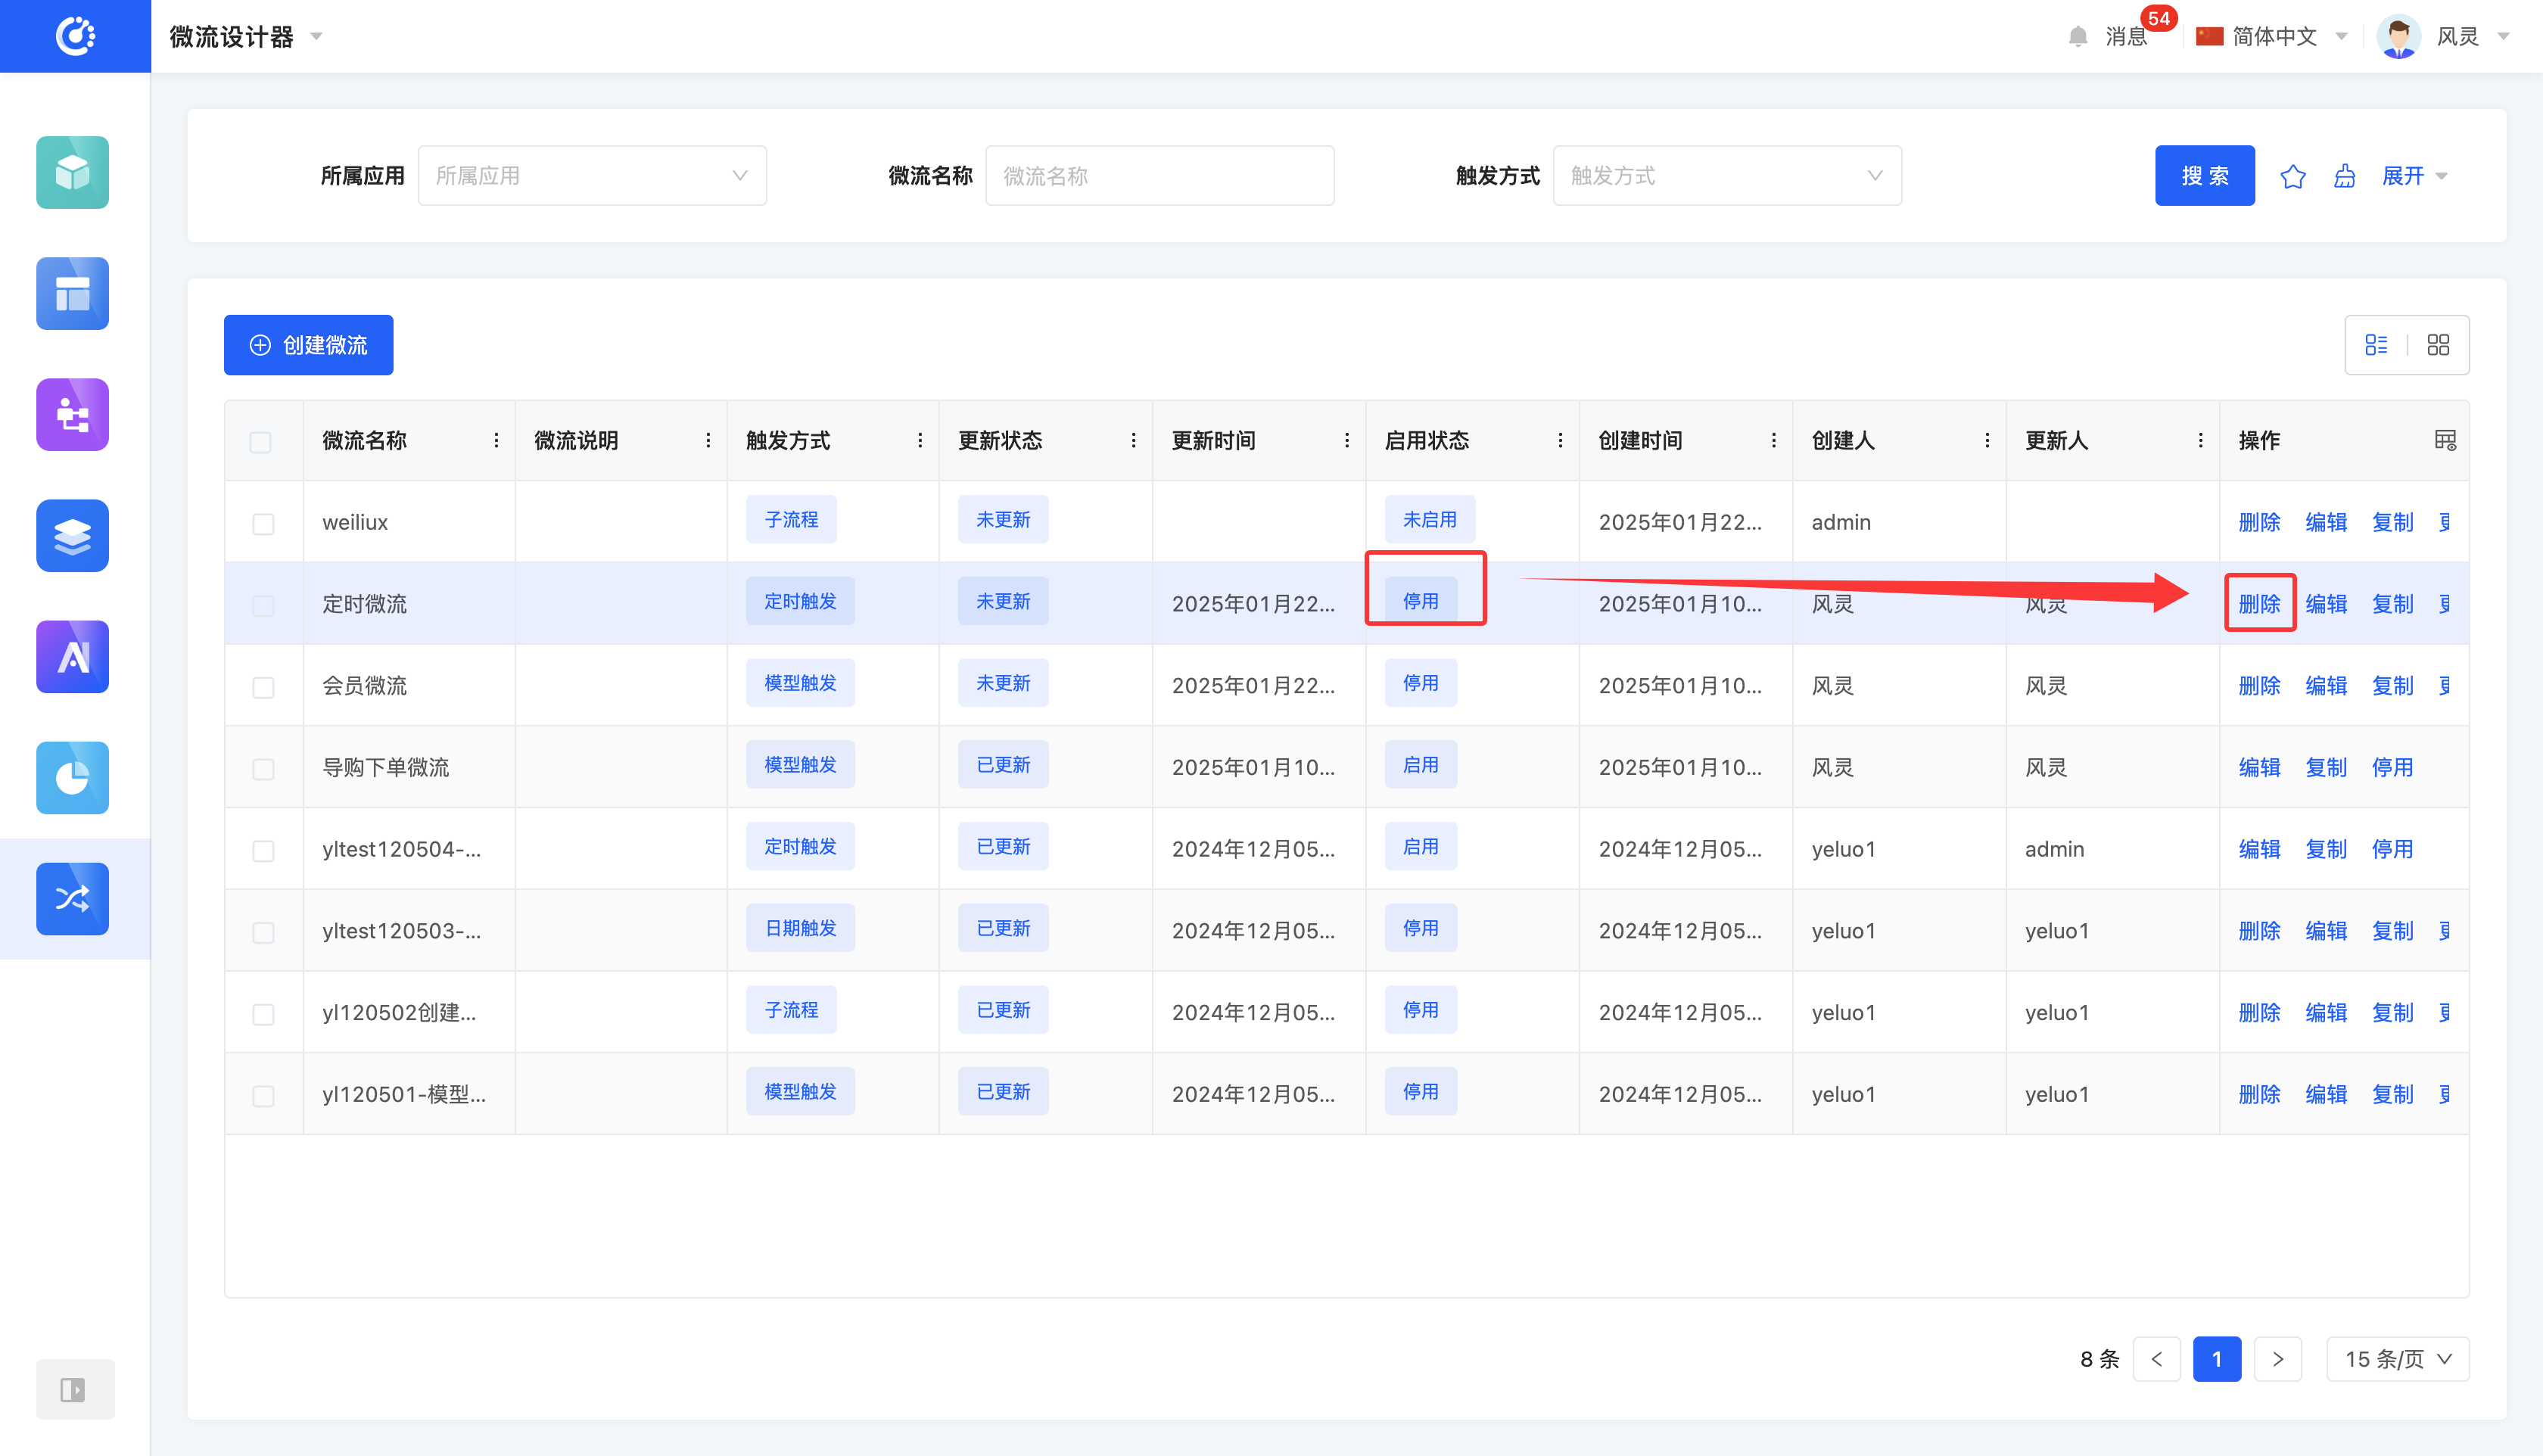
After a microflow is disabled, the delete operation will be available. If you need to enable a disabled microflow, find the enable button in the "More" option.
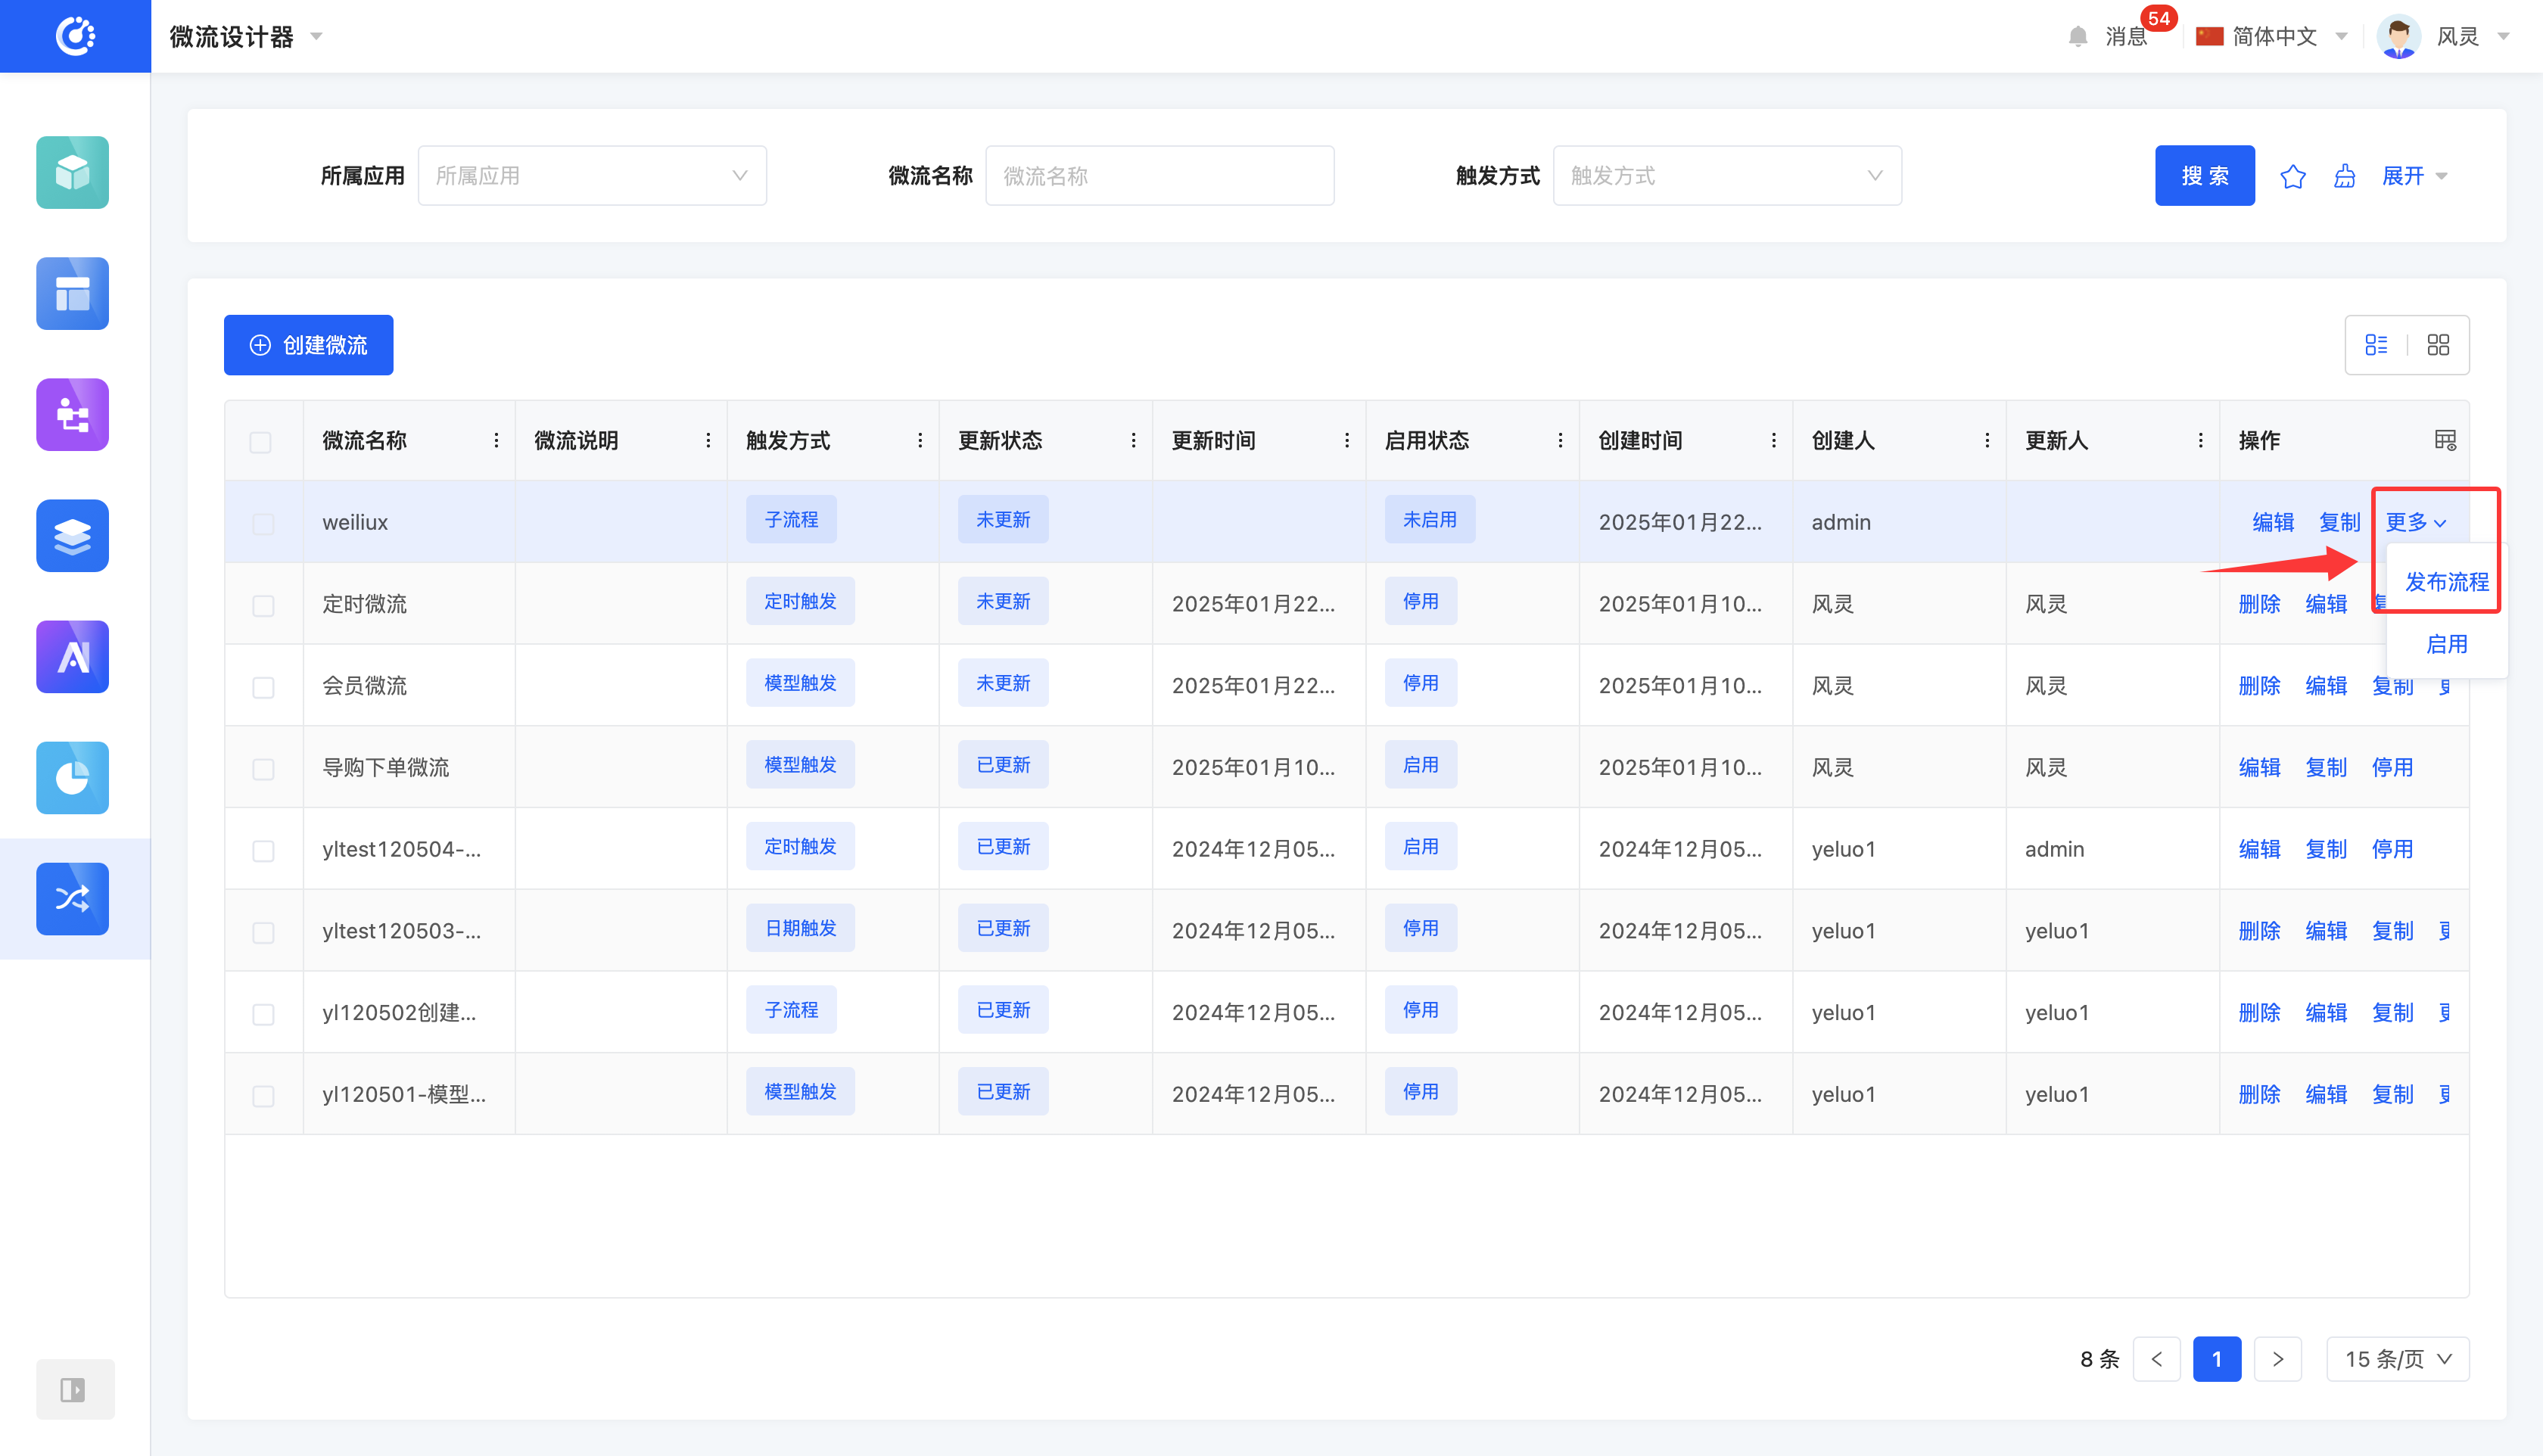
V. Publish a Microflow
1. Function Introduction
Only for microflows that have been created but not published, you can publish them on the microflow management page.
2. Operation Method
Click the "Publish Process" button to successfully publish the current microflow.
Note
A microflow cannot be successfully published if there are nodes that are not fully configured.
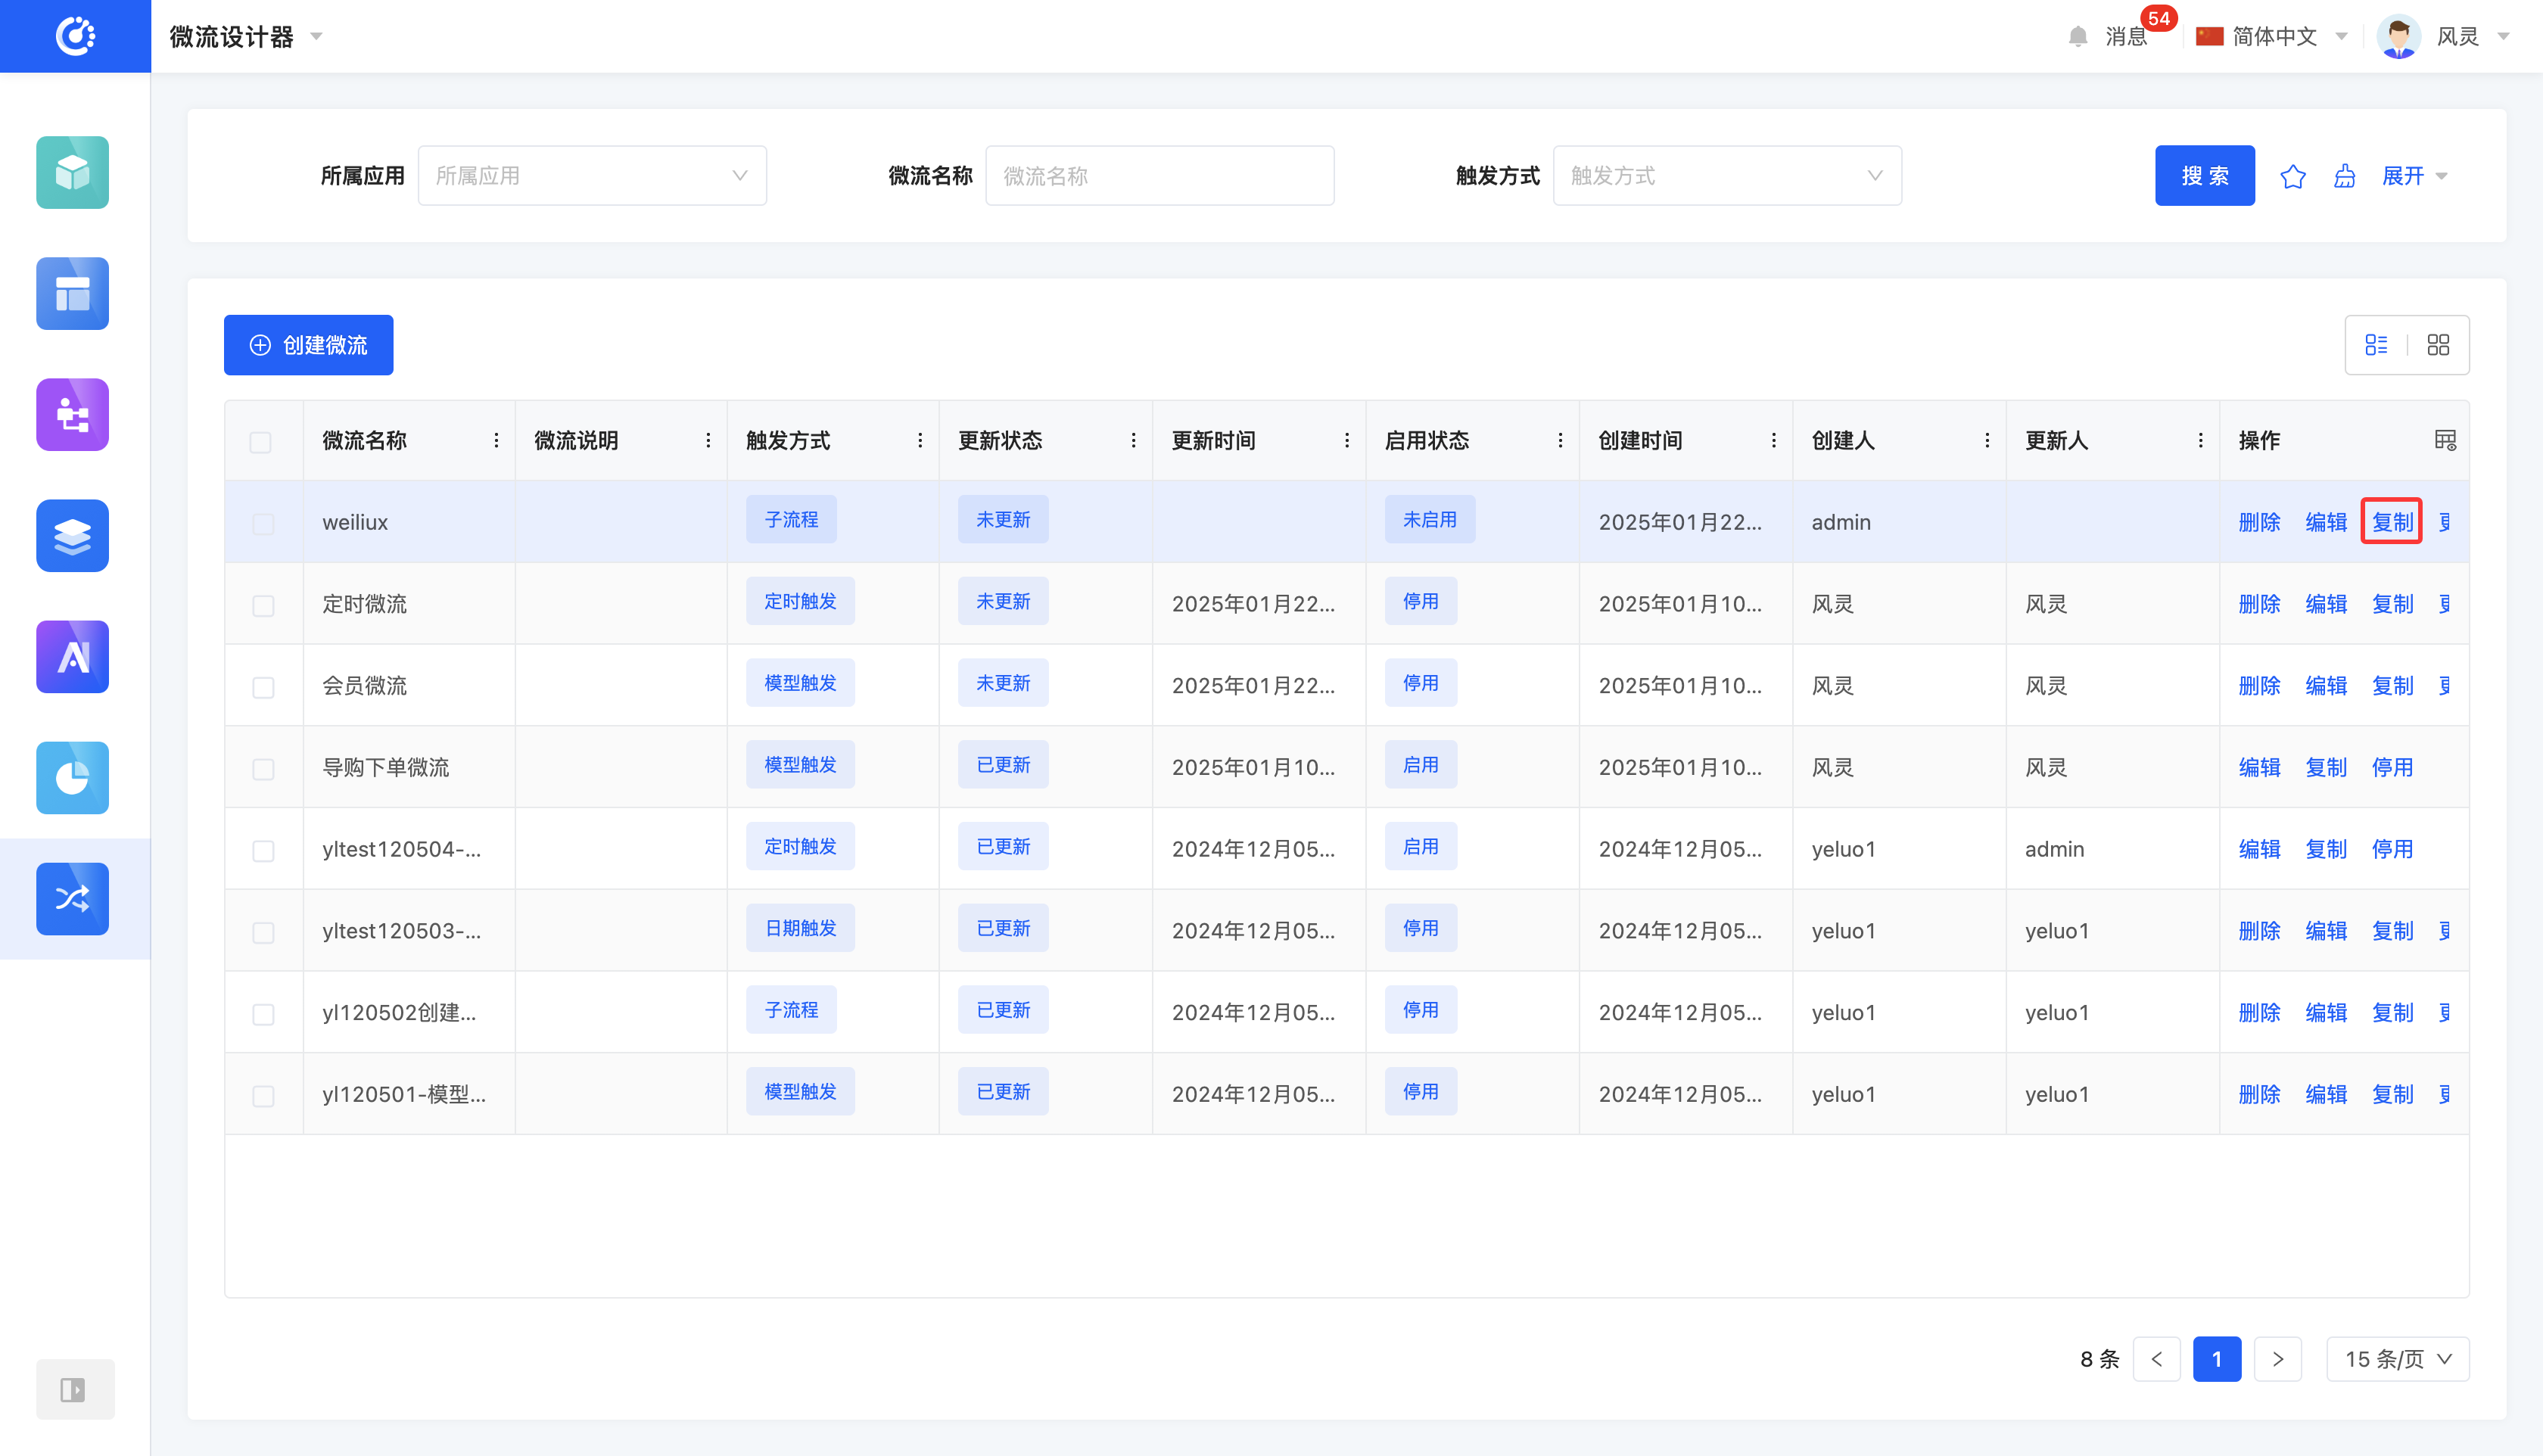
VI. Copy a Microflow
1. Function Introduction
When there are high similarities in the node actions of microflows, you can use the copy function. A new process named "Original Process Name - Copy" will be generated, and you will automatically enter the microflow design interface of the new microflow. Similar to creating a microflow, you need to click the "Save Draft" or "Publish" button to successfully generate the copied microflow.
2. Operation Method
Click the "Copy" button. You will be redirected to the microflow design page. Click the "Save Draft" or "Publish" button to successfully copy the microflow.
VII. Delete a Microflow
1. Function Introduction
When a microflow is no longer needed, you can choose to delete it. If you are not sure whether a microflow needs to be deleted, you can disable it first.
Note
- A microflow cannot be deleted if it is in the enabled state and has not been disabled.
- A microflow cannot be deleted if it has been executed and instances have been generated before deletion.
Warning
Once a microflow is deleted, it cannot be recovered. Please operate with caution!
2. Operation Method
Click the "Delete" button to delete the process.
Note
For published microflows, the "Delete" button will be displayed only after the microflow is disabled.