Relationships between models are a key component of any Oinone module and are essential for modeling any business scenario. However, we may also want to establish connections between fields within a given model. Sometimes, the value of one field is determined by the values of other fields, and other times we want to assist users in data entry.
These scenarios can be achieved through the domain attribute of relation fields and the UX-related compute and constructFun attributes. Although technically uncomplicated, the semantics of these three concepts are crucial. This is also the first time we're writing Java logic code—before now, we've only written class definitions and field declarations.
I. Relation Field Attribute: domain
Reference: Related documentation can be found in "Field Attributes".
Objectives: By the end of this section:
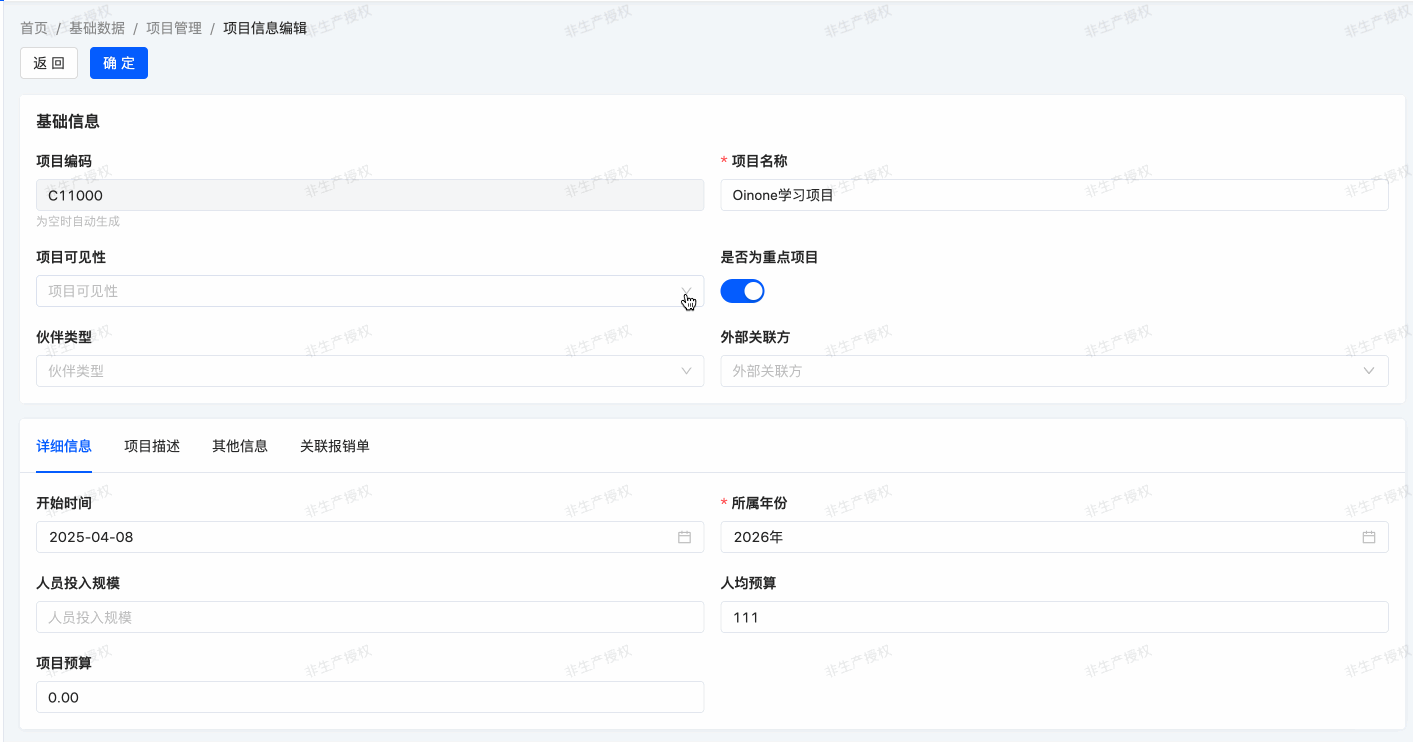
In the project information model, selecting a partner type automatically filters the available options for project external partners.
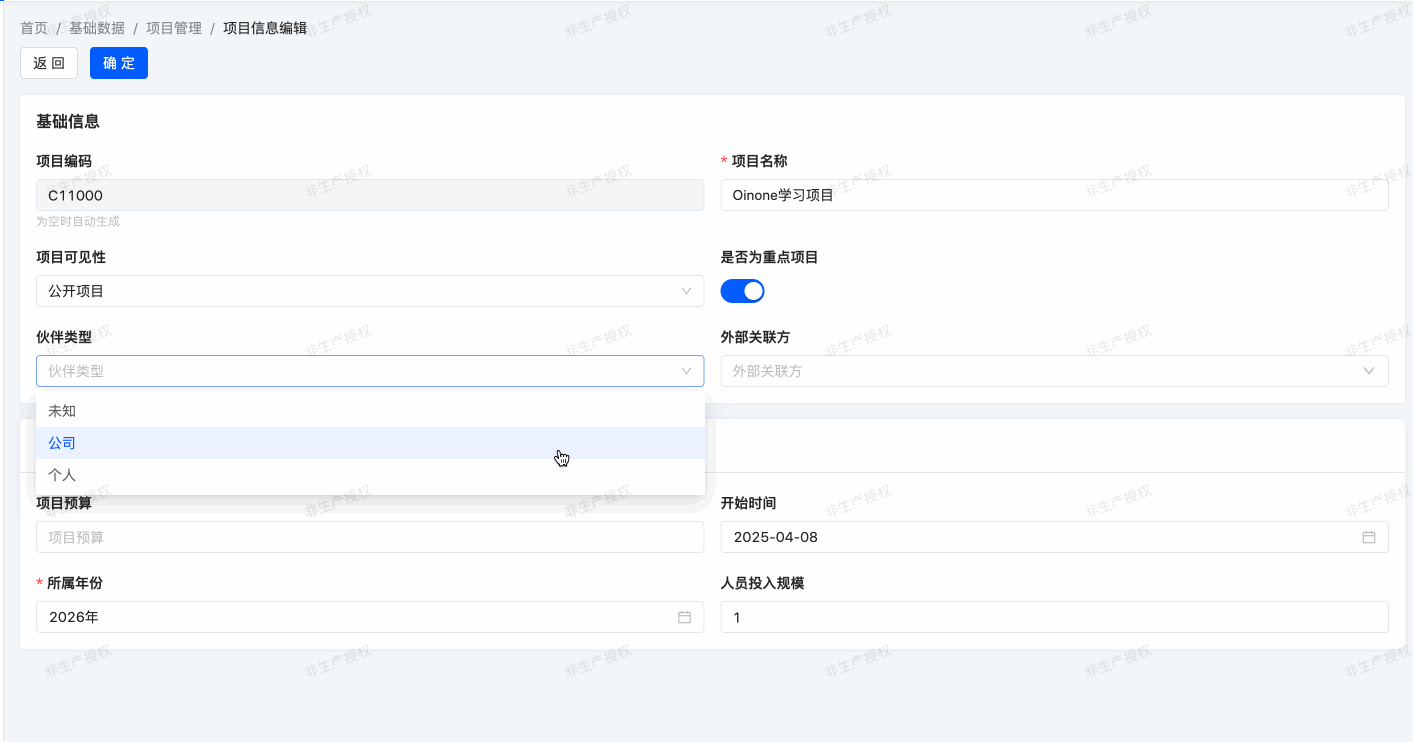
In our expense management module, we've defined project external partners. If a new partner type is added, the selectable range for project external partners should change accordingly after selecting this partner type. To achieve this, we use the domain attribute concept. In simple terms, data displayed in a relation field is filtered based on the domain attribute value.
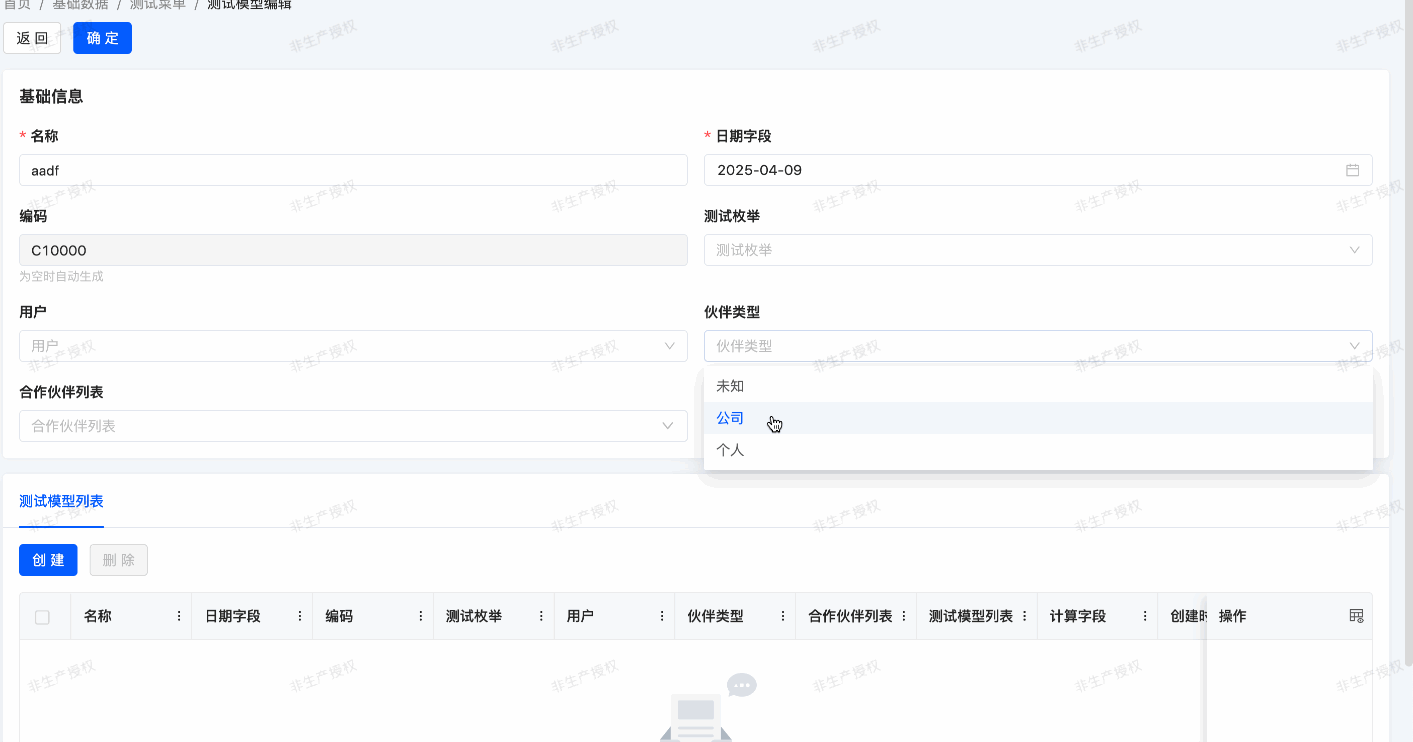
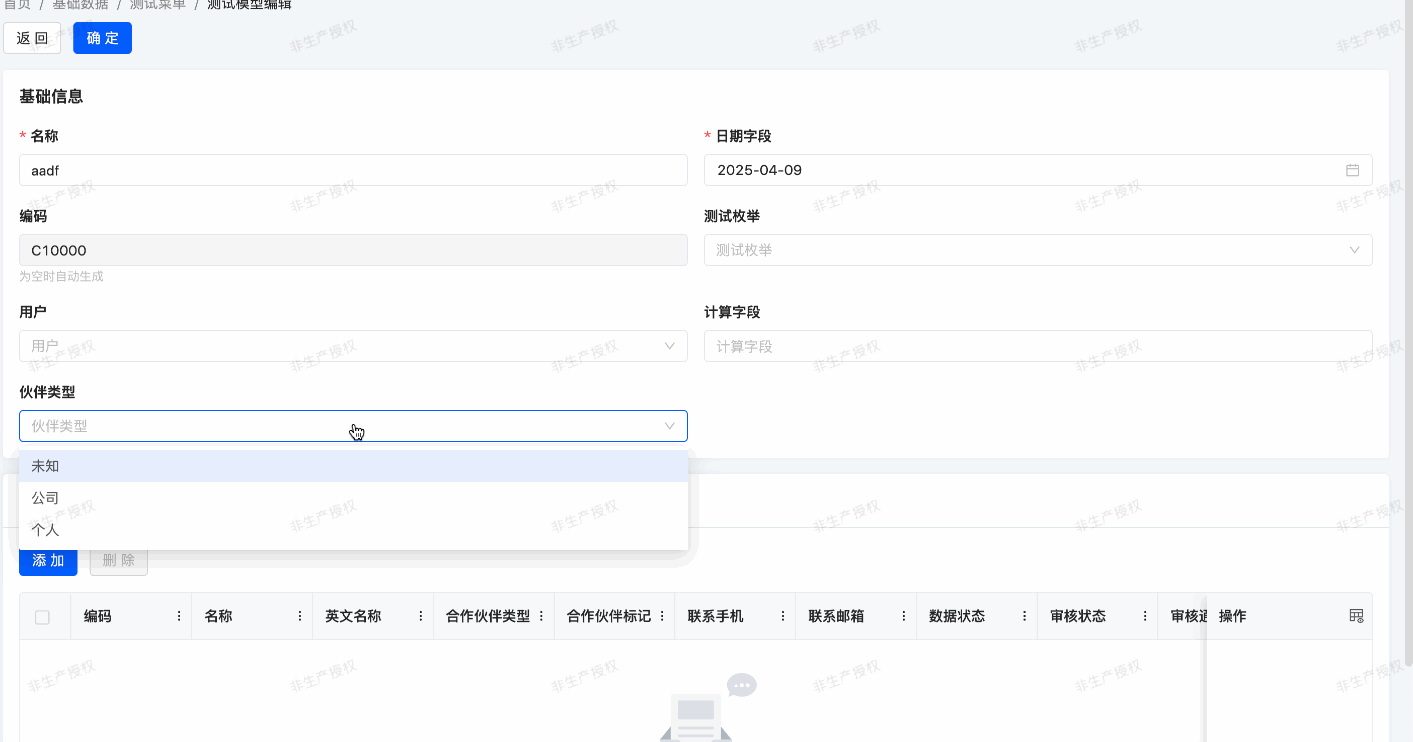
For example, to add the partnerType field to our expenses.TestModel and set the domain attribute for the partners field:
@Field.Enum
@Field(displayName = "伙伴类型")
@UxForm.FieldWidget(@UxWidget(config = {@Prop(name = "clearFields",value = "partners")}))
private BusinessPartnerTypeEnum partnerType;

@Field(displayName = "合作伙伴列表")
@Field.many2many(relationFields = {"testModelId"},referenceFields = {"partnerId"},throughClass =TestModelRelPartner.class)
@Field.Relation(domain = "partnerType == ${activeRecord.partnerType}")
@UxForm.FieldWidget(@UxWidget(widget = "Select"))
// @Field.Relation(domain = "partnerType == ${rootRecord.partnerType}")
private List<PamirsPartner> partners;Configure the Ux clearFields attribute to specify fields to clear when the partnerType field changes.
In the relation field definition, add a domain=X option where X accepts an RSQL expression. activeRecord represents the current view object.
If the UxForm widget attribute is not specified, the default view uses a Table component for many-to-many fields. To affect data filtering in pop-ups—i.e., when a sub-view needs data from a parent view—use rootRecord to fetch values.
Warning:
The domain attribute of relation fields only takes effect when front-end components actively initiate data requests. Using the widget="Checkbox" attribute displays data without triggering new requests, making domain ineffective.
Exercise
As shown in this section's objectives, add the
partnerTypefield to yourexpenses.ProjectInfomodel and its form view.The form view of the
expenses.ProjectInfomodel has been custom-configured. Building on previously acquired knowledge, let's try further modifying and optimizing this form's custom view!
II. New UX Attributes
(I) compute
Reference: Related documentation can be found in "UX compute Attribute".
Objectives: By the end of this section:
In the project information model, the optimal project budget should be calculated based on the budget per capita and staff size.
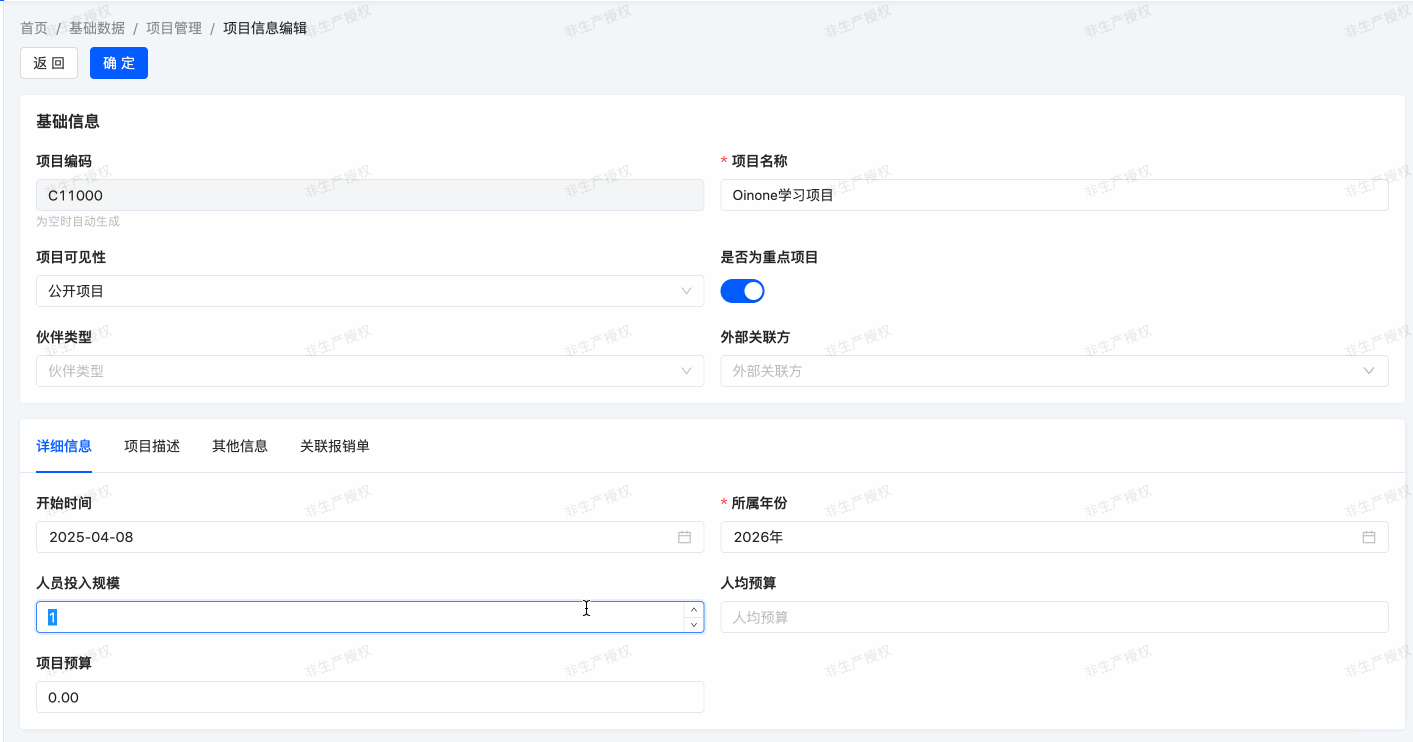
In our expense management module, we've defined budget and staff size. If we add a budget per capita, it's natural to define the budget as the product of staff size and budget per capita. For this, we use the concept of computed attributes—i.e., the value of a given field is calculated based on other fields.
To set a field's computed attribute, set its compute attribute to a front-end-supported calculation expression. The calculation method should set the computed field's value for each record in activeRecord.
For example, to add the computeName field to our expenses.TestModel and set its compute attribute in the model or form view:
@Field(displayName = "计算字段")
@UxForm.FieldWidget(@UxWidget(config = {@Prop(name = "compute",value = "activeRecord.name")}))
private String computeName;<field data="computeName" label="计算字段" compute="activeRecord.name"/>Tip:
You may have noticed that computed attributes are typically used with read-only attributes, which makes sense since users shouldn't set their values.
However, if the computeName field also needs to support user modifications—i.e., computeName uses the name field's value as a default—simply modify the calculation logic to activeRecord.computeName ? activeRecord.computeName : activeRecord.name.
Exercise
As shown in this section's objectives, add the
budgetPerCapitafield to yourexpenses.ProjectInfomodel and its form view.
| Field | Display Name | Type | Java Type |
|---|---|---|---|
| budgetPerCapita | 人均预算 | FLOAT | BigDecimal |
The
computeconfiguration for thebudgetAmountfield in the form view isactiveRecord.staffSize * activeRecord.budgetPerCapita.
(II) constructFun
Reference: Related documentation can be found in "UX constructFun Attribute".
Objectives: By the end of this section:
When toggling the "project visibility" field, set the default value of staff size to 1.
In our expense management module, we also want to assist users in data entry. When the "project visibility" field is toggled, we want to set the staff size to a default value. Additionally, when "project visibility" is unset, we want to reset the staff size to zero. In this case, the value of a given field modifies other fields' values.
The constructFun mechanism provides a way for the client interface to update the form whenever a user fills in a field value, without saving anything to the database. To achieve this, add a Ux annotation to the given field and specify the constructFun value as a defined method, where the parameter data represents the record in the form view. Use @Function(openLevel ={FunctionOpenEnum.API}) to specify that this method can be called by the front-end. Any changes to data are reflected in the form:
package pro.shushi.oinone.trutorials.expenses.api.model;

import pro.shushi.pamirs.boot.base.ux.annotation.field.UxWidget;
import pro.shushi.pamirs.boot.base.ux.annotation.view.UxForm;
import pro.shushi.pamirs.meta.annotation.Field;
import pro.shushi.pamirs.meta.annotation.Function;
import pro.shushi.pamirs.meta.annotation.Model;
import pro.shushi.pamirs.meta.annotation.Prop;
import pro.shushi.pamirs.meta.base.IdModel;
import pro.shushi.pamirs.meta.enmu.FunctionOpenEnum;
import pro.shushi.pamirs.user.api.model.PamirsUser;

@Model.model(TestConstructFunModel.MODEL_MODEL)
@Model(displayName = "测试ConstructFun模型")
public class TestConstructFunModel extends IdModel {
    public static final String MODEL_MODEL="expenses.TestConstructFunModel";

    @Field(displayName = "名称")
    private String name;

    @Field.String
    @Field(displayName = "描述")
    private String description;

    @Field.many2one
    @Field(displayName = "用户")
    @UxForm.FieldWidget(@UxWidget(config = {@Prop(name = "constructFun",value = "constructFun4User")}))
    private PamirsUser user;

    @Function(openLevel ={FunctionOpenEnum.API})
    public TestConstructFunModel constructFun4User(TestConstructFunModel data){
        data.setName("Document for "+data.getUser().getName());
        data.setDescription("Default description for  "+data.getUser().getName());
        return data;
    }

}In this example, changing the partner also changes the name and description values. The user can then decide whether to modify the name and description further.
Exercise
Set the staff size value.
Create an
onProjectVisibilityChangemethod in theexpenses.ProjectInfomodel to set the staff size to 1 when the "project visibility" field is toggled, and clear the staff size field when it's unset.Based on previous learning, we know that UX Prop attributes can be set in custom views. Now, let's use this knowledge to further modify and optimize the form's custom view!
Tip:
A common pitfall with compute and constructFun mechanisms is trying to be "too clever" by adding excessive logic, which can confuse end users with over-automation.
compute is easier to debug since fields are set by a given method, making it easy to track when values are set. constructFun, however, can be confusing—it's hard to know the impact scope, and with multiple methods possibly setting the same field, it's difficult to track value sources.
Warning:
Any method called from the user interface should be defined as a public method.
1. Configuration Items for constructFun
By default, constructFun only submits the currently changed fields. To submit the entire form data or specific field data, you need to configure constructSubmitType as follows:
- Optional Values and Configuration Requirements
ALL: Submits the entire form data without requiring additional parameters.CUSTOM: Submits specified field data. When using this option, you must configuresubmitFieldswith field names separated by commas (e.g., "id,projectVisibility").
- XML Configuration Examples
- Submit the entire form:
<field span="1" priority="108" data="projectVisibility" label="Project Visibility"
constructFun="onProjectVisibilityChange" constructSubmitType='ALL' >- Submit specified fields:
<field span="1" priority="108" data="projectVisibility" label="Project Visibility"
       constructFun="onProjectVisibilityChange" constructSubmitType="CUSTOM"
submitFields="id,projectVisibility" >- Example of Model Field Definition
Configure via annotations on model fields:
@UxForm.FieldWidget(@UxWidget(config = {
    @Prop(name = "constructFun", value = "onProjectVisibilityChange"),
    @Prop(name = "constructSubmitType", value = "ALL") // Value can be "ALL" or "CUSTOM" here
}))Through the above configurations, you can flexibly control the data range submitted by constructFun to meet the needs of different scenarios.
In the next chapter, we'll learn how to trigger business logic when clicking buttons.