The previous chapter introduced how to create custom views for models with basic fields. However, in any real-world business scenario, we need more than one model. Additionally, associations between models are essential. It's easy to imagine one model containing customer information and another containing a list of users. In any existing business model, you will likely need to reference customers or users.
In our expense management module, for a project information model, we also need the following information:
- Project type
- Project sponsor
- External partners
- Received expense list
I. Many-to-One Relationship (many2one)
Reference: Documentation related to this topic can be found in "Many-to-One Relationship".
Objective: By the end of this section:
- A new
expenses.ProjectTypemodel should be created, along with corresponding menus, actions, and views.

- Two many-to-one (many2one) fields should be added to the
expenses.ProjectInfomodel: project sponsor and project type.
In our expense management module, we want to define the concept of project types. For example, project types can be procurement, R&D, and internal administration. Categorizing projects by type is a common business need, especially for more precise filtering.
One project can have one type, but the same type can be assigned to multiple projects. This is the relationship supported by the many-to-one (many2one) concept.
A many-to-one relationship is a simple link to another object. For example, to define a link to user.PamirsUser in our test model, we can write it in two ways:
@Field.many2one
@Field(displayName = "用户")
private PamirsUser user;@Field.many2one
@Field(displayName = "用户")
@Field.Relation(relationFields = {"userId"},referenceFields = {"id"})
private PamirsUser user;
@Field.Integer
@Field(displayName = "用户Id")
private Long userId;Without configuring @Field.Relation, a many-to-one (many2one) field will default to creating a field ending with Id (e.g., userId) in the current model, which is used to associate with the id of the target model. You can then easily access data of the associated object (user) as follows:
PamirsUser user =testModel.fieldQuery(TestModel::getUser).getUser();
user.getName();Warning: If referencing models from other modules, JAVA features require introducing corresponding dependencies
<dependency>
  <groupId>pro.shushi.pamirs.core</groupId>
  <artifactId>pamirs-user-api</artifactId>
</dependency>
<dependency>
  <groupId>pro.shushi.pamirs.core</groupId>
  <artifactId>pamirs-business-api</artifactId>
</dependency>Warning: If referencing models from other modules, Oinone features require declaring module dependencies
……
@Module(
    name = ExpensesModule.MODULE_NAME,
    displayName = "费用管理",
    version = "1.0.0",
    priority = 1,
    dependencies = {ModuleConstants.MODULE_BASE, UserModule.MODULE_MODULE, BusinessModule.MODULE_MODULE}
)
……
public class ExpensesModule implements PamirsModule {
……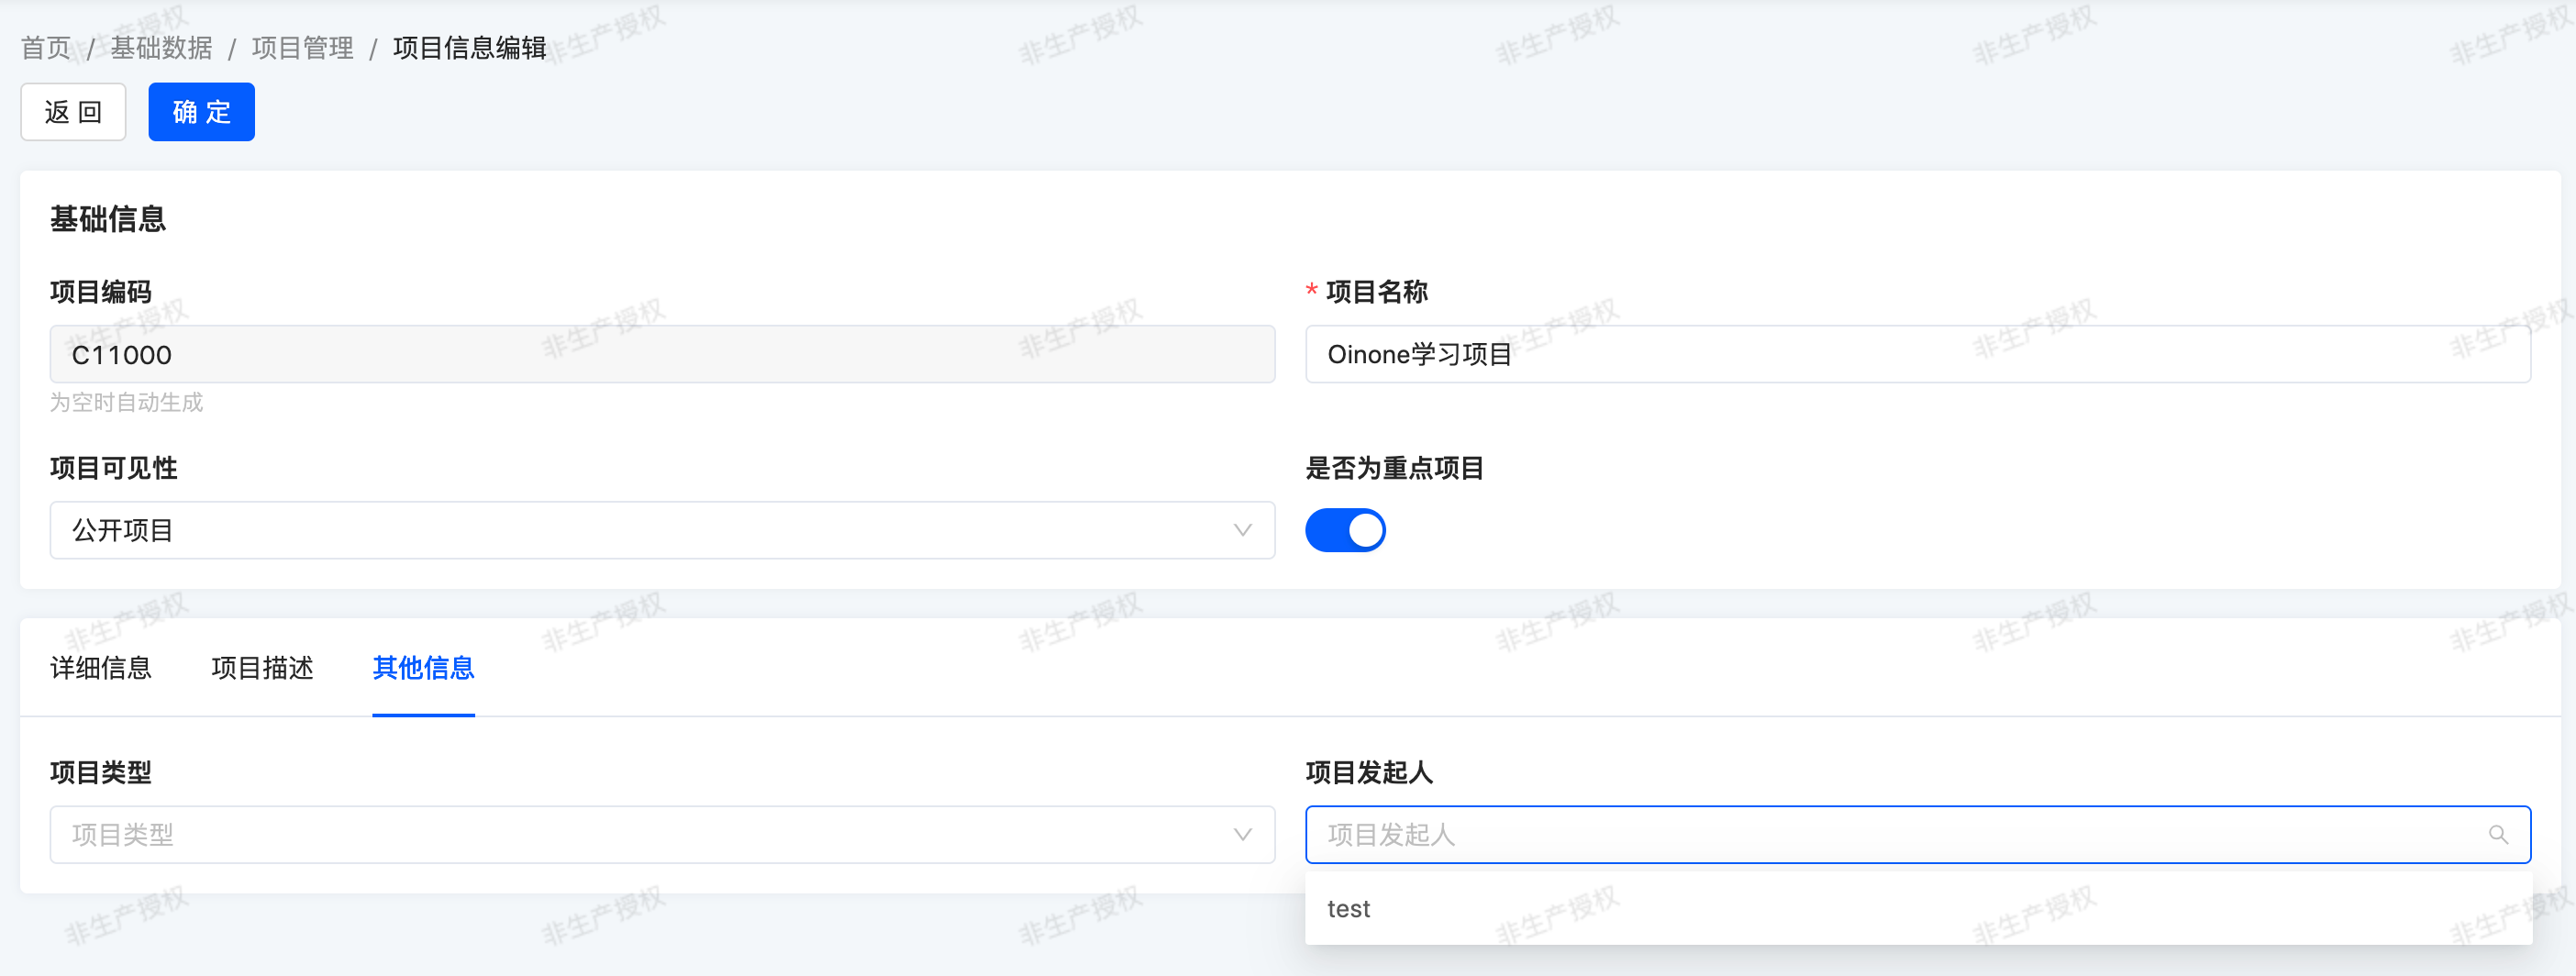
}In practical applications, in form views, a many-to-one relationship can be seen as a drop-down list.
Exercise
Add a project type table.
Create the
expenses.ProjectTypemodel and add the following fields:
| Field | Display Name | Type | Attributes |
|---|---|---|---|
| name | 名称 | STRING | required |
This exercise well reviews content from previous chapters: you need to create a model, set up the model, add an action and a menu, and create a view.
Restart the server again and refresh to see the results!
In the expense management module, we still lack three pieces of information about a project: project type, project sponsor, and external partners. External partners can be anyone, but on the other hand, the project sponsor is an employee of the company (i.e., an Oinone user).
In Oinone, we commonly use two models:
business.PamirsPartner: A partner is an entity or legal entity, which can be a company or an individual.user.PamirsUser: System users. Users can be "internal users" who can access Oinone's backend, or "portal users" who cannot access the backend but can only access the frontend (e.g., view their previous orders in e-commerce).
Exercise
Add project type and project sponsor.
Using
user.PamirsUserfrom the commonly used models above, add a project sponsor field to theexpenses.ProjectInfomodel.Using the model
expenses.ProjectType, add a project type field to theexpenses.ProjectInfomodel.They should be added to a new tab in the form view, as shown in the objectives of this section.
Tip:
We will temporarily ignore the import/export operations that automatically appear in the table view, which will be covered in detail in subsequent chapters.
Now let's look at other types of associations.
II. Many-to-Many Relationship (many2many)
Reference: Documentation related to this topic can be found in "Many-to-Many Relationship".
Objective: By the end of this section:
The expenses_project_info_rel_partner table should be created and several fields added:
mysql> desc expenses_project_info_rel_partner;
+-----------------+----------+------+-----+-------------------+-----------------------------------------------+
| Field           | Type     | Null | Key | Default           | Extra                                         |
+-----------------+----------+------+-----+-------------------+-----------------------------------------------+
| project_info_id | bigint   | NO   | PRI | NULL              |                                               |
| partner_id      | bigint   | NO   | PRI | NULL              |                                               |
| create_date     | datetime | NO   |     | CURRENT_TIMESTAMP | DEFAULT_GENERATED                             |
| write_date      | datetime | NO   |     | CURRENT_TIMESTAMP | DEFAULT_GENERATED on update CURRENT_TIMESTAMP |
| create_uid      | bigint   | YES  |     | NULL              |                                               |
| write_uid       | bigint   | YES  |     | NULL              |                                               |
| is_deleted      | bigint   | NO   | PRI | 0                 |                                               |
+-----------------+----------+------+-----+-------------------+-----------------------------------------------+
7 rows in set (0.01 sec)Add an "external partners" field to the expenses.ProjectInfo model
In our expense management module, we want to define the concept of project external partners, such as "X equipment supplier" or "X implementation supplier".
One project can have multiple external partners, and one external partner can be assigned to multiple projects. This is the relationship supported by the many-to-many (many2many) concept.
A many-to-many relationship is a two-way multiple relationship: any record on one side can be associated with any number of records on the other side. For example, to define a link to business.PamirsPartner in our expenses.TestModel model, we can write it in two ways:
(Ⅰ) Intermediate table using system default generation
@Field.many2many
@Field(displayName = "合作伙伴列表")
private List<PamirsPartner> partners;Default generation rules are as follows: The intermediate table will be stored in the database corresponding to the model where the field is defined, and the table name is spliced with _rel_ in alphabetical order of the associated model names.
The sample intermediate table name is: expenses_pamirs_partner_rel_test_model
This intermediate table will contain two fields, pamirs_partner_id and test_model_id, corresponding to the ids of the business.PamirsPartner model and the expenses.TestModel model, respectively.
This means multiple partners can be added to our test model. It behaves like a list of records, meaning you must use a loop when accessing data:
testModel.fieldQuery(TestModel::getPartners);
for(PamirsPartner partner: testModel.getPartners()){
    partner.getName();
}(Ⅱ) Intermediate table using a specific model
package pro.shushi.oinone.trutorials.expenses.api.model;

import pro.shushi.pamirs.meta.annotation.Field;
import pro.shushi.pamirs.meta.annotation.Model;
import pro.shushi.pamirs.meta.base.BaseRelation;

@Model.model(TestModelRelPartner.MODEL_MODEL)
@Model(displayName = "测试模型与合作伙伴关联表")
public class TestModelRelPartner extends BaseRelation {

    public static final String MODEL_MODEL="expenses.TestModelRelPartner";
    @Field(displayName = "测试模型Id")
    private Long testModelId;

    @Field(displayName = "合作伙伴Id")
    private Long partnerId;

}@Field(displayName = "合作伙伴列表")
@Field.many2many(relationFields = {"testModelId"},referenceFields = {"partnerId"},throughClass =TestModelRelPartner.class)
private List<PamirsPartner> partners;We specify using the TestModelRelPartner model to define the intermediate table. In this intermediate table, the test_model_id field corresponds to the ID of the expenses.TestModel model, and the partner_id field corresponds to the ID of the business.PamirsPartner model.
Tip: Partner data preparation
Partners can be managed and maintained in [Management Center - Partners - Company|Individual]. Add a "Shushi Oinone" company and "Chen Xiaoyou" individual for testing.

Exercise
Add a project and partner association table.
Create the
expenses.ProjectInfoRelPartnermodel and add the following fields:
| Field | Display Name | Type | Java Type |
|---|---|---|---|
| projectInfoId | 项目信息Id | INTEGER | Long |
| partnerId | 合作伙伴Id | INTEGER | Long |
Exercise
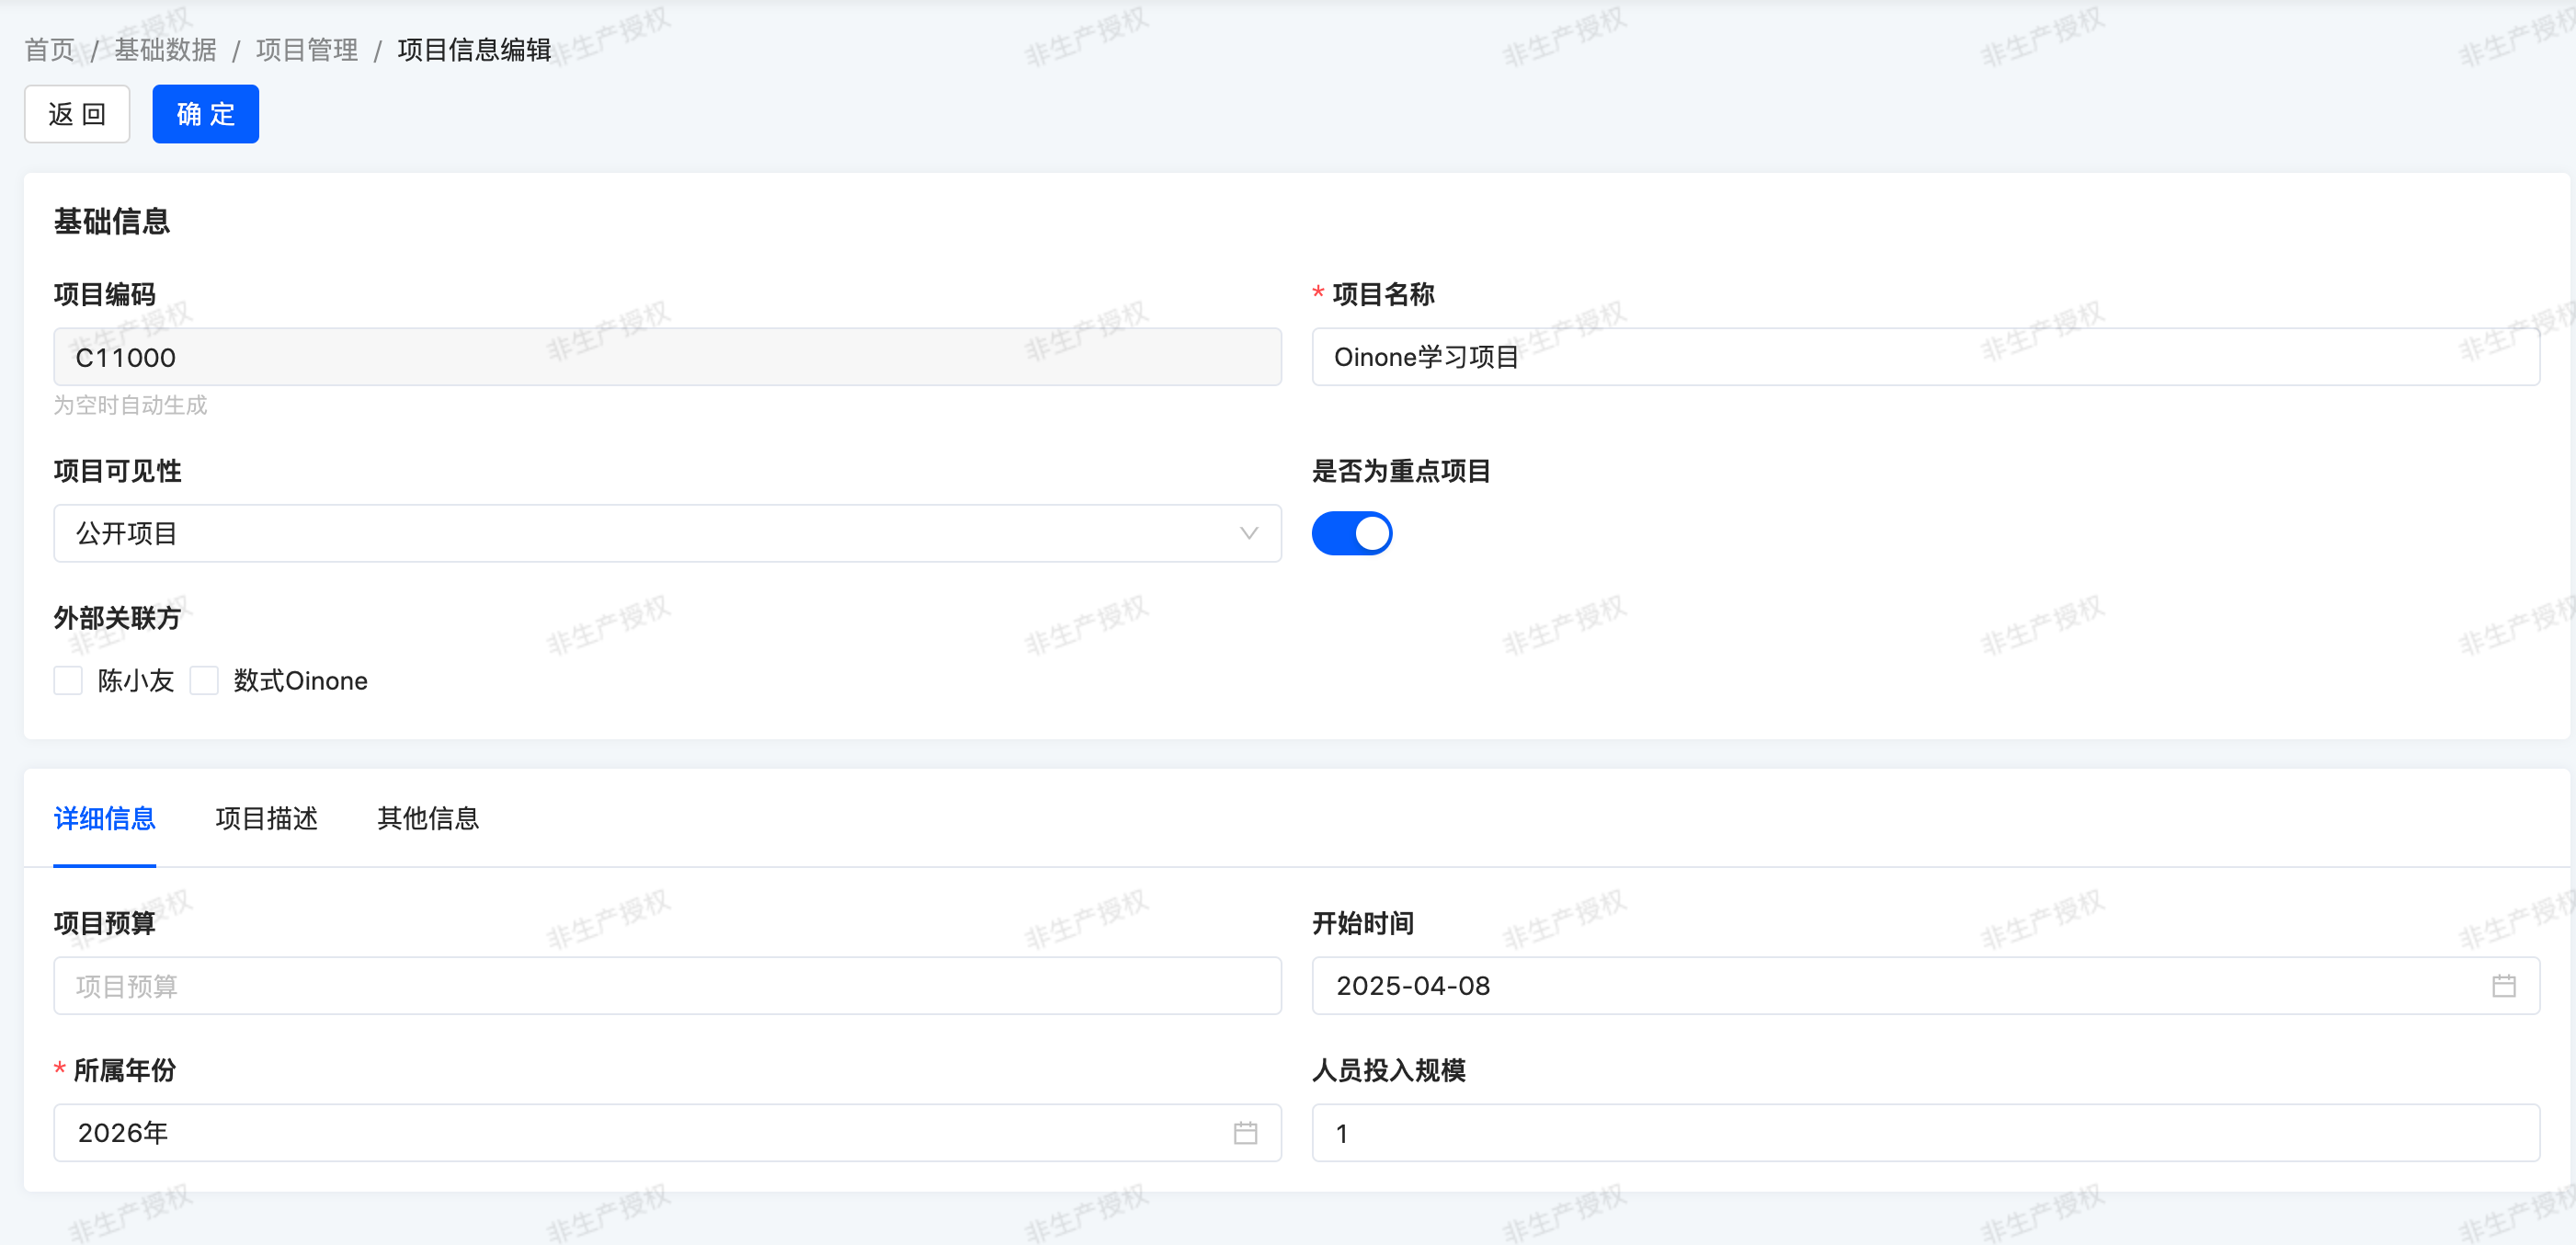
Add external partners.
Using
user.PamirsPartnerfrom the commonly used models above, add an external partners field (partners) to theexpenses.ProjectInfomodel.Add the
partnersfield to yourexpenses.ProjectInfomodel and its form and list views.Tip: In the view, use the
widget="Checkbox" optionLabel="activeRecord.name"attribute as shown here. Thewidgetattribute will be explained in detail in subsequent training chapters. Now, you can try adding and removing this attribute to see the effect.
III. One-to-Many Relationship (one2many)
Objective: By the end of this section:
- A new
expenses.ExpenseBillmodel should be created. - An expense field should be added to the
expenses.ProjectInfomodel.
In our expense management module, we want to define the concept of expense bills. An expense bill is a record of a project's budget usage.
One expense bill corresponds to one project, but the same project can have multiple expense bills. Here, the concept of many-to-one (many2one) appears again. However, in this case, we want to display a list of expense bills for a given project, so we will use the concept of one-to-many (one2many).
A one-to-many relationship is the reverse of a many-to-one relationship. For example, we defined a link to the user.PamirsUser model through the userId field in the test model. We can define the reverse relationship, i.e., the list of test models associated with our user:
@Field(displayName = "测试模型列表")
@Field.one2many
@Field.Relation(relationFields = {"id"},referenceFields = {"userId"})
private List<TestModel> testModels;Tip:
Because a one-to-many (one2many) relationship is a virtual relationship, it essentially defines a many-to-one (many2one) in the associated model. As in the example, referenceFields defines userId, i.e., adding a userId field in TestModel.
According to convention, one-to-many (one2many) fields are typically of the collection type List. They behave like a list of records, meaning you must use a loop when accessing data:
user.fieldQuery(PamirsUser::getTestModels);
for(TestModel testModel: user.getTestModels()){
    testModel.getName();
}Warning:
In reality, the user module does not depend on the expense management module, so the one-to-many relationship field in the example cannot be defined in the user.PamirsUser model; this is only for demonstrating the code writing.
Exercise
Add an expense bill table.
Create the
expenses.ExpenseBillmodel and add the following fields:
| Field | Display Name | Type | Java Type | Attributes |
|---|---|---|---|---|
| code | 报销单号 | STRING | String | invisible (not displayed) Code is automatically generated according to rules |
| item | 费用项 | STRING | String | required |
| reason | 事由 | STRING | String | required |
| amount | 报销金额 | MONEY | BigDecimal | required |
| attachment | 附件(电子发票) | TEXT | List<String> | Field attributes: serialize = Field.serialize.COMMA (Serialized and split by ",") store = NullableBoolEnum.TRUE (stored) multi = true (multivalue) required = true (required) UX attributes: @UxForm.FieldWidget(@UxWidget(widget = "Upload")) @UxTable.FieldWidget(@UxWidget(widget = "Upload")) @UxDetail.FieldWidget(@UxWidget(widget = "Upload")) |
| projectInfoId | 项目Id | INTEGER | Long | invisible (not displayed) |
Add the
expenseBillsfield to yourexpenses.ProjectInfomodel and its form view as shown in the objectives of this section.This exercise well reviews content from previous chapters: how to add the
expenseBillsfield to your custom form view by referring to the default view. In the default form view, this field is an inline one2many table view, which will be explained in detail in subsequent training chapters. Now, you can try to learn from the default view to customize the view and see the effect.
Here are several important points to note. First, not all models need actions or menus. Some models are designed to be accessed only through another model. This is the case in our exercise: expense bills are always accessed through project information.
Second, although the projectInfoId field is not displayed, we add values to it in the view. How does Oinone know which project our expense bill is associated with? This is the beauty of using the Oinone framework: sometimes certain things are defined implicitly. When we create a record through a one-to-many (one2many) field, the corresponding many-to-one (many2one) field is automatically filled for convenience.
Restart the server again and refresh to see the results!
Are you still with us? This chapter is definitely not the easiest. It introduces several new concepts while relying on all previously covered content. Don't worry, the next chapter will be easier 😉