I. Overview
There are multiple ways to install Oinone Math based on the intended usage scenario. For developers of Oinone Math and Oinone Math staff, the preferred method is still to install using the source code.
II. Adapting the Environment for Tutorials
(Ⅰ) Backend Development
So, let's push your changes to the tutorial code repository: oinone/oinone-backend-tutorials. Like the oinone/oinone-backend-starter repository, it will start independently and become part of the whole.
Tip: Independent Module Launch
Modules of Oinone Math support independent operation and do not depend on the Oinone designer module.
Follow the same process as the oinone/oinone-backend-starter repository to clone the oinone/oinone-backend-tutorials repository on your machine with the following command:
git clone git@github.com:oinone/oinone-backend-tutorials.gitConfigure your forked repository and Git to push changes to your forked repository instead of the main repository.
Associate Git with your forked repository Visit github.com/oinone/oinone-backend-tutorials, then click the "Fork" button to create a forked repository of this repository under your account.
In the following command, replace <your_github_account> with the GitHub account name you used when creating the forked repository.
cd /TutorialsPath
git remote add dev git@github.com:<your_github_account>/oinone-backend-tutorials.gitThat's it! Now your environment is ready to run Oinone from the source code, and you have successfully created a repository. This will enable you to push your work to GitHub.
(Ⅱ) Frontend Development
So, let's push your changes to the tutorial code repository: oinone/oinone-frontend-tutorials. Like the oinone/oinone-frontend-starter repository, it can start independently and replace oinone-frontend-starter to provide frontend services.
Follow the same process as the oinone/oinone-frontend-starter repository to clone the oinone/oinone-frontend-tutorials repository on your machine with the following command:
git clone git@github.com:oinone/oinone-frontend-tutorials.gitConfigure your forked repository and Git to push changes to your forked repository instead of the main repository.
Associate Git with your forked repository Visit github.com/oinone/oinone-frontend-tutorials, then click the "Fork" button to create a forked repository of this repository under your account.
In the following command, replace <your_github_account> with the GitHub account name you used when creating the forked repository.
cd /TutorialsPath
git remote add dev git@github.com:<your_github_account>/oinone-frontend-tutorials.gitThat's it! Now your environment is ready to run Oinone from the source code, and you have successfully created a repository. This will enable you to push your work to GitHub.
III. Additional Backend Tools
(Ⅰ) IDEA Tool and Plugin Installation
1. Please download the corresponding plugin according to your Idea version
| IDEA Version | Corresponding Plugin |
|---|---|
| 2023.2 | pamirs-intellij-plugin-2023.2.zip |
| 2023.3 | pamirs-intellij-plugin-2023.3.zip |
| 2024.1 | pamirs-intellij-plugin-2024.1.zip |
| 2024.2 | pamirs-intellij-plugin-2024.2.zip |
| 2024.3 | pamirs-intellij-plugin-2024.3.zip |
| 2025.1 | pamirs-intellij-plugin-2025.1.zip |
| 2025.2 | pamirs-intellij-plugin-2025.2.zip |
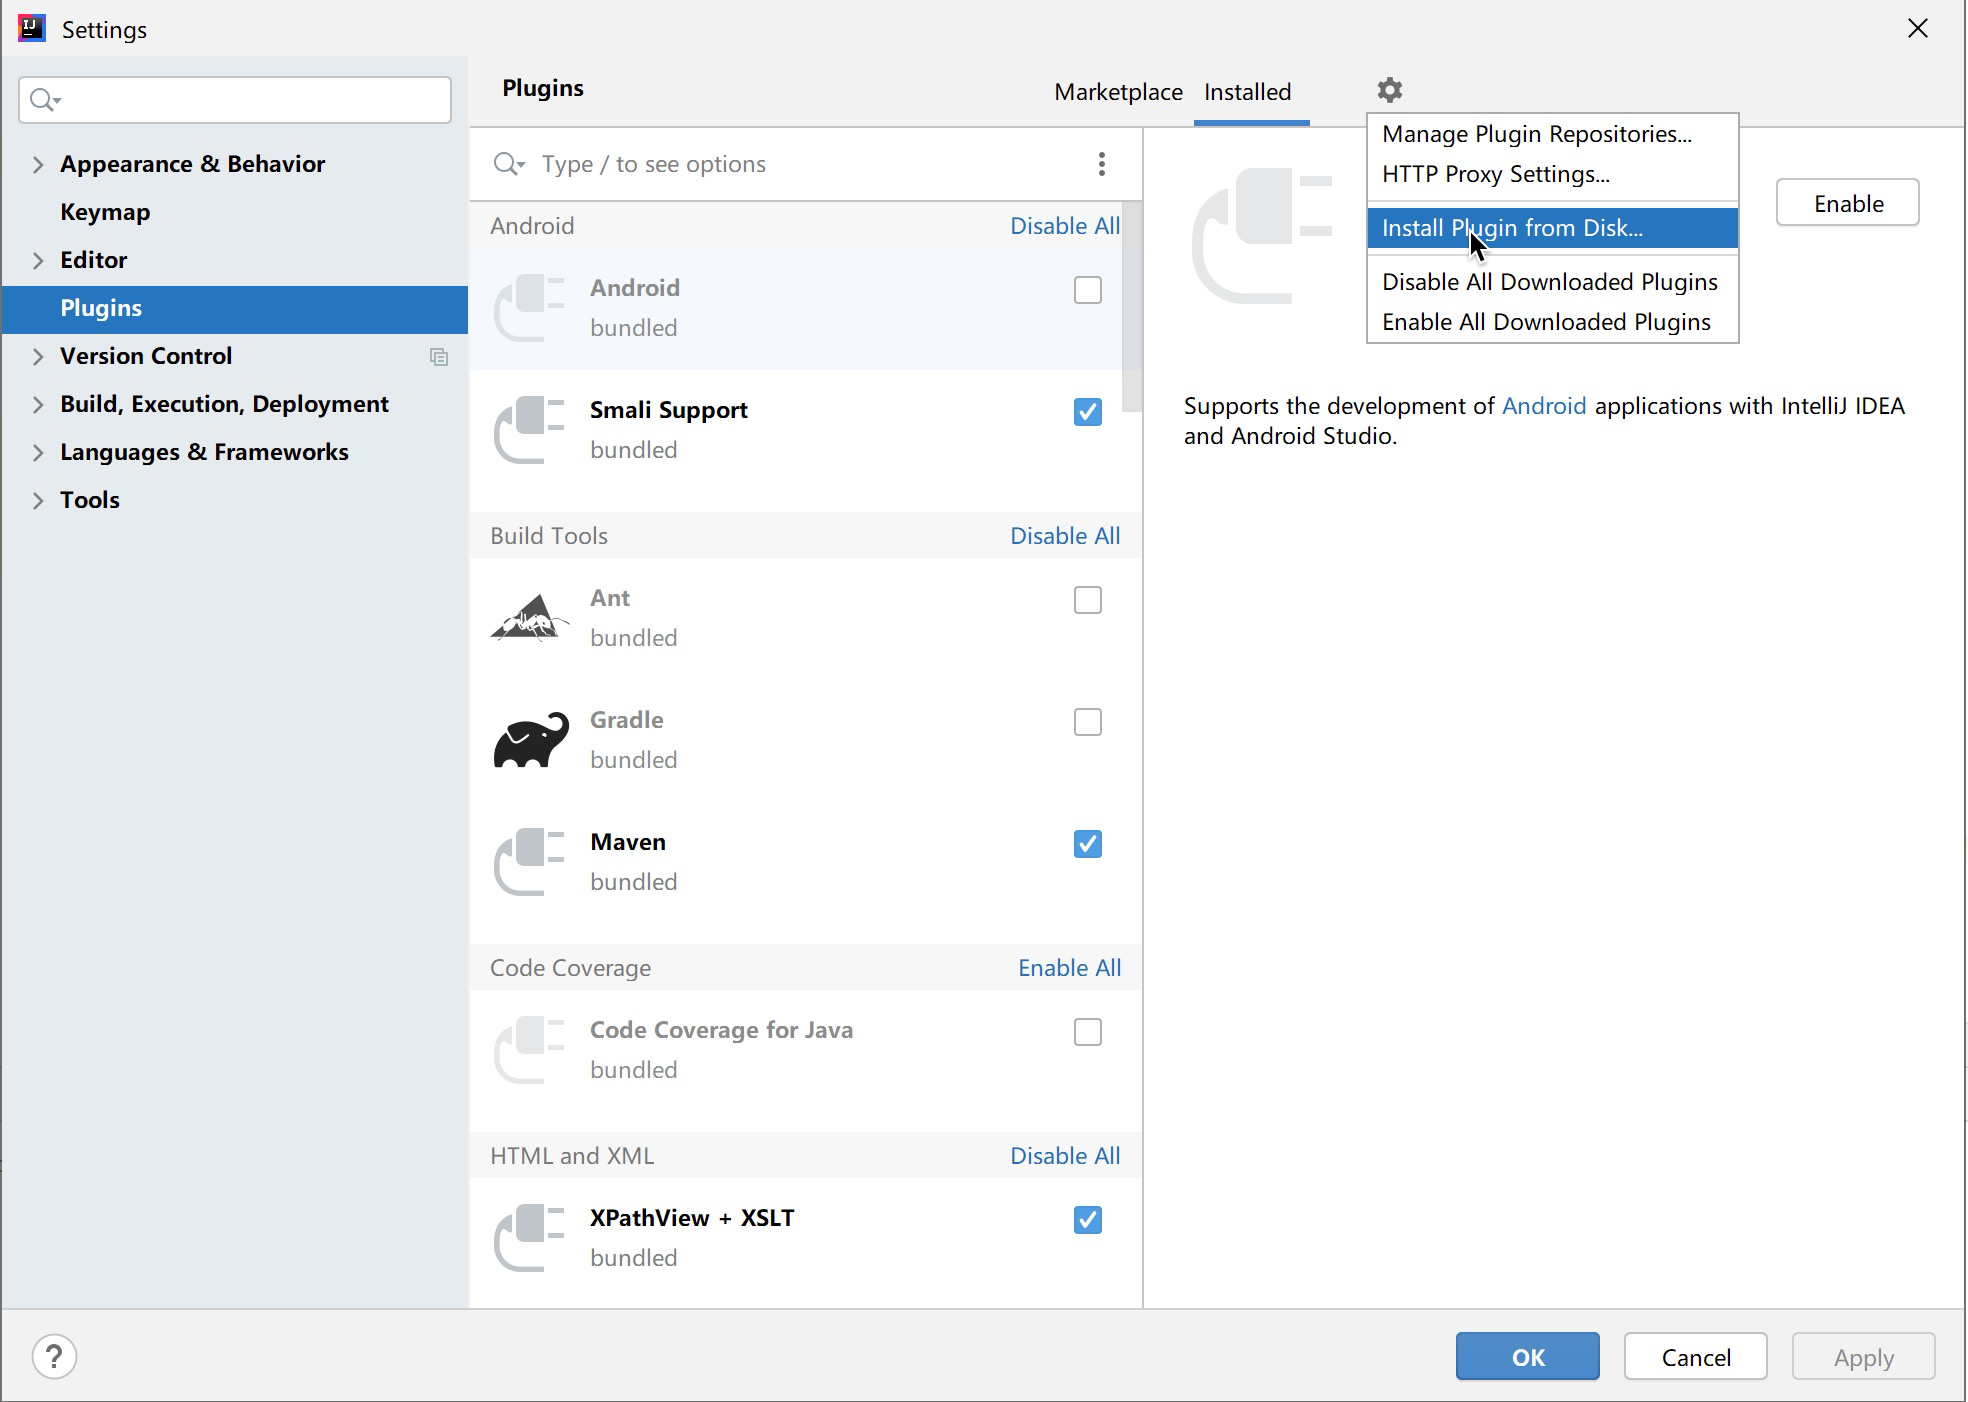
Mac: Click the Preferences menu (shortcut command+,)
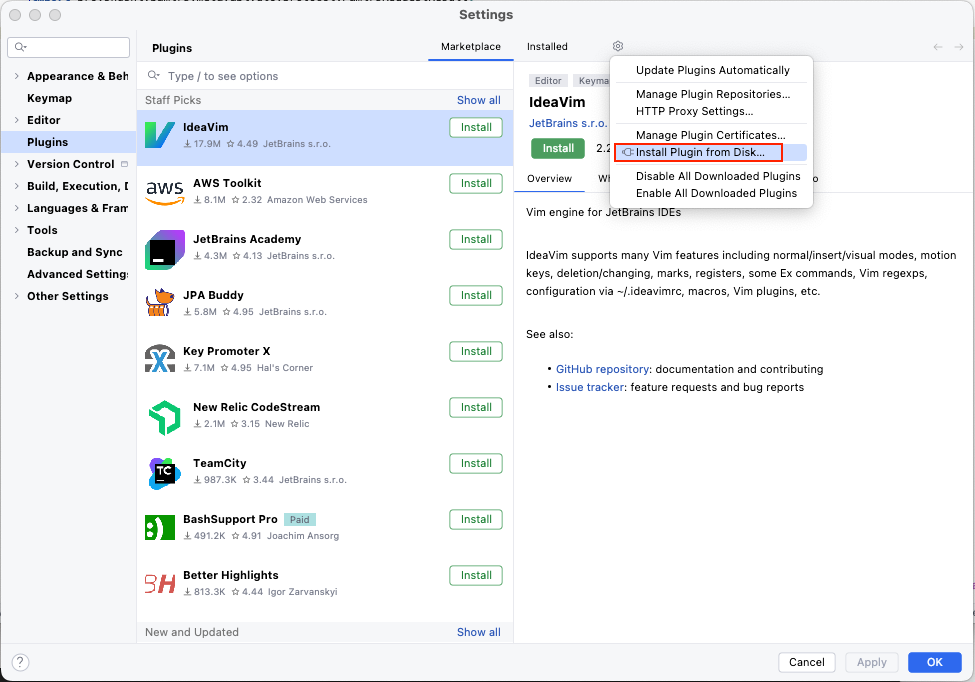
Windows: Click the menu item File => Settings => Plugins
Tip
When installing the plugin, select the .zip file without unzipping it.
(Ⅱ) DB GUI Tool
Many people like to use Datagrip, MySQLWorkbench, DBEaver for database management tools. You can choose one according to your preference.
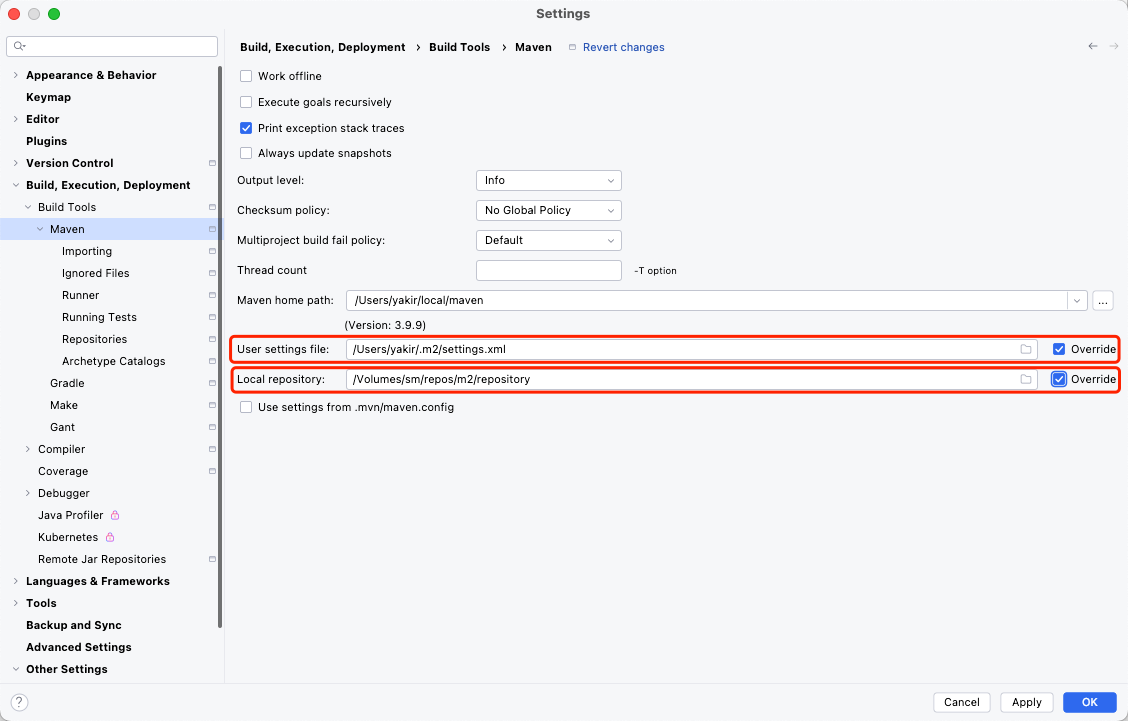
(Ⅲ) Maven Tool
1. Installation
Refer to Maven Installation and Precautions
2. Configuration
It is recommended to place the Maven configuration file settings.xml in the .m2 folder under the user directory.
If there is no user-level maven configuration, you may need to configure maven preferences in IDEA.
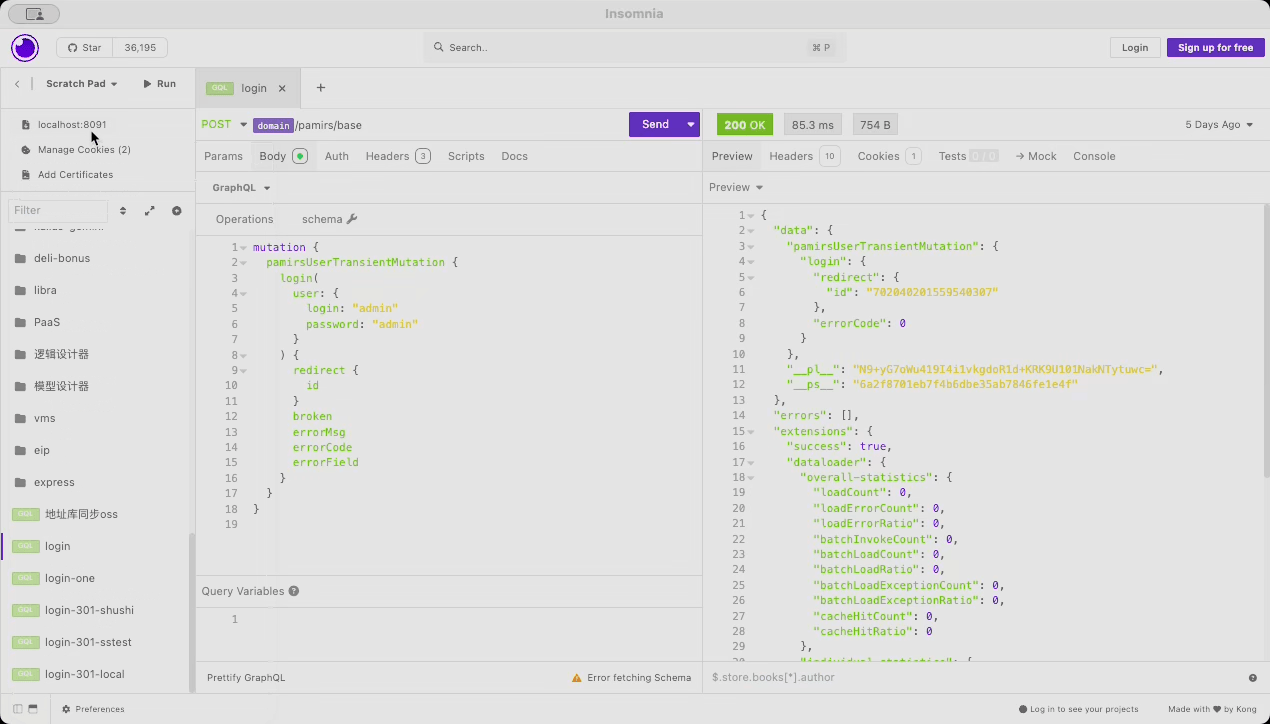
(Ⅳ) GraphQL API Debugging Tool
Common GraphQL debugging tools include Postman, Insomnia, etc. When using these tools, you can combine the Environment and placeholder functions to facilitate interface debugging.
IV. Additional Frontend Tools
Refer to the frontend Environment Configuration Advanced