I. Preparation
- Obtain the Enterprise Edition license
- Obtain the private Maven/NPM repository address and account (for developers only)
II. Upgrade the Oinone Designer to the Enterprise Edition
The reference steps for the upgrade are as follows:
- Create a
pksdirectory in the same level directory asdocker-compose.ymland put the Enterprise Edition license in it. - Use
volumesto mount the license into thepksdirectory. - Modify the
.envfile to configure the license information. - Restart the
Oinonedesigner.
(I) Modify docker-compose.yml to Mount the License
services:
  backend:
    container_name: oinone-backend
    volumes:
- ./pks:/opt/pamirs/pks(II) Modify the .env File to Configure License Information
# Enter your subject name
LIC_SUBJECT=<subject>
# Enter your license file name
LIC_FILE=pks/<license.lic>Note:
For more information about the .env file, please refer to: Oinone Designer Configuration Guide
(III) Restart the Oinone Designer
# MacOS/Linux
docker compose down -v
docker compose up -d

# Windows
docker compose -p oinone down -v
docker compose -p oinone up -dIII. Upgrade the Business Application to the Enterprise Edition
(I) Add Enterprise Edition Dependencies to the Business Application
Remove Community Edition Dependency Management
<properties>
  <!-- oinone -->
  <oinone-pamirs.version>7.2.0</oinone-pamirs.version>

  <!-- distribution -->
  <pamirs.distribution.version>7.2.0</pamirs.distribution.version>
</properties>

<dependencyManagement>
  <dependencies>
    <dependency>
        <groupId>pro.shushi.pamirs</groupId>
        <artifactId>pamirs-k2</artifactId>
        <version>${oinone-pamirs.version}</version>
        <type>pom</type>
        <scope>import</scope>
    </dependency>
    <dependency>
        <groupId>pro.shushi.pamirs</groupId>
        <artifactId>pamirs-framework</artifactId>
        <version>${oinone-pamirs.version}</version>
        <type>pom</type>
        <scope>import</scope>
    </dependency>
    <dependency>
        <groupId>pro.shushi.pamirs.boot</groupId>
        <artifactId>pamirs-boot-dependencies</artifactId>
        <version>${oinone-pamirs.version}</version>
        <type>pom</type>
        <scope>import</scope>
    </dependency>
    <dependency>
        <groupId>pro.shushi.pamirs.core</groupId>
        <artifactId>pamirs-core-dependencies</artifactId>
        <version>${oinone-pamirs.version}</version>
        <type>pom</type>
        <scope>import</scope>
    </dependency>
    <dependency>
        <groupId>pro.shushi.pamirs.middleware</groupId>
        <artifactId>pamirs-middleware-dependencies</artifactId>
        <version>${oinone-pamirs.version}</version>
        <type>pom</type>
        <scope>import</scope>
    </dependency>
    <dependency>
        <groupId>pro.shushi.pamirs</groupId>
        <artifactId>pamirs-distribution</artifactId>
        <version>${pamirs.distribution.version}</version>
        <type>pom</type>
        <scope>import</scope>
    </dependency>
  </dependencies>
</dependencyManagement>Add Enterprise Edition Dependency Management
You can click to view the latest version: Oinone Version Update Log
<properties>
  <!-- oinone -->
  <oinone-bom.version>7.2.0</oinone-bom.version>
</properties>

<dependencyManagement>
  <dependency>
    <groupId>pro.shushi</groupId>
    <artifactId>oinone-bom</artifactId>
    <version>${oinone-bom.version}</version>
    <type>pom</type>
    <scope>import</scope>
  </dependency>
</dependencyManagement>Add Enterprise Edition Dependencies to the Startup Project
Available Dependencies for the Seed Edition
<dependencies>
  <!-- seed version -->
  <dependency>
    <groupId>pro.shushi.pamirs.framework</groupId>
    <artifactId>pamirs-framework-turbo-ee</artifactId>
  </dependency>

  <!-- sys_setting enterprise version -->
  <dependency>
    <groupId>pro.shushi.pamirs.core</groupId>
    <artifactId>pamirs-sys-setting-ee</artifactId>
  </dependency>
</dependencies>Available Dependencies for the Standard Edition
<dependencies>
  <!-- seed version -->
  <dependency>
    <groupId>pro.shushi.pamirs.framework</groupId>
    <artifactId>pamirs-framework-turbo-ee</artifactId>
  </dependency>

  <!-- sys_setting enterprise version -->
  <dependency>
    <groupId>pro.shushi.pamirs.core</groupId>
    <artifactId>pamirs-sys-setting-ee</artifactId>
  </dependency>

  <!-- standard version -->
  <!-- auth -->
  <dependency>
      <groupId>pro.shushi.pamirs.core</groupId>
      <artifactId>pamirs-auth3-ee-core</artifactId>
  </dependency>
  <dependency>
      <groupId>pro.shushi.pamirs.core</groupId>
      <artifactId>pamirs-auth3-ee-view</artifactId>
  </dependency>
  <dependency>
      <groupId>pro.shushi.pamirs.core</groupId>
      <artifactId>pamirs-auth3-ee-rbac-core</artifactId>
  </dependency>
  <dependency>
      <groupId>pro.shushi.pamirs.core</groupId>
      <artifactId>pamirs-auth3-ee-rbac-view</artifactId>
  </dependency>

  <!-- apps enterprise version -->
  <dependency>
      <groupId>pro.shushi.pamirs.core</groupId>
      <artifactId>pamirs-apps-ee</artifactId>
  </dependency>

  <!-- designer_metadata -->
  <dependency>
      <groupId>pro.shushi.pamirs.designer</groupId>
      <artifactId>pamirs-designer-metadata-core</artifactId>
  </dependency>
</dependencies>Available Dependencies for the Professional Edition
PS: All dependencies of the Seed Edition and Standard Edition can be used.
<dependencies>
  <!-- seed version -->
  <dependency>
    <groupId>pro.shushi.pamirs.framework</groupId>
    <artifactId>pamirs-framework-turbo-ee</artifactId>
  </dependency>

  <!-- sys_setting enterprise version -->
  <dependency>
    <groupId>pro.shushi.pamirs.core</groupId>
    <artifactId>pamirs-sys-setting-ee</artifactId>
  </dependency>

  <!-- standard version -->
  <!-- auth -->
  <dependency>
      <groupId>pro.shushi.pamirs.core</groupId>
      <artifactId>pamirs-auth3-ee-core</artifactId>
  </dependency>
  <dependency>
      <groupId>pro.shushi.pamirs.core</groupId>
      <artifactId>pamirs-auth3-ee-view</artifactId>
  </dependency>
  <dependency>
      <groupId>pro.shushi.pamirs.core</groupId>
      <artifactId>pamirs-auth3-ee-rbac-core</artifactId>
  </dependency>
  <dependency>
      <groupId>pro.shushi.pamirs.core</groupId>
      <artifactId>pamirs-auth3-ee-rbac-view</artifactId>
  </dependency>

  <!-- apps enterprise version -->
  <dependency>
      <groupId>pro.shushi.pamirs.core</groupId>
      <artifactId>pamirs-apps-ee</artifactId>
  </dependency>

  <!-- designer_metadata -->
  <dependency>
      <groupId>pro.shushi.pamirs.designer</groupId>
      <artifactId>pamirs-designer-metadata-core</artifactId>
  </dependency>

  <!-- professional version -->
  <dependency>
    <groupId>pro.shushi.pamirs.framework</groupId>
    <artifactId>pamirs-framework-meta-virtual</artifactId>
  </dependency>

  <!-- data_audit -->
  <dependency>
    <groupId>pro.shushi.pamirs.core</groupId>
    <artifactId>pamirs-data-audit-core</artifactId>
  </dependency>

  <!-- print -->
  <dependency>
    <groupId>pro.shushi.pamirs.core</groupId>
    <artifactId>pamirs-print-core</artifactId>
  </dependency>
  <dependency>
    <groupId>pro.shushi.pamirs.core</groupId>
    <artifactId>pamirs-print-view</artifactId>
  </dependency>
</dependencies>Available Dependencies for the Enterprise Edition
PS: All dependencies of the Seed Edition, Standard Edition, and Professional Edition can be used.
<dependencies>
  <!-- seed version -->
  <dependency>
    <groupId>pro.shushi.pamirs.framework</groupId>
    <artifactId>pamirs-framework-turbo-ee</artifactId>
  </dependency>

  <!-- sys_setting enterprise version -->
  <dependency>
    <groupId>pro.shushi.pamirs.core</groupId>
    <artifactId>pamirs-sys-setting-ee</artifactId>
  </dependency>

  <!-- standard version -->
  <!-- auth -->
  <dependency>
      <groupId>pro.shushi.pamirs.core</groupId>
      <artifactId>pamirs-auth3-ee-core</artifactId>
  </dependency>
  <dependency>
      <groupId>pro.shushi.pamirs.core</groupId>
      <artifactId>pamirs-auth3-ee-view</artifactId>
  </dependency>
  <dependency>
      <groupId>pro.shushi.pamirs.core</groupId>
      <artifactId>pamirs-auth3-ee-rbac-core</artifactId>
  </dependency>
  <dependency>
      <groupId>pro.shushi.pamirs.core</groupId>
      <artifactId>pamirs-auth3-ee-rbac-view</artifactId>
  </dependency>

  <!-- apps enterprise version -->
  <dependency>
      <groupId>pro.shushi.pamirs.core</groupId>
      <artifactId>pamirs-apps-ee</artifactId>
  </dependency>

  <!-- designer_metadata -->
  <dependency>
      <groupId>pro.shushi.pamirs.designer</groupId>
      <artifactId>pamirs-designer-metadata-core</artifactId>
  </dependency>

  <!-- professional version -->
  <dependency>
    <groupId>pro.shushi.pamirs.framework</groupId>
    <artifactId>pamirs-framework-meta-virtual</artifactId>
  </dependency>

  <!-- data_audit -->
  <dependency>
    <groupId>pro.shushi.pamirs.core</groupId>
    <artifactId>pamirs-data-audit-core</artifactId>
  </dependency>

  <!-- print -->
  <dependency>
    <groupId>pro.shushi.pamirs.core</groupId>
    <artifactId>pamirs-print-core</artifactId>
  </dependency>
  <dependency>
    <groupId>pro.shushi.pamirs.core</groupId>
    <artifactId>pamirs-print-view</artifactId>
  </dependency>

  <!-- enterprise version -->
  <!-- fusion -->
  <dependency>
    <groupId>pro.shushi.pamirs.fusion</groupId>
    <artifactId>pamirs-fusion-lite-core</artifactId>
  </dependency>
  <dependency>
    <groupId>pro.shushi.pamirs.fusion</groupId>
    <artifactId>pamirs-fusion-view</artifactId>
  </dependency>
  <dependency>
    <groupId>pro.shushi.pamirs.fusion</groupId>
    <artifactId>pamirs-fusion-orm-client</artifactId>
  </dependency>

  <!-- sso -->
  <dependency>
    <groupId>pro.shushi.pamirs.core</groupId>
    <artifactId>pamirs-sso-server</artifactId>
  </dependency>
  <dependency>
    <groupId>pro.shushi.pamirs.core</groupId>
    <artifactId>pamirs-sso-client</artifactId>
  </dependency>
</dependencies>(II) Modify the application.yml Configuration
Place the License in the Project Root Directory
Taking the oinone-backend-tutorials provided in the tutorial as an example, its directory structure is as follows:
.
├── docker
│   └── docker-compose.yml
├── oinone-tutorials-boot
│   ├── pom.xml
│   └── src
│       └── main
│           ├── java
│           └── resources
│               ├── application.yml
│               └── config
│                   └── application-dev.yml
├── pom.xml
├── pks
│   └── license.lic
├── LICENSE.txt
└── README.mdConfigure License Information
Configure the license information in application.yml:
Note:
Here, the configuration in application.yml is modified, not application-dev.yml.
pamirs:
  license:
    # Enter your subject name
    subject: <subject>
    # Enter your license file name
path: pks/<license.lic>For more license configurations, please refer to: Common Questions about Using the Oinone License
Note:
If the license file cannot be read correctly due to the directory hierarchy or relative position, it is recommended to specify your license using an absolute path.
Configure the Startup Modules
Add the corresponding modules of the corresponding dependencies according to the license version in application.yml. The following are the module configurations available for different versions, which need to be configured in combination with the new dependencies you added.
Note:
Here, the configuration in application.yml is modified, not application-dev.yml.
New Available Modules for the Standard Edition
pamirs:
  boot:
    modules:
      # other modules
      # ...
      # standard version modules
- designer_metadataNew Available Modules for the Professional Edition
pamirs:
  boot:
    modules:
      # other modules
      # ...
      # standard version modules
      - designer_metadata
      # professional version modules
      - data_audit
- printAvailable Modules for the Enterprise Edition
pamirs:
  boot:
    modules:
      # other modules
      # ...
      # standard version modules
      - designer_metadata
      # professional version modules
      - data_audit
      - print
      # enterprise version modules
      - fusion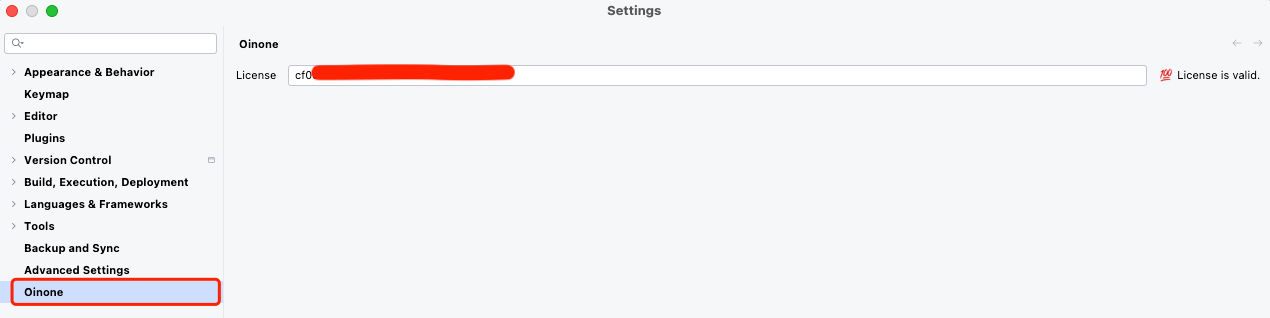
- ssoIV. IDEA Development Verification
Click in sequence: Settings -> Oinone and enter the license code.
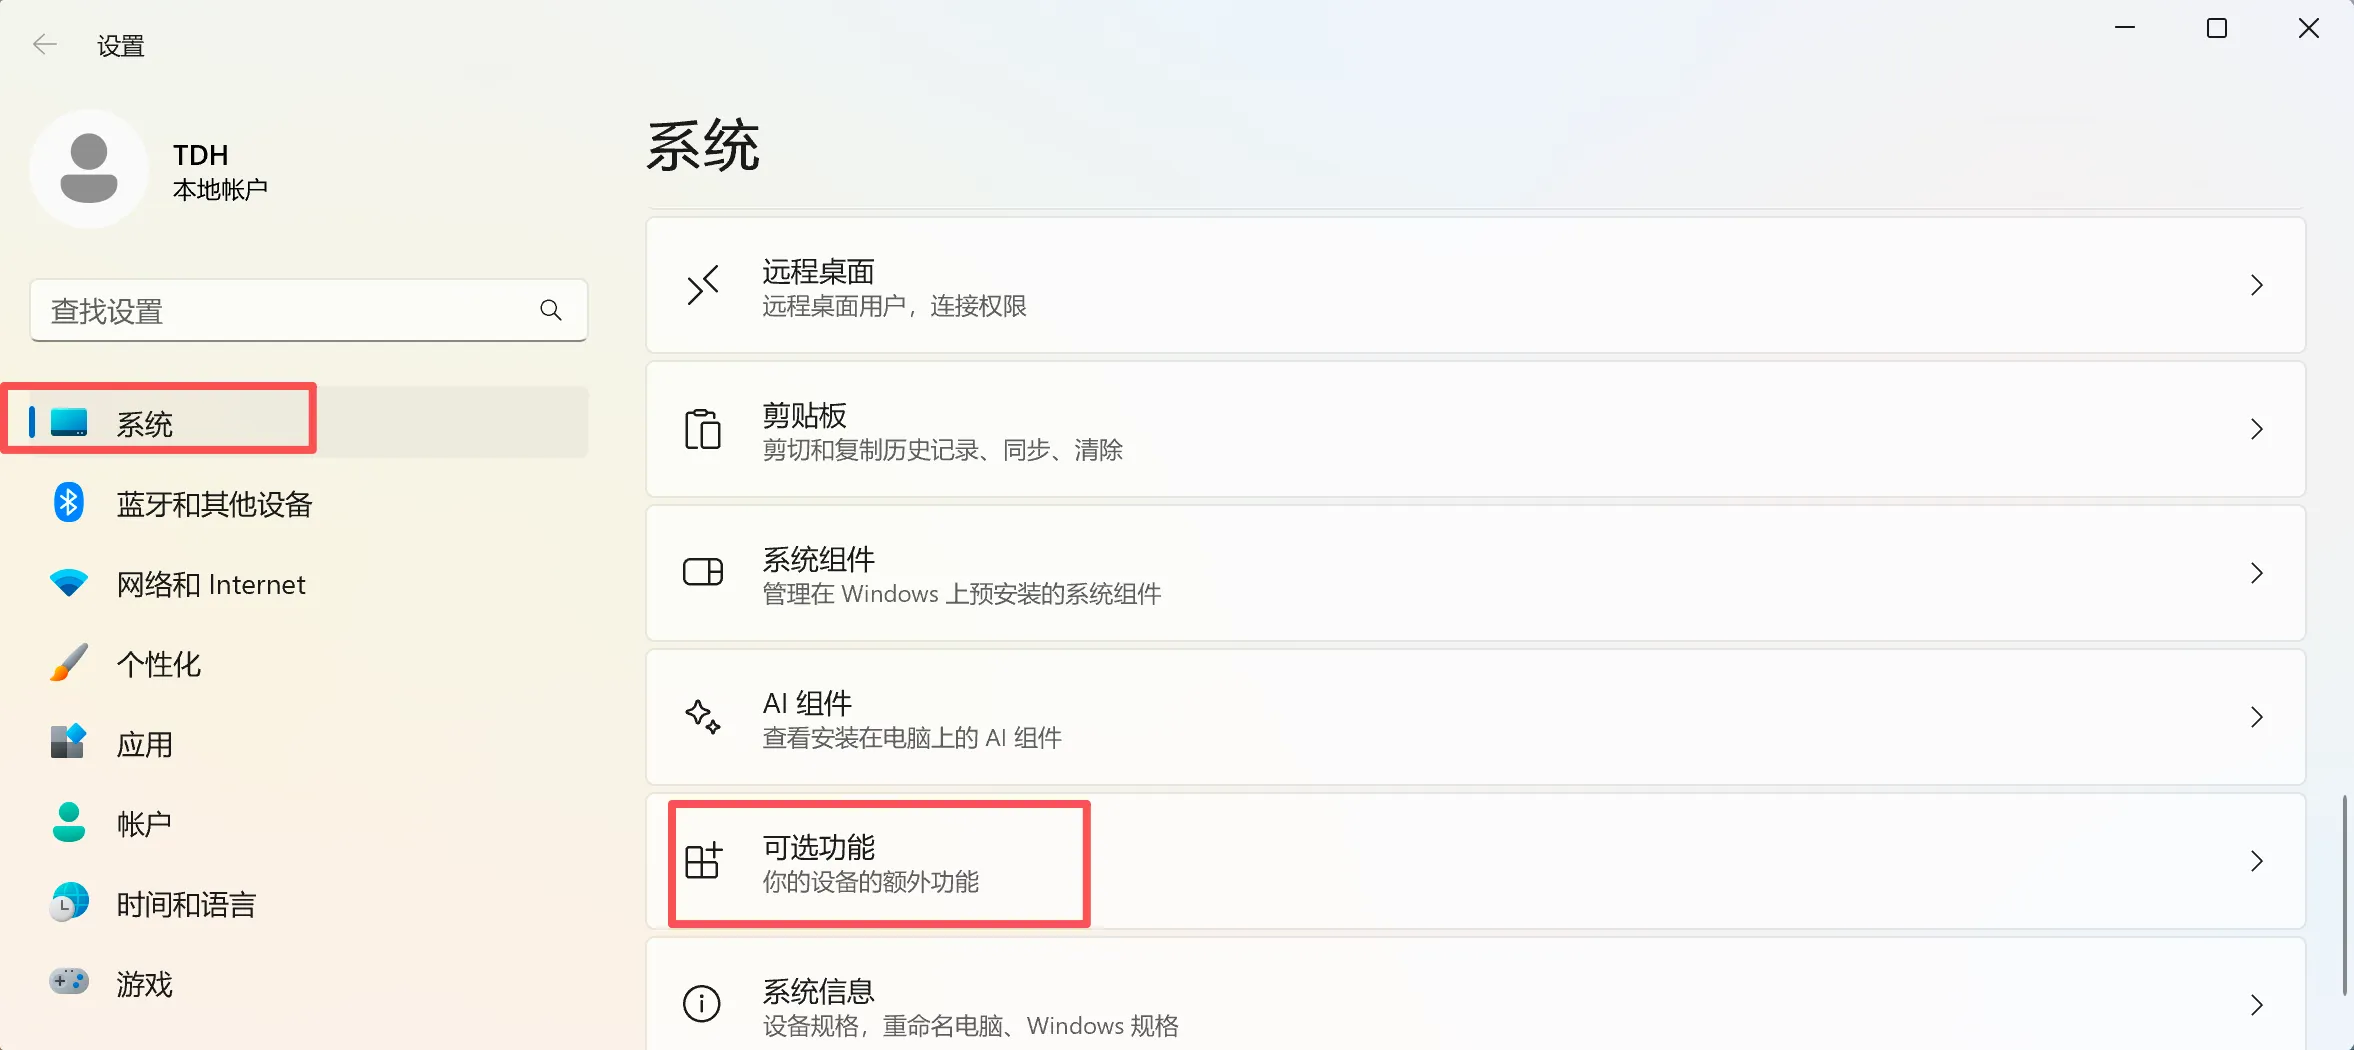
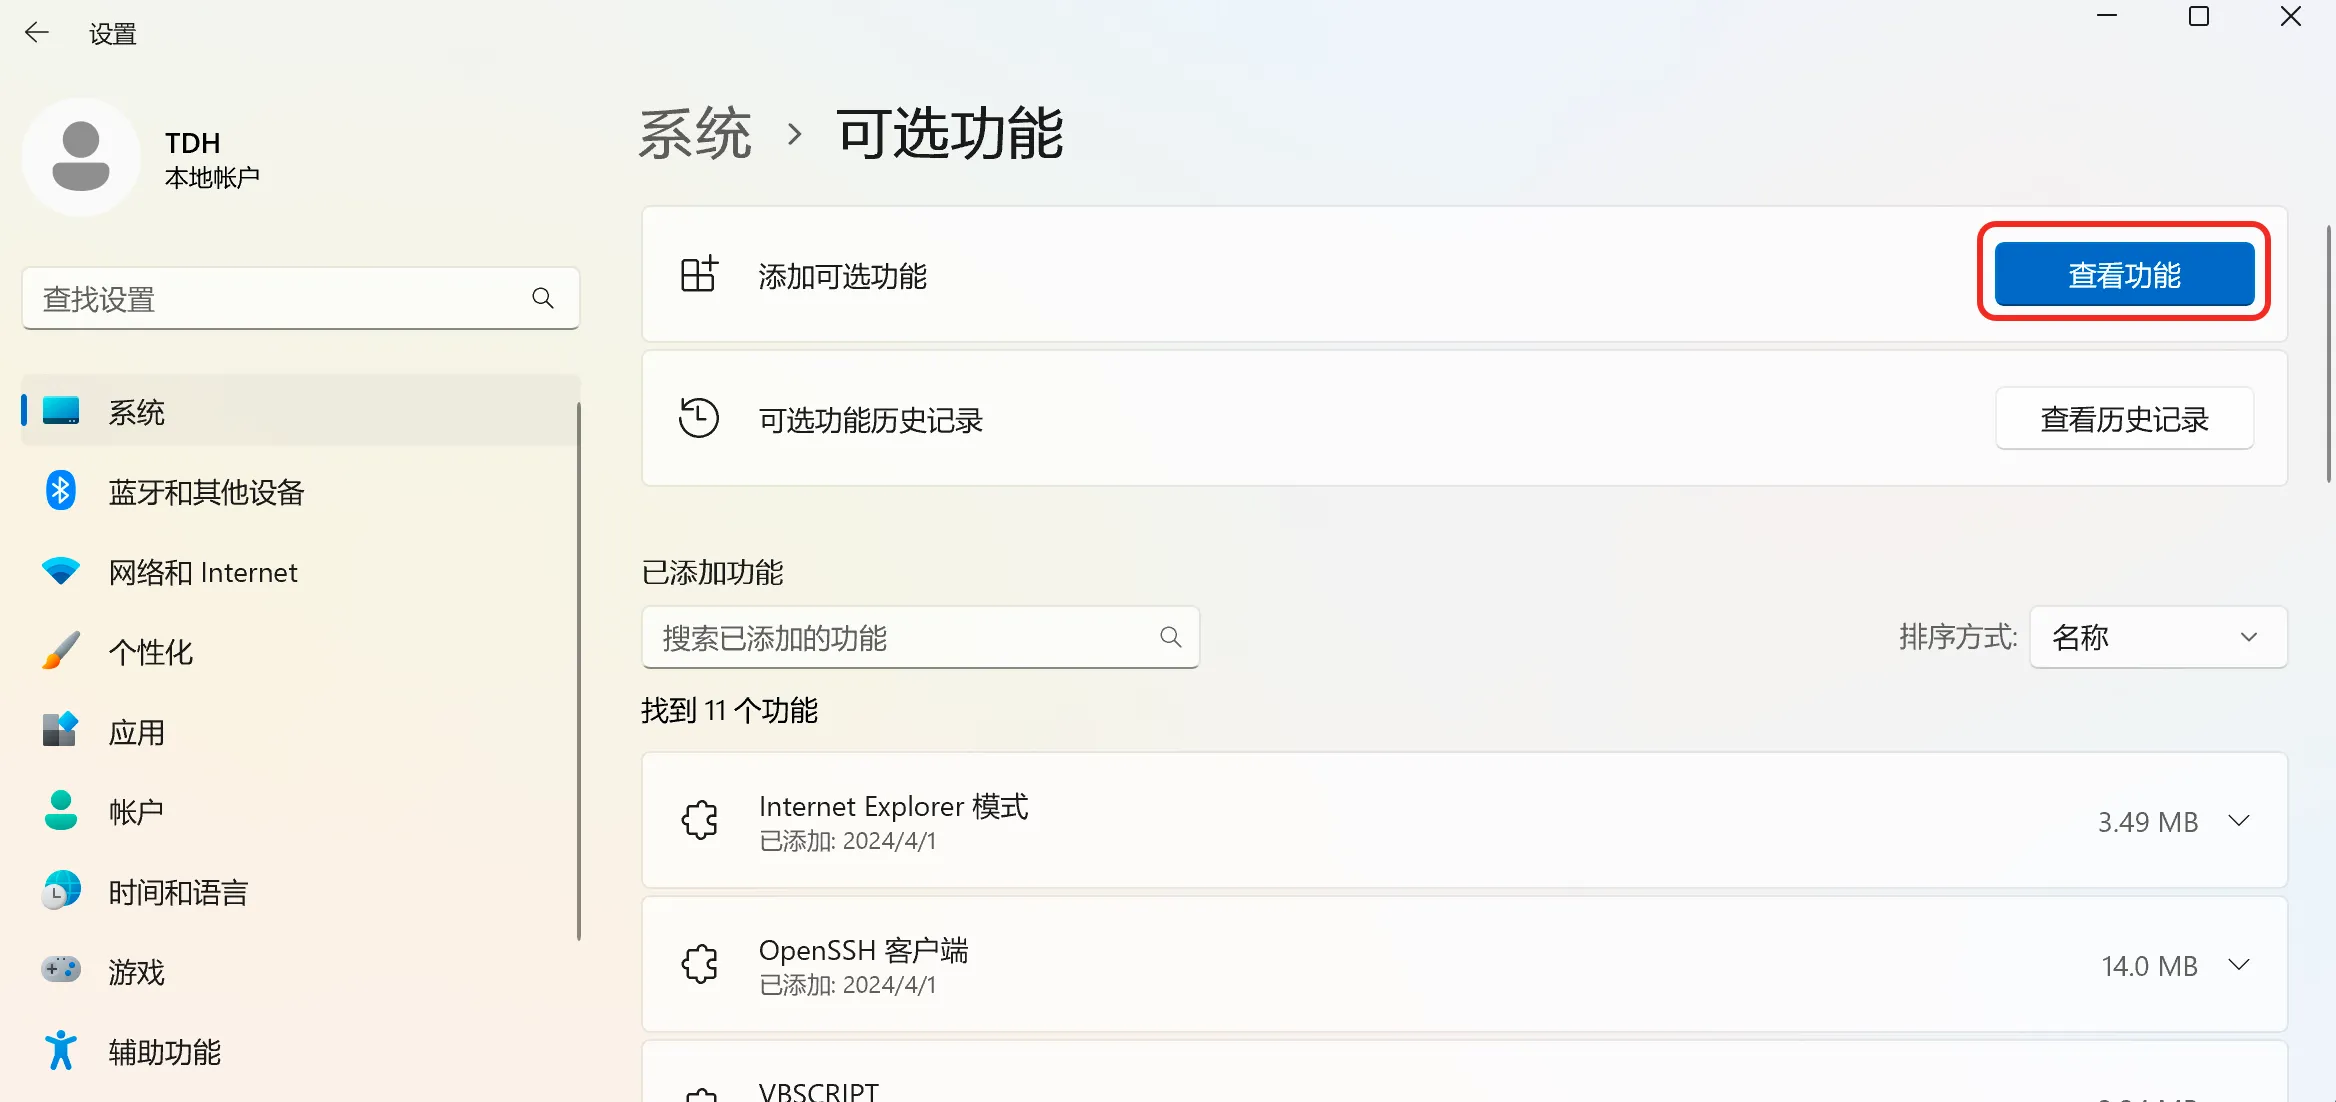
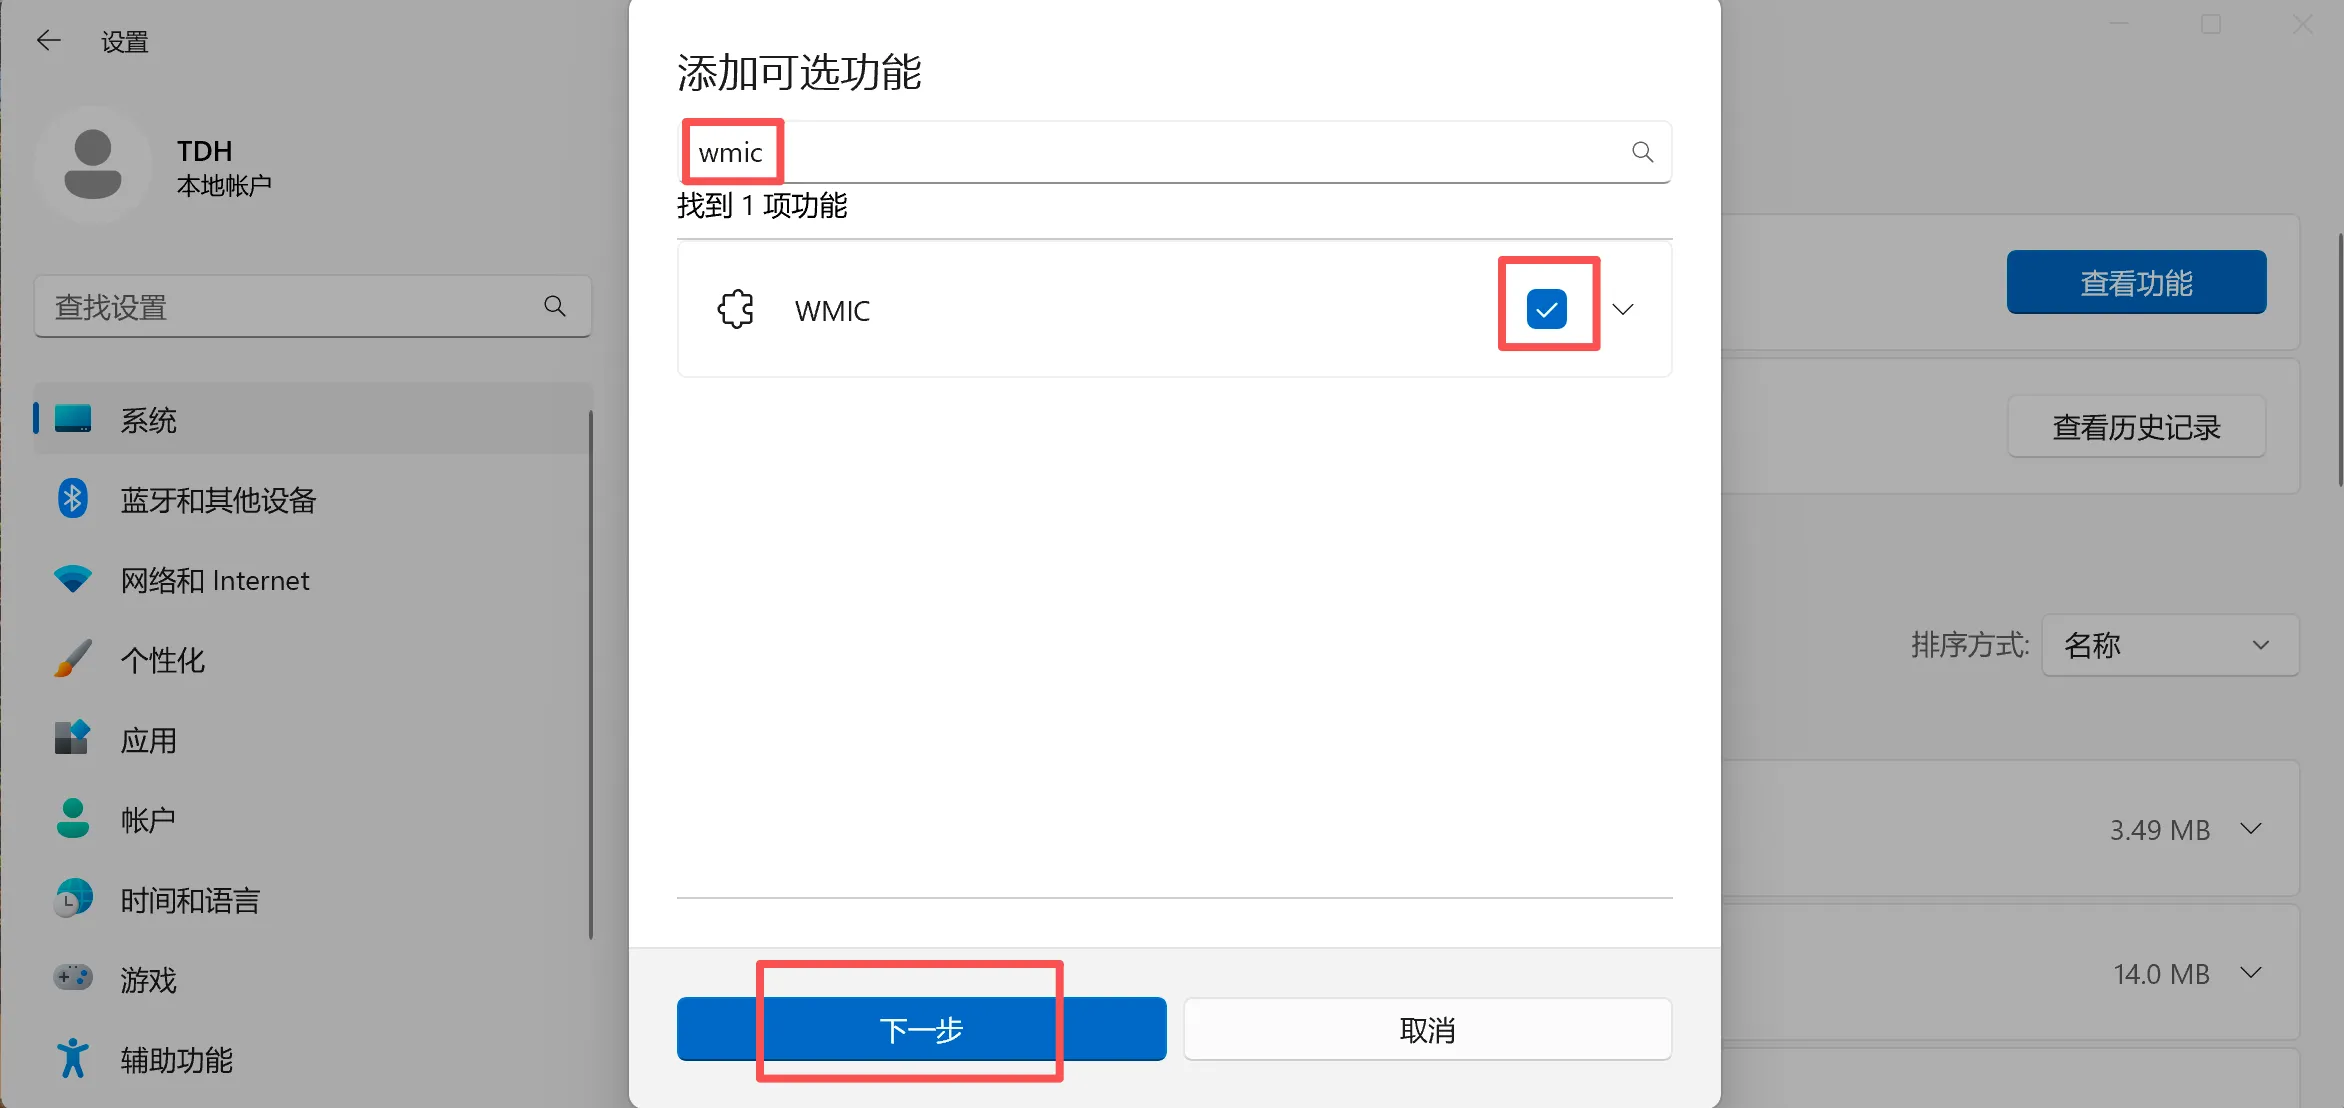
Note:
If the IDEA plugin fails to activate on the Windows operating system (including no response when clicking the activation button), you can pre - judge whether wmic is activated. If it is not activated, you can refer to the instructions in the following figure to install and activate wmic.