The connector of the AI Integrated Designer builds a data channel between platform applications and external large models through a visual interface. Enterprise users can freely combine large model components with different capabilities based on their own business scenarios to quickly complete the design and deployment of customized AI application product packages.
I. Filtering
1. Function Introduction
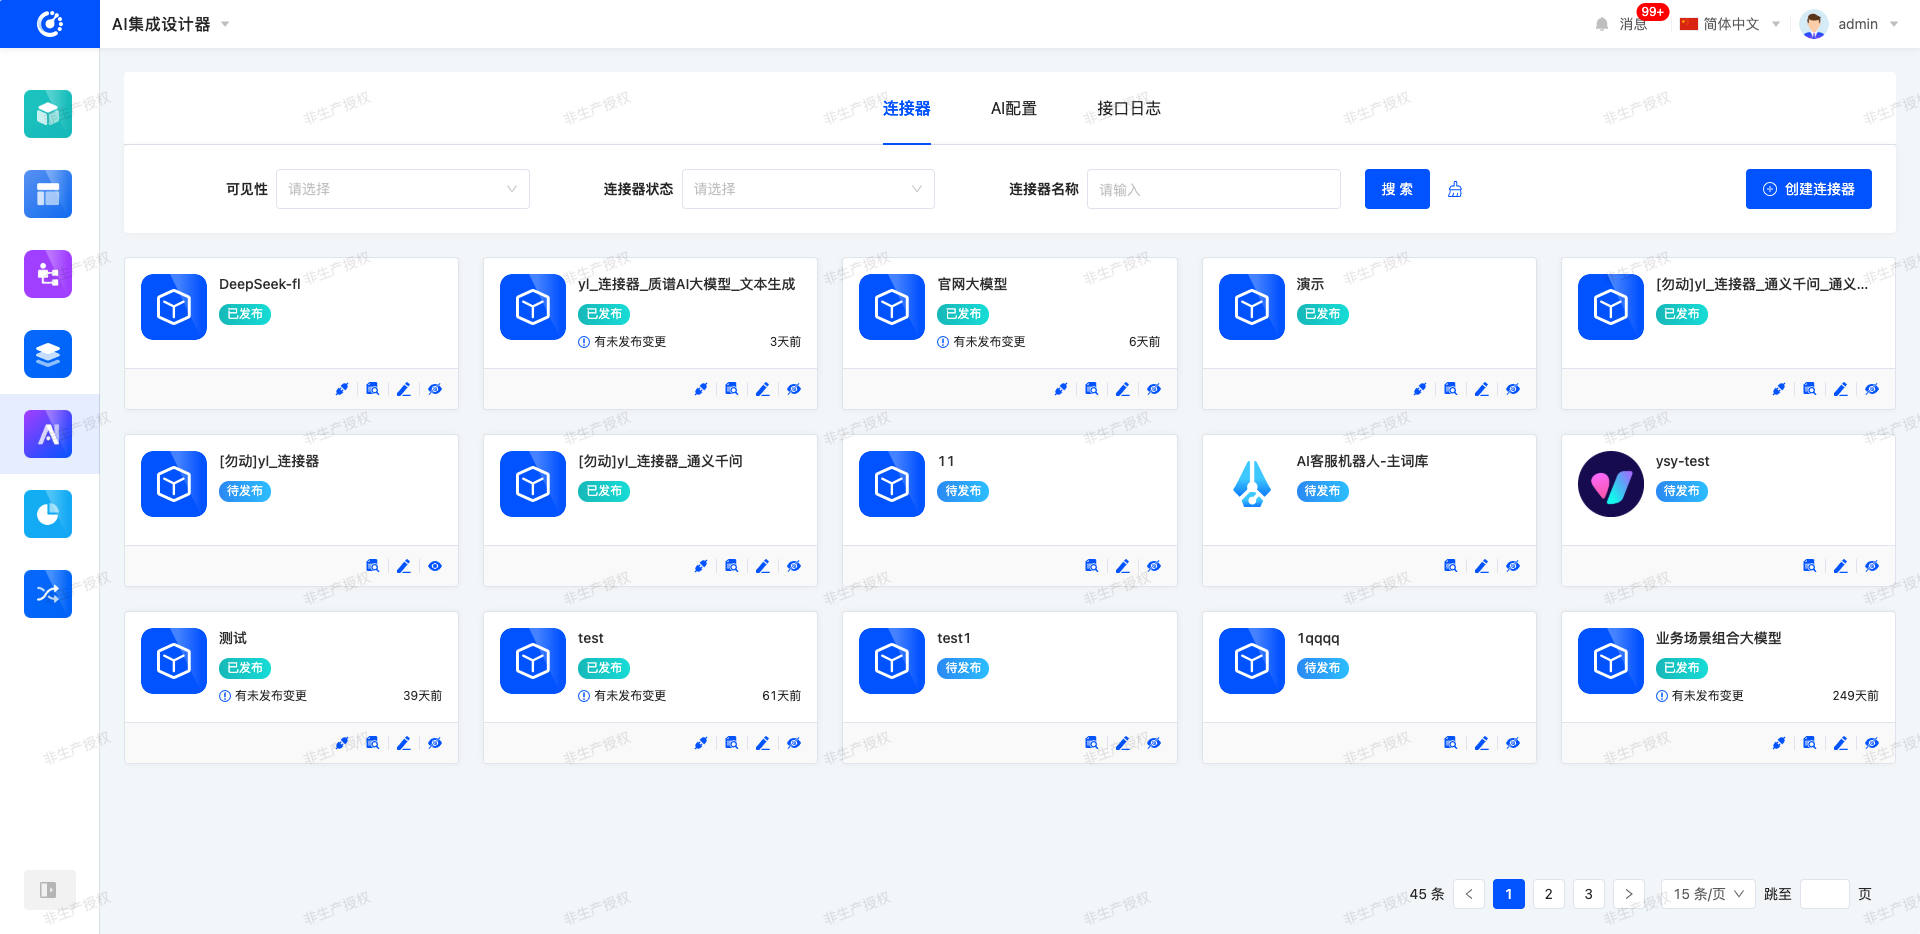
The system supports setting connector filtering conditions as needed, and users can flexibly set parameters. After filtering, the system will generate a corresponding list to intuitively present connector information and efficiently manage connectors.
2. Operation Method
- Filtering: Enter conditions in the filtering area and click the "Search" button to filter connectors.
- One-click Clear: Click the "Clear" icon to clear the conditions in the current filtering area with one click.
II. Creation and Design
1. Function Introduction
It supports adding new connectors and customizing connector information according to requirements. After filling in the information, different AI configurations can be dragged into the design interface to customize different connectors.
2. Operation Method
- Click "Create Connector", fill in the information as required on the pop-up page, and save it to create the connector successfully.
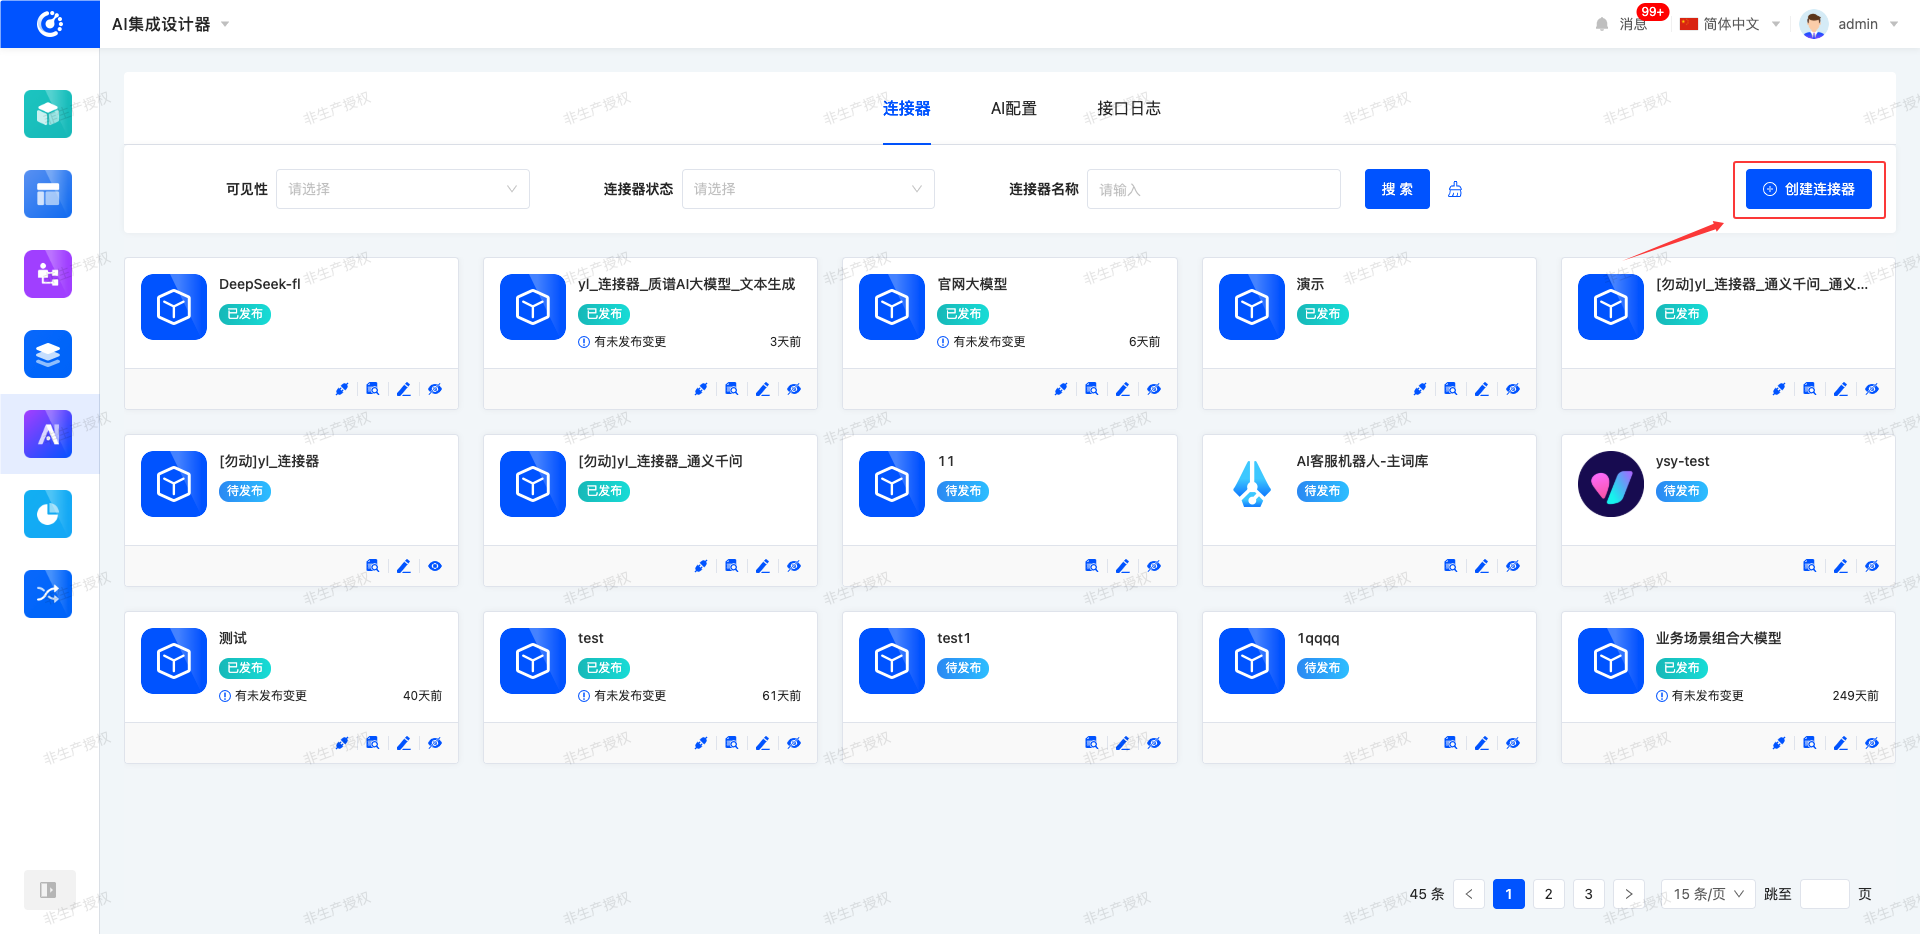
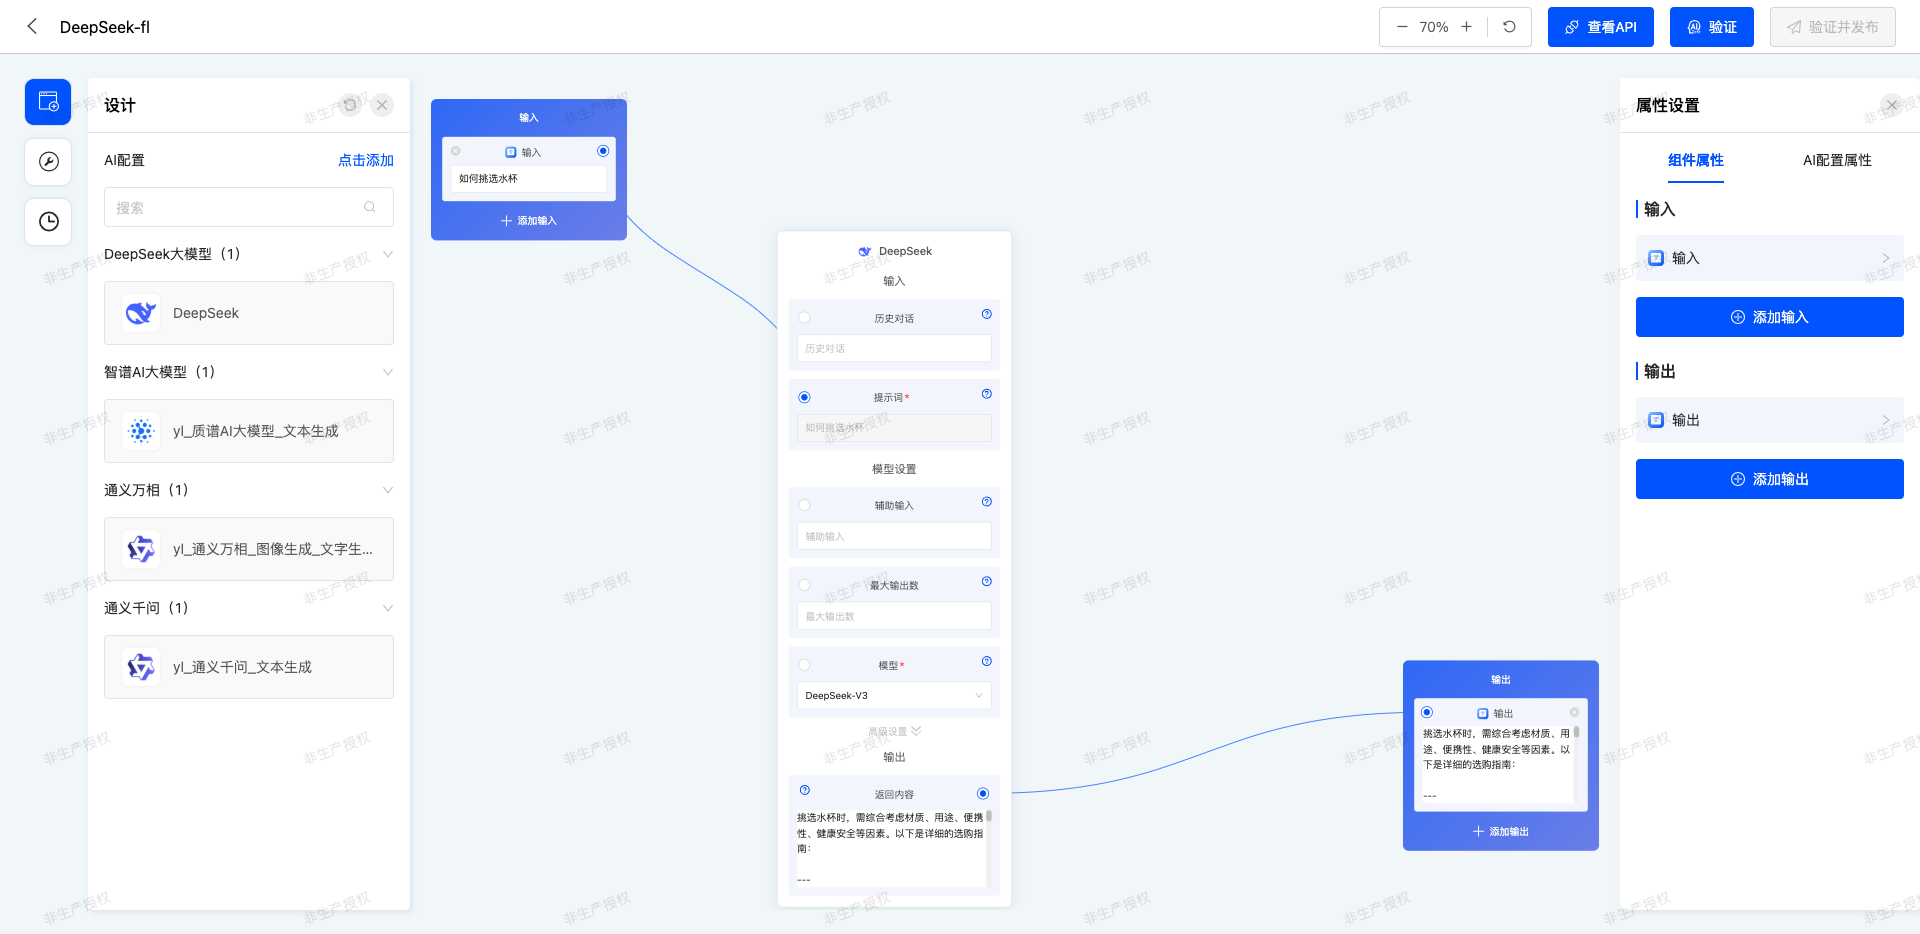
- After the connector is created, it will automatically jump to the design interface. On this interface, you can flexibly configure the input and output types of the connector, freely select the suitable large model, and adjust various configuration parameters of the large model in real-time according to actual business needs to achieve personalized connection settings.
Note
- After completing the configuration, you can test the connectivity of the connector through the system verification function to ensure normal data transmission.
- After the connector is successfully published, you can view its API information.
III. Viewing
1. Function Introduction
For designed connectors, it supports quickly viewing the connection order of AI configurations and detailed configuration information. For published connectors, in addition to the above content, you can also obtain their API information for easy data docking.
2. Operation Method
- Click the "View" icon to jump to the corresponding page for viewing.

IV. Editing
1. Function Introduction
For created connectors, you can edit and modify them, including adjusting connector information or changing model settings.
2. Operation Method
Click "Edit" to edit on the jumped design page.

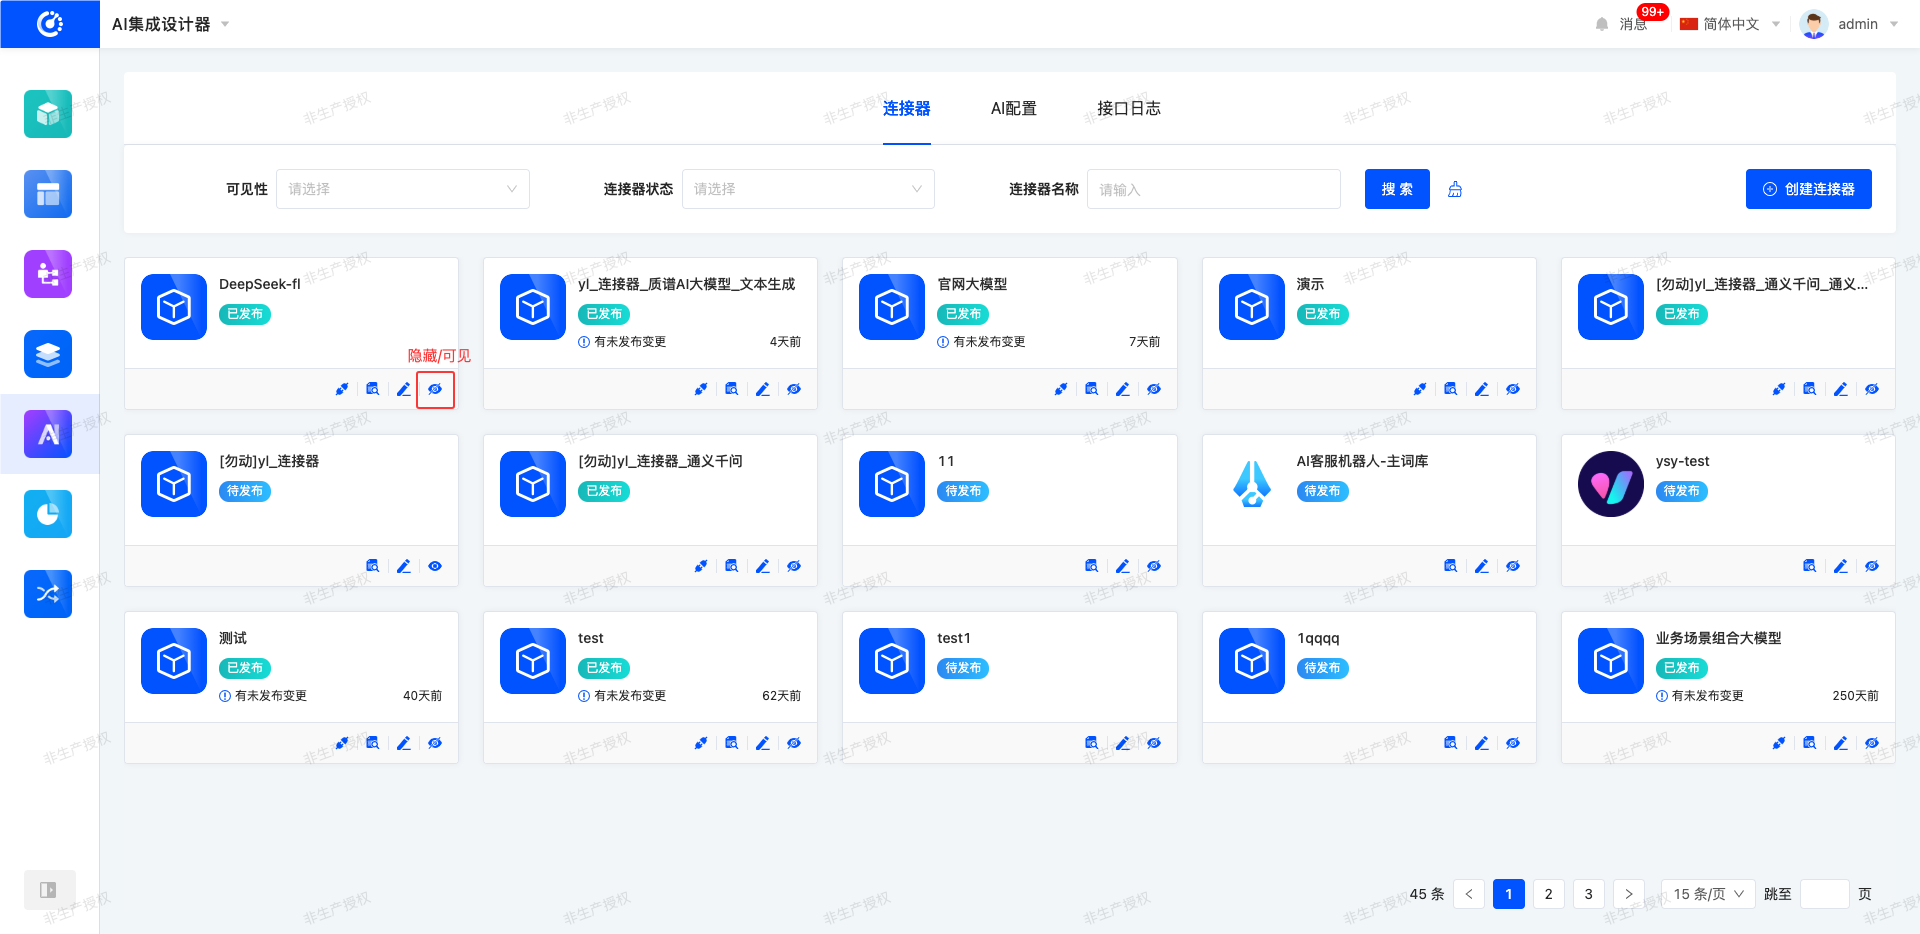
V. Hiding/Showing
1. Function Introduction
For connectors that are not currently in use, you can perform a hiding operation. Hidden connectors cannot be used, but it does not affect the data that has already been used. If needed in the future, you can set the hidden connector to the visible state to reuse it.
2. Operation Method
Click "Hide" to set the connector to the hidden state; click again to restore the connector to the visible state.
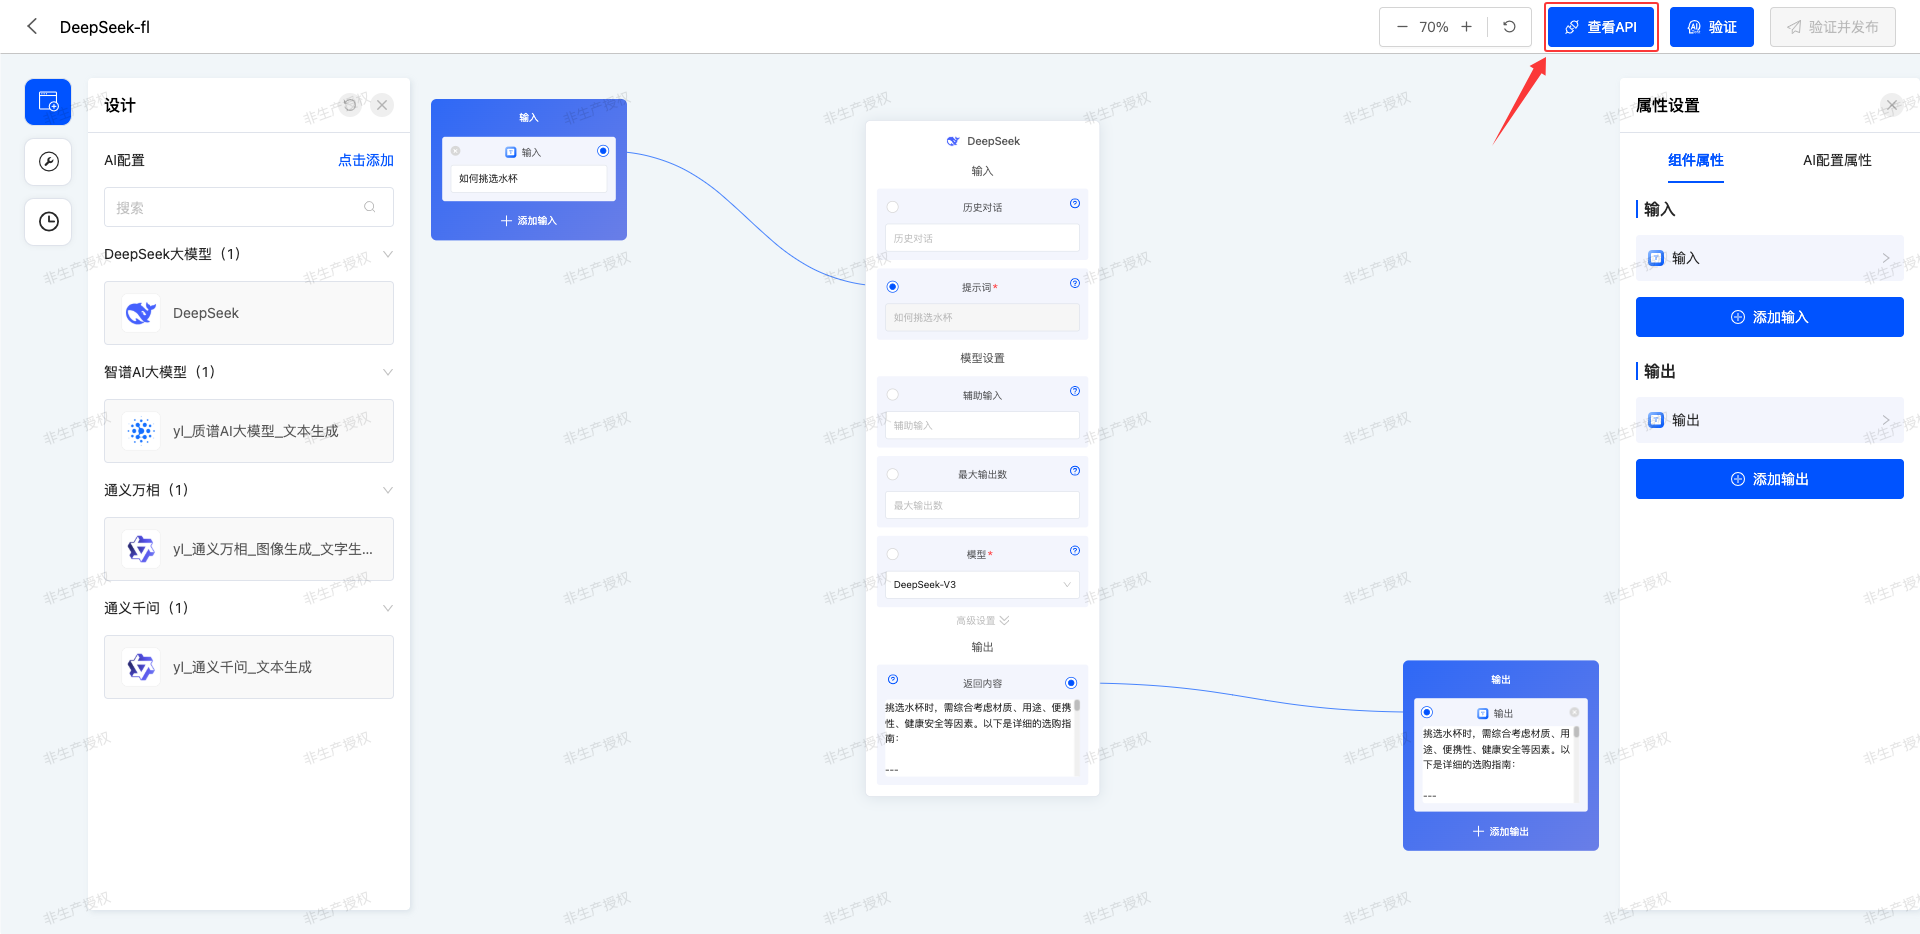
VI. Viewing API
1. Function Introduction
For published connectors, you can view their API information.
2. Operation Method
On the management page or the design page, click the "View API" button to view the API information of the connector.