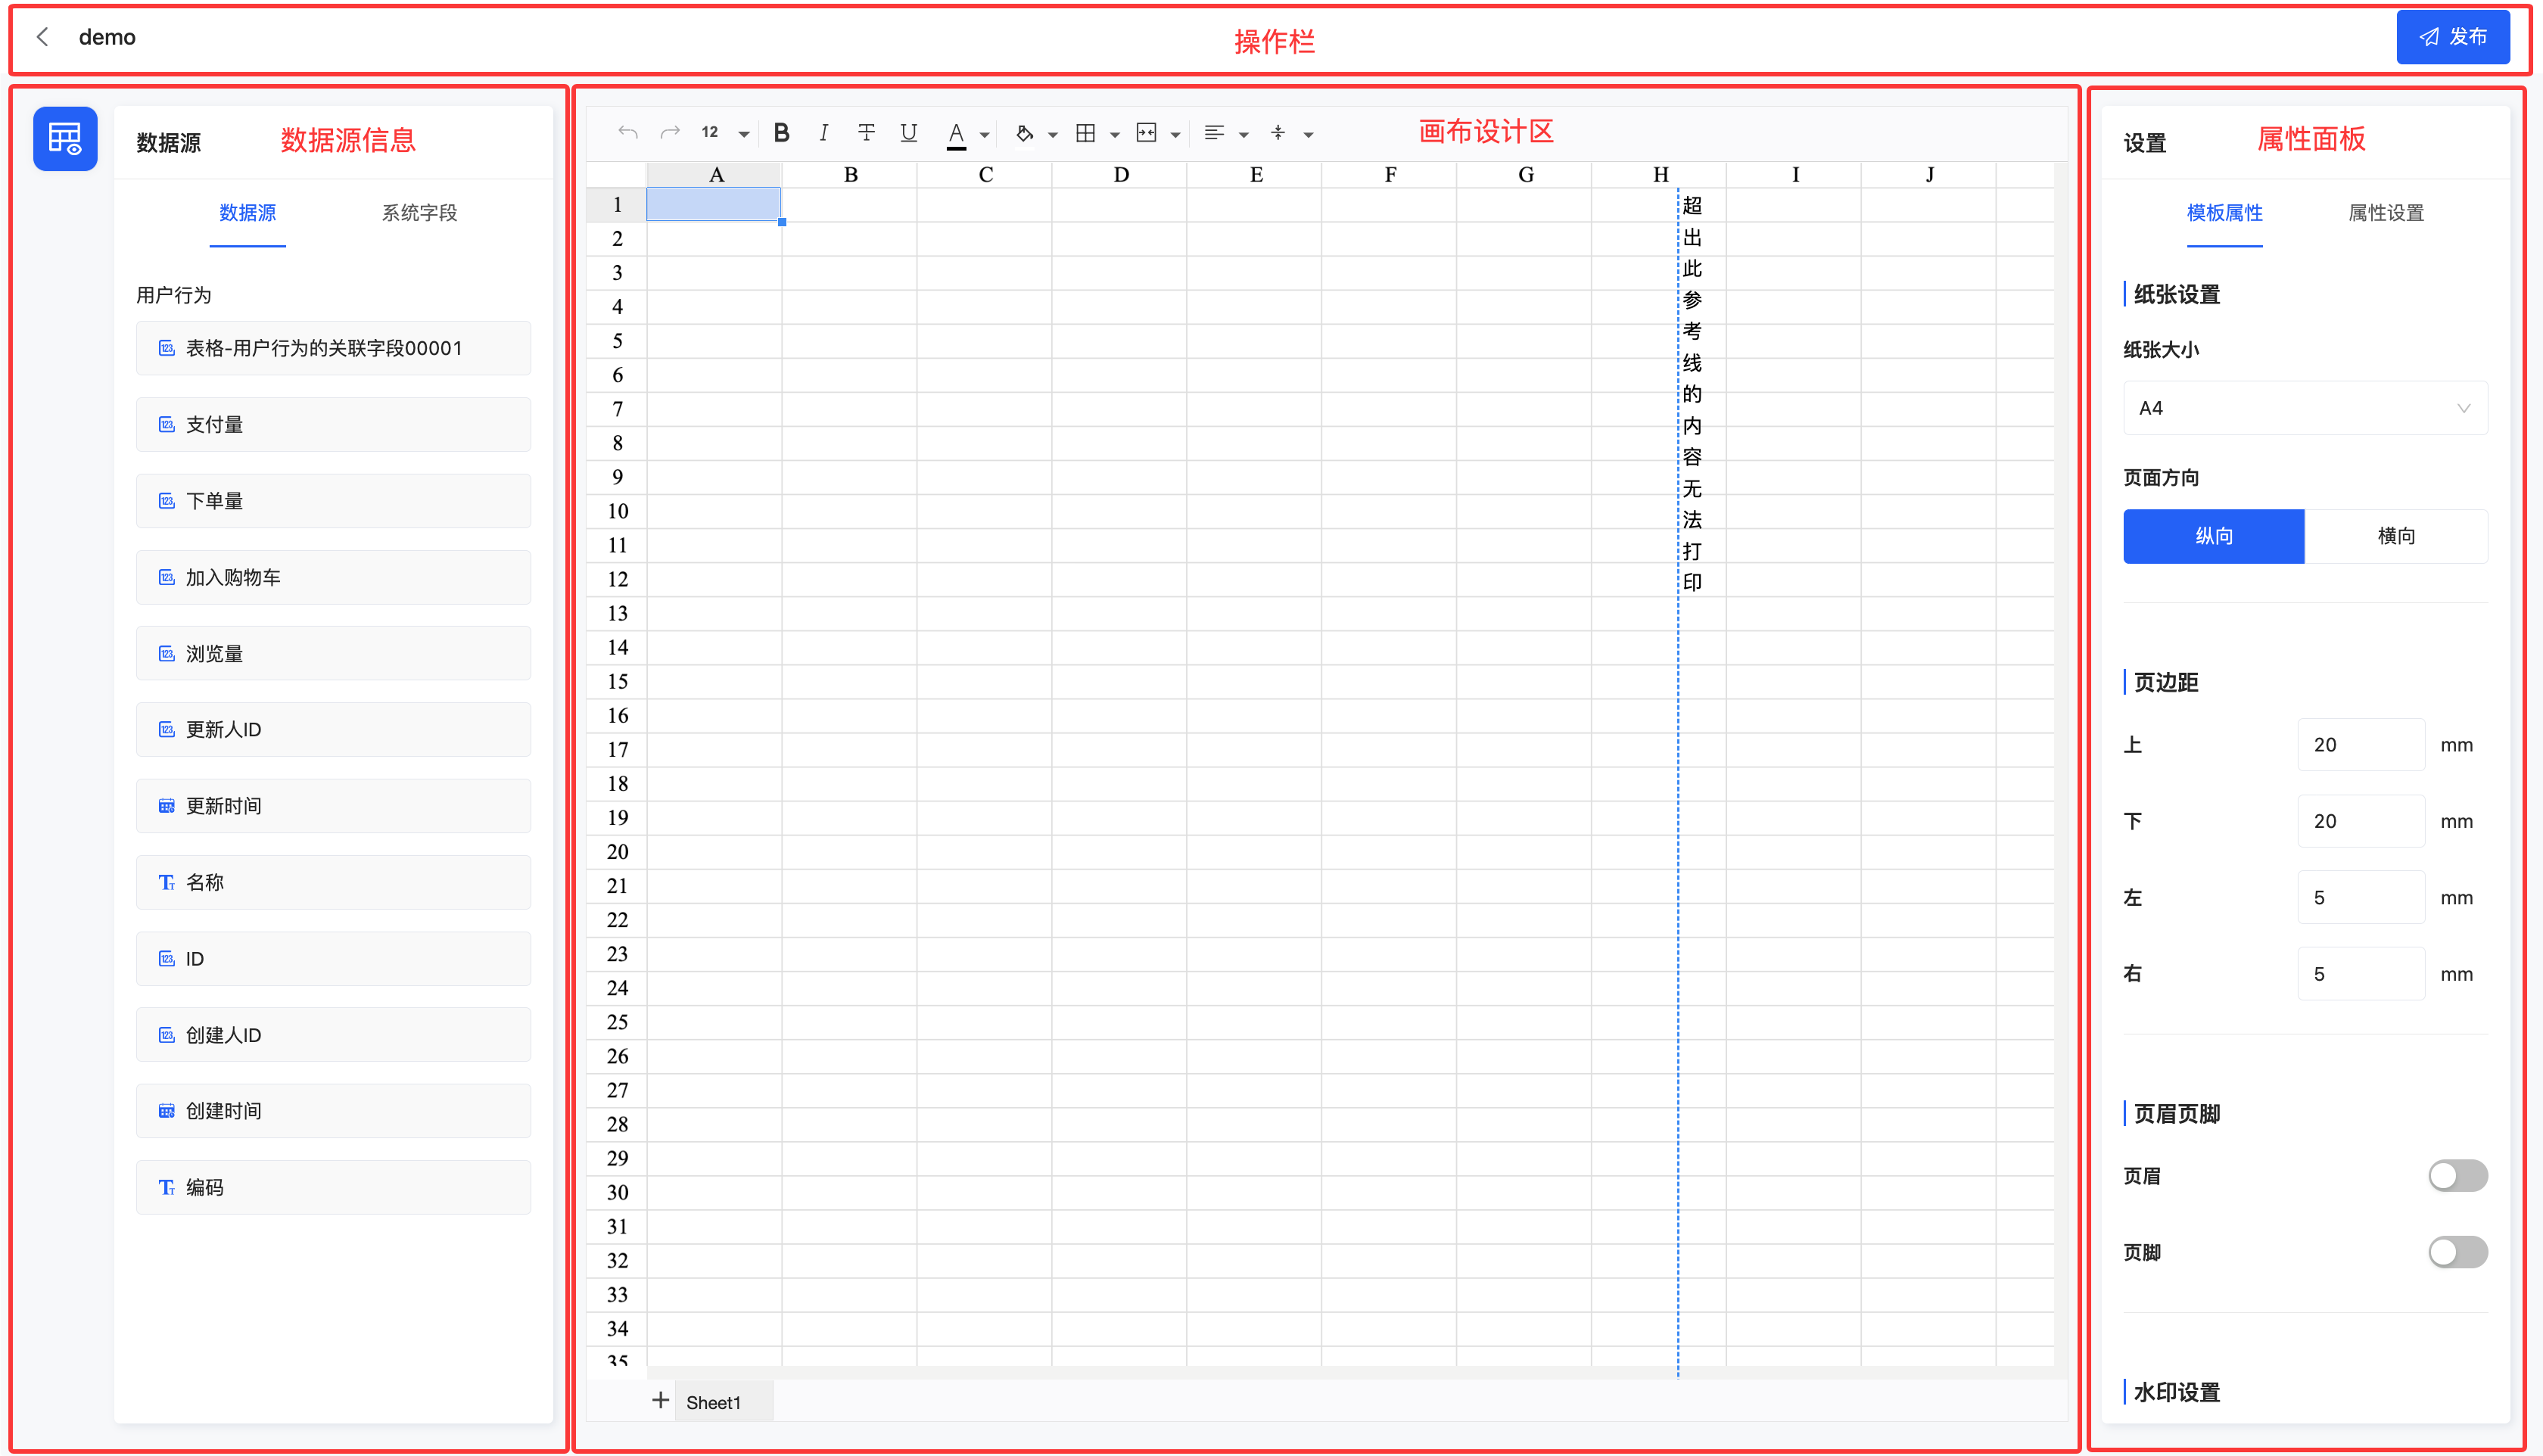
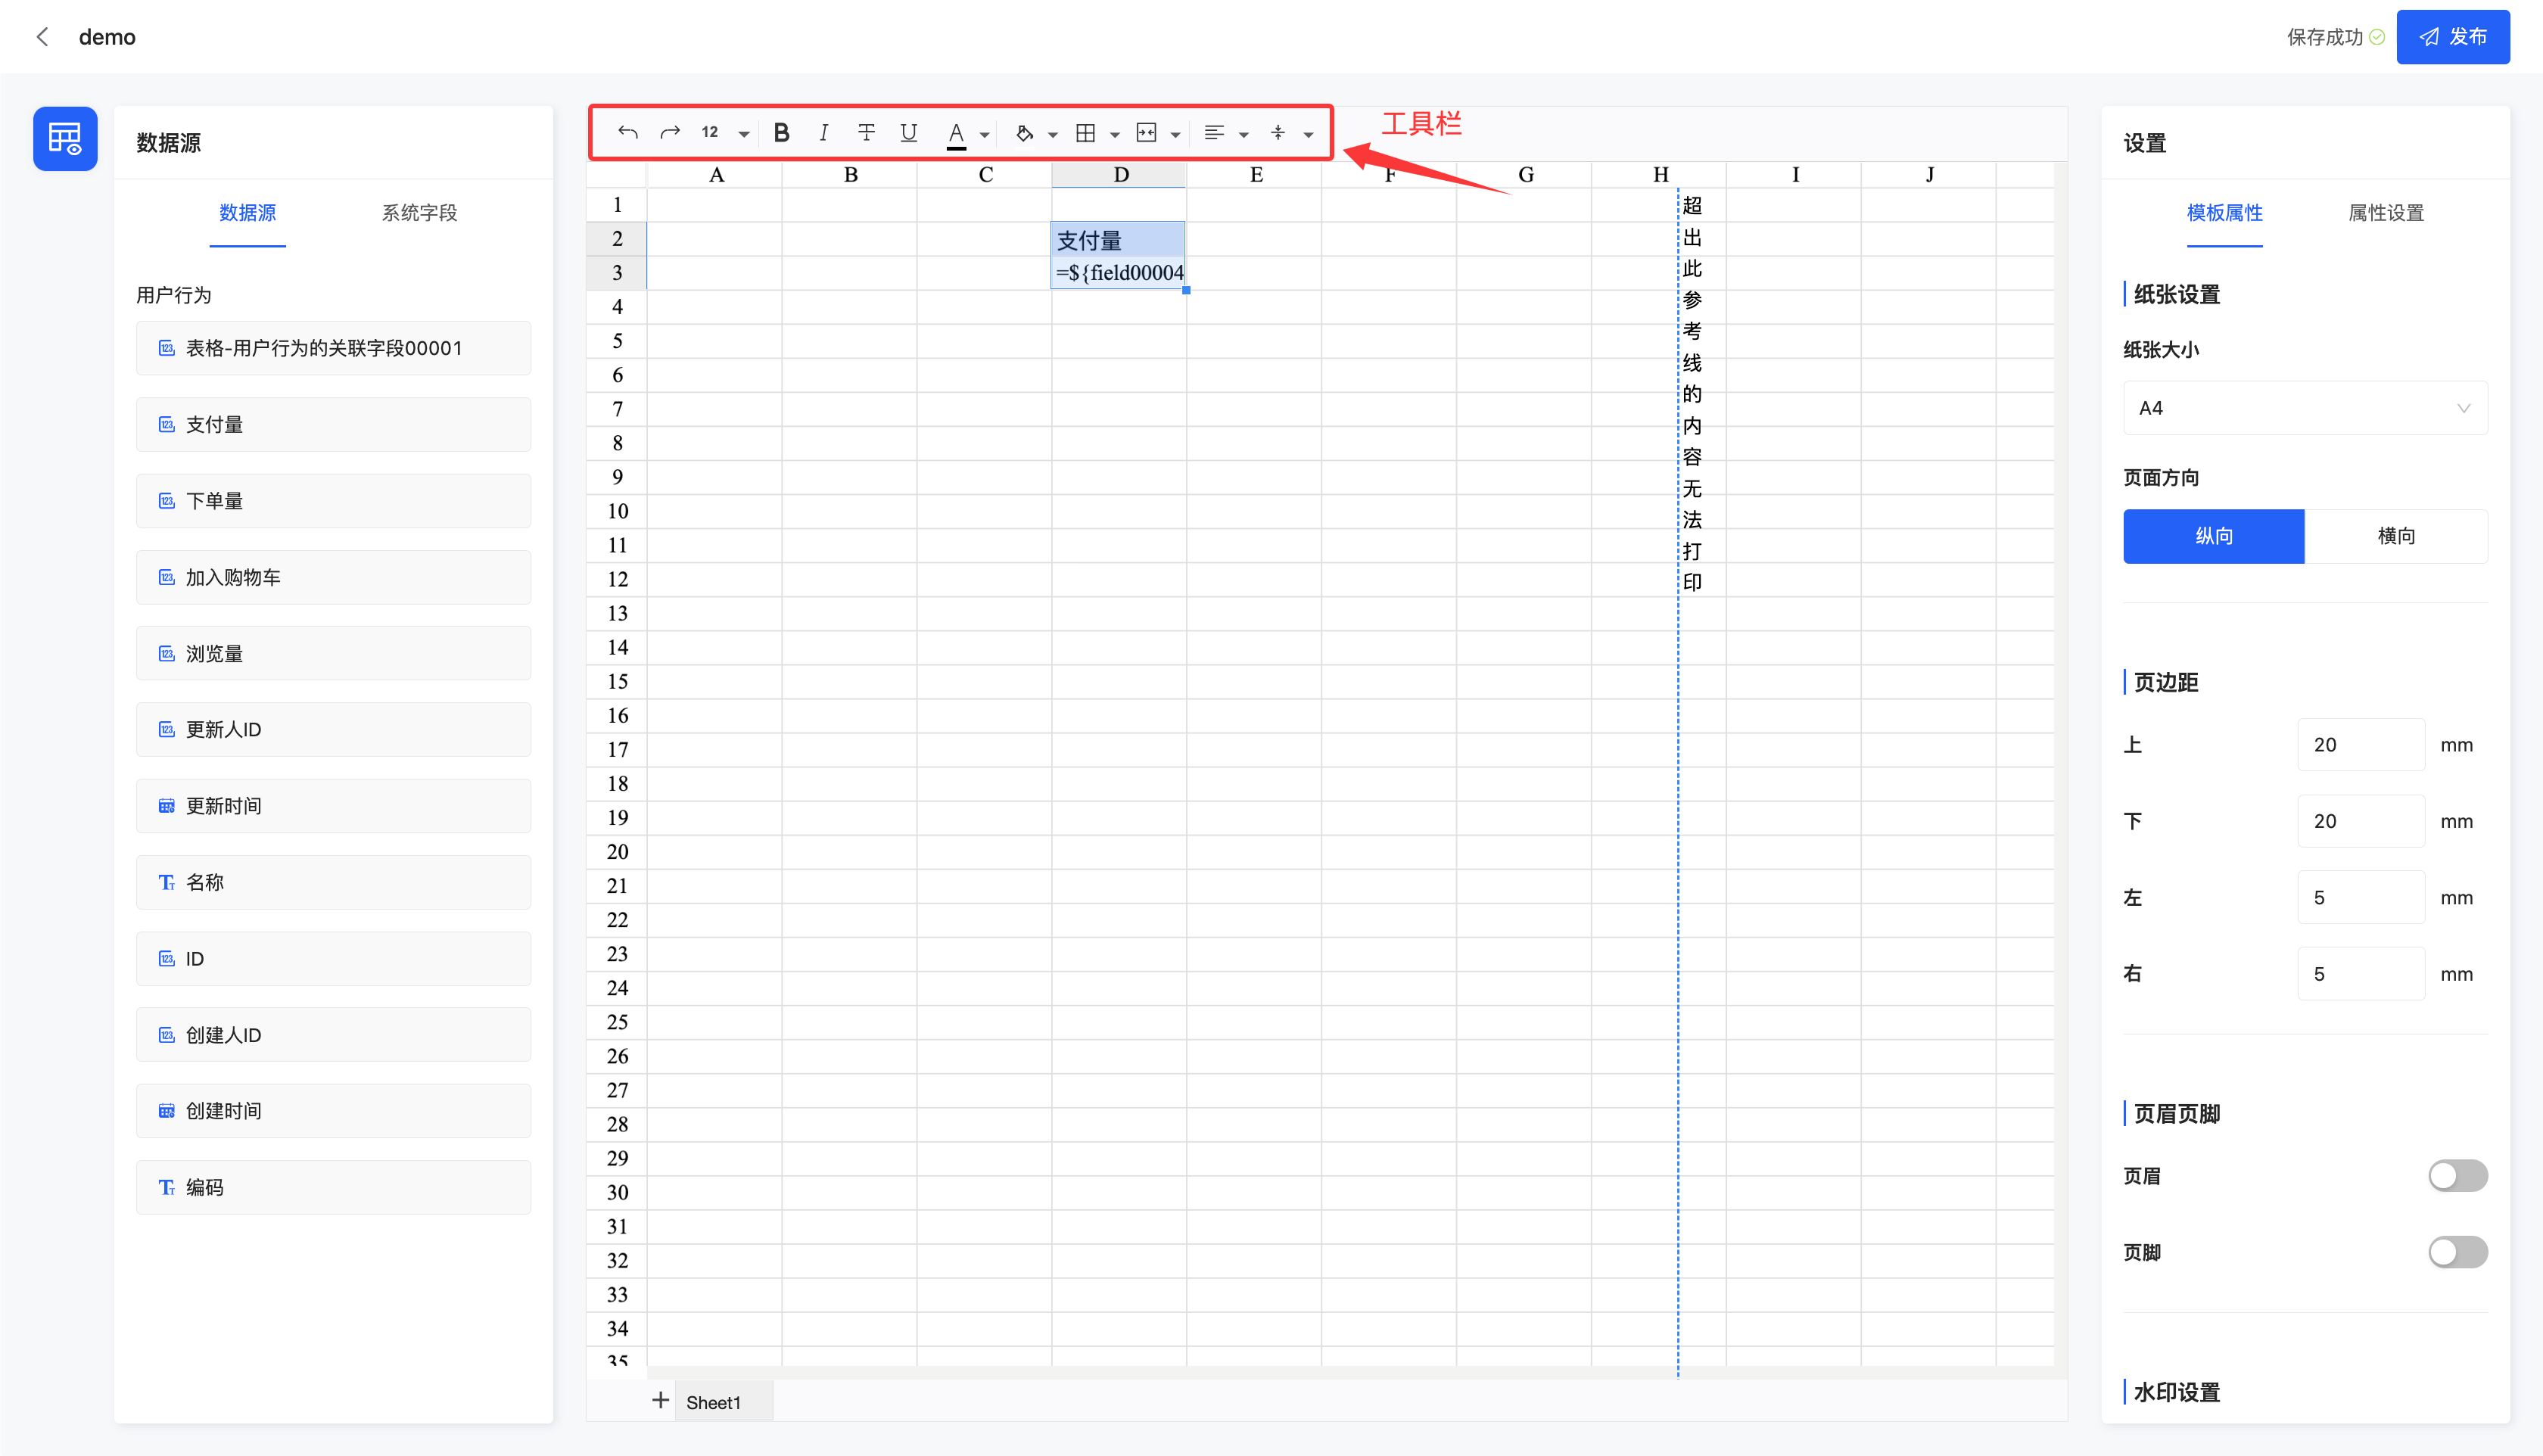
This interface is mainly divided into four functional areas, namely: the operation bar, data source information, canvas design area, and property panel.
I. Operation Bar - Publish
1. Function Introduction
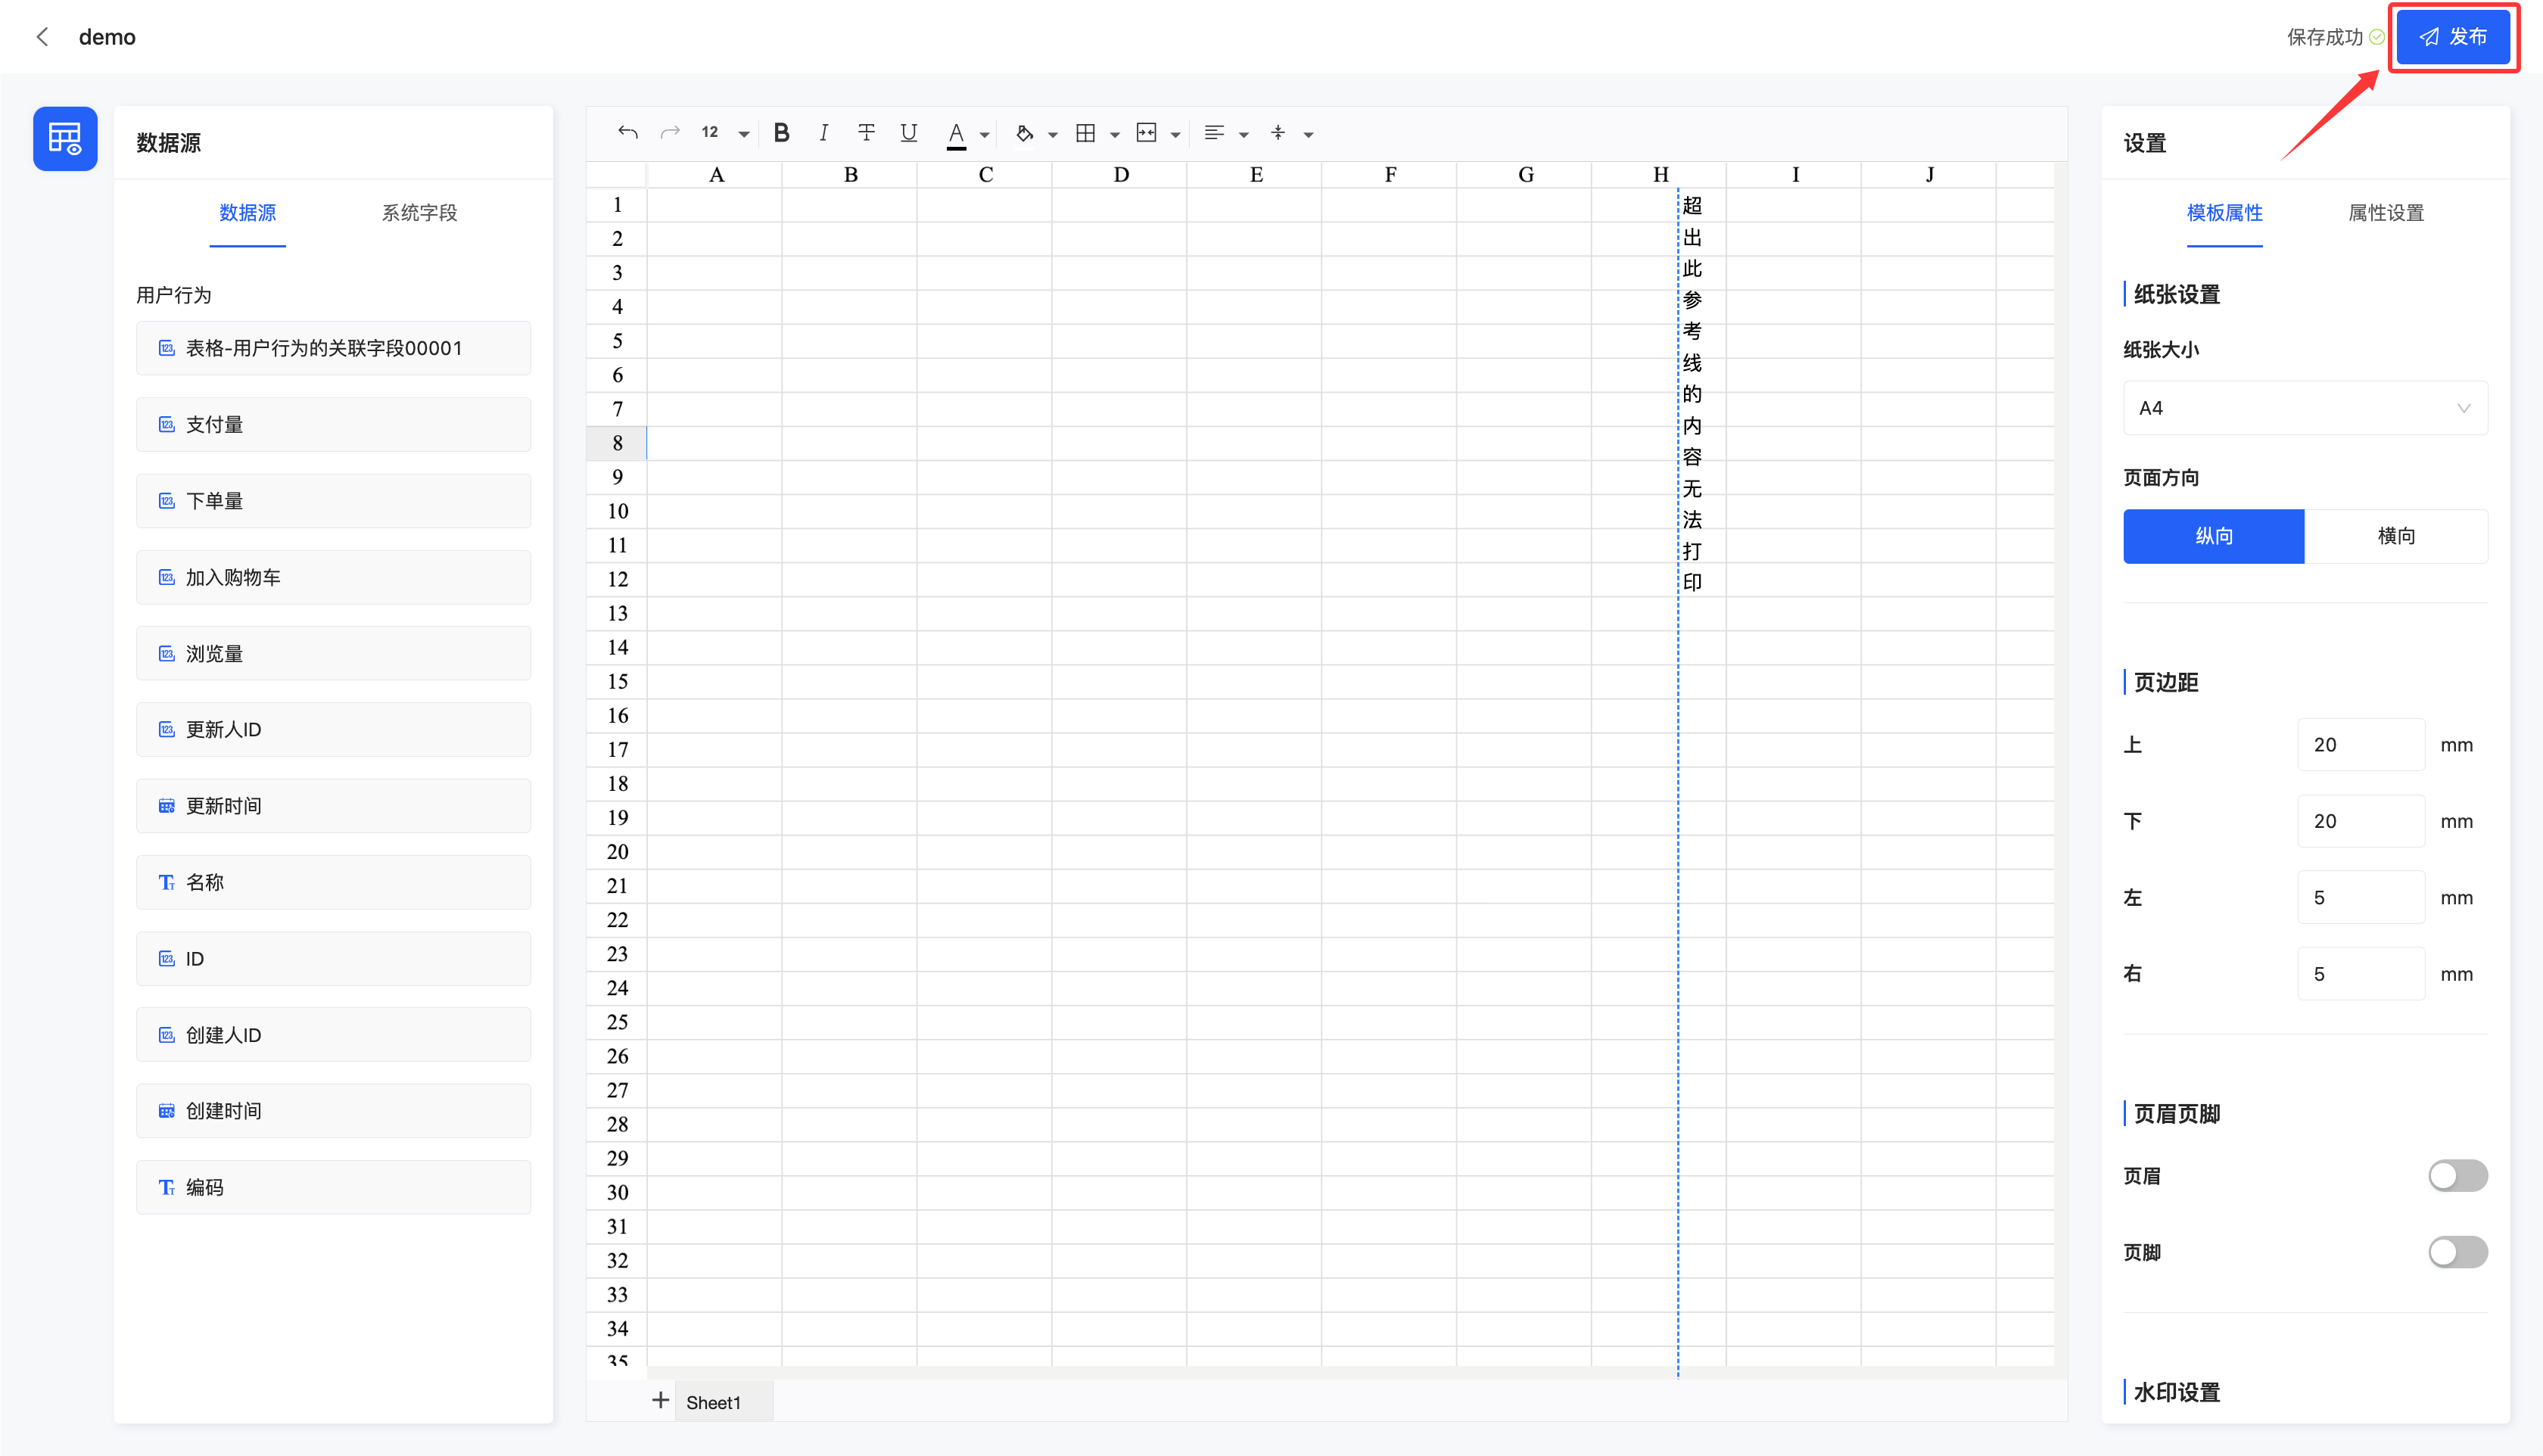
After the template design is completed, the template can be officially made effective through the publish operation. If the publish operation is not performed, the template will also be automatically saved. However, in this case, the automatically saved version only exists as a draft and will not be officially displayed or take effect.
2. Operation Method
On the top operation bar, click "Publish" to publish the current template.
II. Data Source Information
1. Function Introduction
The data source includes two parts: the data source and system fields.
- Data Source: That is, the model fields associated with the template.
- System Fields
- Printing Time: The time when the printing occurs, in the format "YYYY-MM-DD".
- Printer: The operator who initiates the current printing.
- Business Process Information: The information of the manual nodes in the process triggered by the model associated with the template.
2. Operation Method
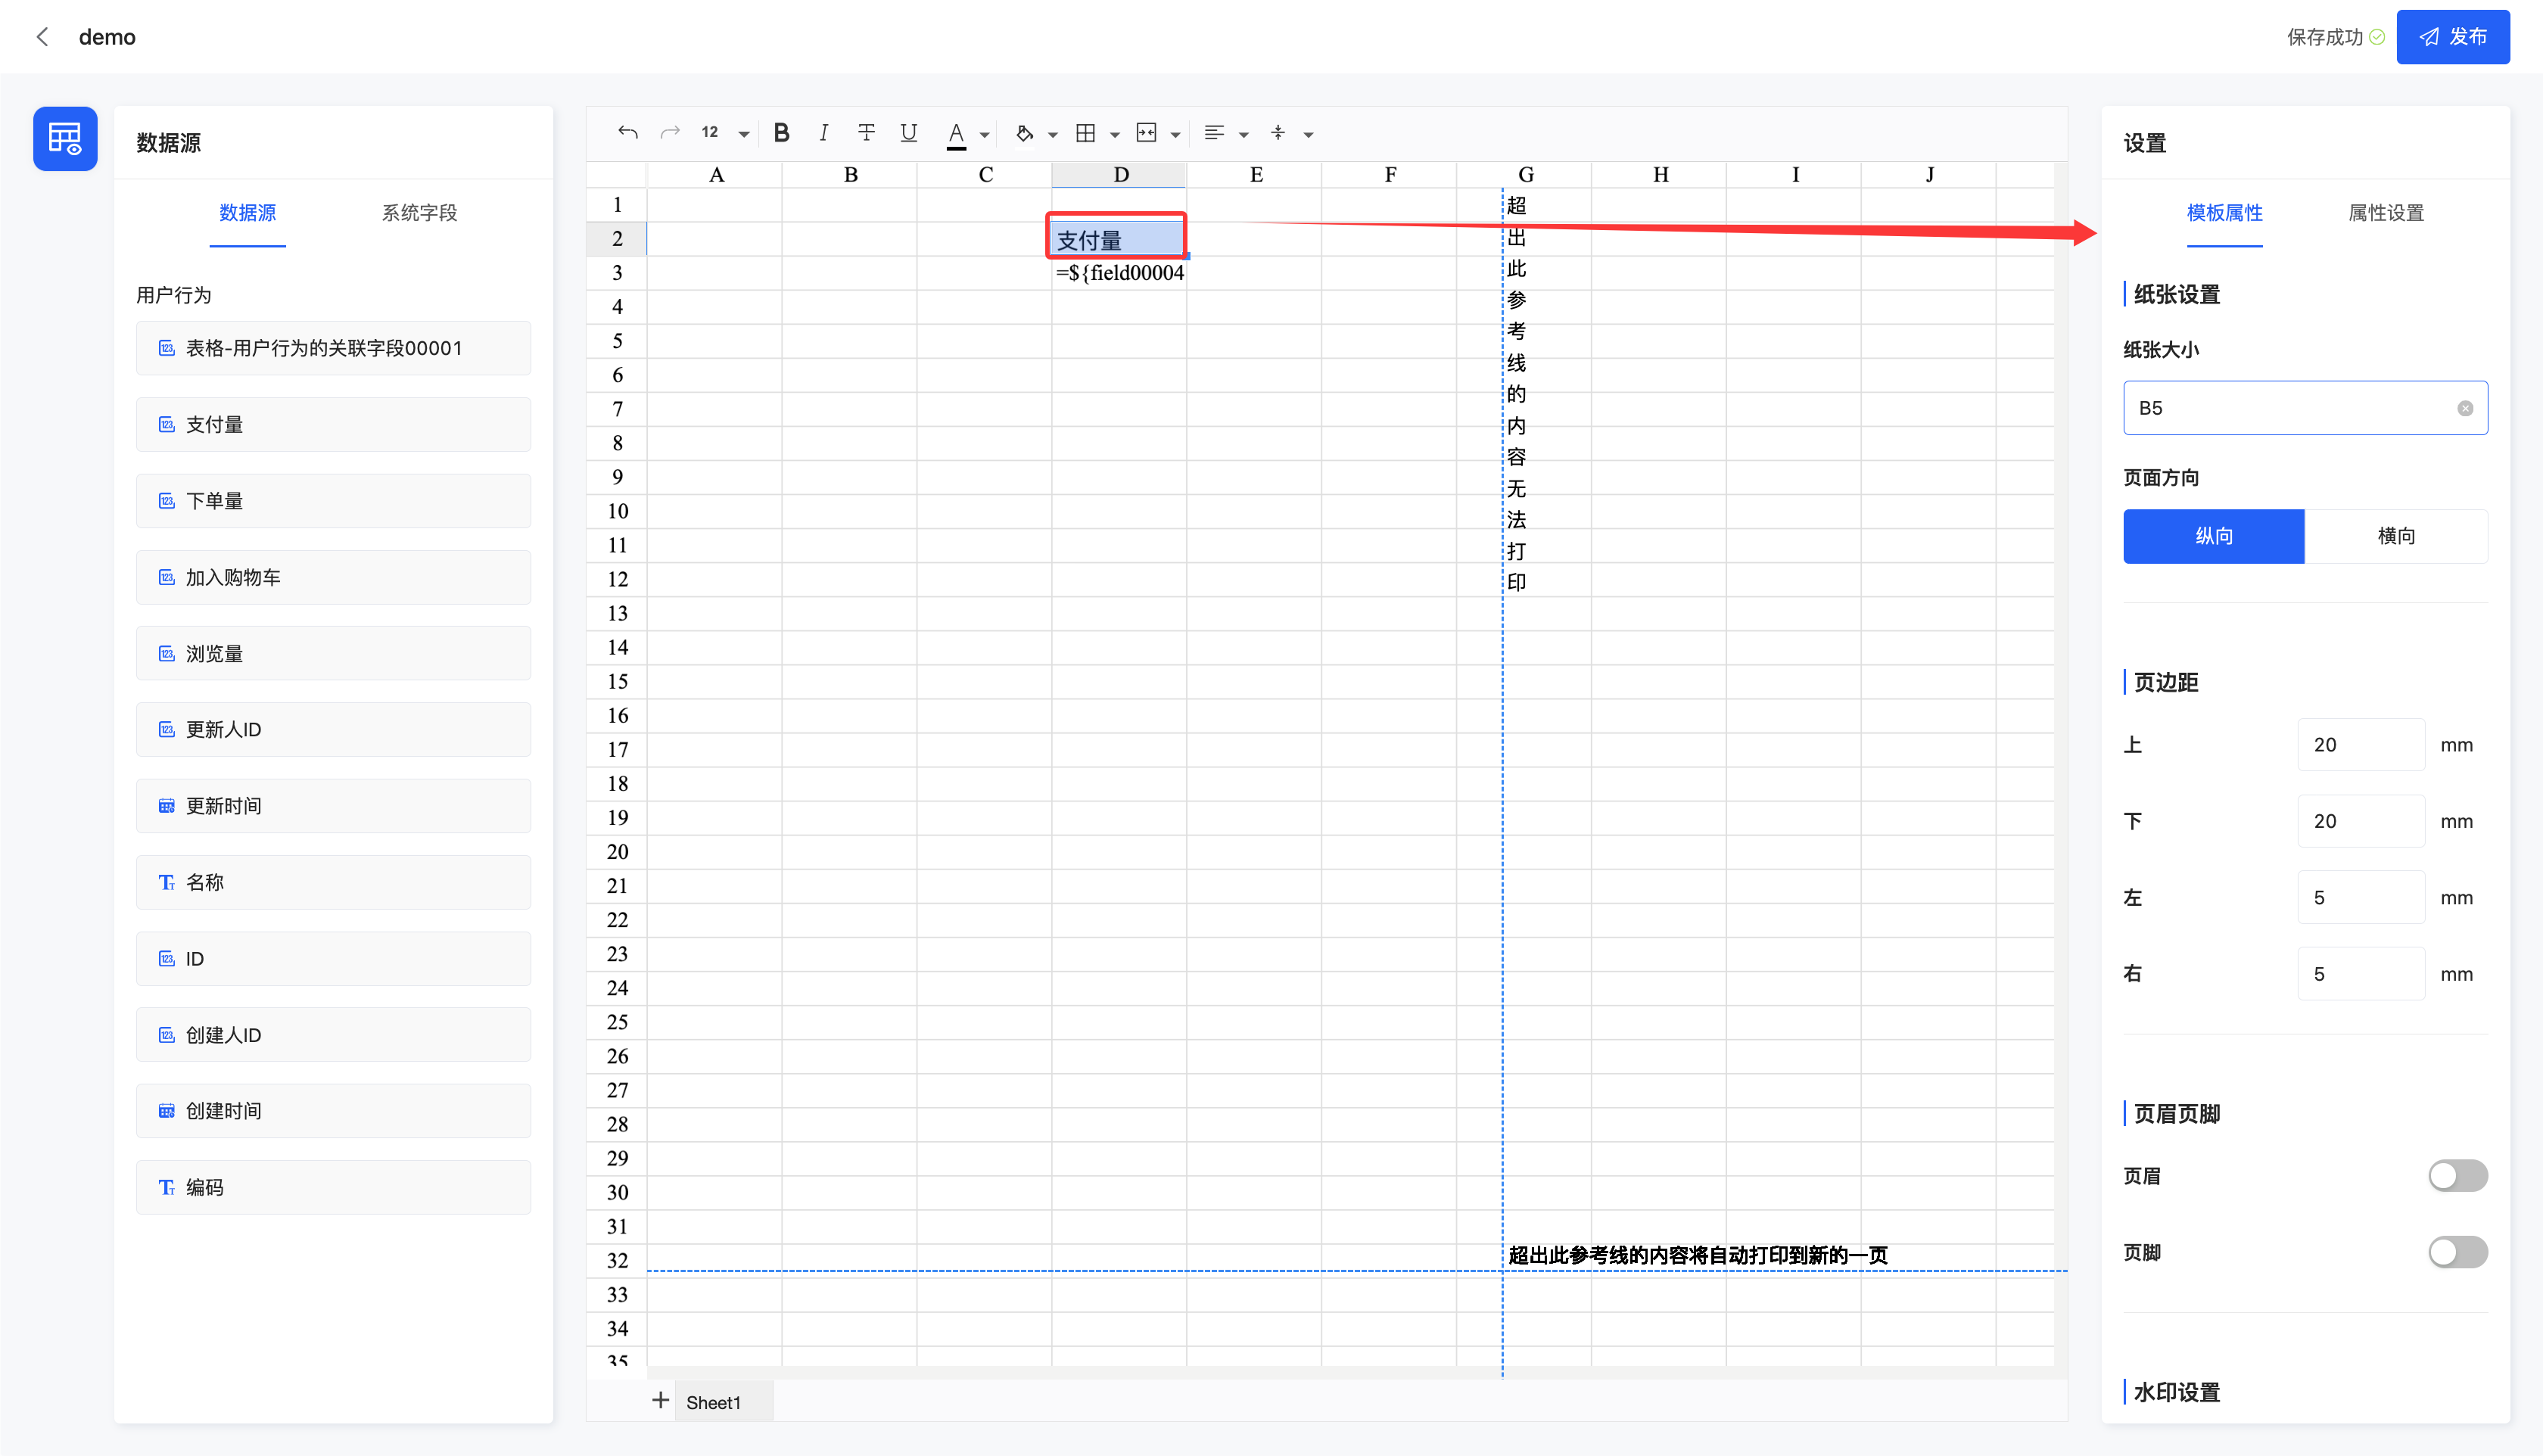
Drag the data to the corresponding area in the canvas design area.
3. Canvas Design Area
1. Function Introduction
When data is added to the design canvas area, a default style will be automatically generated. Users can select any data and configure it in detail using the toolbar above.
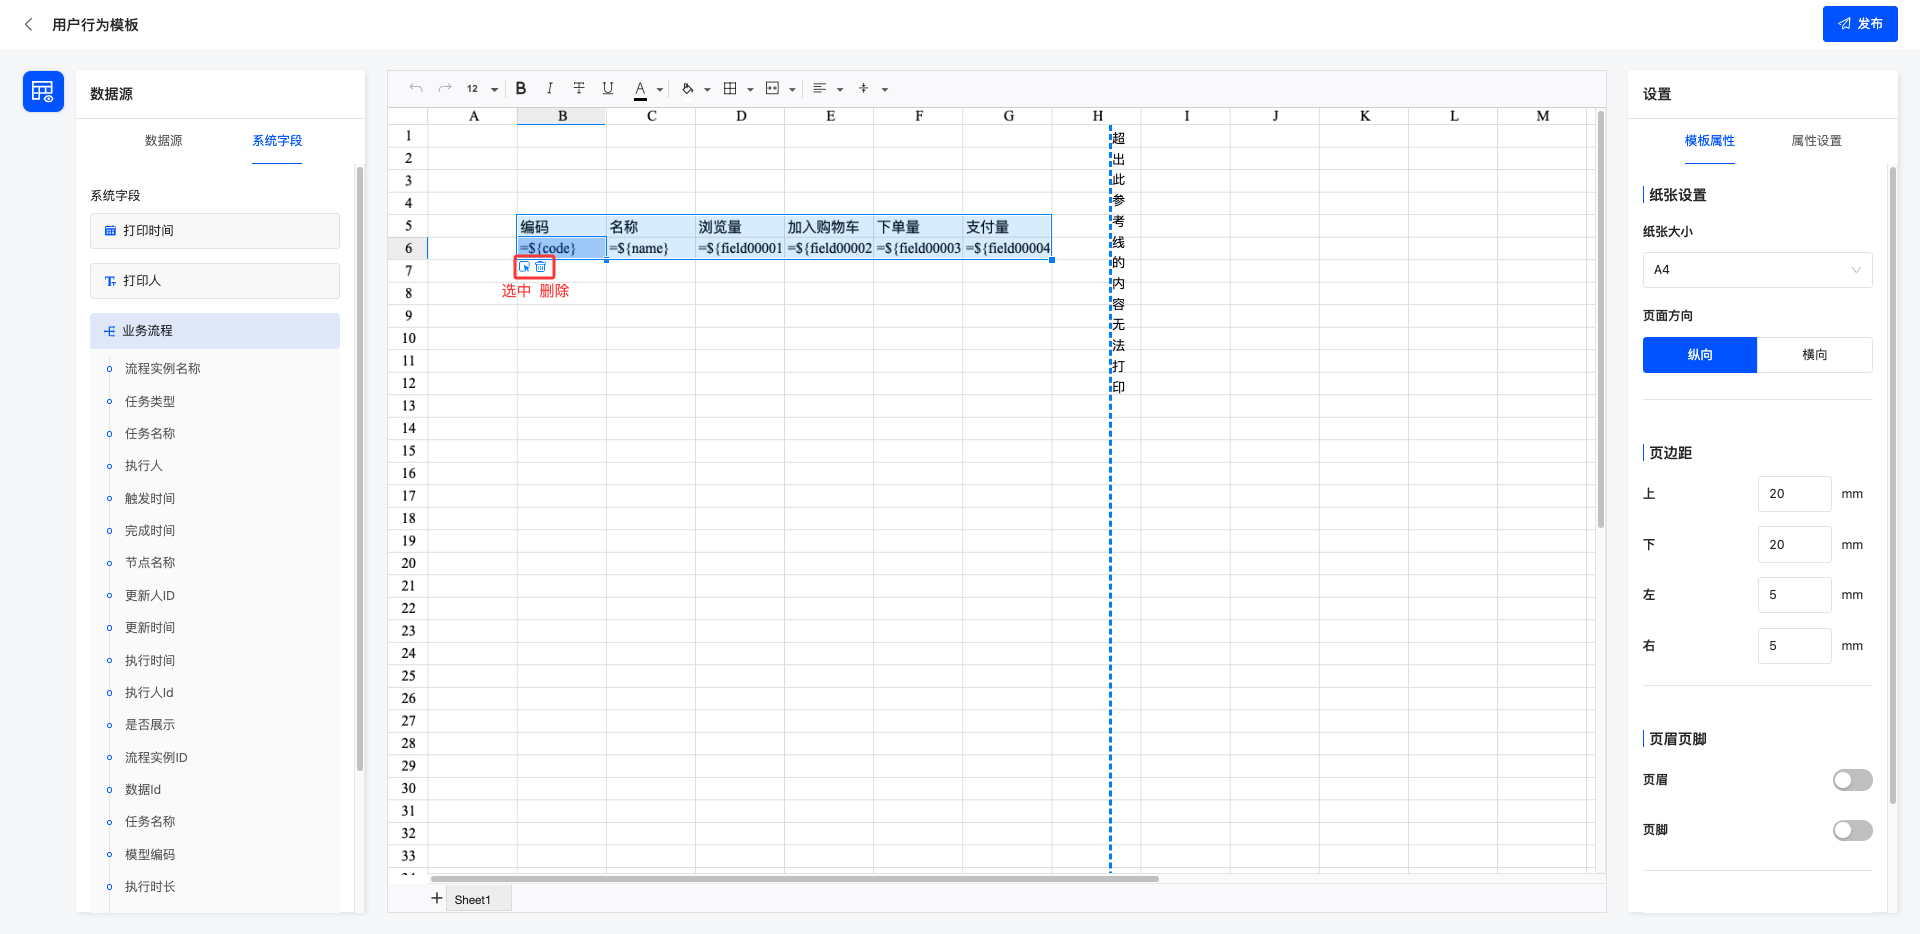
When a many-to-many field is dragged in, the system will automatically generate a sub-form. Clicking on the sub-form area allows you to edit it. By default, the sub-form contains 5 fields (taken from the first 5 fields under the many-to-many relationship of the left data source).
Note
- If you need to expand the sub-form area, the values of the original cells within the expanded range will be cleared; if the expanded area overlaps with another sub-form area, this expansion will be invalid.
- If you need to shrink the sub-form area, the shrinking range will clear the values of cells that are not within the current range.
2. Operation Methods
The sub-form area is equipped with two function buttons:
- Select Sub-form: After clicking, the property panel on the right will switch to the sub-form property display interface.
- Delete: After clicking, the entire sub-form will be removed.
Note
- Fields under cascading fields are not allowed to be dragged into non-sub-form cells; and the content in the sub-form cannot be copied to outside the sub-form area, otherwise the print template cannot be published successfully.
- Fields under non-cascading fields are also not allowed to be dragged into the sub-form.
IV. Property Panel
1. Function Introduction
In the property panel, users can conveniently set various properties, including template properties and field properties.
- Model Properties
| Property | Description |
|---|---|
| Paper Size | You can set the paper size of the print template. |
| Page Orientation | You can adjust the page orientation. |
| Margins | You can separately adjust the margins of the paper. |
| Header/Footer | After enabling, you can separately set the display content on the left, middle, or right of the header/footer. |
| Watermark | You can select the watermark type, including no watermark, text, or image: Text: You can customize the watermark text, and the text will be displayed on the page according to the customized size, color, inclination, etc. Image: You can upload an image, and the image will be displayed on the page according to the customized width, height, inclination, etc. |
- Property Settings
| Field Type | Property | Description |
|---|---|---|
| Text | Display Format | Set the text content to static text, QR code, or barcode. |
| Text | When Content is Too Long | When the content is too long, you can set whether to enable automatic line breaks. |
| Integer | When Content is Too Long | When the content is too long, you can set whether to enable automatic line breaks. |
| Integer | Display Thousands Separator | When the value is too large, it can be displayed in thousands separator format. |
| Decimal | When Content is Too Long | When the content is too long, you can set whether to enable automatic line breaks. |
| Decimal | Specify Decimal Places | You can specify the number of decimal places to display. |
| Decimal | Decimal Display Type | You can choose to display decimals in percentage form or with thousands separators. |
| Date | When Content is Too Long | When the content is too long, you can set whether to enable automatic line breaks. |
| Date | Date Format | You can select the date display format. |
| DateTime | When Content is Too Long | When the content is too long, you can set whether to enable automatic line breaks. |
| DateTime | Date Format | You can select the date display format. |
| DateTime | Time Format | You can select the time display format. |
| Time | When Content is Too Long | When the content is too long, you can set whether to enable automatic line breaks. |
| Time | Time Format | You can select the time display format. |
| Other Types | When Content is Too Long | When the content is too long, you can set whether to enable automatic line breaks. |
Note
The available options for date, date-time, and time are the date-time formats set for the current language.
2. Operation Method
Select a field, and you can configure template properties or data properties in the property panel.