The platform allows users to custom-design diverse print template formats based on actual business needs. Seamless docking between templates and business models is achieved through model binding and visual design tools.
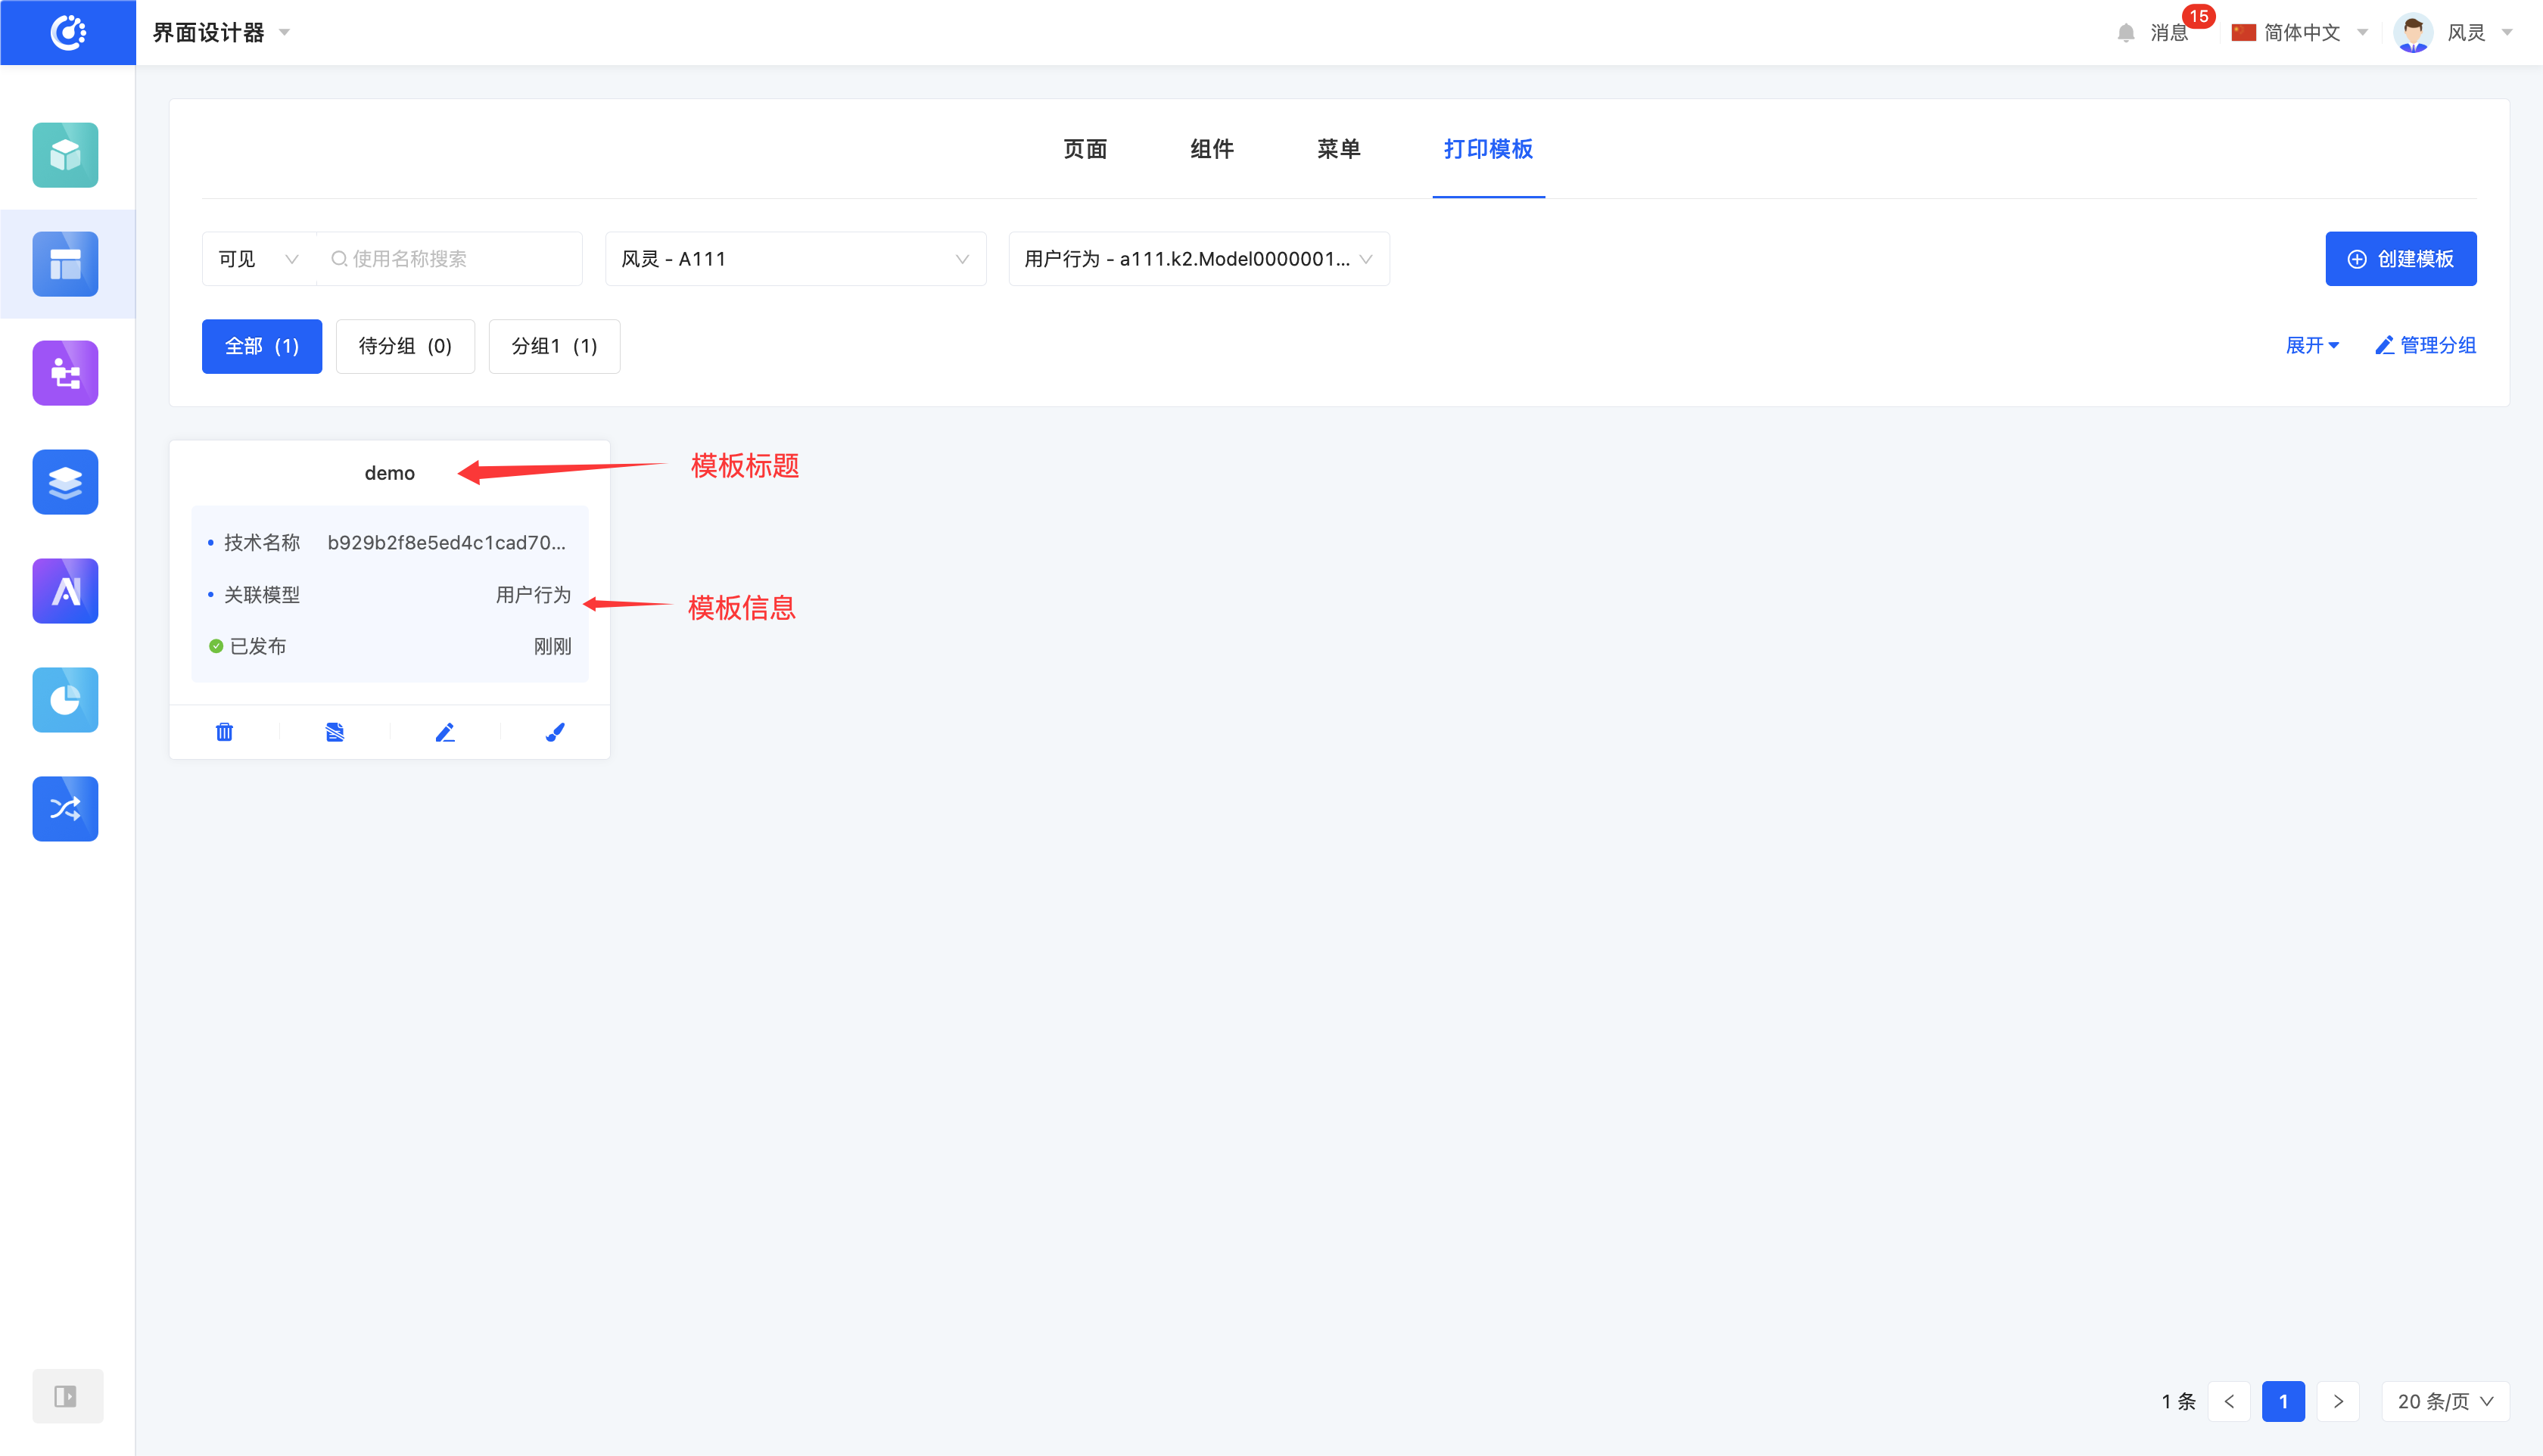
In the print template interface, templates are displayed in card form, where basic information such as template title, technical name, associated model, and publication status can be viewed.
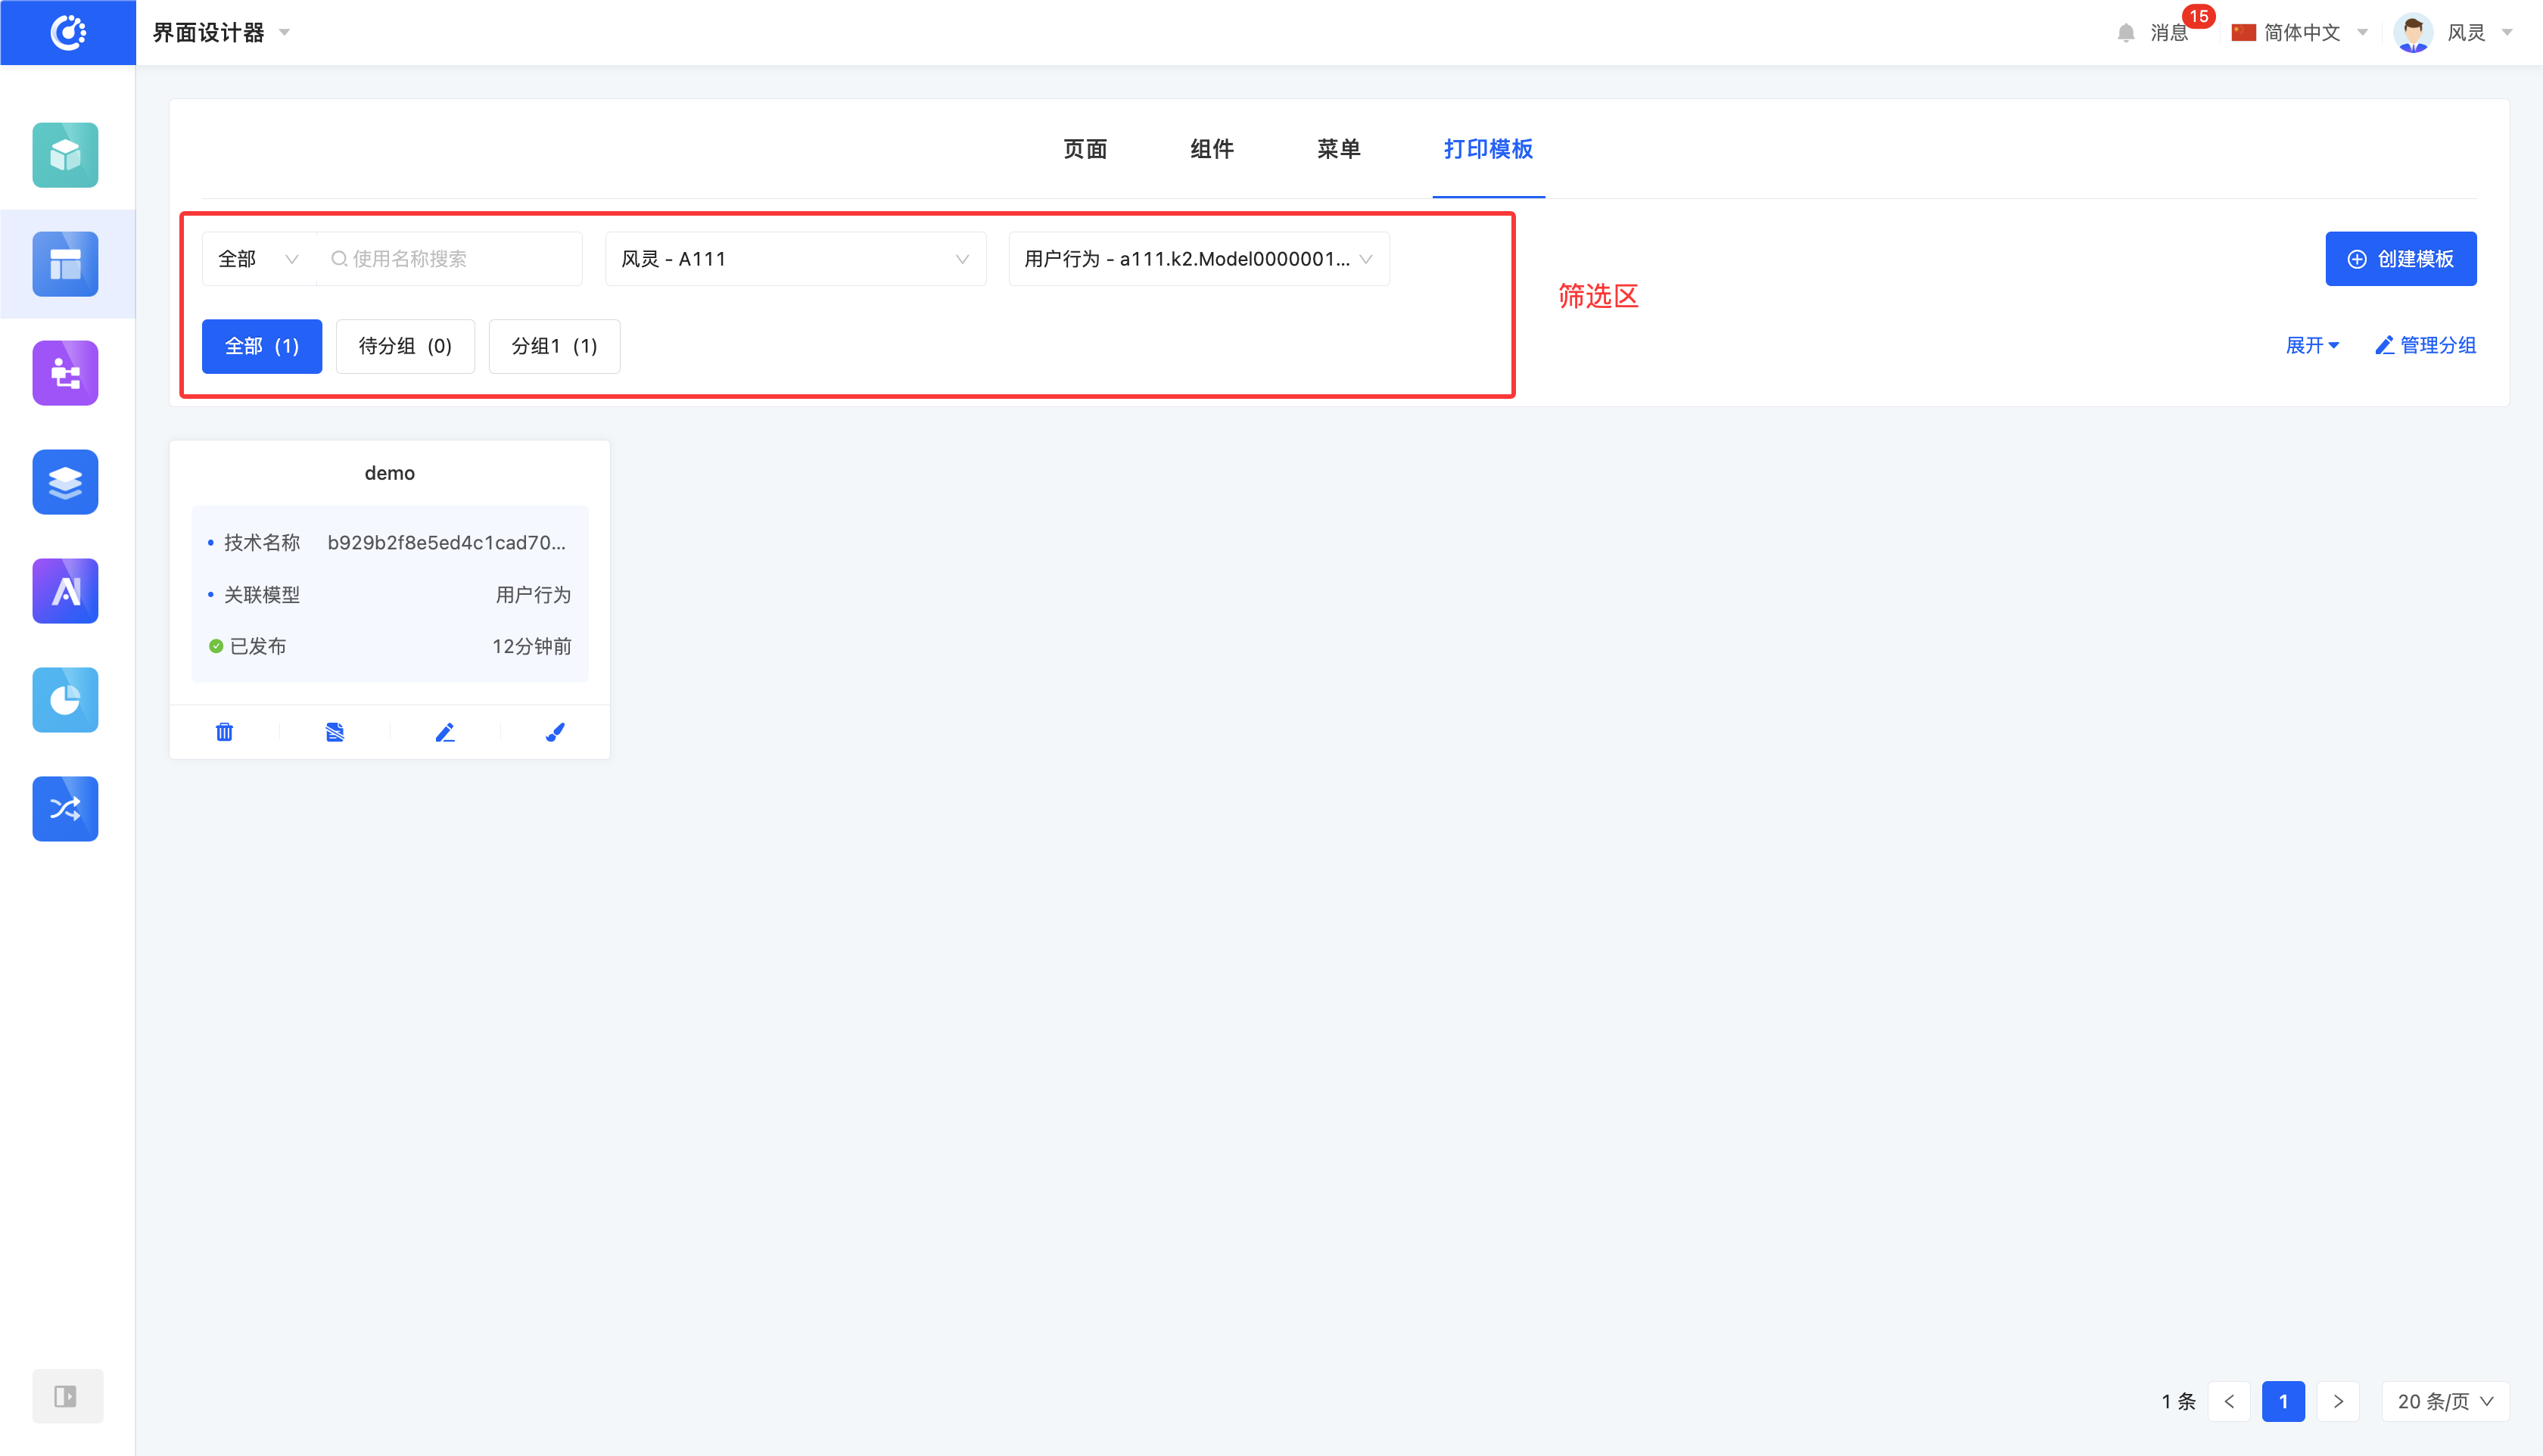
I. Filtering
1. Function Introduction
According to actual business needs, template filtering conditions can be customized, including template name, application, model, and grouping, to accurately filter templates. Under the current filtering conditions, the corresponding template list will be displayed, facilitating operations such as designing different templates.
2. Operation Method
Select or enter conditions in the filtering area to complete the filtering of templates.
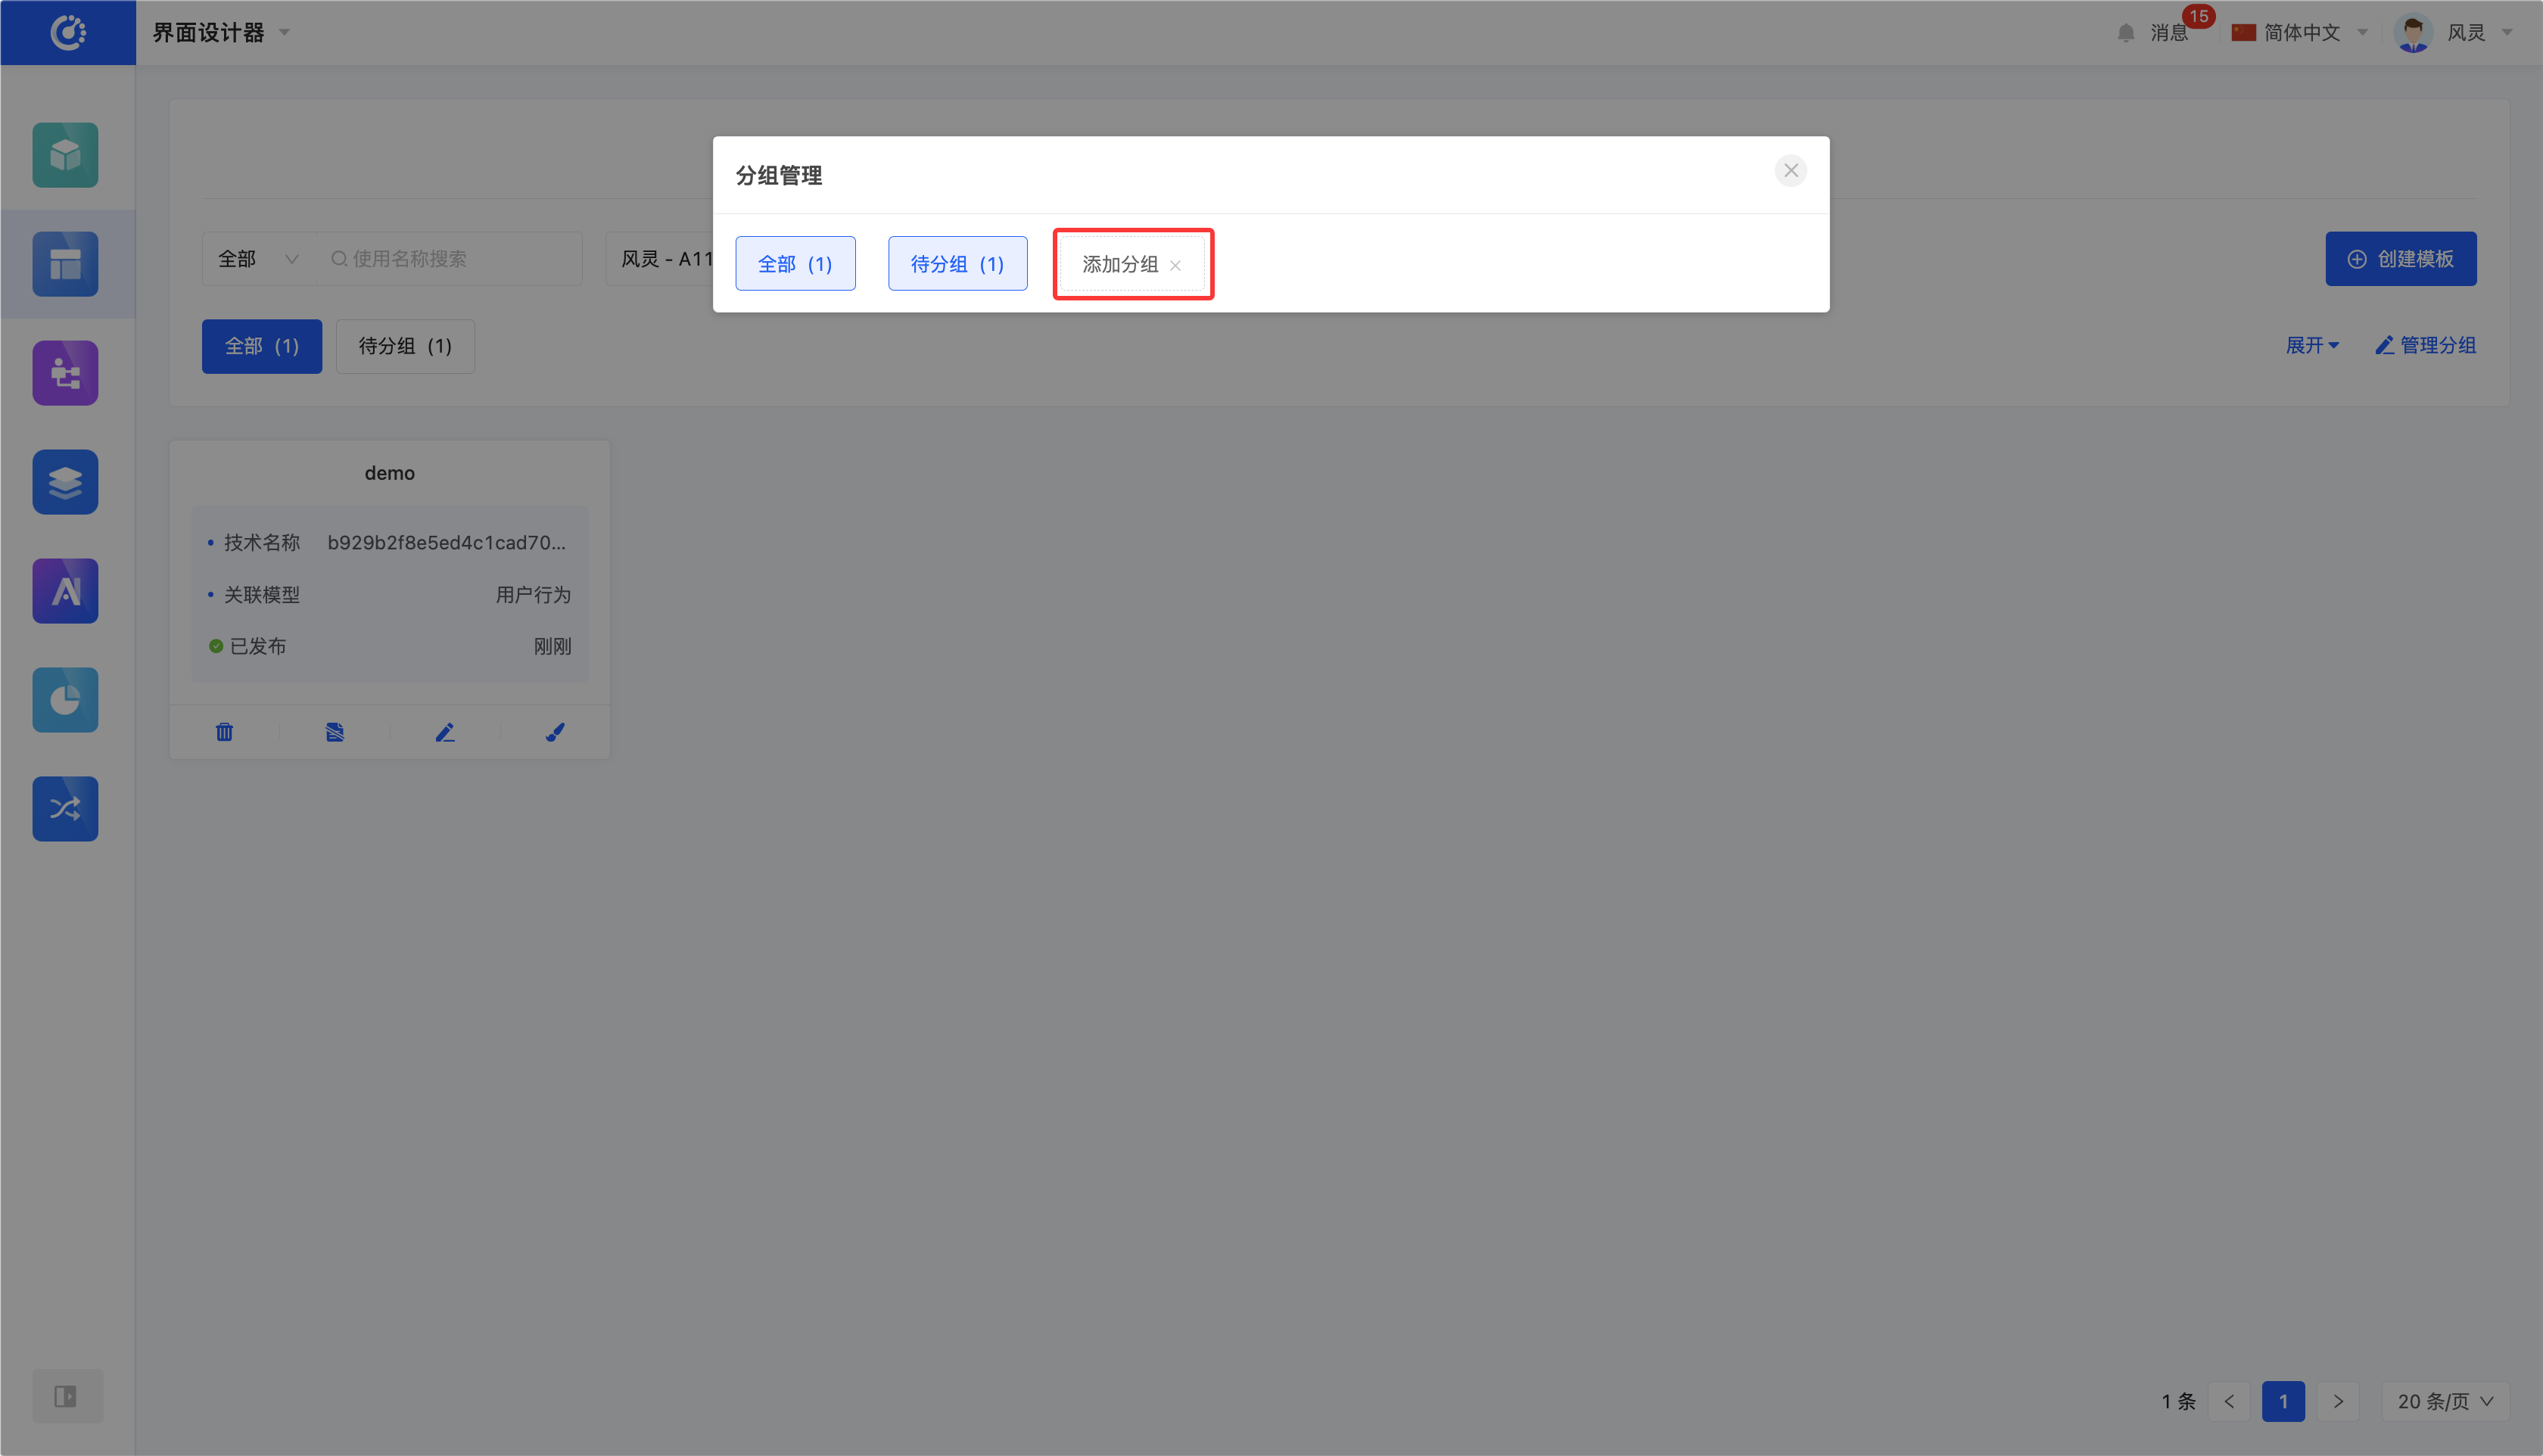
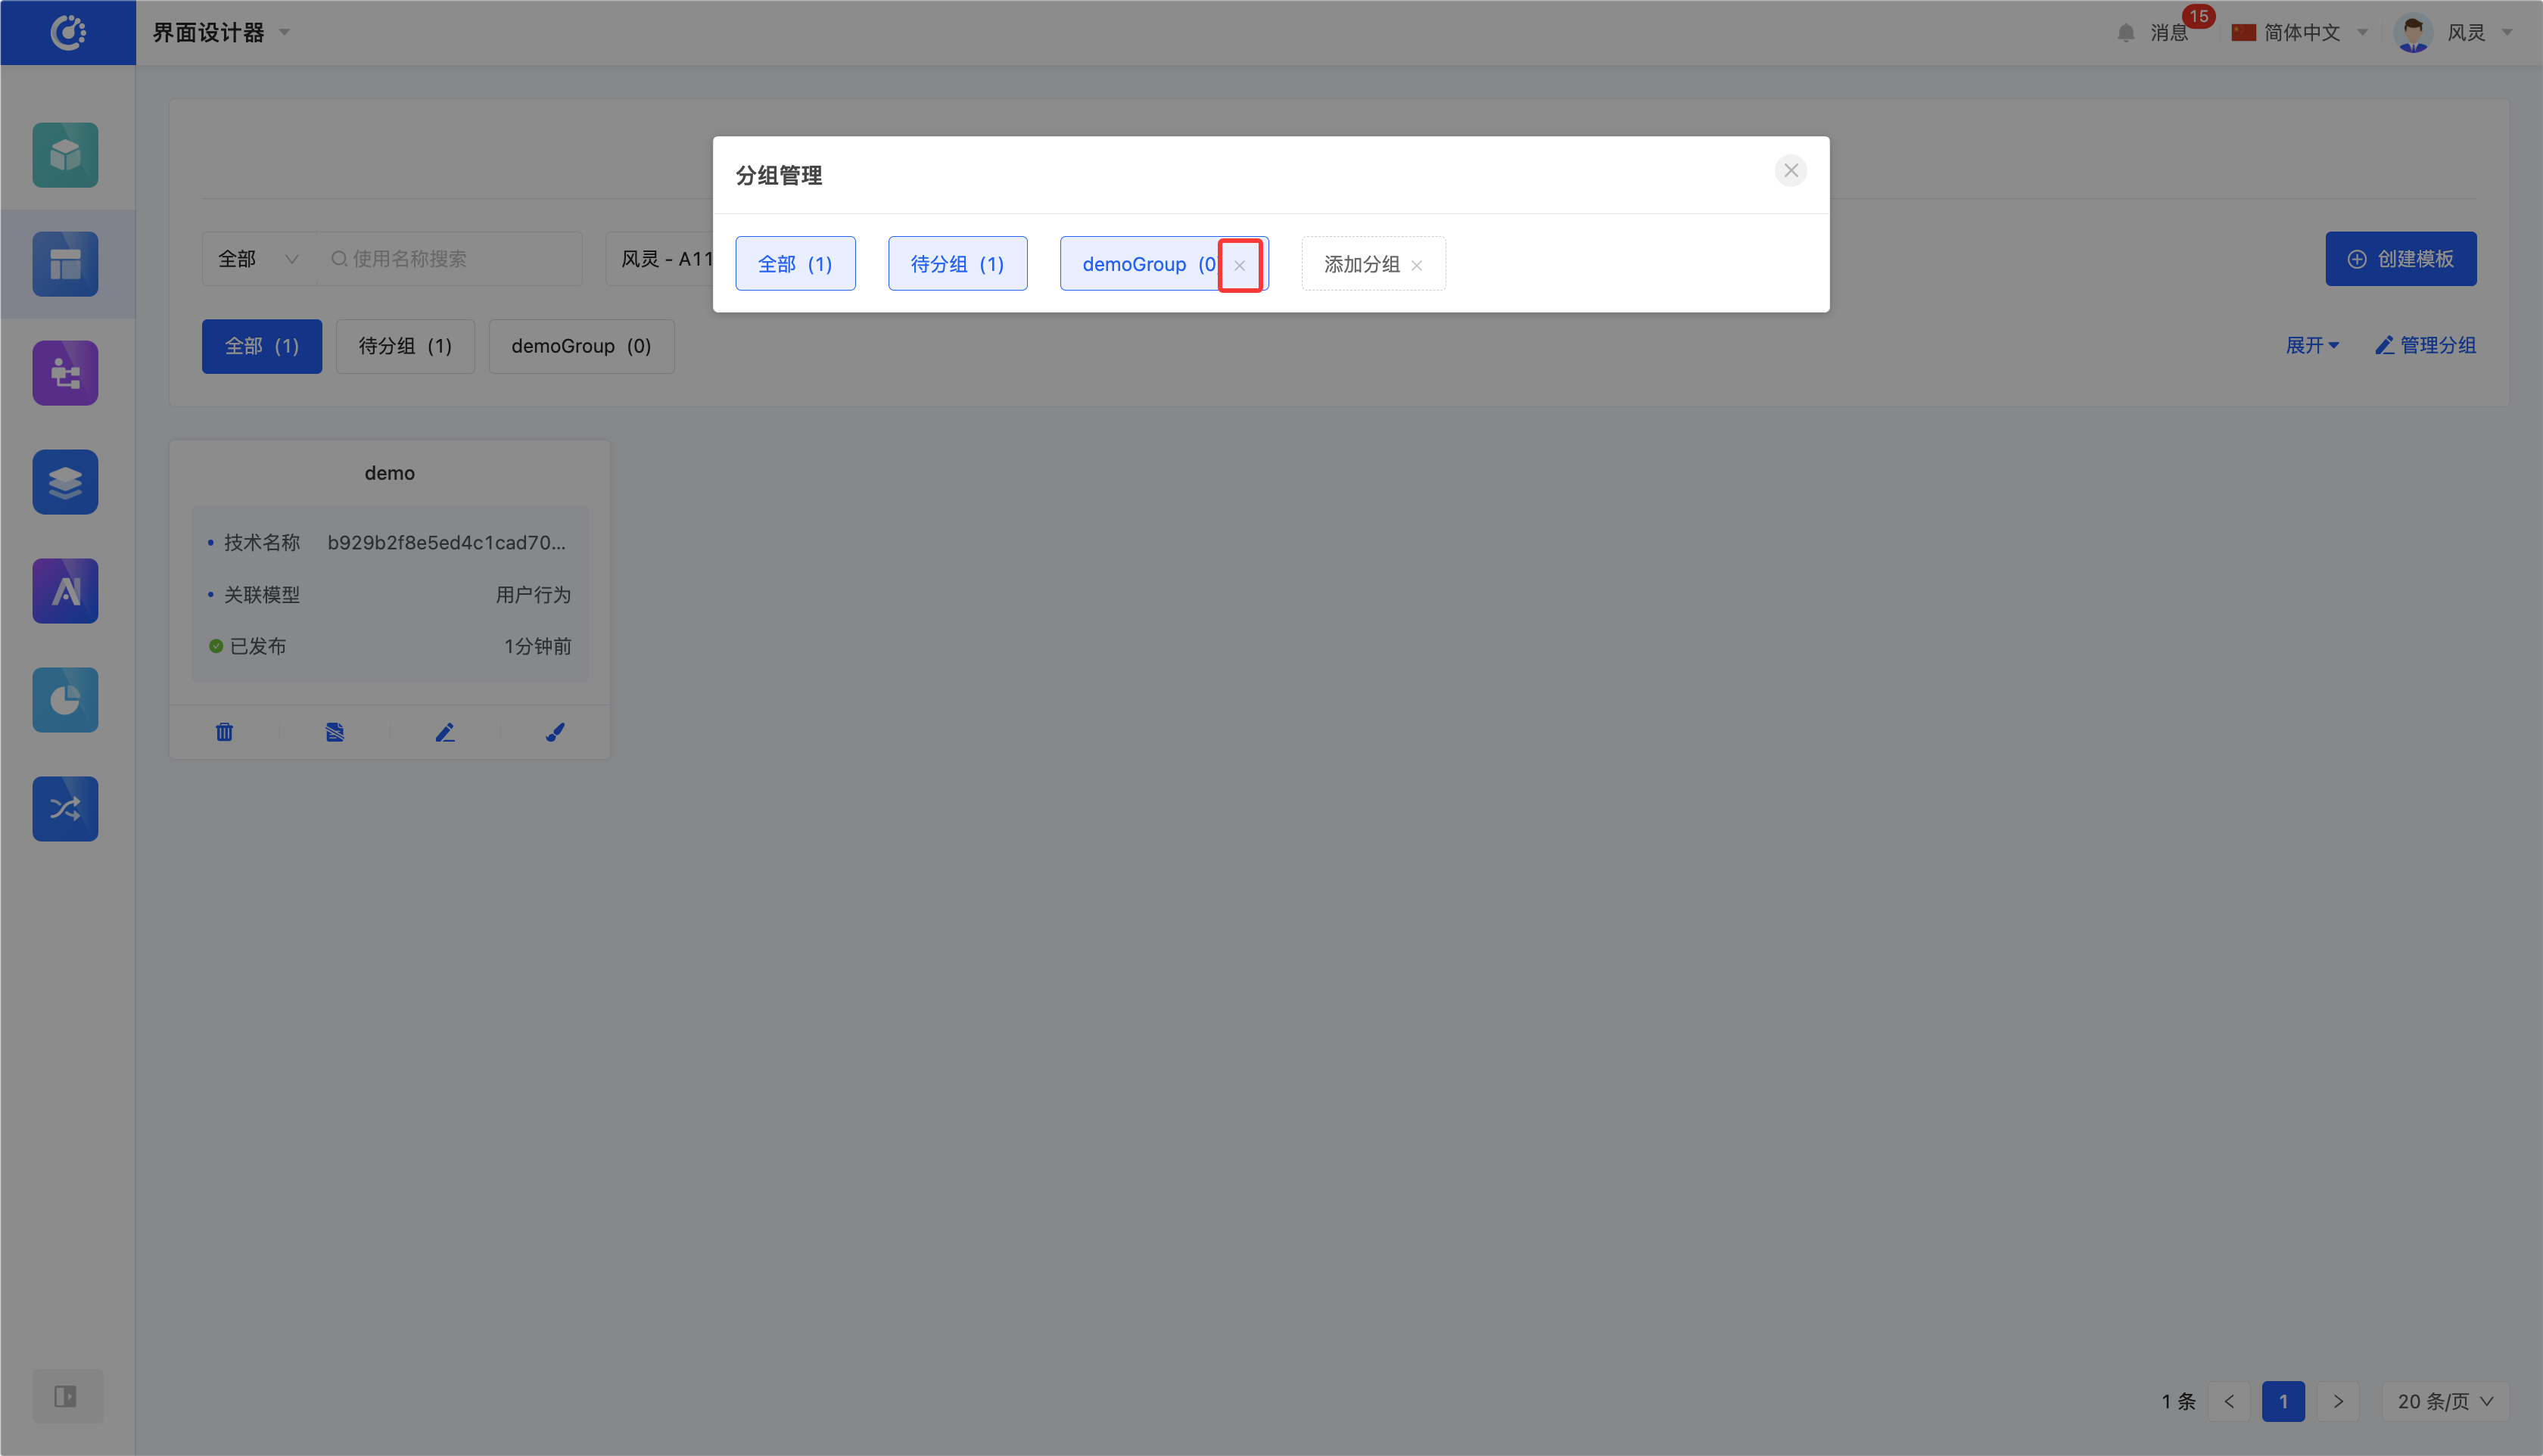
II. Group Management
1. Function Introduction
The grouping function can be used to classify and manage templates (including adding, modifying, and deleting).
2. Operation Method
- Manage Groups: Click "Manage Groups" to perform management operations on groups in the pop-up window.

- Add Group: Click "Add Group", enter the group name, and press Enter.
- Modify Group: Double-click the group label, modify it, and press Enter to save.
Note
If the group is also used by other applications, the name will change synchronously.
- Delete Group: Click the "Delete" icon after the group to delete it.
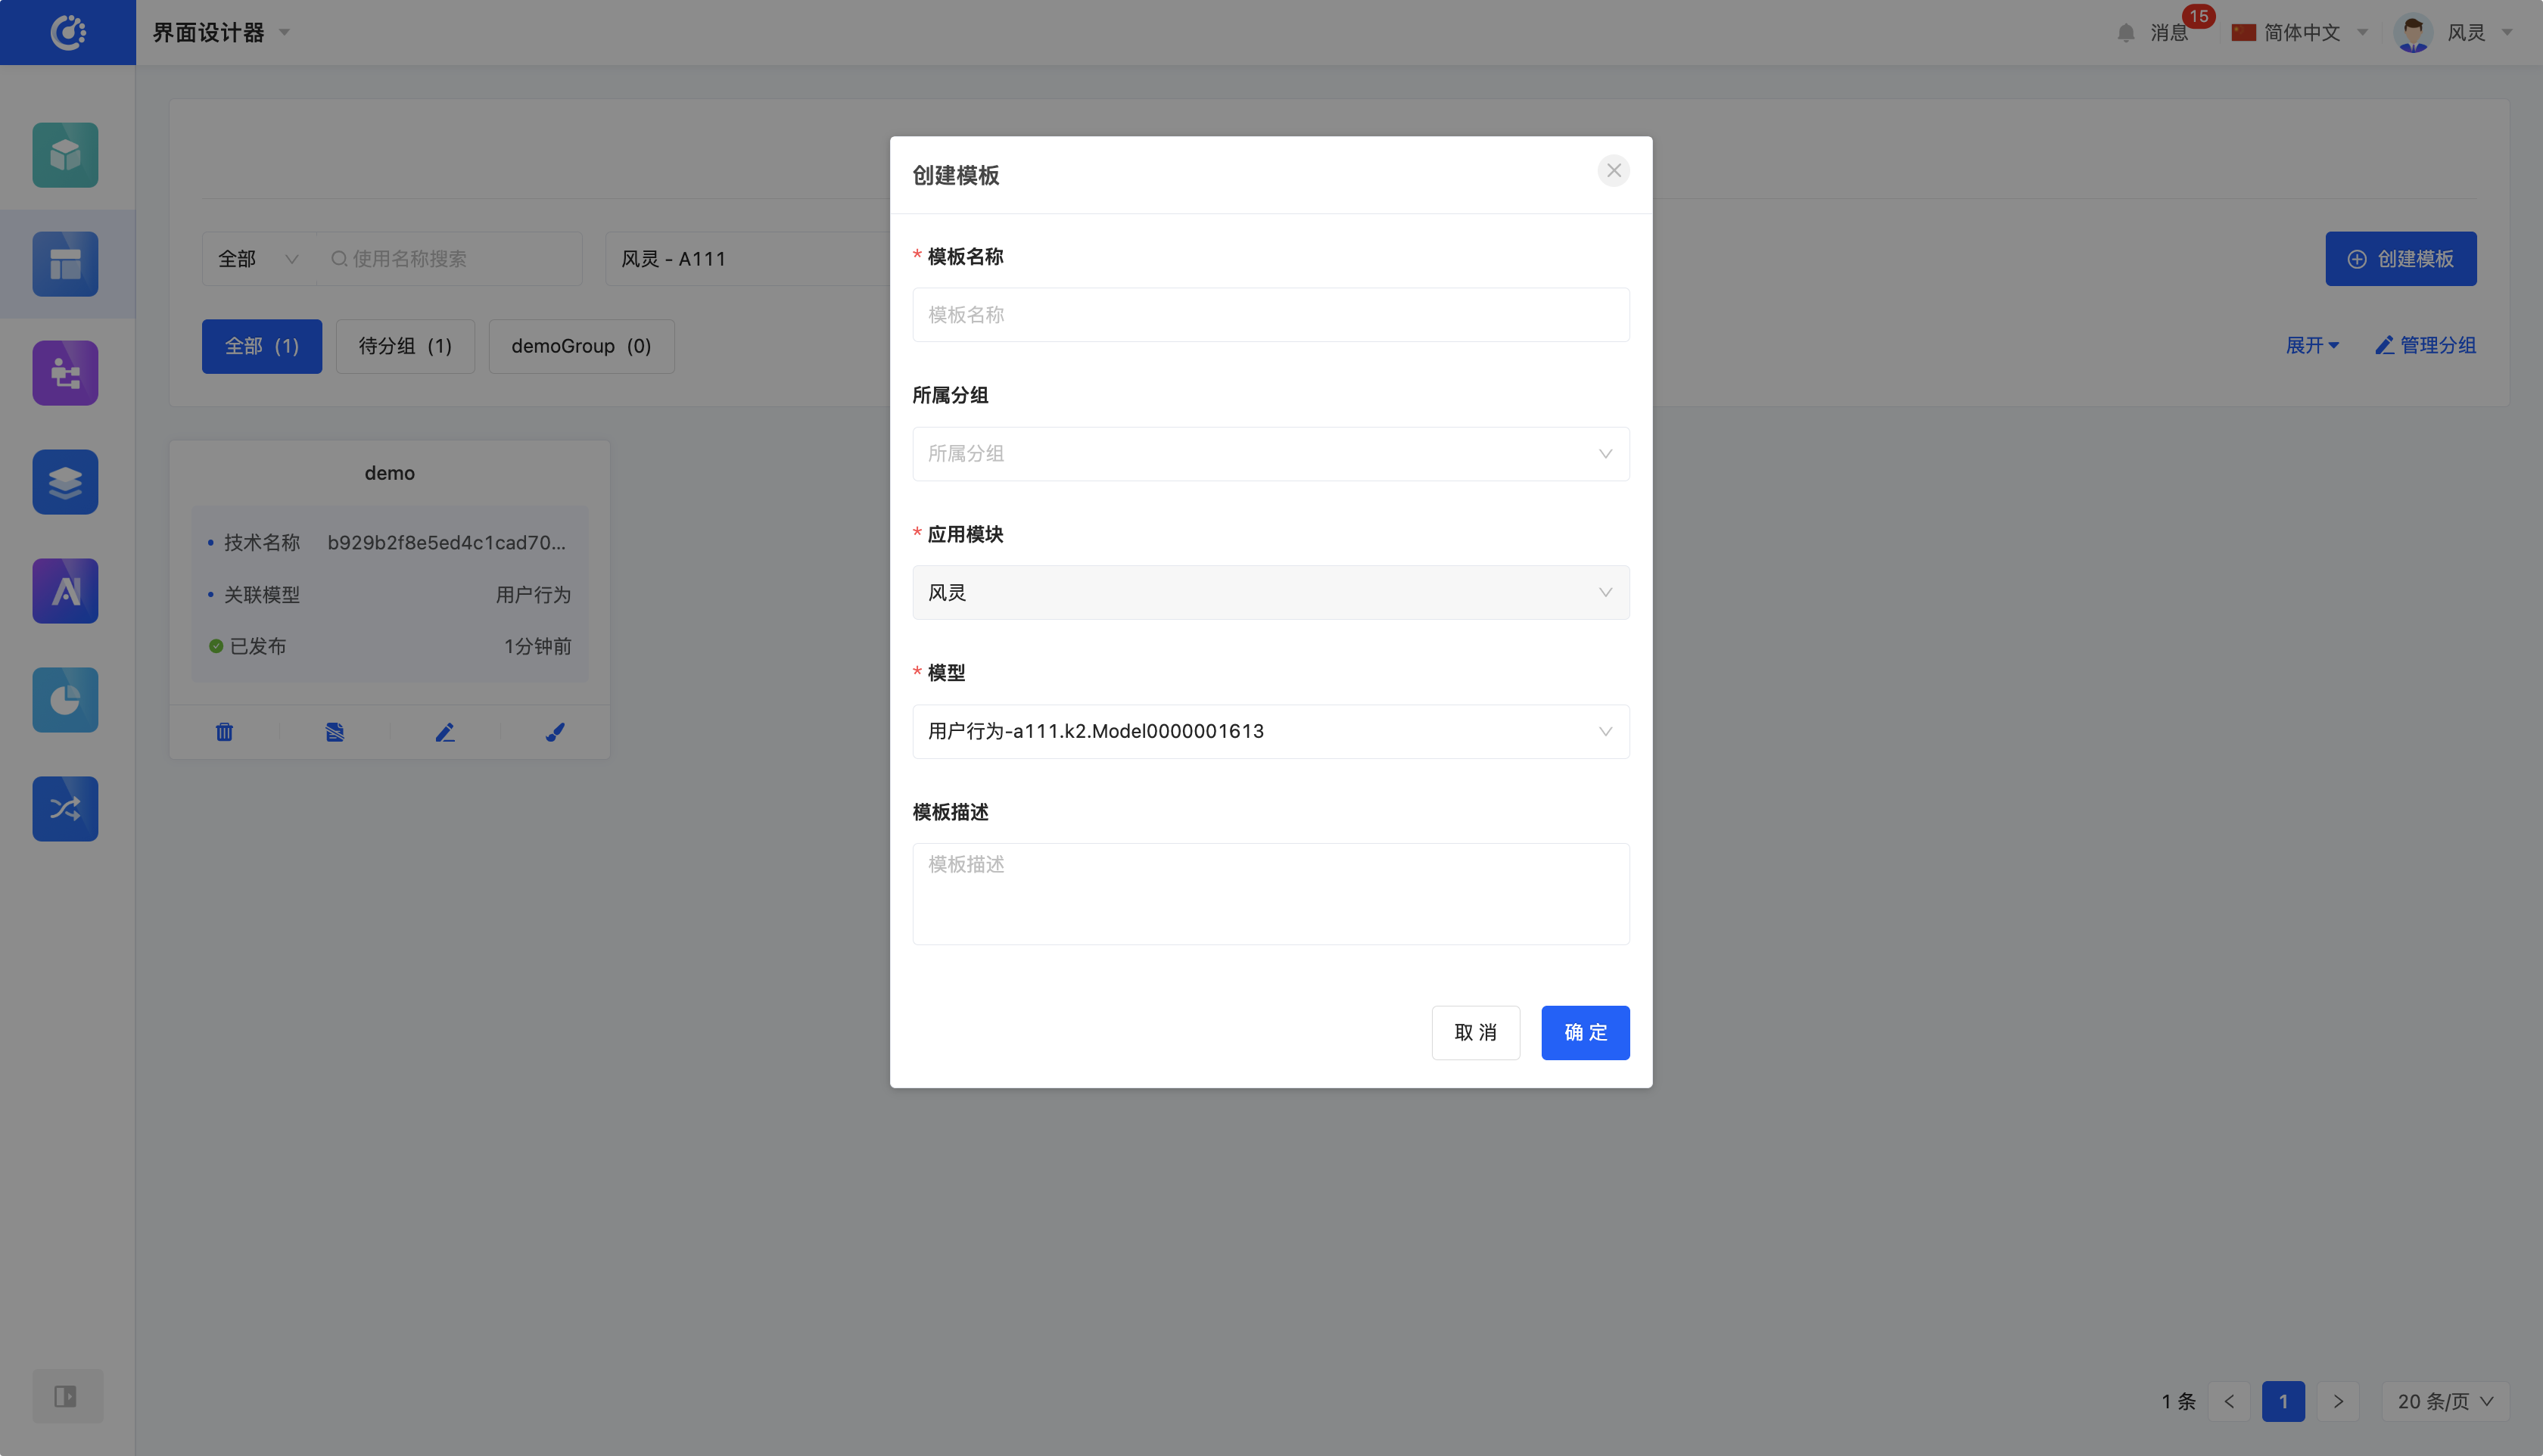
III. Create Template
1. Function Introduction
Use the interface designer to create print templates and edit template information during the creation process. The created templates can be selected when printing pages.
2. Operation Method
Click "Create Template", correctly fill in the information in the pop-up page, and click "OK" to successfully create it.

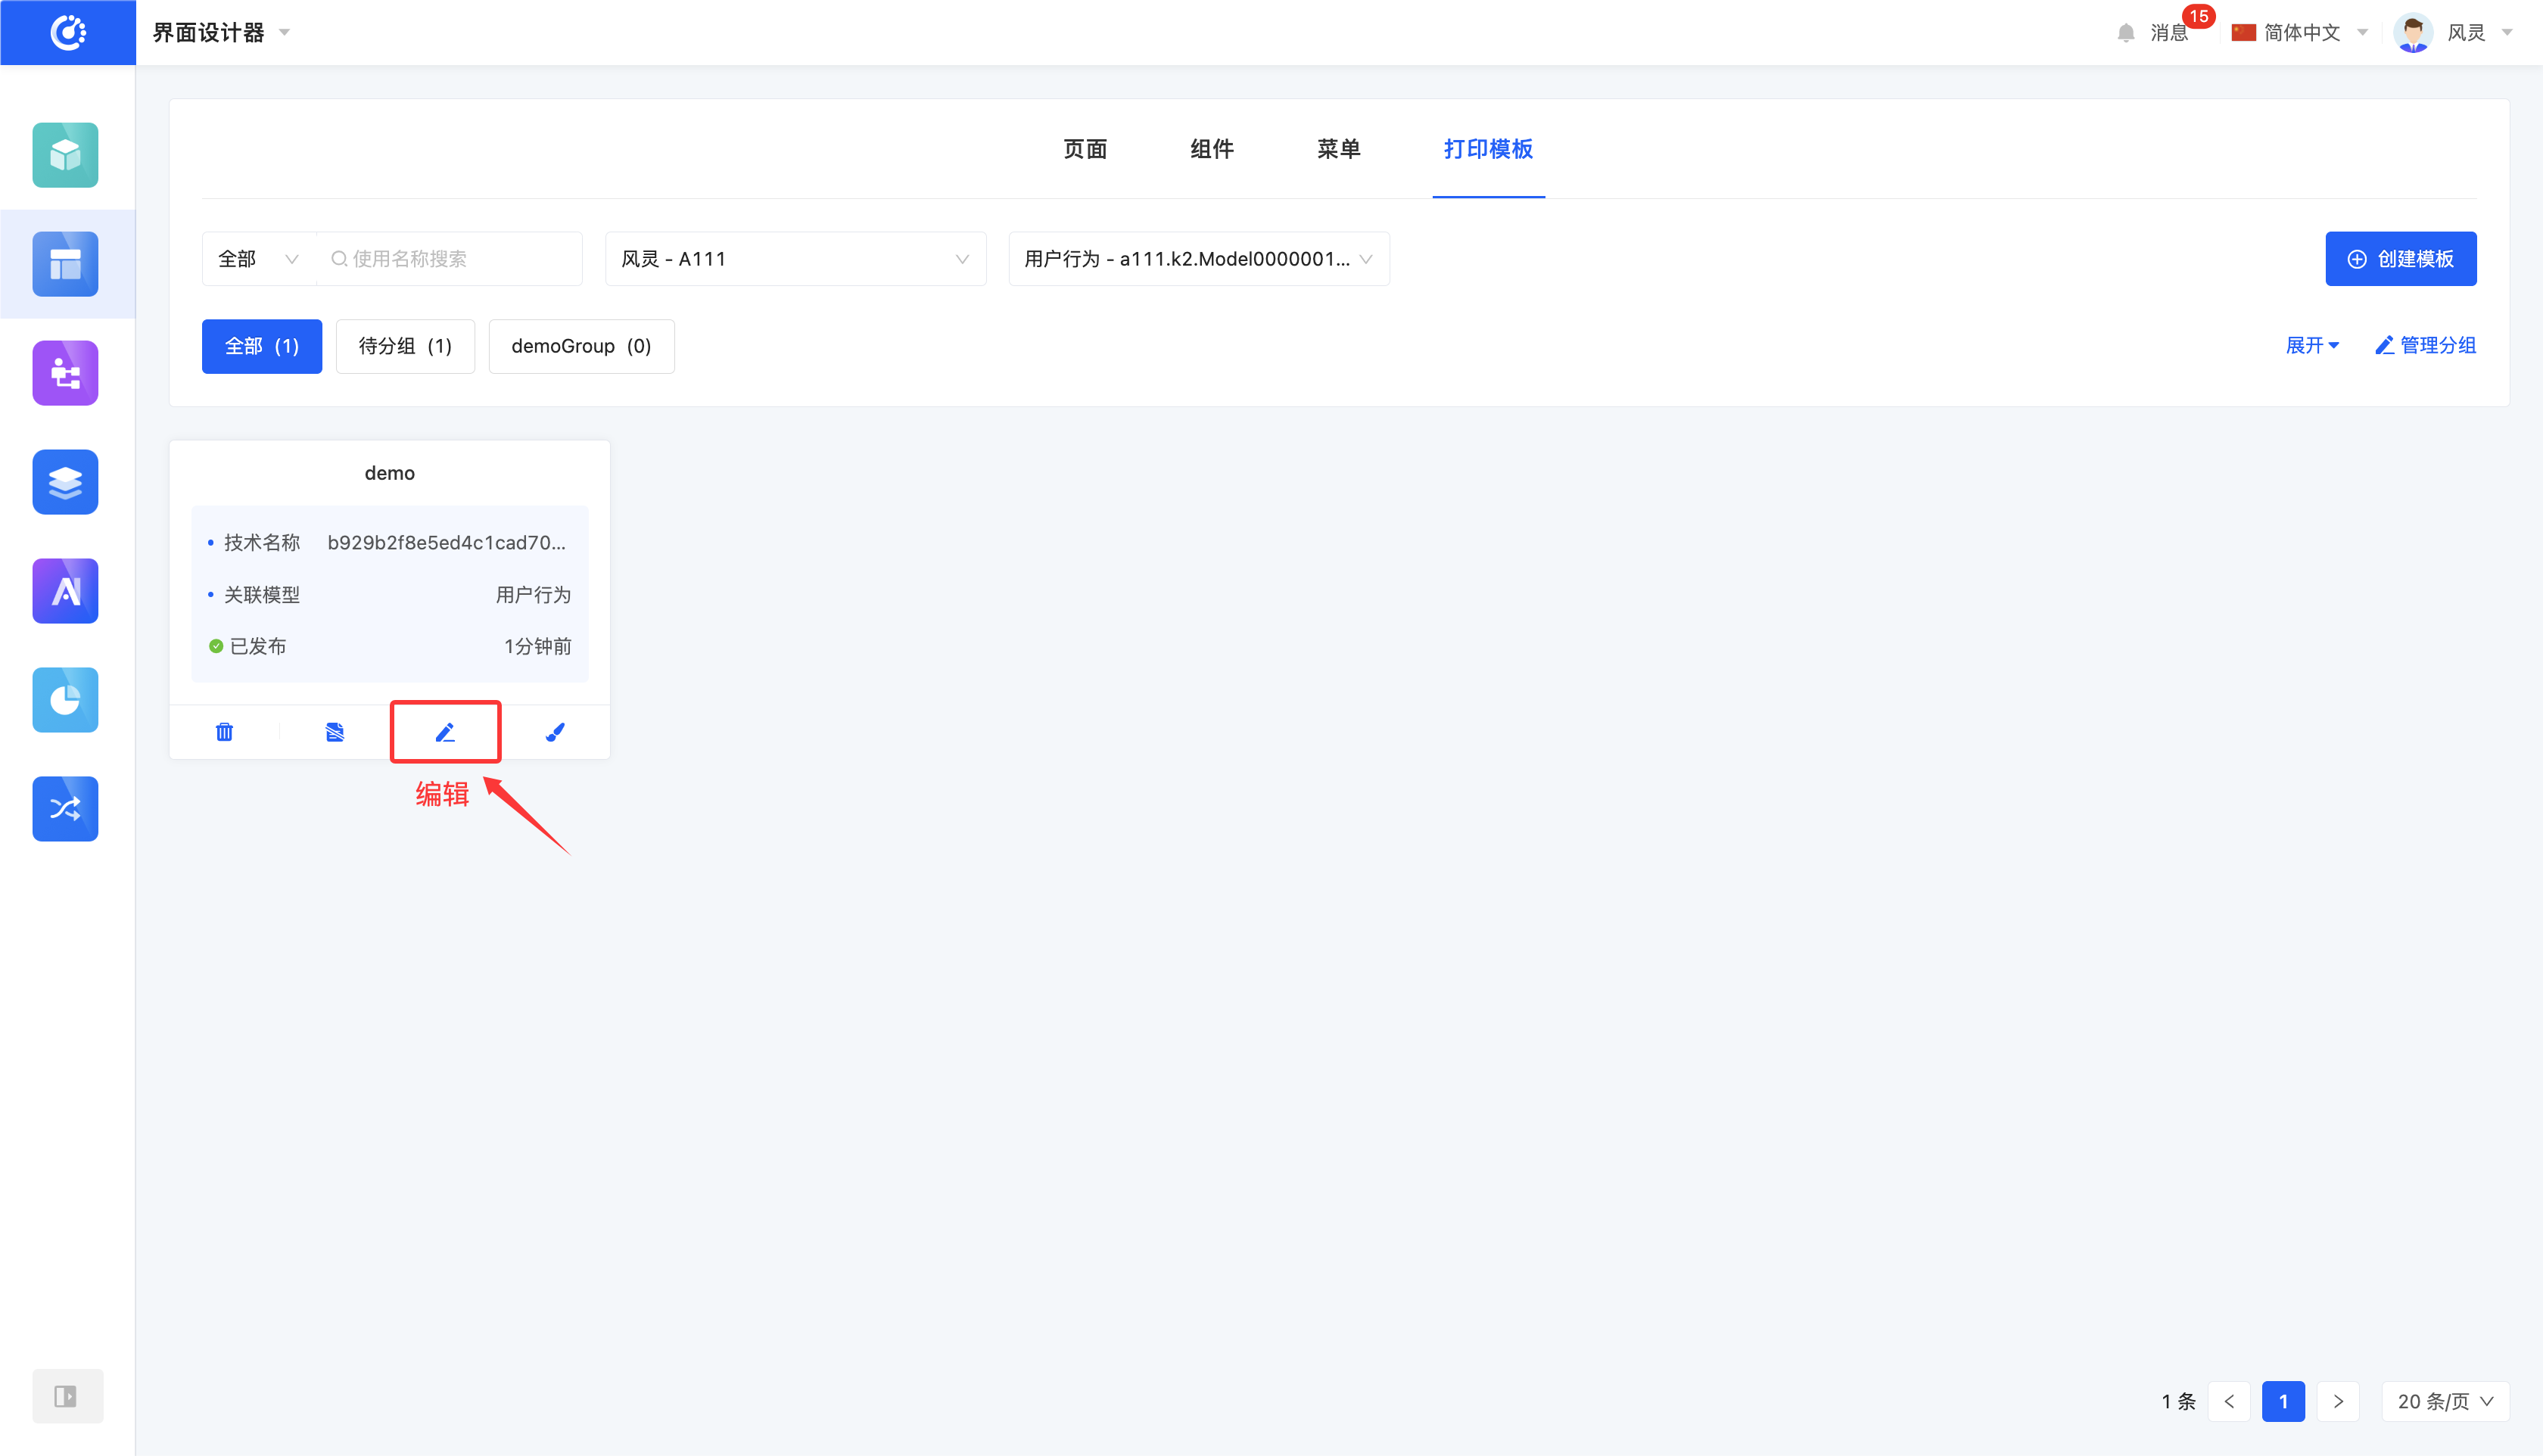
IV. Edit Template
1. Function Introduction
Successfully created templates can be edited.
Note
Only partial information is supported for modification, and some information is fixed at the time of creation, so please fill it in carefully when creating.
2. Operation Method
Click "Edit" to edit the template information in the pop-up editing page.
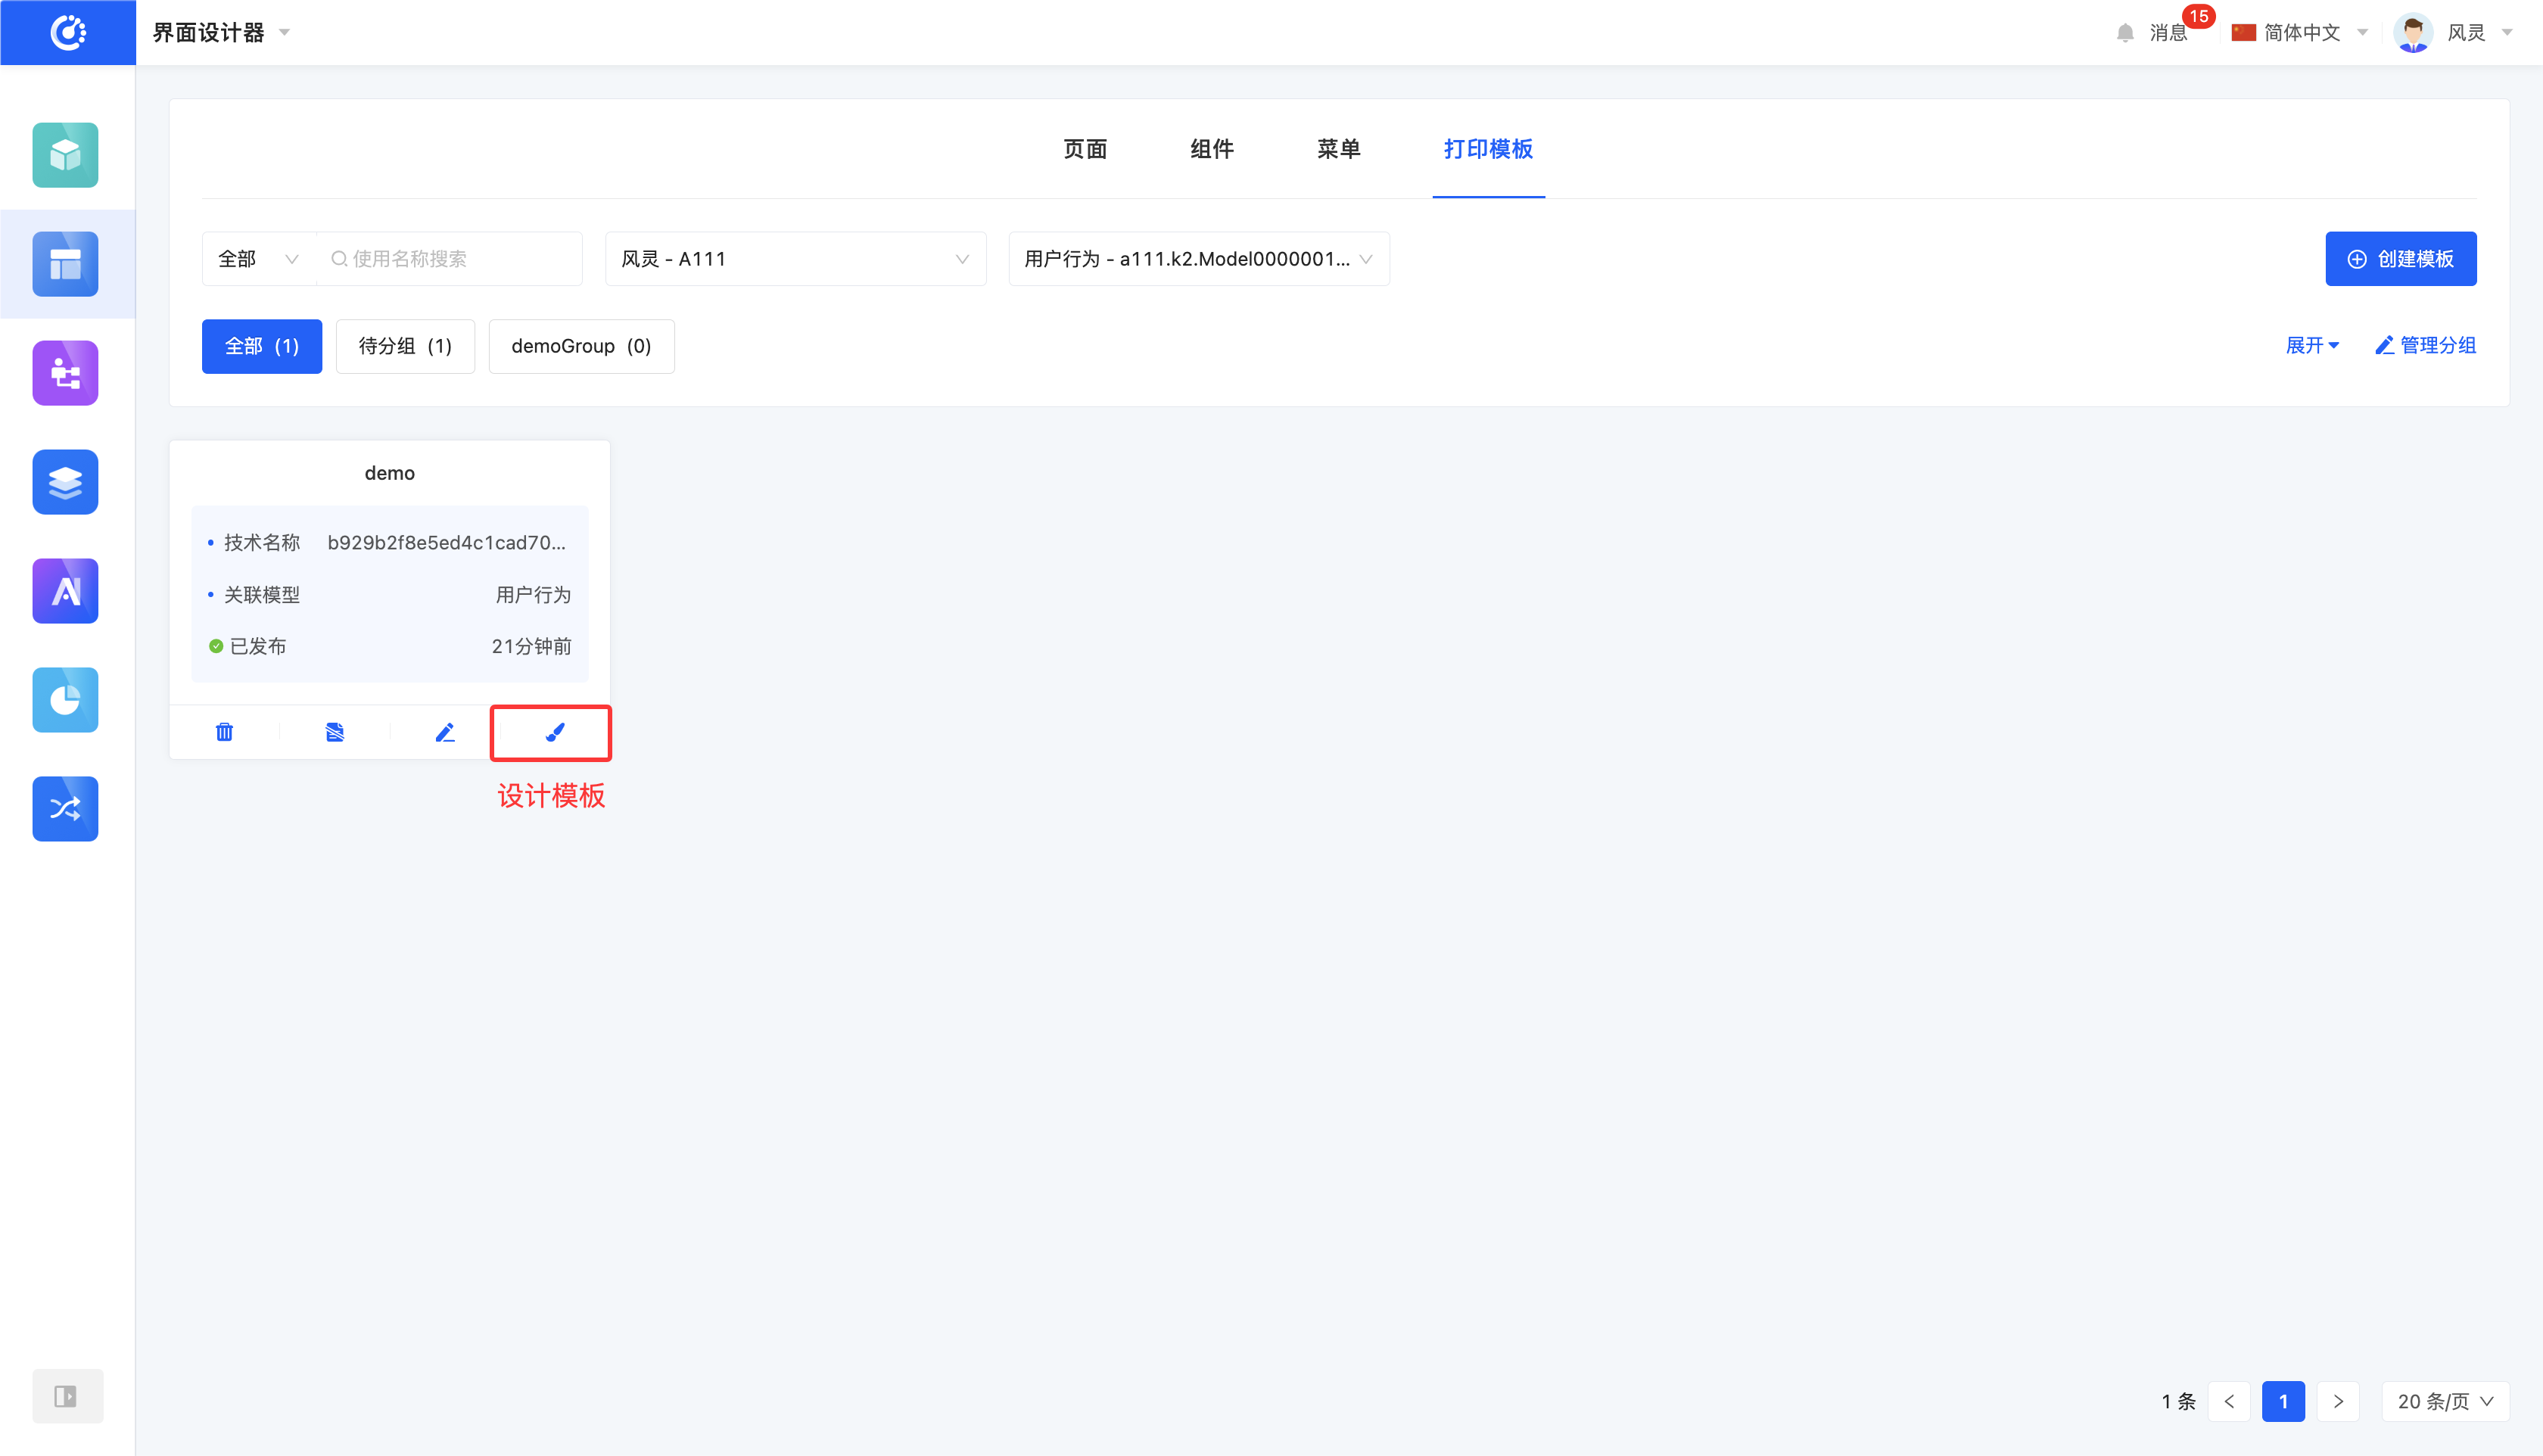
V. Design Template
1. Function Introduction
In the template design interface, template design and typesetting work can be carried out. By using various data source fields, personalized design layouts can be made for templates to meet different needs and styles.
2. Operation Method
Click the main part of the page card or click the "Design Template" button to enter the template design interface (for details, see the print template design document).
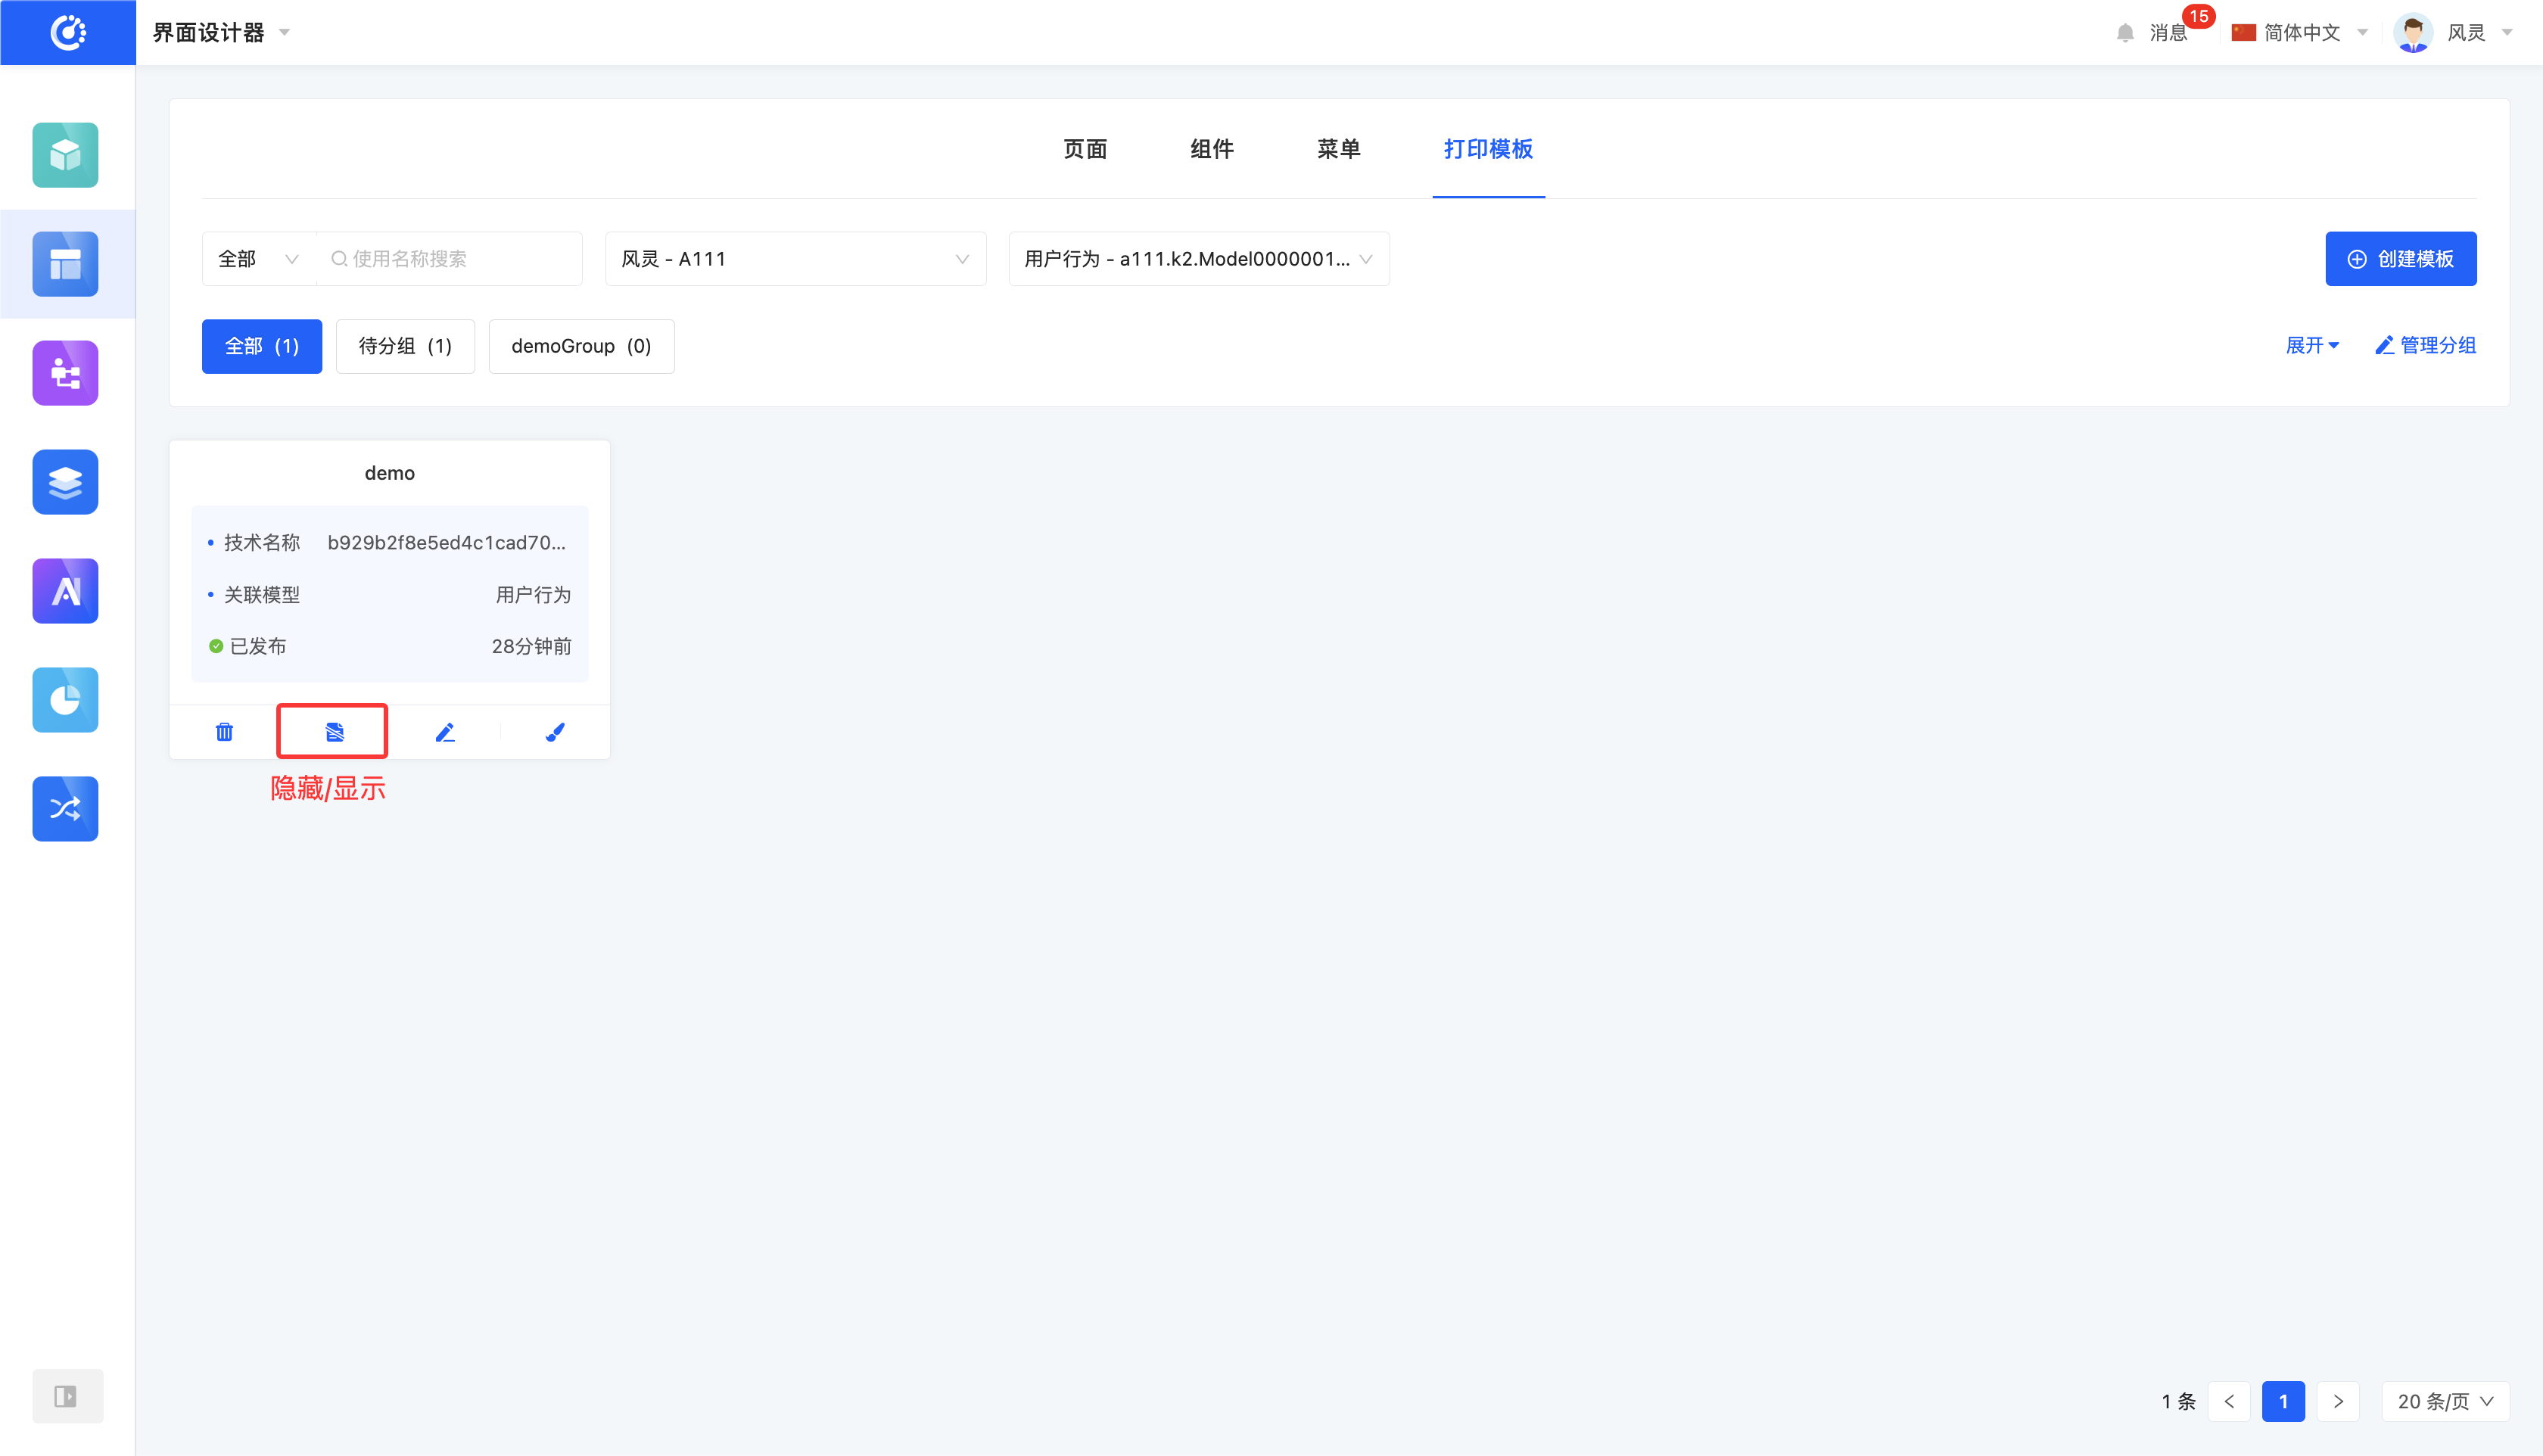
VI. Hide/Show Template
1. Function Introduction
For templates that are not currently in use, a hide operation can be performed. If needed in the future, simply set the hidden template to the show state to put it back into use. In addition, hidden templates still support operations such as editing.
Note
Hidden templates will no longer be displayed in the optional list when printing.
2. Operation Method
Click "Hide" to set the template to the hidden state, and the button becomes "Show"; click again to set the template to the visible state.
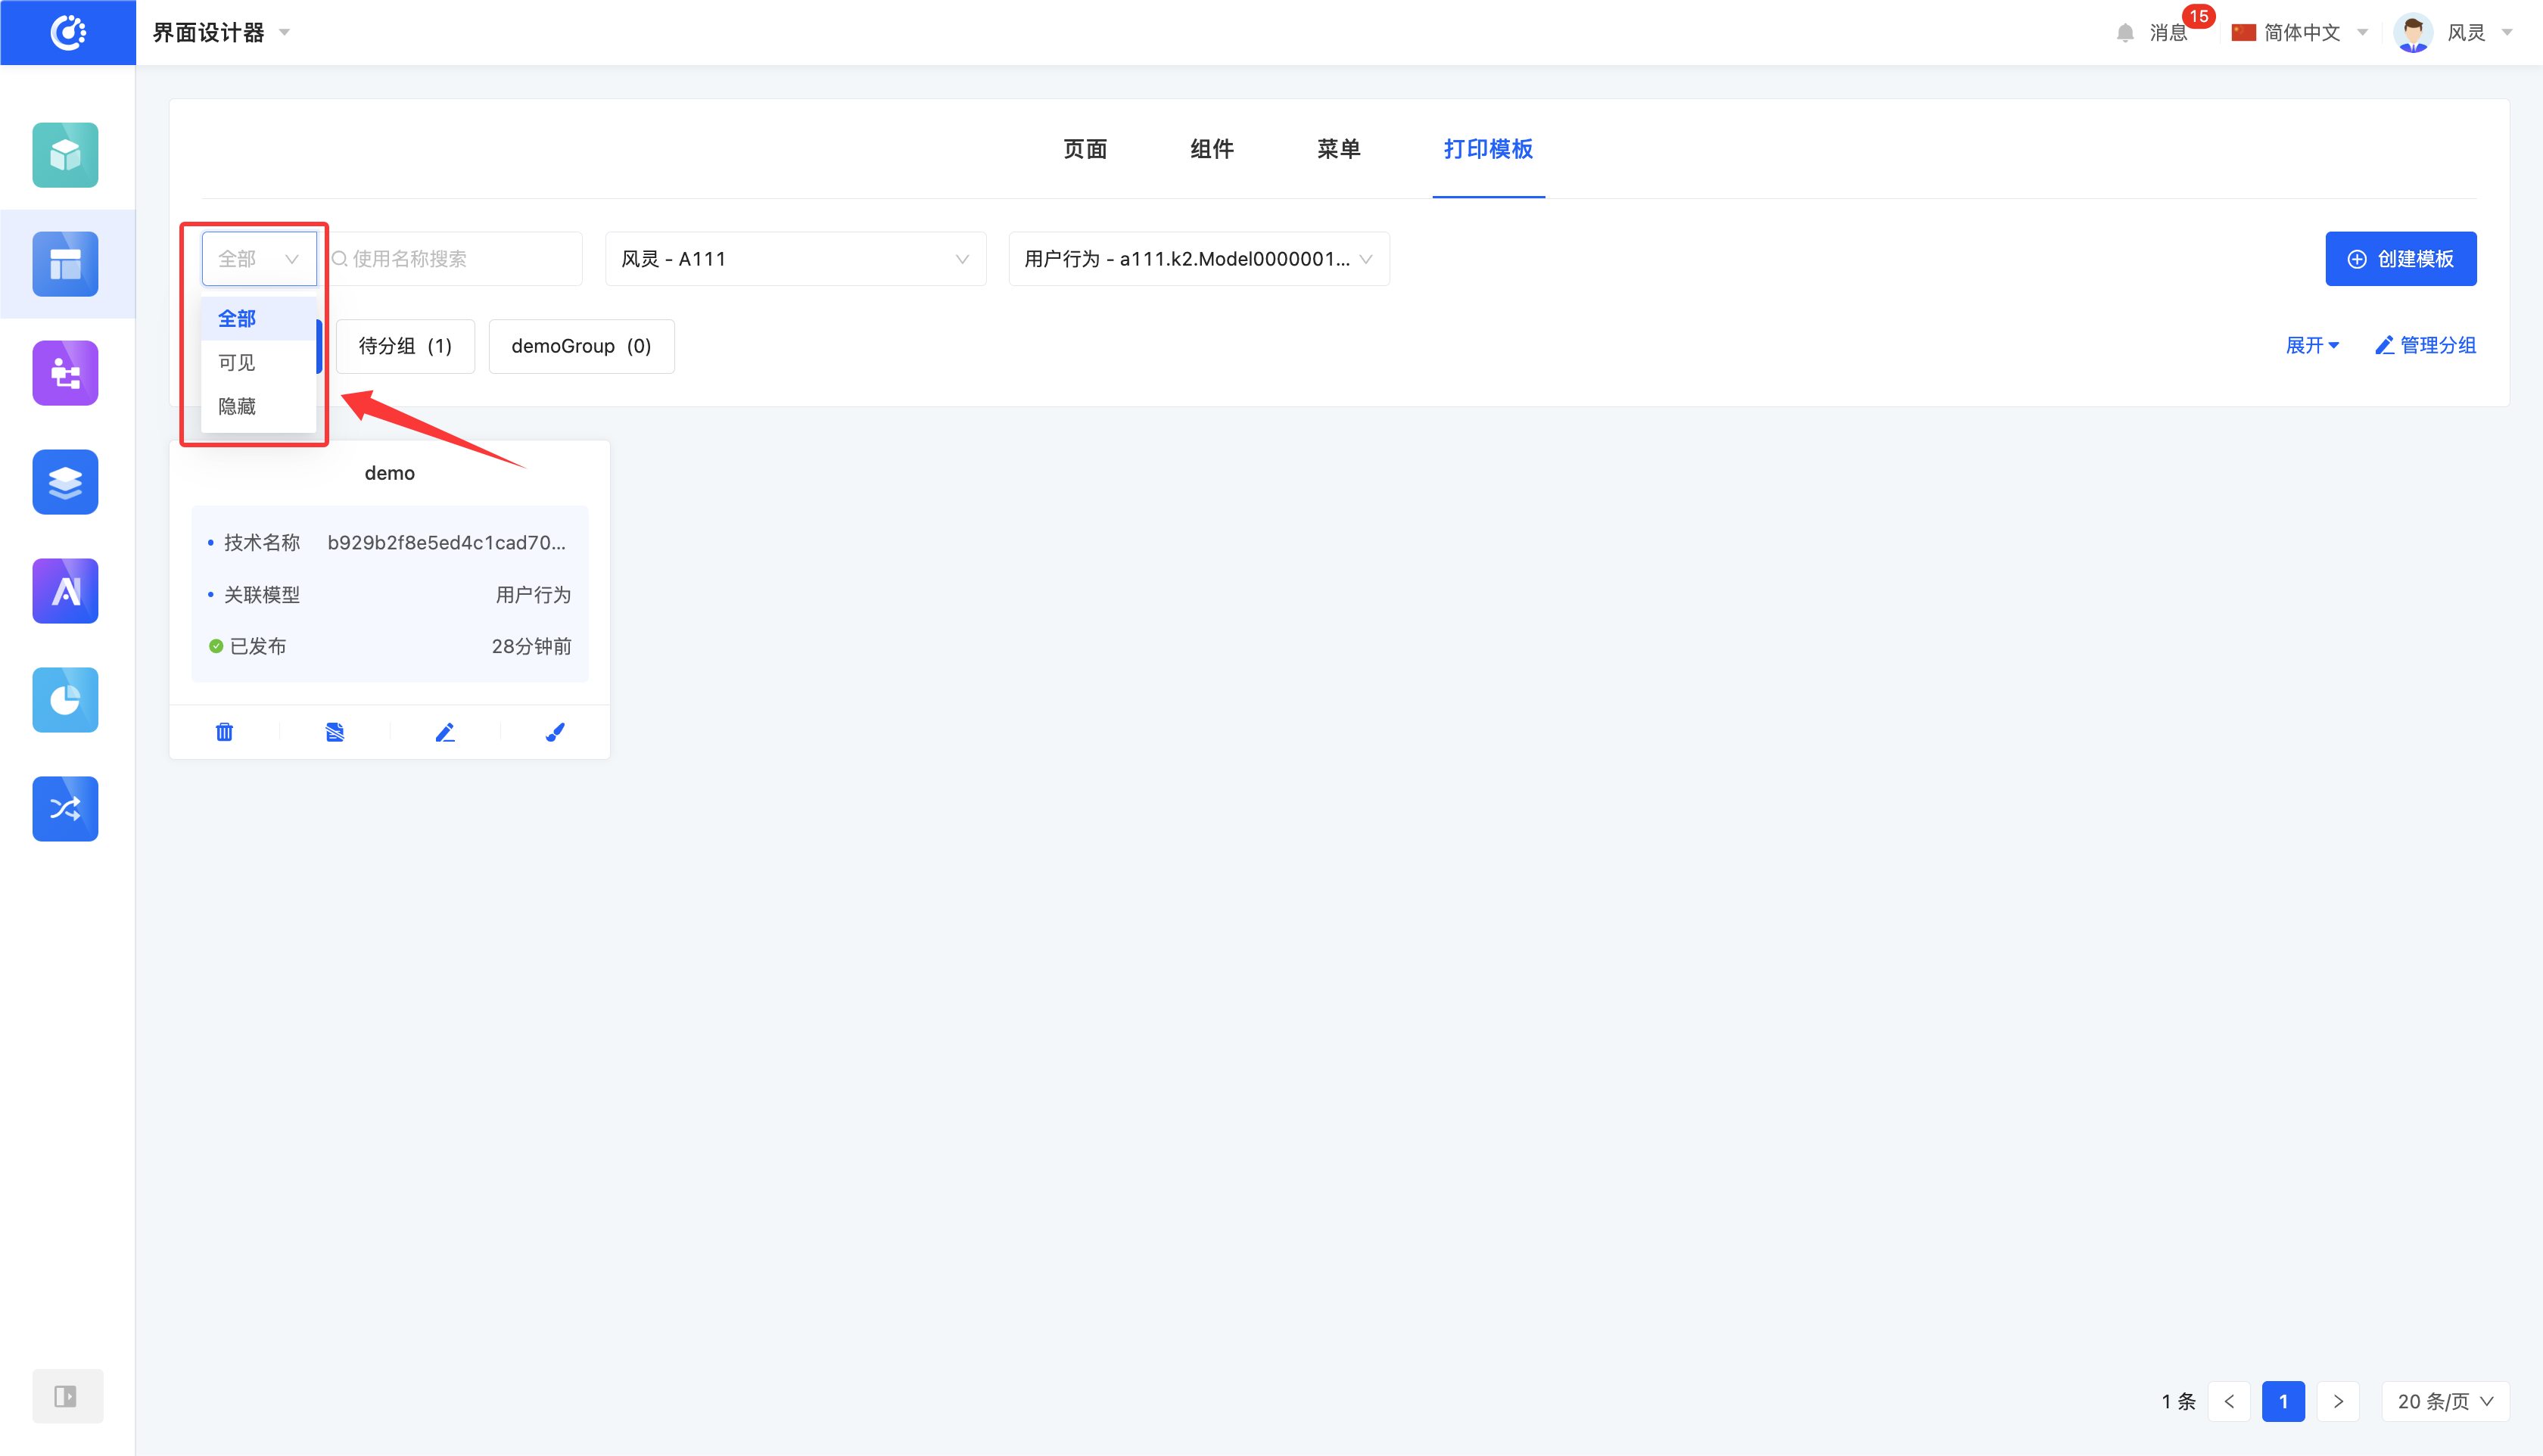
Tip
If you need to operate on a hidden template but cannot find a hidden template in the list, switch the filter options. The page list defaults to displaying all "visible" templates. Switch to "All" or "Hidden" to find the hidden template.
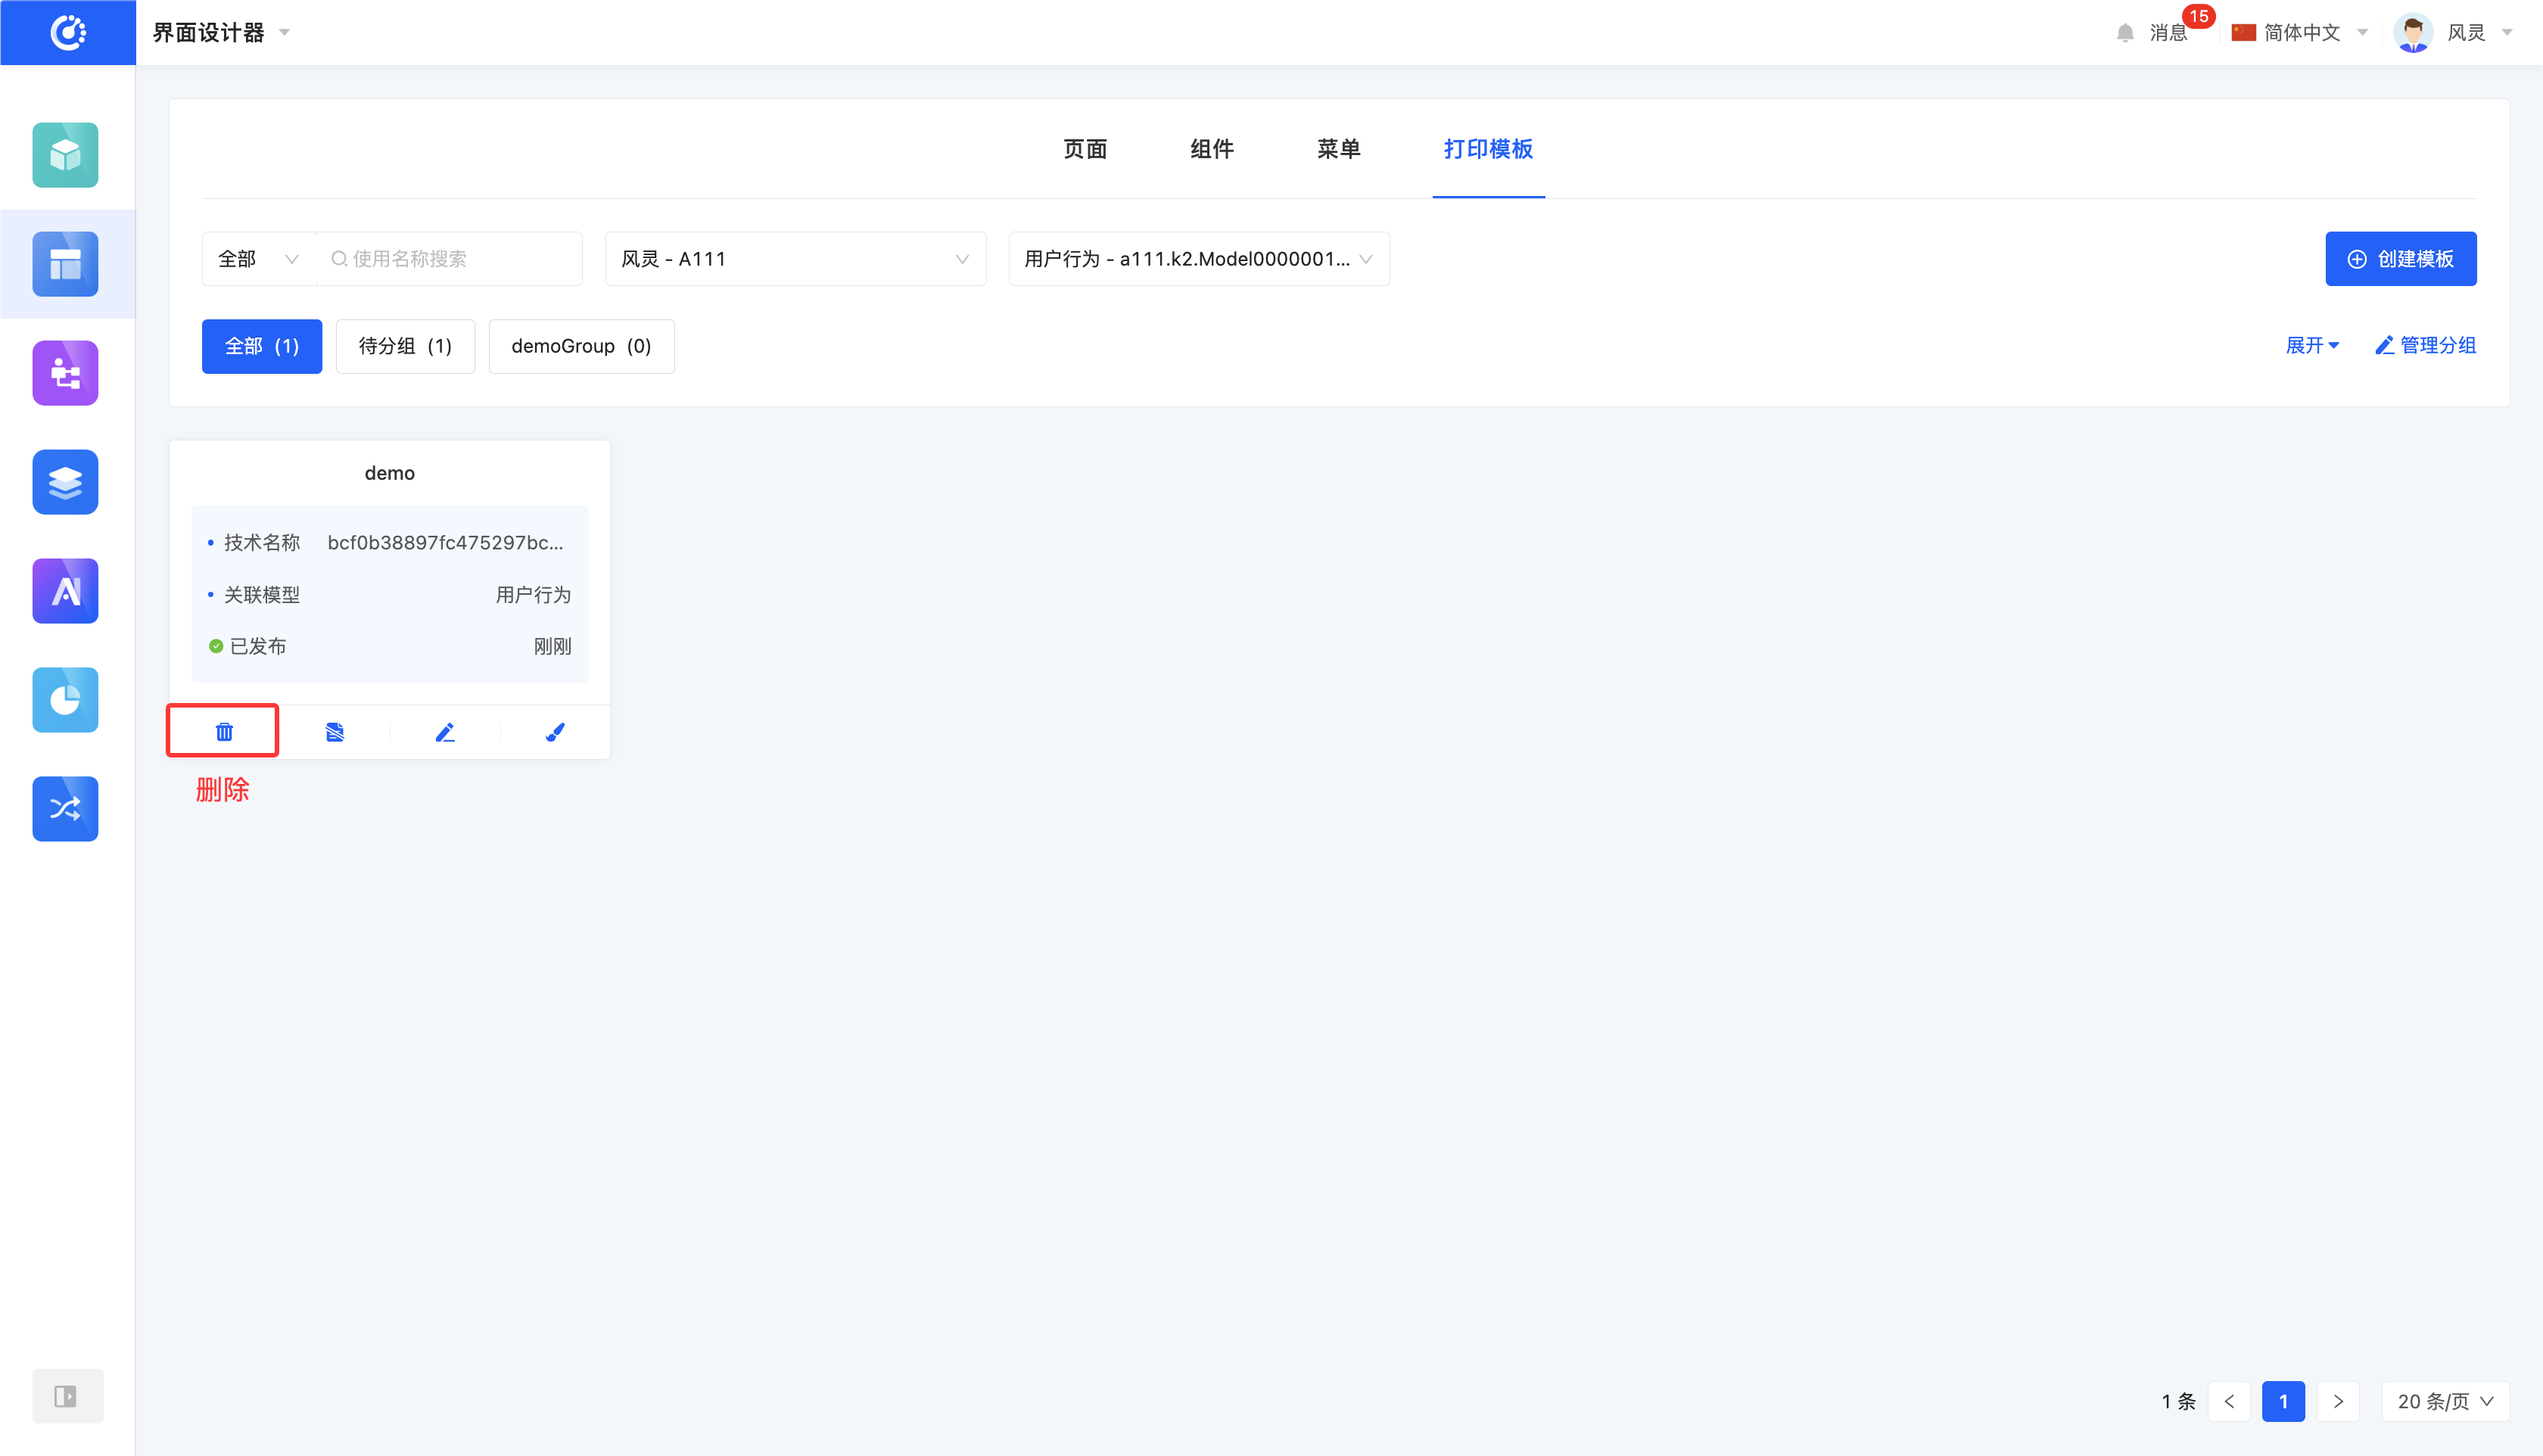
VII. Delete Template
1. Function Introduction
When a template is no longer in use, it can be deleted. If you are not sure whether the template needs to be deleted, you can first hide it.
Warning
Deleted templates cannot be recovered. Please operate with caution!
2. Operation Method
Click the "Delete" icon, and confirm the deletion to delete it.